Pikemans M101 A2 slow Expo/ Base camp trailer build.

Pikeman

Adventurer
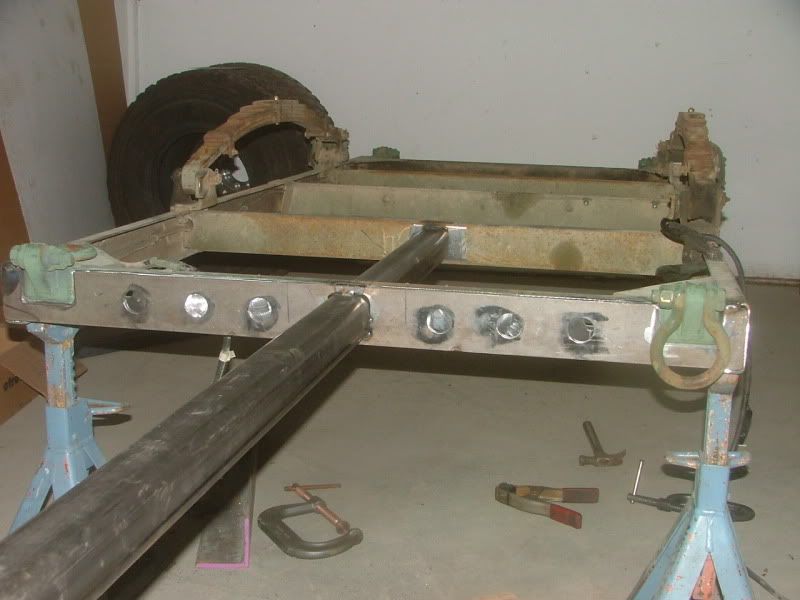
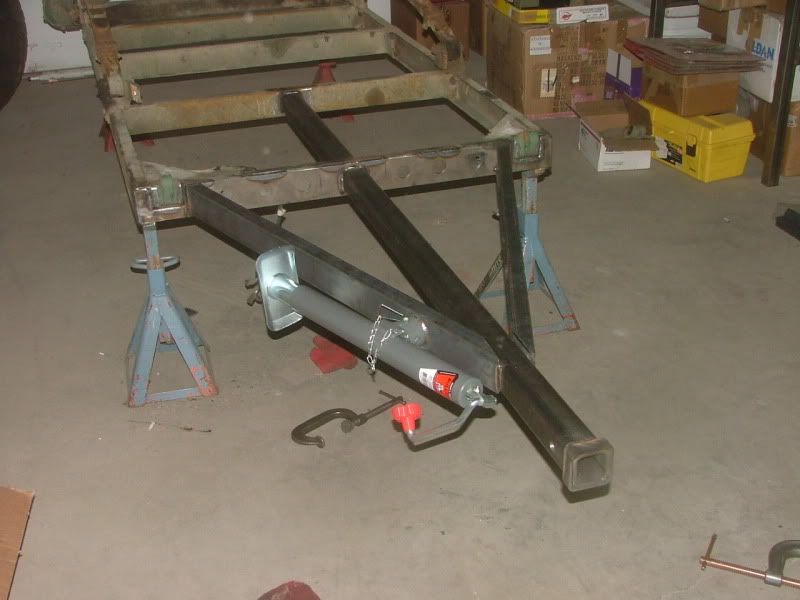
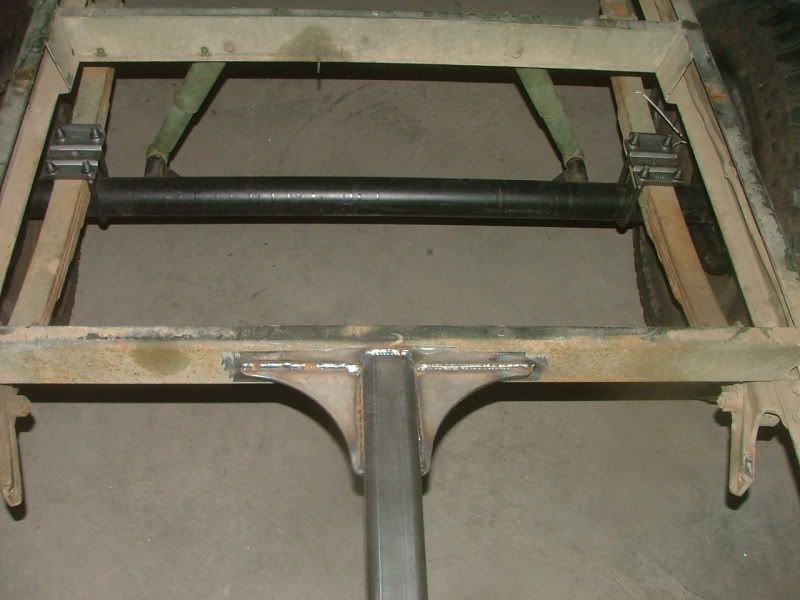
Ok Jeepdork, based on the link you provided and zooming in on the pictures you can tell the tongue is actually part of the frame itself in the majority of the trailers. The flatbed or deck is then bolted and or welded on top of the frame structure. The deck has a steel frame and might be why you see it as the tongue going under the frame. This is because you have a trailer frame and then an option of either a cargo box or flat deck. If you look at the ones with the thick I-beams for tongues they are double height to allow the bed structure to be welded to the tongue. Model 24 AD/ED and 20AD/ED both have a portion of the frame the comes forward of the bed but if you look closely the I-beams are welded to the face of the deck structure and rest on top of the actual frame.

The main thing is my question is answered about my plan on how to rework and tie my new tongue into the frame for my applcation will work.
 

tassie tiger

New member
Down here in oz the most common way is to use an A frame drawbar setup that sits under the frame.

Like this;


IMGP7387 by tassie tiger2010, on Flickr

If you think of the forces applied to a trailer they go from your hitch to where it meets the road (the tyres ((or tires)). If you run the drawbar on each side to the suspension front mount then the stresses during towing go straight to the correct spot, not through the frame.

cheers mate.
 

Pikeman

Adventurer
Well I finally got around to working on the new tongue. Here are the pictures so far of progress made today. I am hoping to go in to the shop tomorrow after work and finish the welds, and flip the trailer over and put the axle on.

Hole through front crossmember
DSCF5644.jpg

Doubler plate and reciever tube in place
DSCF5647.jpg

Added the sides and also the tongue jack.
DSCF5651.jpg

DSCF5652.jpg


Still plan on adding some triangle gussets on the second crossmember and reciever tube. As well as anything else I happen to notice or feel needs reinforcement.

I welcome any input on the progress so far.
 
Last edited:

Mark Harley

Expedition Leader
Pikeman :

Looks good and sturdy too!
I would make some gussets just for strength too.
3/16 or 1/4" plate in the corners.

What are the holes for on the front cross member?
 

Pikeman

Adventurer
Mark,
I will be adding 6" triangle gussest made from 3/16. The holes in the doubler plate are there to add area to weld and join it to the front cross member creating a better bond than just the edges. I am just glad to have access to a shop that is able to make some nice stuff like the doubler plate or anything else i might need as we build.
 
Last edited:

Dirtytires

Explorer
Progress. I like it.. Looks good. Like all have said gussets should be put in corners.
I was looking at mine and noticed it slides into a channel and then is bolted by a
2 huge bolts under the trailer itself. Glad your able to get this thing started. Been a
long time..lol
 

Pikeman

Adventurer
So while I was at work the great crew at Outdoor Logic welded in the gussets, mounted the axle and even made lower shock mounts.
DSCF5659.jpg

DSCF5657.jpg

DSCF5656.jpg

DSCF5662.jpg

DSCF5663.jpg


So the trailer is on its wheels and almost ready to be towed again as the base chasis. I will be working on wiring it next.
 

Mark Harley

Expedition Leader
That is a very nice job on the webs and shock mounts.
The trailer looks great! Keep the pictures coming.
I am interested in seeing the hitched height.

Sell the extra parts on Steel Soldier and recoup some costs.
 

Pikeman

Adventurer
Mark, I sold the parts on SS site. Right now with the larger than stock tires(now same as Tow Vehicle) without the bed sitting on frame that it will have a slight tongue down attitude when coneected. Time will tell once I mount bed and actually hook it up how it will sit.

Break down of expenses so far:
Trailer- $210
New Axle- $380
Max Coupler- $225
Steel for tongue-$125
Electrical parts- $85
Total- $1025

Part sold
Old axle & tongue- $300
Side rails/bows- $200
Total cost- $525
 

skersfan

Supporting Sponsor
Looking good sir, I can not see the front very well but it appears you have made strong at the middle for sure. I assume it triangulates to the tongue and is welded directly to the front cross member. Using the 2.5 240 wall it would normally be strong enough on its own, very seldom do we fill them so full that it would bend, with the triangulated sides it will keep it from bending side ways, which is very hard to do. You could gusset the two outside tubes to the main frame. If so do it on the bottom as the weight is forcing everything down.
 

Revco

Adventurer
For being a small trailer, I think your setup will work fine. Personally I would have put the diagonal a-frame under the chassis for less fatigue on the welds and more material to weld to. If you look at car hauler trailers and the nicer utility trailers, you'll see the tongue is under the main frame/deck. It's usually referred to a "Wrap Around Tongue". Usually these diagonal channel sections go under the frame all the way back near the axle. This increases stability when towing and fights the forces of nature that are pushing down at the two pieces joined together. For example... Take a pencil and break it in half. Now tape the two halves back together and see how little force is required to break at the joint. Now stack one half on top of the other and tape them together and see how much more pressure it takes to break the joint.

Either way, it looks good and should be fine since you're most likely not going to overload the trailer. The only other issue I see is the shock mount gussetts. They'll most likely be fine since shocks only put as much load on the mount as they do when you're stroking them by hand, but if the shock gets bottomed out, it can push that mount down, and the horizontal gussets can shear off due to their design of a straight butt joint in it's weakest plane. If you take this trailer out on trails and it's loaded pretty good, coming off a rock could bottom out the shock and cause the mount to shear right off. I'd add a vertical gusset under each shock mount to increase the shear strength of the mount. It's easy and cheap insurance.
 
Last edited:

Pikeman

Adventurer
Bob- the pictures of the front are in post 18 I think. The 3/16 doubler plate goes all the way across and the factory frame channel is also 3/16 giving me 3/8" where the reciever tube passes through the front cross member.
 

Pikeman

Adventurer
The plan is to use the original Military box and modify it for my needs. In front of first support rib to front of trailer is about an 18"x18" square, cut out turn into door. Behind the door mount drawer slides with a Camp Chef 2 burner stove to slide out for my galley area. Inside the box frame it in and cover with hinged lid to allow access from top. This will still leave me with just over 6' of bed length inside for when I have the lid off and use it as a utility trailer. Now I am debating between a roll-n-lock retractable toneau cover and a tube frame rack above to mount my RTT or to go with a hard lid RTT design. The hard lid with RTT mounted will keep the weight/ CG lower but when I remove for Utility type I will not be able to secure things in the bed.

Next option is to go ahead and build an entirely new box to the frame making it narrower and lighter than the original military box. To many decisions to make at this time and not enough budget to pursue any of them. I think I am going to put it back with original bed/box and use it a time or two to figure out if I want to modify current or make new one.

To answer the question METAL
 
Last edited:

Forum statistics

Threads
189,038
Messages
2,912,271
Members
231,545
Latest member
JPT4648
Top