Hi everyone. I've been a long time expo lurker and I have finally got around to posting my camper build. I've just been amazed at the level of innovation and skill that you have all showed in your builds. I have borrowed a lot of the your ideas and through nothing but a lot of trial and error I may have stumbled across a few myself. First though, I would like to give credit where credit is due:
allochris - His build really got me thinking.....it can be done! http://www.expeditionportal.com/forum/threads/4811-Allochris-s-ultimate-buildup-thread!!!
pods8 - For his super technical data on weights, strengths, and characteristics of various building materials. http://www.expeditionportal.com/for...re-fiberglass-skin-pop-up-camper-build-thread
campfinder - Seeing the A-frame wooden camper for real! This build is what really got me sold on building an A-frame camper out of wood. The 2-roof idea is brilliant.
My goal was to build an A-frame camper for under $1000 and under 500 lbs dry weight using a modified stitch-and-glue epoxy technique. I built a small drift boat last summer and fell in love with West System epoxy, and figured a wooden/foam/fibreglass composite was the cheapest and easiest way to build a camper. My key design requirements were:
1. Must be hard sided and pop up. I originally viewed this camper as being a winter camper - kind of the ultimate ski bum vehicle - so it had to be insulted with a hard roof in order to shed a lot of snow.
2. A-frame design. At first I was thinking a clamshell pop-up design with the axis perpendicular to the length of the truck, (much like this build: http://www.expeditionportal.com/forum/threads/58224-Making-my-Uro-Camper-Kubic-1-0), but when I saw allochris' and campfinder's A-frames that was the ticket. It puts the height were it is most needed: along the length of the truck in the middle. I'm 6'2" so it was kind of important to be able to stand up straight.
3. Not TOO well built. Yup. I wanted a camper that wouldn't outlast my truck and as I figure my family will outgrow our Tacoma in a few years I didn't want to build using super high tech (and expensive) materials. As it turned out the final tab was around $1300...a little over budget because I under estimated the amount of epoxy I would need.
4. Just a shell. I noticed a lot of guys start their design based on what they will actually carry in their camper. Kind of like picking the size of backpack after you figure out how much stuff you are going to bring on a hike. And although this is the smartest way of doing it in the long term, I didn't have the patience to learn about dual battery systems, water storage, and the like. I just wanted to build! So....the goal was to build just the shell, and add stuff in subsequent sessions. Right now, I'm building a kitchen area and cabinets that will be somewhat modular and removable. Basically just a bunch of chuck boxes that can be removed and added as needed. This way if need be, I can empty out all the camping specific stuff and have a lot of storage room for other stuff.
My wife and I built it over a six month period this fall and winter but probably around 80% of it was built in the last three weeks before March break. We headed to Kamloops, BC so spend time with friends and family with some skiing on route. The paint was pretty much still wet as we rolled down the Trans Canada. I just wished we took more pictures as we built. Anyways...enough talking. These are the pictures we have:

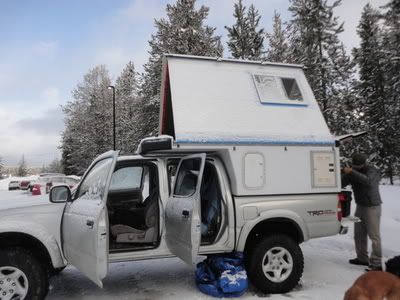
My truck and me. I wasn't just trying to look pretty with my truck. Using this picture and photoshop I was trying to determine the height I would need. In the end, I just guessed.
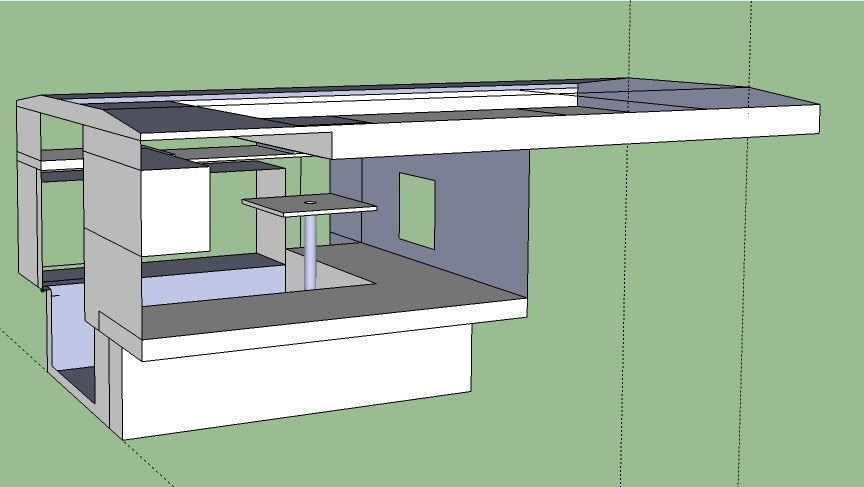
Some basic Sketch-uping. (It's a verb).

The "foundation". Basically a box that fits into the truck bed. 3/8" ply exterior, foam core, and 1/4" ply interior. Probably a little more than needed, but hey....I'm learning as i'm going. I thought about a building around the tire wells, but I thought the added time and effort didn't justify the gain in space. And besides, the space is still there; it's just "shed" space. When I'm finished fly-fishing, I open the tailgate and chuck my boots/waders in the cavity between the truck bed wall and camper.

My beautiful wife and full time epoxy assistant. She did all the fibreglass and epoxy work. I supervised. After the composite panels were built we butt jointed them and glued with epoxy. All plywood joints were fibre glassed with 6" tape for strength and waterproofness. Ideally, the entire exterior would be a fibreglassed, but I decided against it for cost and weight.

Mocking-up the roof....
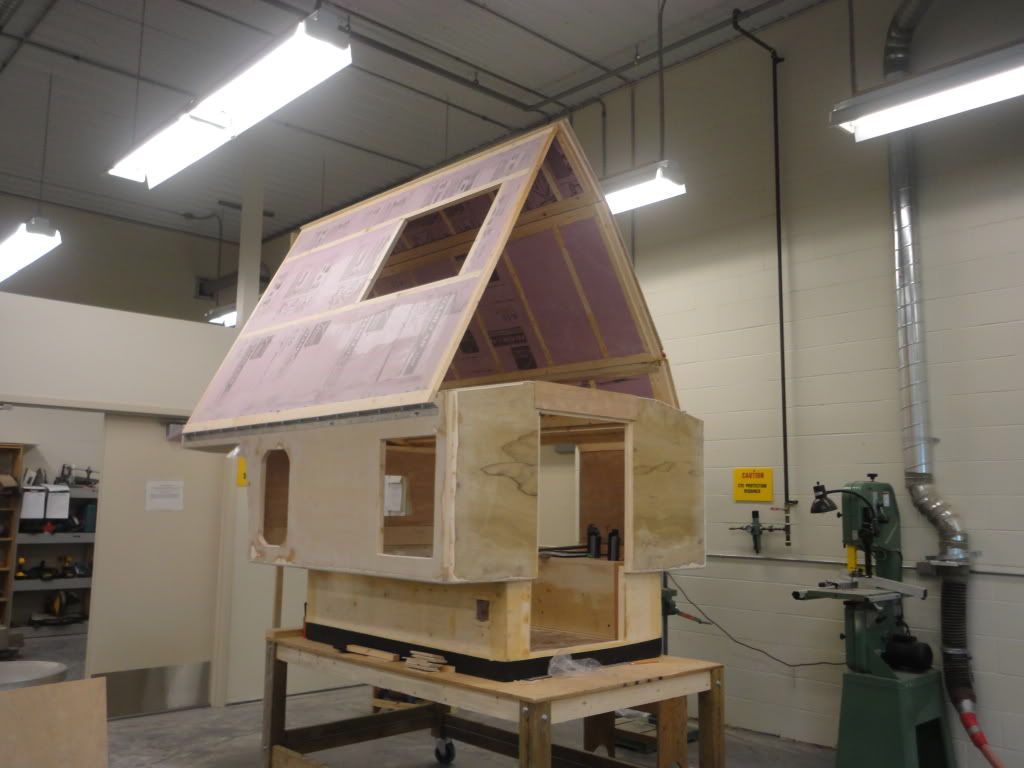
...and going for it.

The dolly the camper sits on is its home when not on the truck. To get it on the truck i lift it on the rollers (seen on the edge) and literally push it onto truck with two fingers. Very easy once it is balanced on the rollers. To get the camper on all the way and off, I use some cable, pulleys, and a hand winch mounted to the back of the dolly. The system is not quite perfected, but i really wanted to avoid camper jacks.

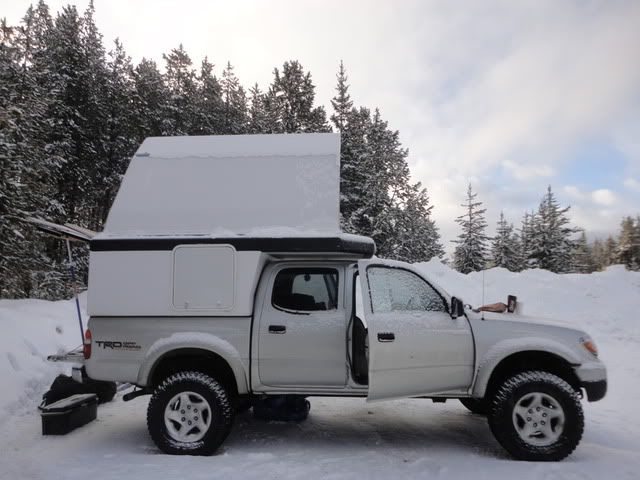
On the truck for the first time. The paint we used is awesome. It's a oil primer followed by an industrial latex floor paint. I was skeptical at first but after our first road trip, I'm sold. This paint holds up to a lot. However, there is a bit of chipping where the paint is covering the fibreglass seam on the cab over. I'll try to dig up the name if people are interested.
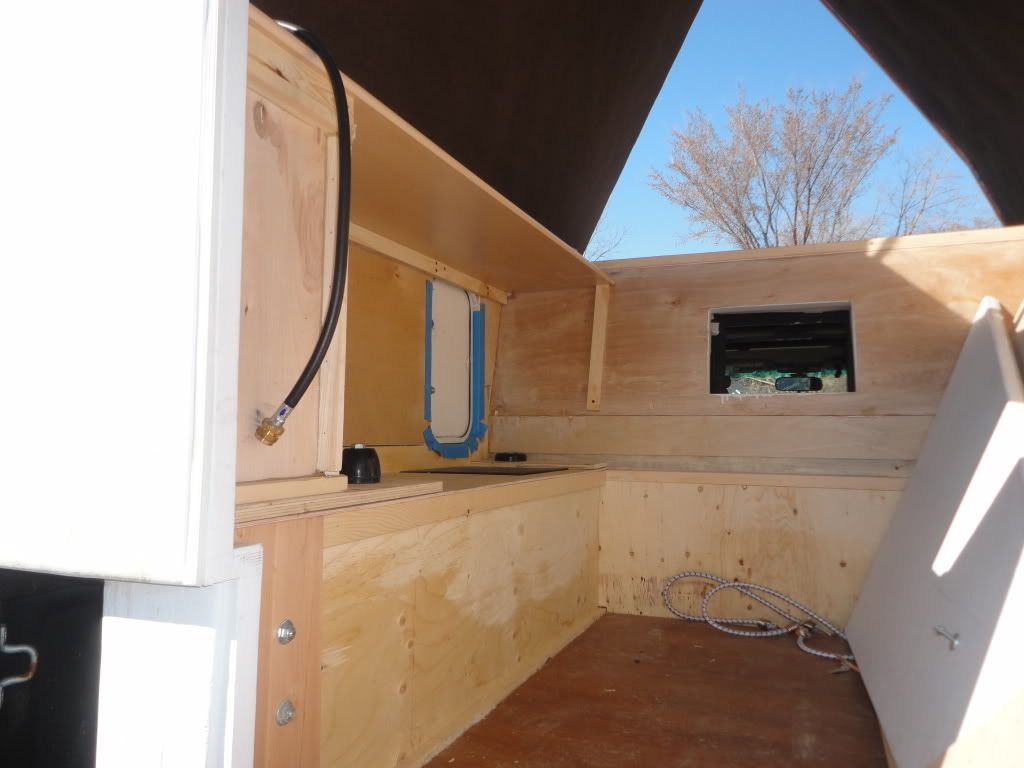
A quick shot of the unfinished interior. The bench on the left will become permanent with some chuck boxes underneath. The hatch with the blue weather seal will become our water access point. It fits our water jug perfectly. The hanging propane hose is coming from the propane hatch. It's built into the driver side rear corner, and is totally sealed from the interior. The two black objects on the bench are part of the mounting system. As luck would have it, there are two holes in the truck frame right below where I wanted to place the mounts in the camper. I hacked some holes in the truck bed which allow some turnbuckles and treaded rod to mount the camper directly to frame. The black objects are marine bumpers - for boats or docks. I added them last minute as kind of a vibration dampener. Out of everything, I was most concerned about the mounting system as I really just "engineered" it through some guesswork. However, during our first trip (3400 km, mostly highway), everything was snug and there was no shifting. I'll continue to look for stress fractures and the like though.
Last edited: