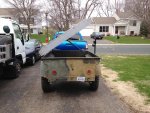
1966 Johnson Furnace M416 build - The Odyssey...or Homer for short.

RKRUGER

Adventurer- Toyota Nut
A few weeks ago, I was able to purchase a very solid original 1966 M416 manufactured in March of 1966 by Johnson Furnace Company.

First day I saw it...
416-1.jpg

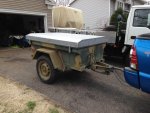
Barn fresh you could say. Original tires with a 12-65 stamp on them. Lunette eye and handbrake intact and functional, as are the drain bungs. Need taillights, and the right fender got a nasty kiss from a tree in the guys woods a few years ago. That is when he parked it in the barn. Here is is in my driveway... Boys spent a little time with some soap and water on it...
IMG_0904.jpg

IMG_0912.jpg

Two weeks ago I also placed an order for a Cascadia Vehicle Tent (CVT) Mt. Rainier and 55 awning as part of the 2014 Group Buy. Bobby was great on the phone. Talked about options and such. The tent will essentially cover the entire bed of the trailer... but I am having a lid formed up here in town by Reach-Aspen equipment. The top will flatter many of the others on this site by imitation. I am going to use a perimeter frame ala TacoDell and attach the hinges to the left side as he so admirably did. Need to get the top fab'd, primed and mounted prior to Father's Day as that is when my tent is tentatively scheduled to arrive. Big 10 day outing with the family over The Fourth! and I plan this to be the Master Suite for the lil woman and me.

Parts ordered so far...

(6) BP B2426FS hinges
(1) stick 1.5 x 2" 11GA tube
(1) Bdl253 lunette ring lock

Need some thoughts/ experiences with tires. I would like to mount a set of LT235/85R16 Grabber AT2 tire on the stock rim. It is a 32" tire, just like my Yokohama AT-S in 265/70-17 on TED. Thoughts as to mounting on a stock wheel?

Hubs come off this weekend and bearings get packed. We'll see if an SOA is in Homer's future...
 

E Dr. P

Observer
Nice trailer! I put 245/75R16 tires on stock wheels (without tubes) on one of my trailers, didn't have a problem.
 

RKRUGER

Adventurer- Toyota Nut
Question on material for the lid... What seems to be the consensus on gauge? I am looking at a 5x8 sheet of 16ga galvaneal that can be used as one continuous sheet. No seem on top or sides. Thoughts?

Dr. P. thanks for the note. I should be just fine with 235 then. Stuff is starting to come together.
 

RKRUGER

Adventurer- Toyota Nut
Order to McMaster is in. Many thanks for the parts list that I have pulled together from on the site.

(30') .75"x.75" rubber bulb seal = 93085K82
(1) Weld on Stainless handle = 7088A3
(2) Gas springs, 175#'s = 9416K21
(4) Ball socket for gas springs = 9416K76
(4) Gas spring mounting brackets = 9512K91
(2) Gas spring seal protector = 4185T12
(2) Adjustable draw latches = 13435A61

Stuff should be here by weekend. Drawings for the top hit the shop floor this afternoon so the lid is scheduled for tomorrow. Nice to have friends with access to really big tools.

I keep looking at these tires. http://www.tirerack.com/tires/BigPic.jsp?sidewall=Outlined+White+Letters&tireMake=General&tireModel=Grabber+AT+2&partnum=385SR6GRAT2OWL&GCID=C13674x012-tire&KEYWORD=tires.jsp_General_Grabber_AT_2_Tire&code=yes&CAWELAID=530007250000327307&CAGPSPN=pla in a 235/ 85 -16 size. I think that they will go on the stock wheel under the stock fenders. Should give plenty of sidewall and about 1.5" of lift over the stock NDT. Anyone offering dissent?
 
Would suggest thicker than 16 gauge for the skin. Mine and another guy currently working on one here on forum right now used 16 gauge and it comes out with ripples and waves across the exterior of the skin unless your lid frame is perfectly level on the top side. I'd go less tube frame and thicker skin panels (that provide strength and coverage from elements) if I had chance to do over.
 

4runnerteq

Explorer
good looking trailer. Looks like it could be mine. Even the ame type find. In a lean to next to a barn. Nice parts list too. Thanks
 
Would suggest thicker than 16 gauge for the skin. Mine and another guy currently working on one here on forum right now used 16 gauge and it comes out with ripples and waves across the exterior of the skin unless your lid frame is perfectly level on the top side. I'd go less tube frame and thicker skin panels (that provide strength and coverage from elements) if I had chance to do over.

I resemble that other guy. I had two pieces of 16g steel meet in the center as opposed to two seams on either side. That was a big part of the reason for rippling. So I screwed down a sheet of 16g aluminum over the top of it and it looks great. My only regret on my lid is that it's heavy and instead of resting the lid frame on the bed walls I made it to overlap them, which added more weight and less lifting height due to RTT rack risers behind it. Too late now. If I have time ect I may do a different lid rebuild.
 

RKRUGER

Adventurer- Toyota Nut
Homer gets a top... well, the start of one

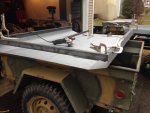
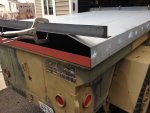
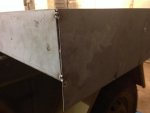
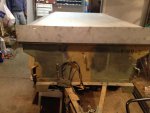
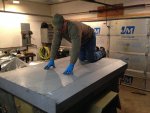
Thanks for the feedback guys. Sometimes things end up at a different spot because it's too good of a deal to pass up. The top has been bent- up out of a 16ga 5 x 6 sheet of galvaneal. It was on hand and reasonable... and as it is one sheet, no center seam to contend with.

Perimeter frame is 1.5" x 3" angle with mitered corners. We primer painted the angle prior to tacking the lid. We ran the sheet 1/8" proud over the angle to capture the gasketing material and provide a little extra weather protection and to make up for the little bit of tweak around the top rail of my trailer. I really went back and forth on the idea but I really like how it turned out. End pieces need to be sheared and the top frame will get welded up this week.

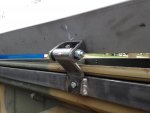
Yakima track and Control Towers should be in this week. Making some progress... which is good. Hopefully the little bit of snow we got Sunday will be the last of that!
 

Attachments

  • IMG_0936.jpg
    IMG_0936.jpg
    111.4 KB · Views: 71
  • IMG_0953.jpg
    IMG_0953.jpg
    121.3 KB · Views: 67
  • IMG_0959.jpg
    IMG_0959.jpg
    123.7 KB · Views: 72

DonBeasley

Adventurer
Keep up the great work and keep sending the pictures. It will sure beat trying to pack everything in the back of the Taco.
 

RKRUGER

Adventurer- Toyota Nut
Thanks Don and Grumpy Fish! This has been a great project so far. I am making progress... but still seems that the springtime is getting away from me, and I have been traveling way too much for work. Need to add an update... so here goes!!!!
 
Last edited:

RKRUGER

Adventurer- Toyota Nut
Homer opens up!!!!!

This has been a great project so far. I have learned a ton, and I have been very fortunate to be able to work with my good friend who has done most of the welding (and other work) and I have been doing the thinking and saying can't we do it this way!

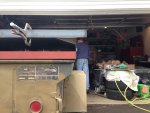
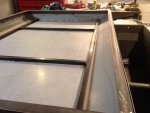
So... we had the sheared end pieces to use as a square to pull the sides and top into alignment. Goal here was to have a rigid lightweight top... same goal we all seem to have. I wish there would have been a photographer around as it took both hands, a foot, and a hi-lift and Paul welding as I coaxed, cajoled and cussed the ends into place.

Next the "h-frame" as I am calling it was secured to the end caps and the lid keeping the tubing inset enough from the breaks in the top to allow the Yakima rails to be centered on the 1x1 tubing. My idea was that with the 1.5x 3" angle perimeter and the 16ga lid, the "h-frame" would span front to back to carry the weight of the tent. Add a couple of cross struts to keep it from oil canning and the result should be a strong light weight bridge structure.

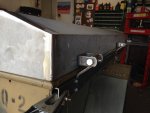
Next came the side frame to hold the hinges. There is a 3" wide 1/4" thick piece on the inside. The outside tube is 1"x3" 11Ga and runs the length of the tub. We leveled the lid with some spacers to account for gasketing material, and mounted the top of the hinge (the yoke) to the lid first going thru the yoke, the skin and the inside 1.5x 3" angle with some 5/16' stainless hardware. Then we square off on the bottom and tacked the tongue of the hinge. The tongue was then drilled thru with the tubing and the inside brace steel. The front and rear tongues got spacers inside the 1x3" tube and the whole thing was tightened with 3/8 stainless hardware down to the side of the trailer.

And now the lid is attached to the trailer and can be lifted clean. A few friends still think this is going to be a great big BBQ.
 

Attachments

  • IMG_0965.jpg
    IMG_0965.jpg
    76.3 KB · Views: 55
  • IMG_0970.jpg
    IMG_0970.jpg
    102.7 KB · Views: 52
  • IMG_0972.jpg
    IMG_0972.jpg
    110.9 KB · Views: 56
  • IMG_0960.jpg
    IMG_0960.jpg
    104.8 KB · Views: 55
  • IMG_0989.jpg
    IMG_0989.jpg
    90 KB · Views: 59
  • IMG_1004.jpg
    IMG_1004.jpg
    119.2 KB · Views: 60
Last edited:

RKRUGER

Adventurer- Toyota Nut
Homer gets a lift... for the top. Easy, boys.

This was the one part I agonized over... and I think most of us do, because there are a ton of threads on here asking "how do I figure out how to mount the struts."

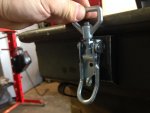
First we mounted up the latches to the sides of the trailer, spaced out from the tub with a piece of tubing. The catch on the lid is tapped into the angle and held in place with some 10/32 stainless fasteners. I really like these latches. Plenty of cast little bits and a provision for a padlock. Pretty high quality I would say.

Well, this one is a bit tougher, and of course you are working blind as the struts are inside the tub. I bought 175# struts (McMaster part number supplied earlier) and reviewed both the McMaster site and the threads here on Expo. I still don't have it correct, or right is maybe the better word, but it does work and I have absolutely no qualms about sticking my neck out and saying the struts will hold up the lid and the soon to be mounted Mt. Rainier. What my gripe is is that it takes considerable effort to get the top started upwards, I believe that is because I have the struts too close to horizontal when the lid is closed. Currently, the end attached to the lid is mounted to the 1.5x 3" angle that runs around the perimeter of the lid. That means the two ends are basically level with the top of the trailer when it is closed.

Anyone have any thoughts...

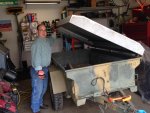
And of course, some poser pics with the lid mounted and opened up as well...
 

Attachments

  • IMG_1008.jpg
    IMG_1008.jpg
    76.8 KB · Views: 68
  • IMG_1012.jpg
    IMG_1012.jpg
    185.7 KB · Views: 62
  • IMG_1024.jpg
    IMG_1024.jpg
    80.8 KB · Views: 67
  • IMG_1018.jpg
    IMG_1018.jpg
    190 KB · Views: 68
  • IMG_1021.jpg
    IMG_1021.jpg
    232.7 KB · Views: 68
Last edited:

Forum statistics

Threads
188,178
Messages
2,903,430
Members
229,665
Latest member
SANelson
Top