4biker's M-100 trailer build from the bed up!

4biker

Observer
I have this trailer build going up on a local 4x4 site, and I've been getting some great feedback and ideas. I figured I can get more info from an even bigger audience here. Let me know what you think as I get going, and if you see any glaring defects, please let me know. I'm a novice fabricator, but I've already learned a ton!

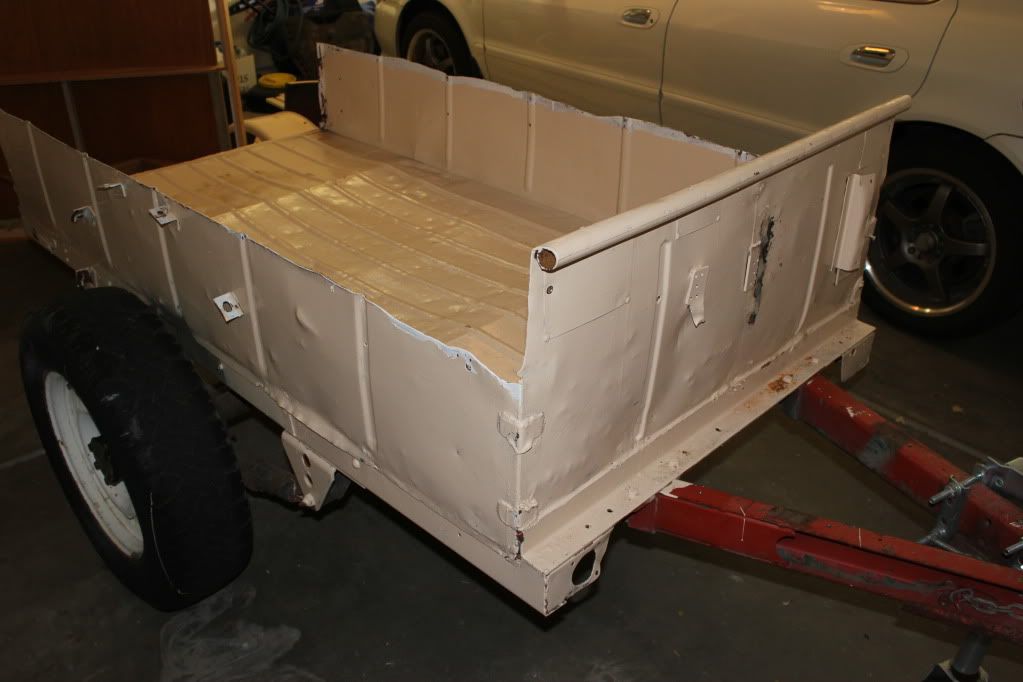
Here's where I started. 1953 Willy's M-100, for $300.

IMG_1660.jpg

IMG_1667.jpg


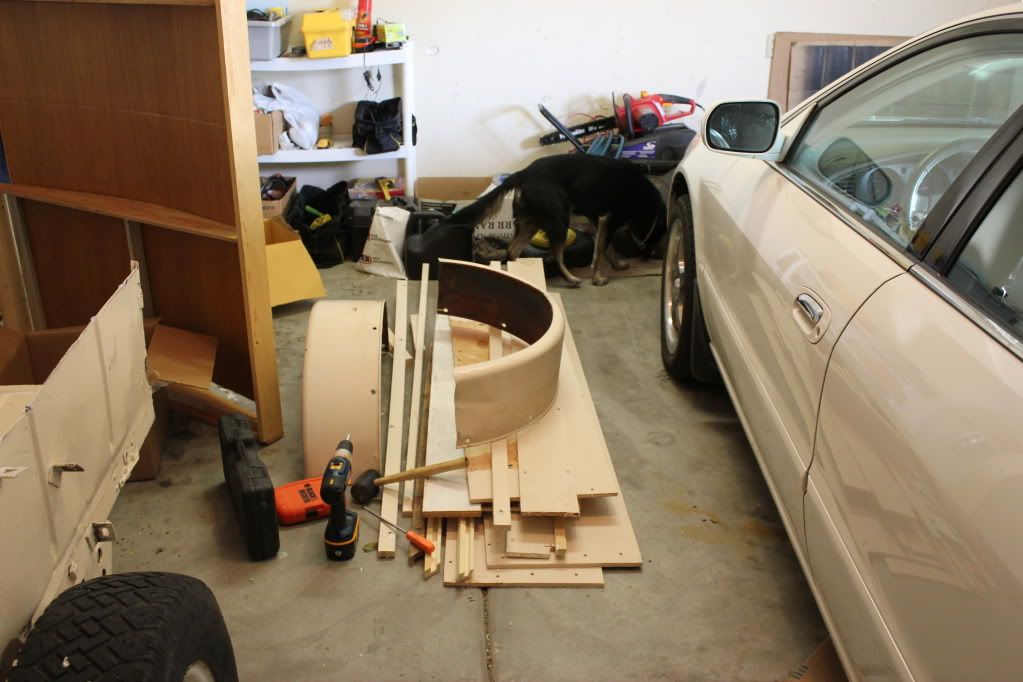
I took all of the wood off, and found this:

IMG_1728.jpg

IMG_1731.jpg

IMG_1732.jpg

IMG_1730.jpg


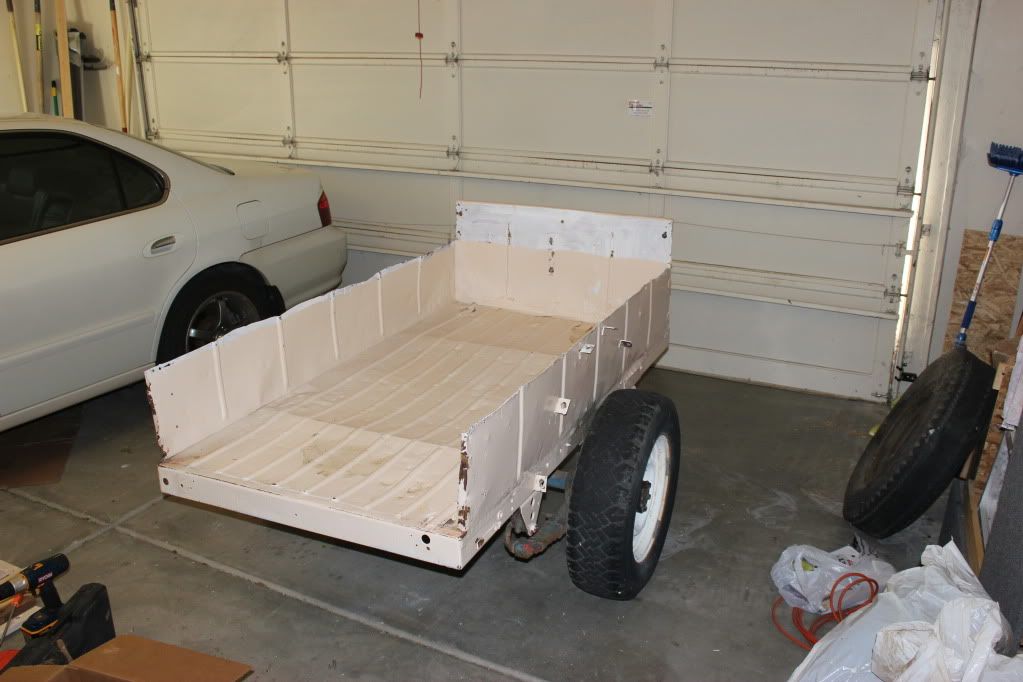
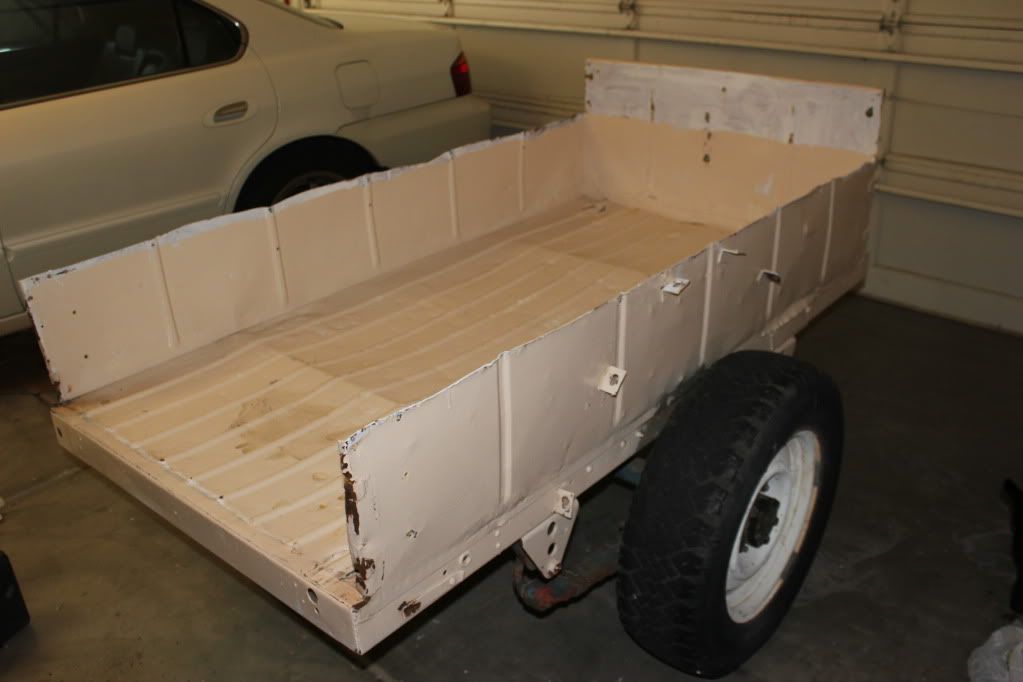
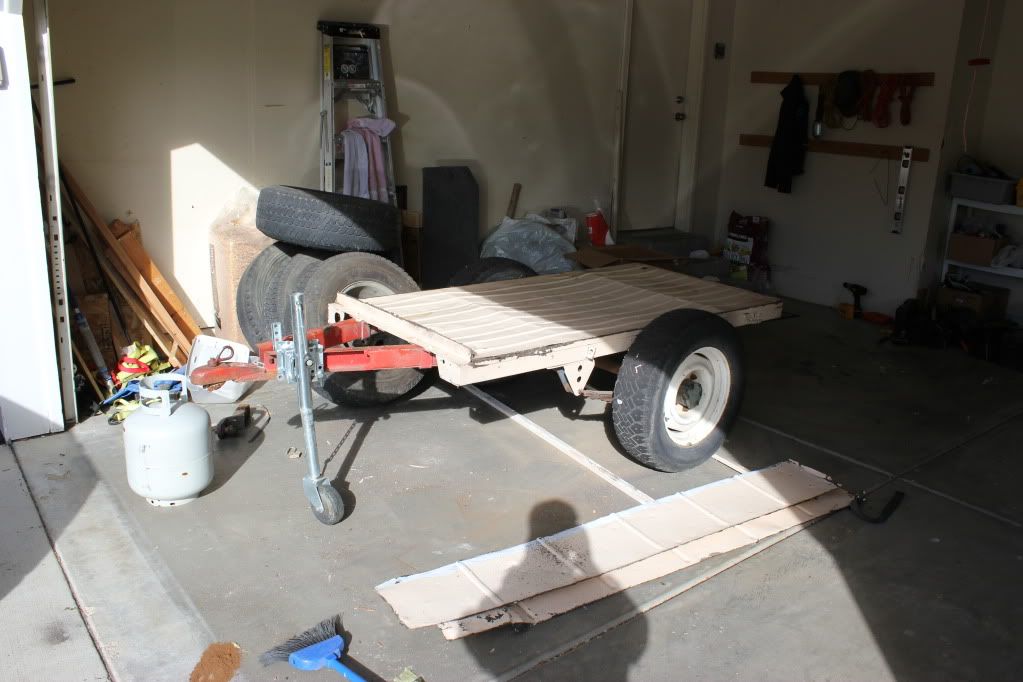
There was so much mayhem on the sides and back that I decided to take it down to the frame and just start from there.

IMG_1890.jpg


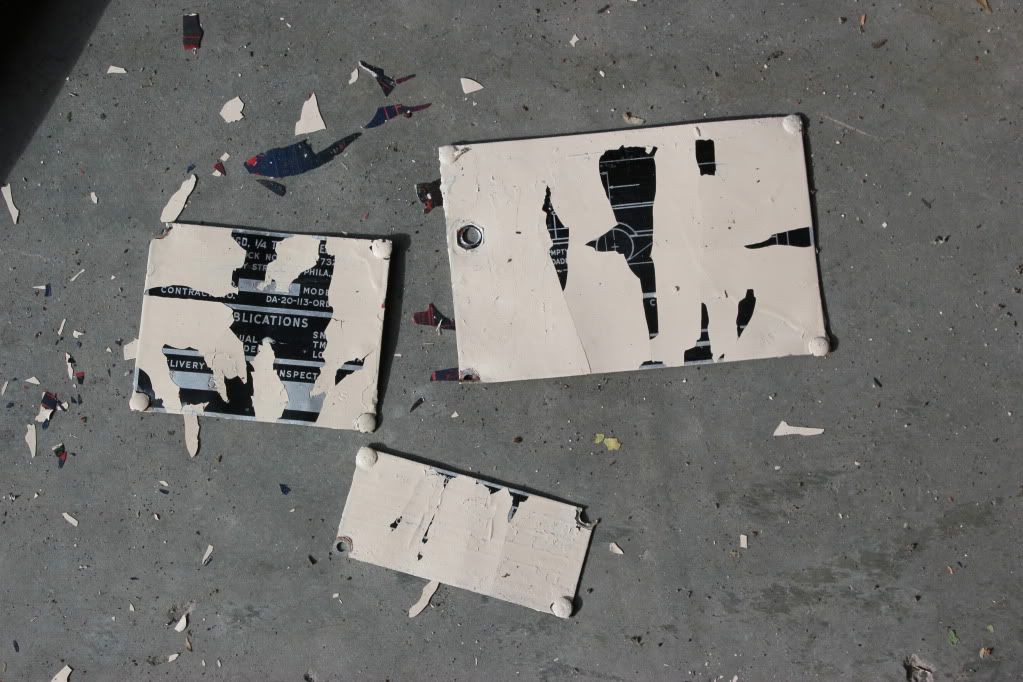
I did find some ID tags on the front that were pretty well hidden

IMG_1891.jpg


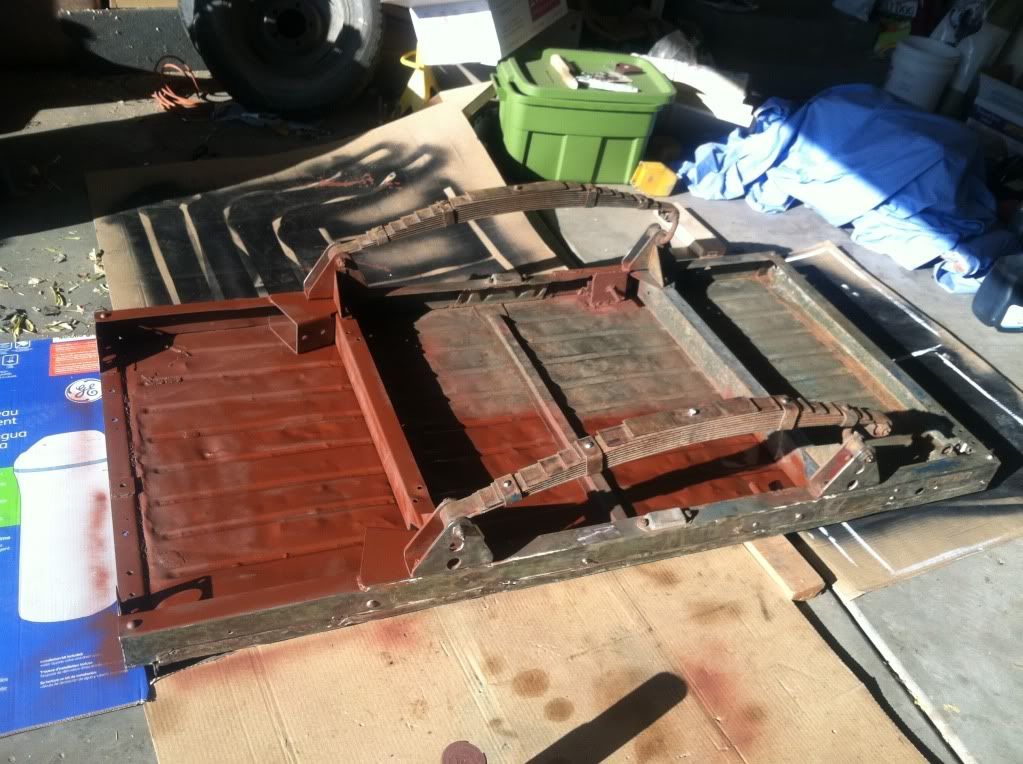
Against the advice of smarter people, I wire-wheeled that thing for 3 days to get all of that (probably lead-based) paint off, so the original army green/navy blue paint was visible. Then I pulled the axle (which I am more than happy to sell if anyone needs one) and flipped the trailer on its back for some R&R. I forgot to take a before picture but this is what it looked like halfway primed on the bottom. Honestly it was upside down for a few weeks, repairing some pinholes from rust, etc.

472C9538.jpg


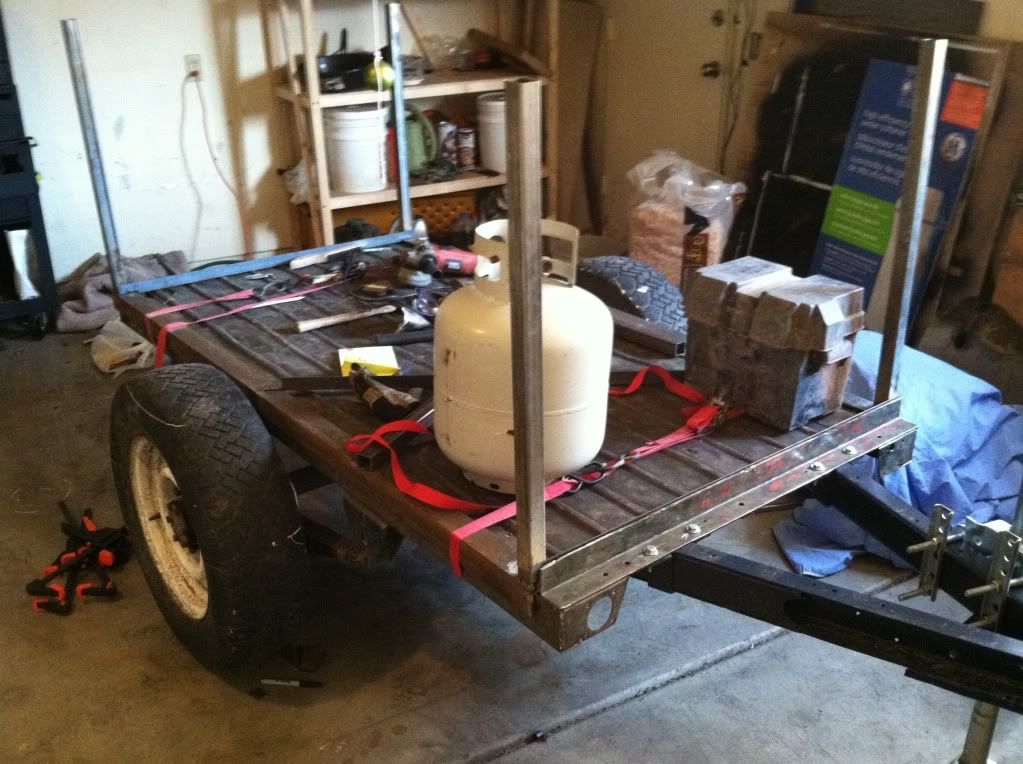
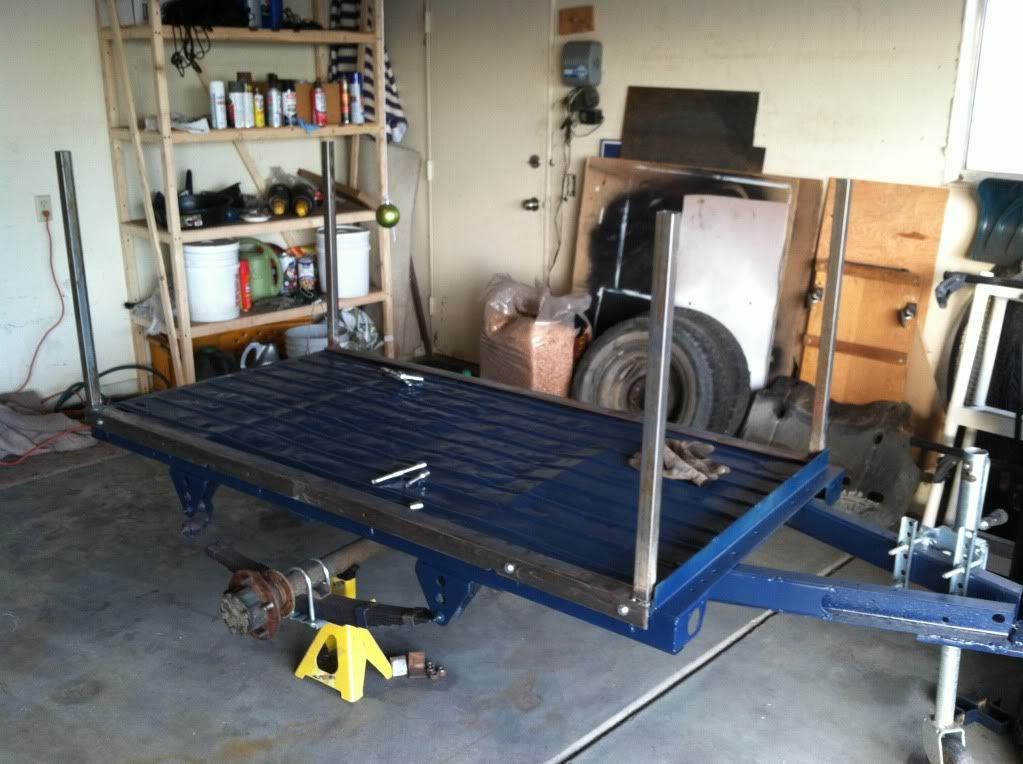
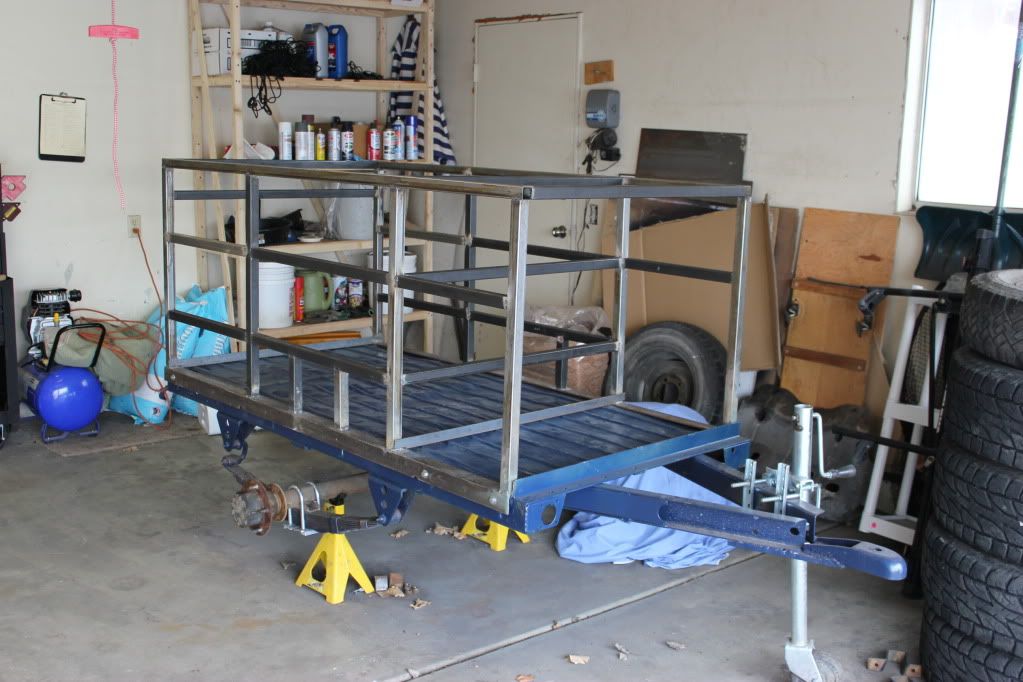
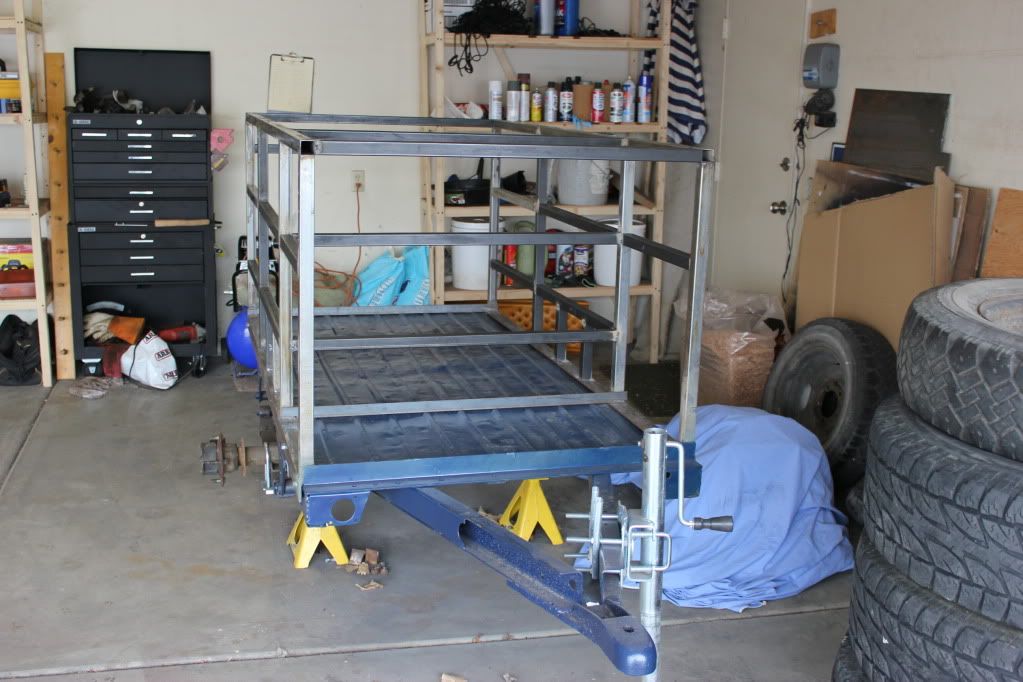
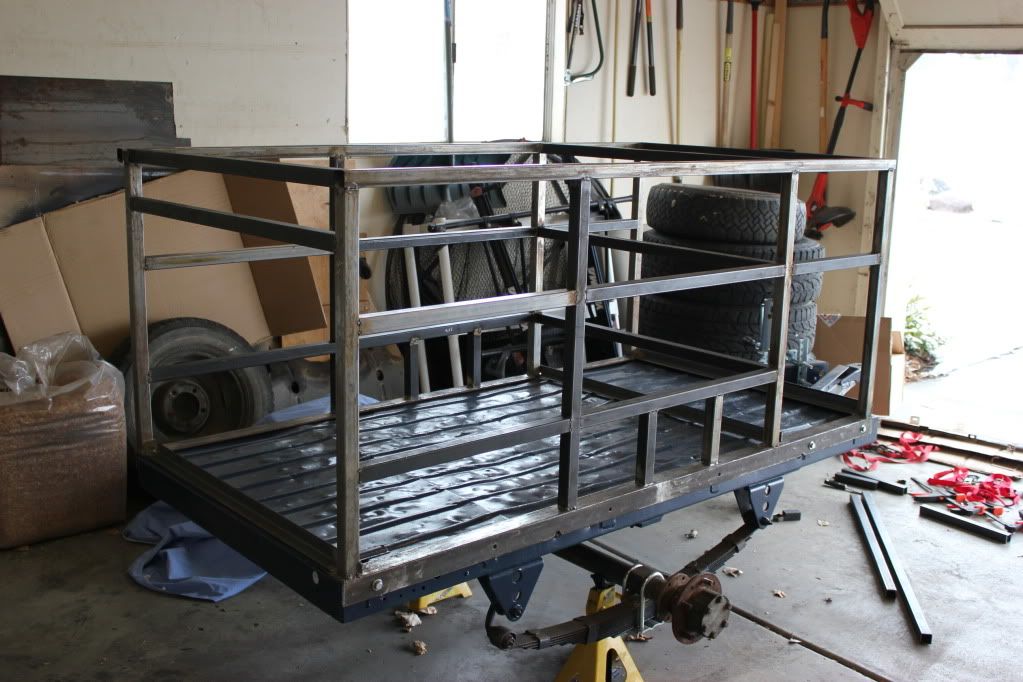
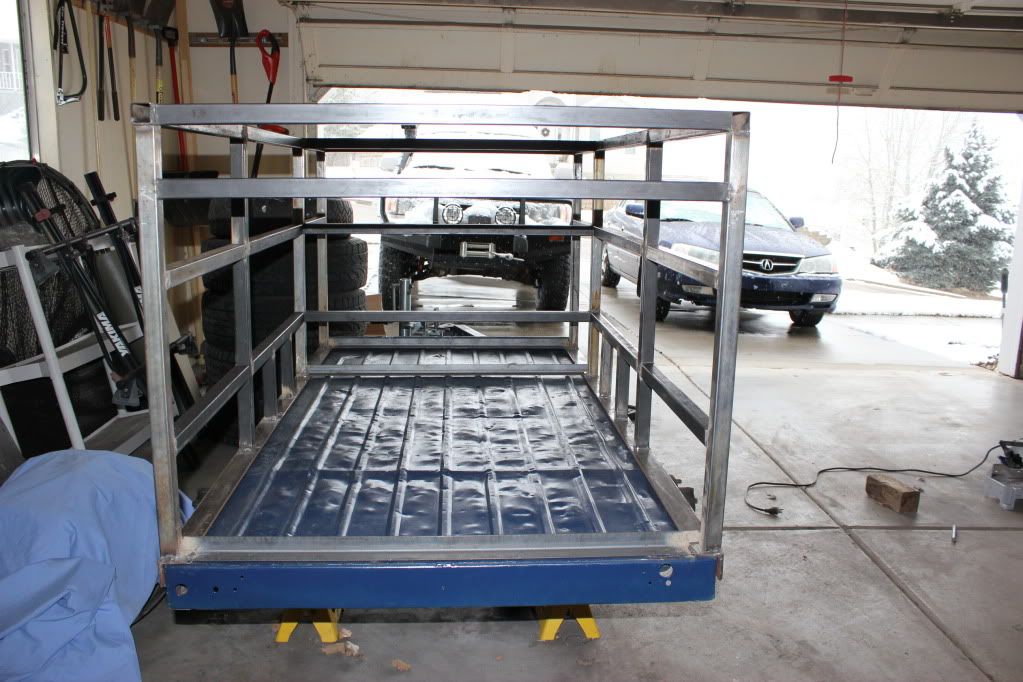
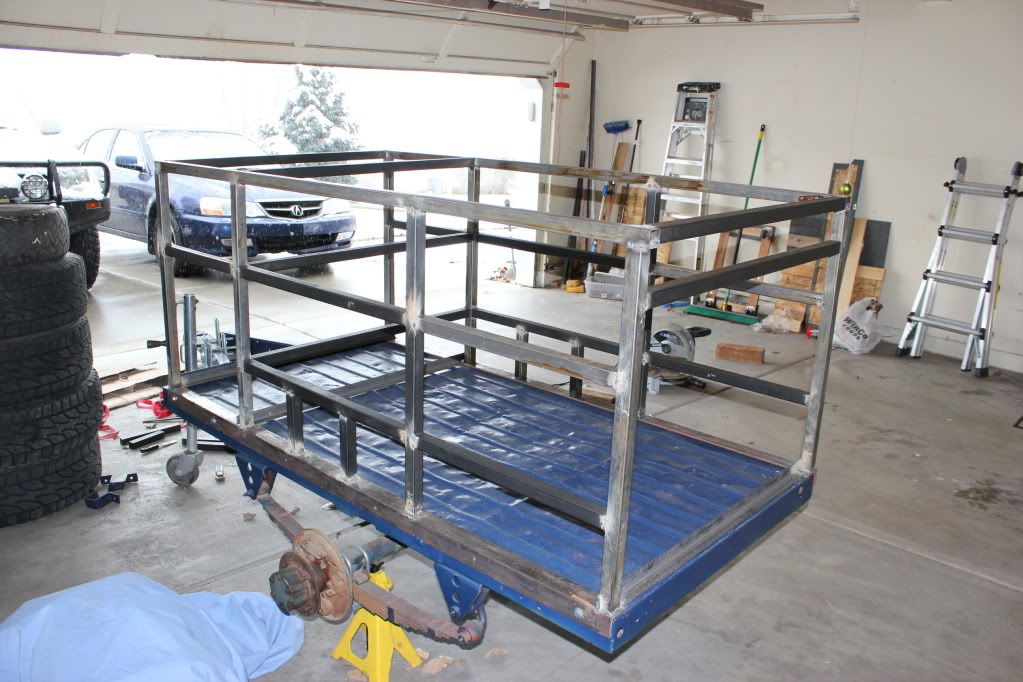
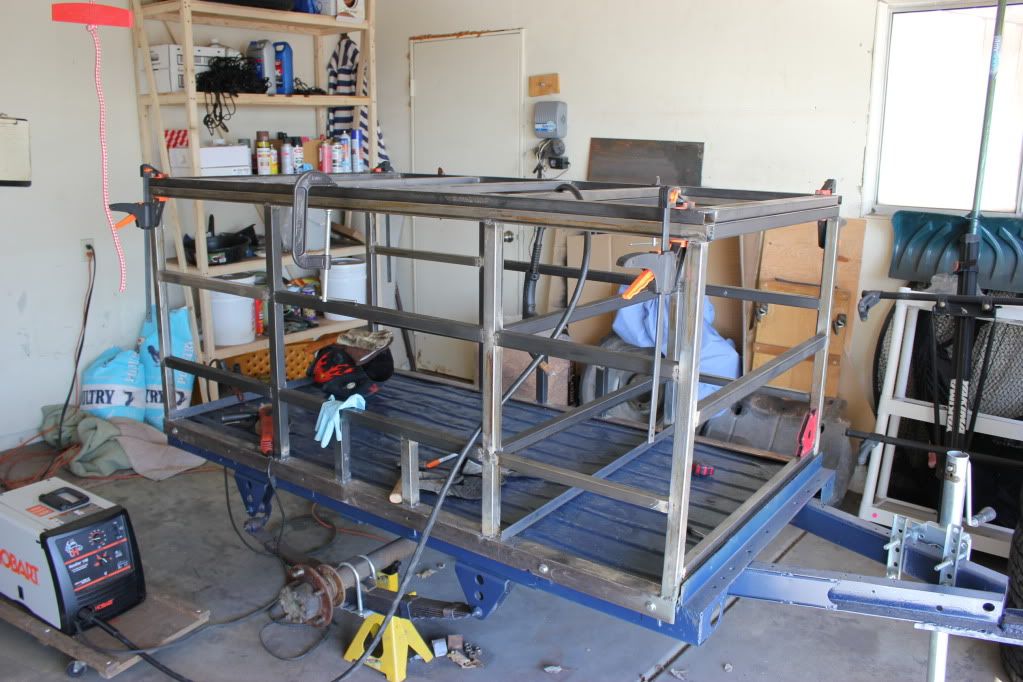
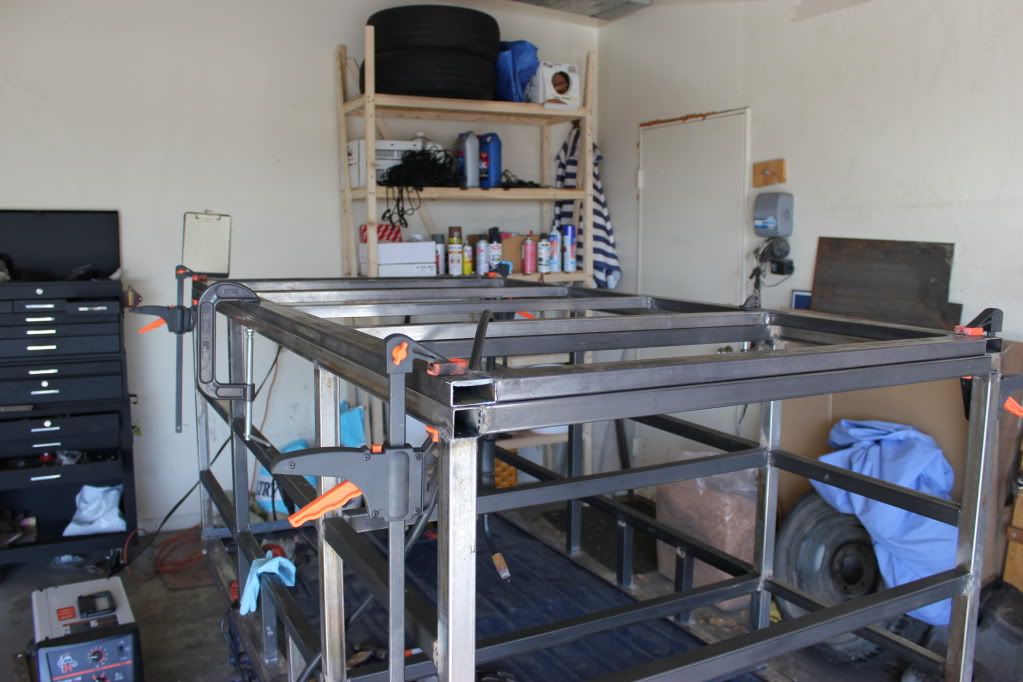
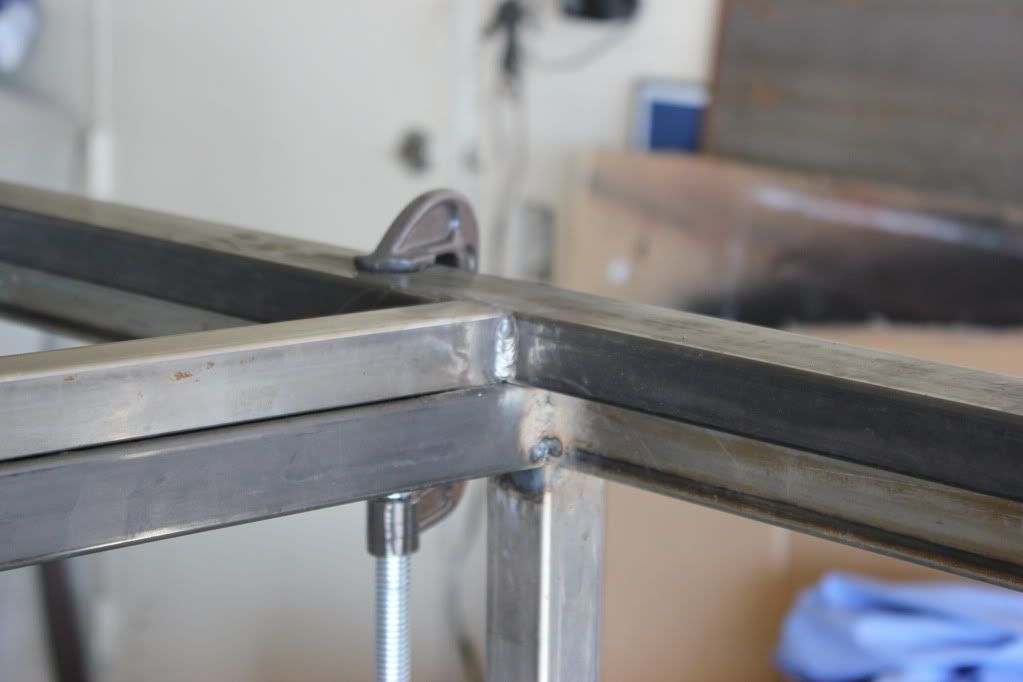
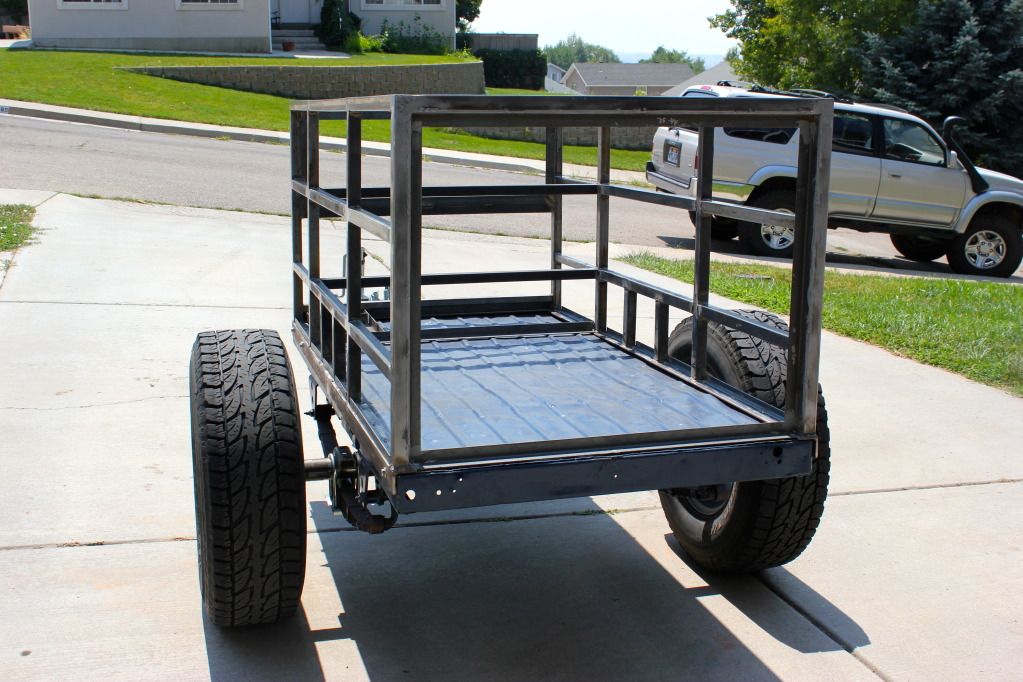
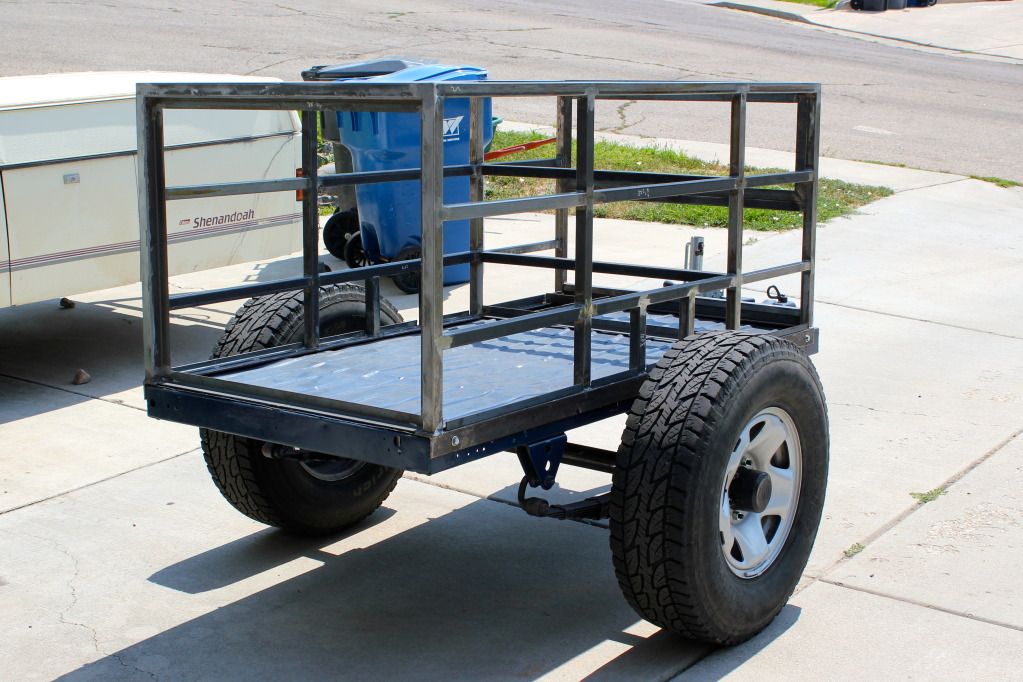
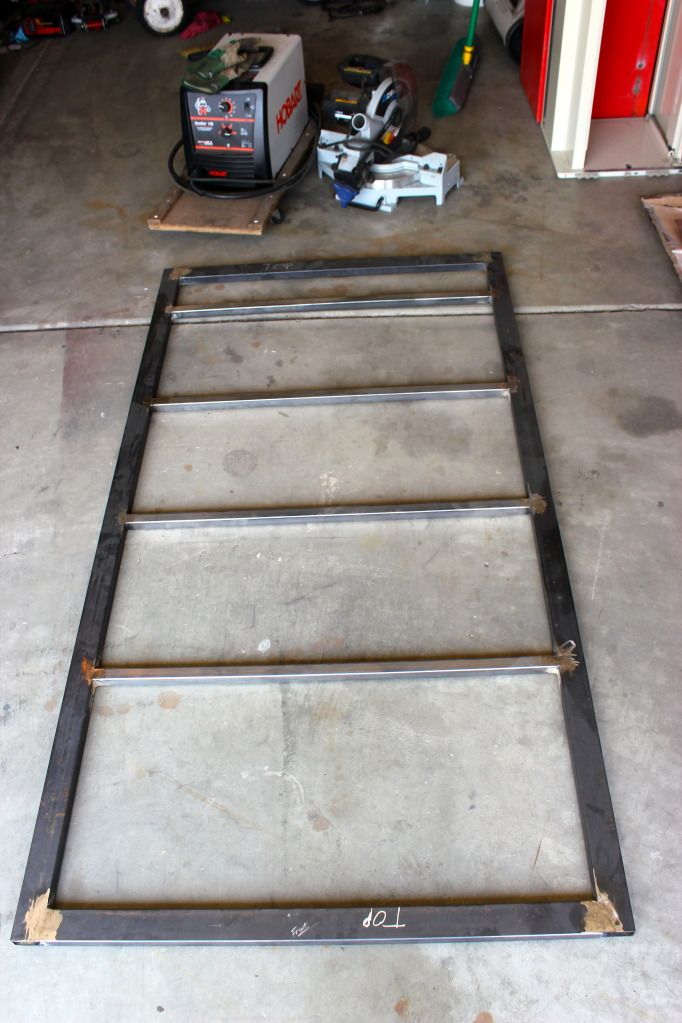
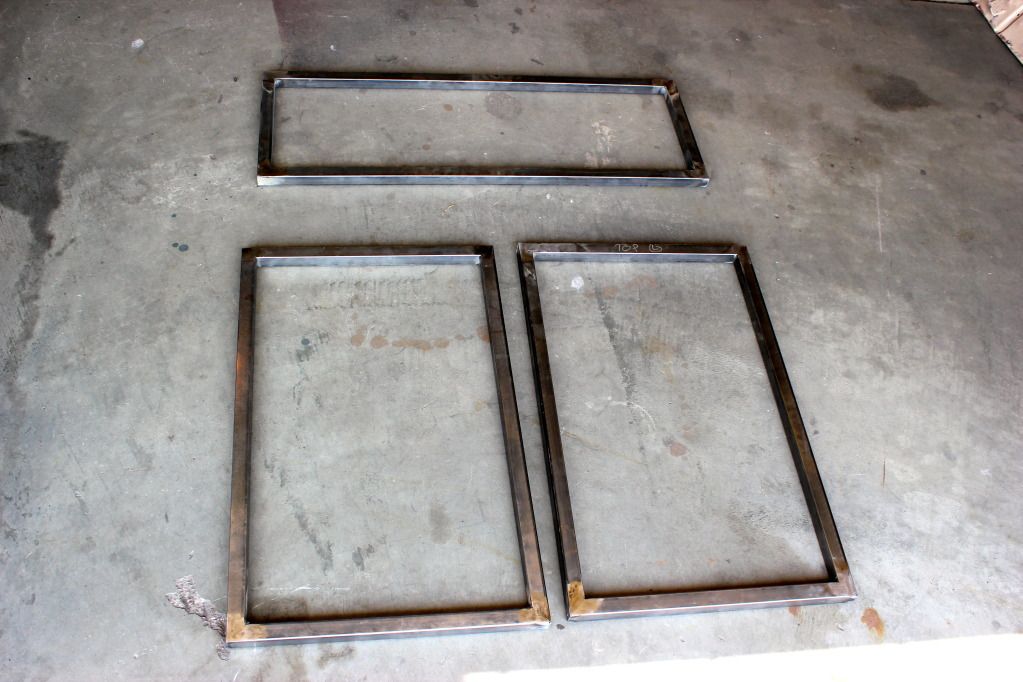
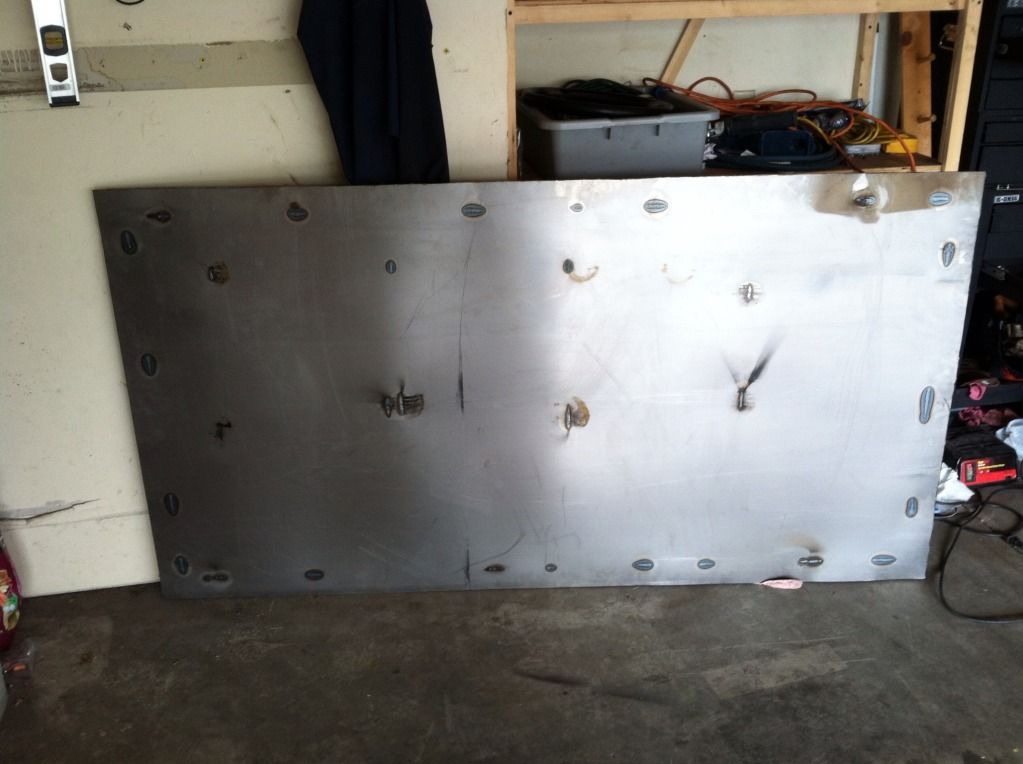
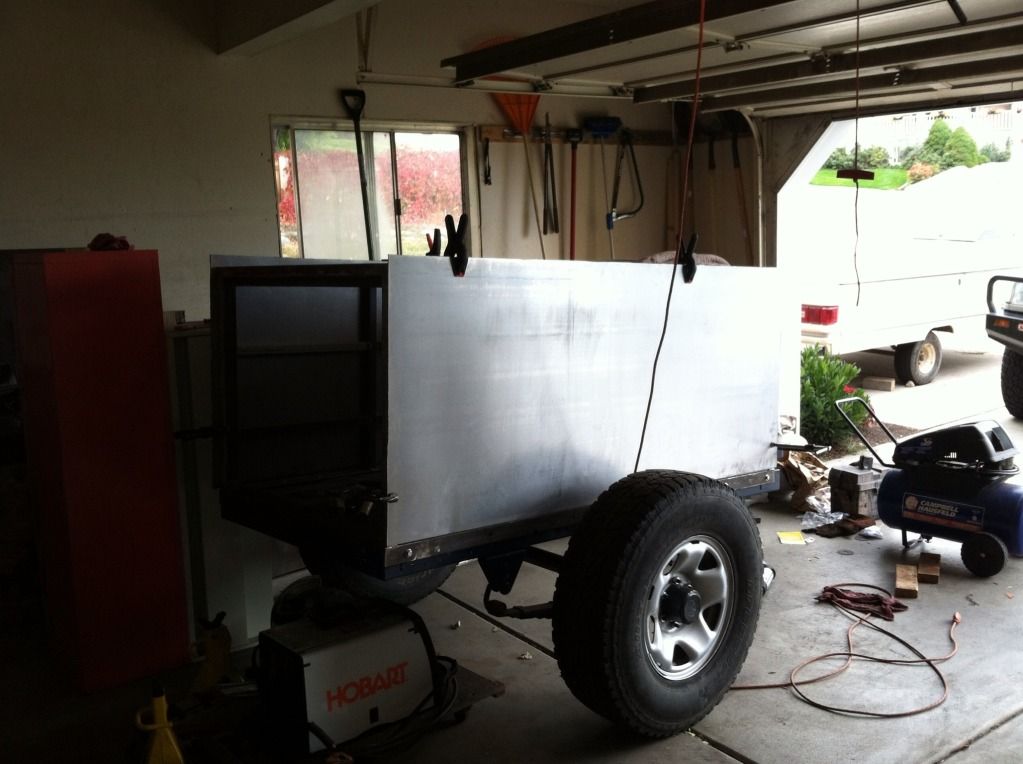
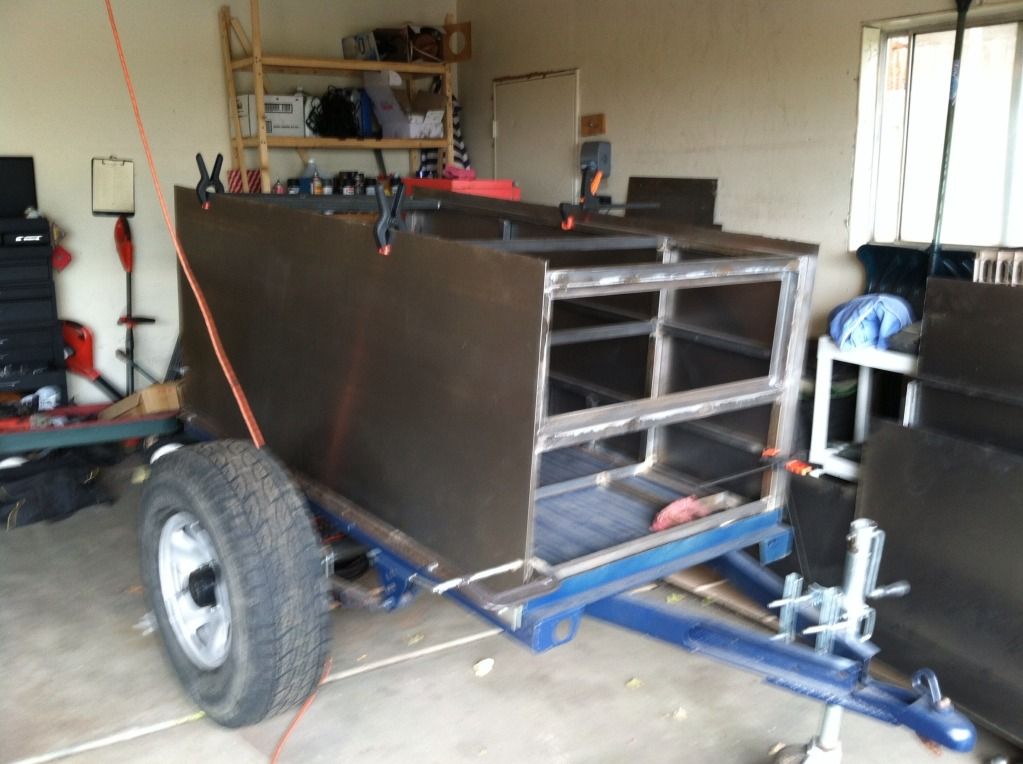
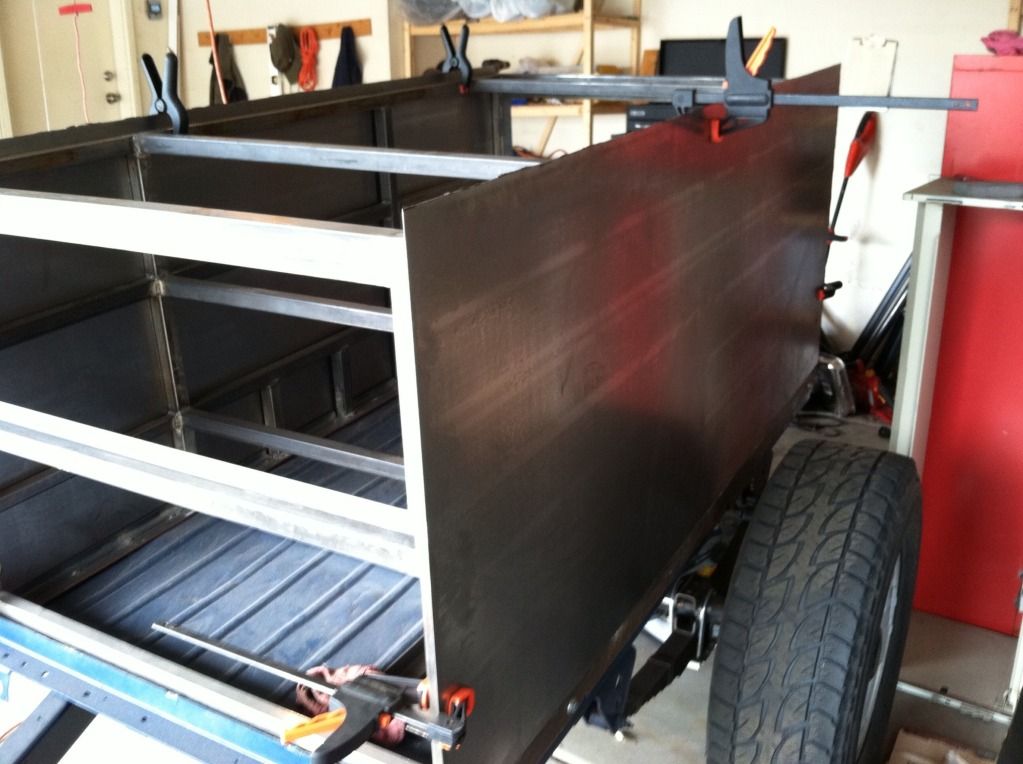
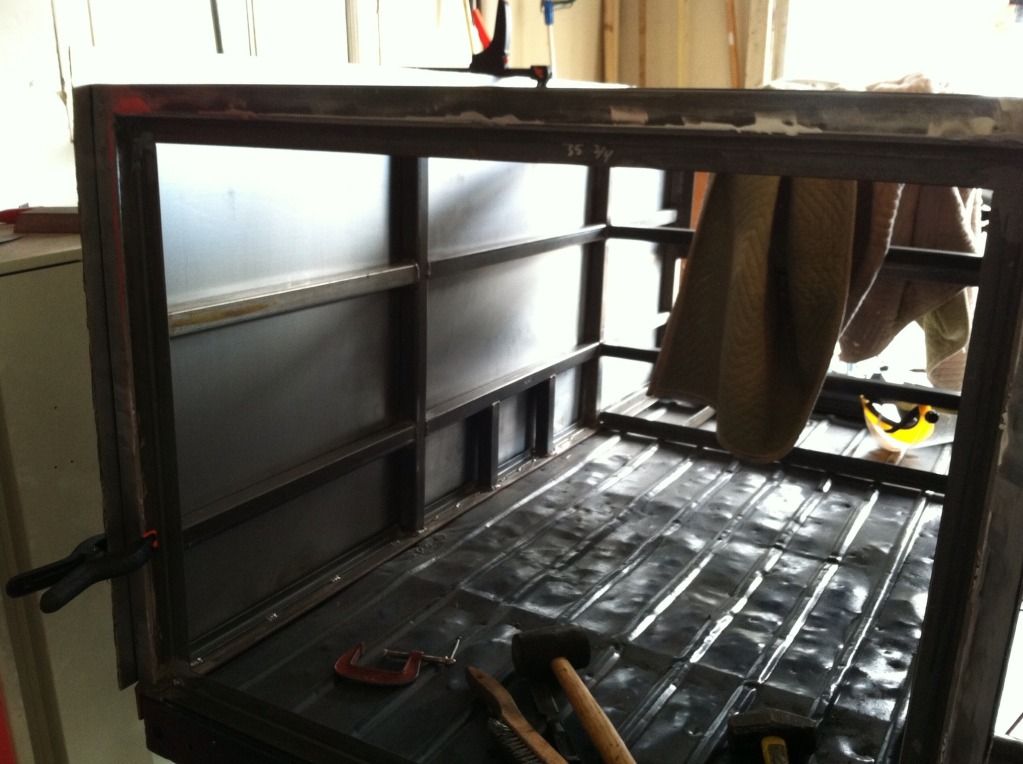
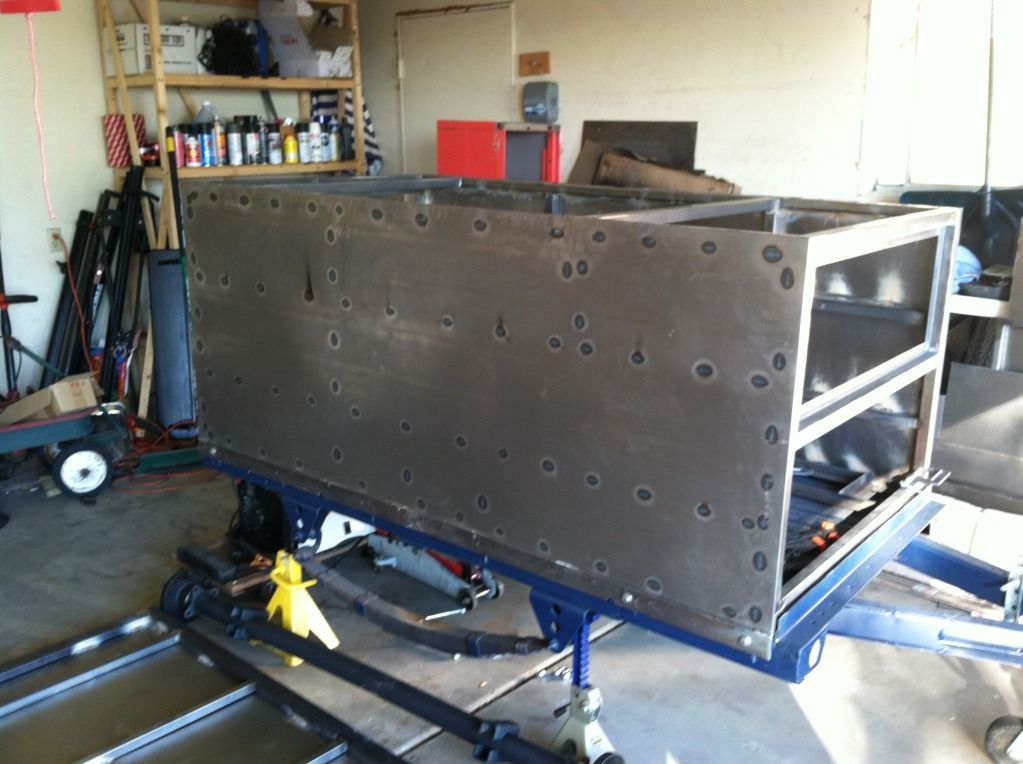
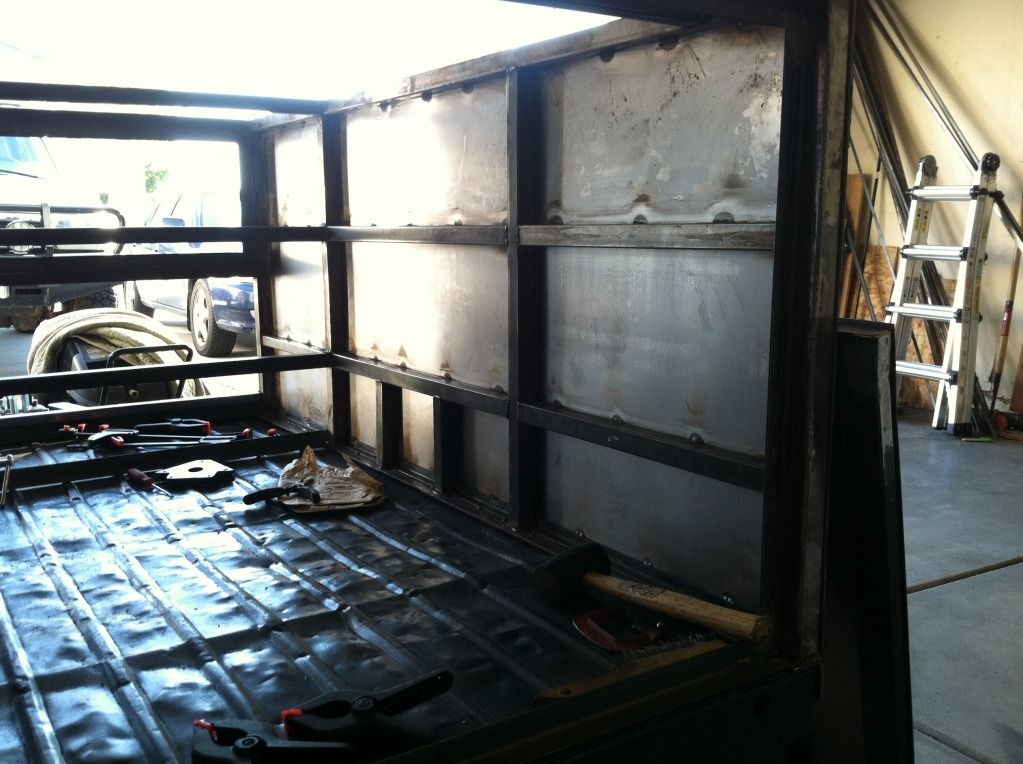
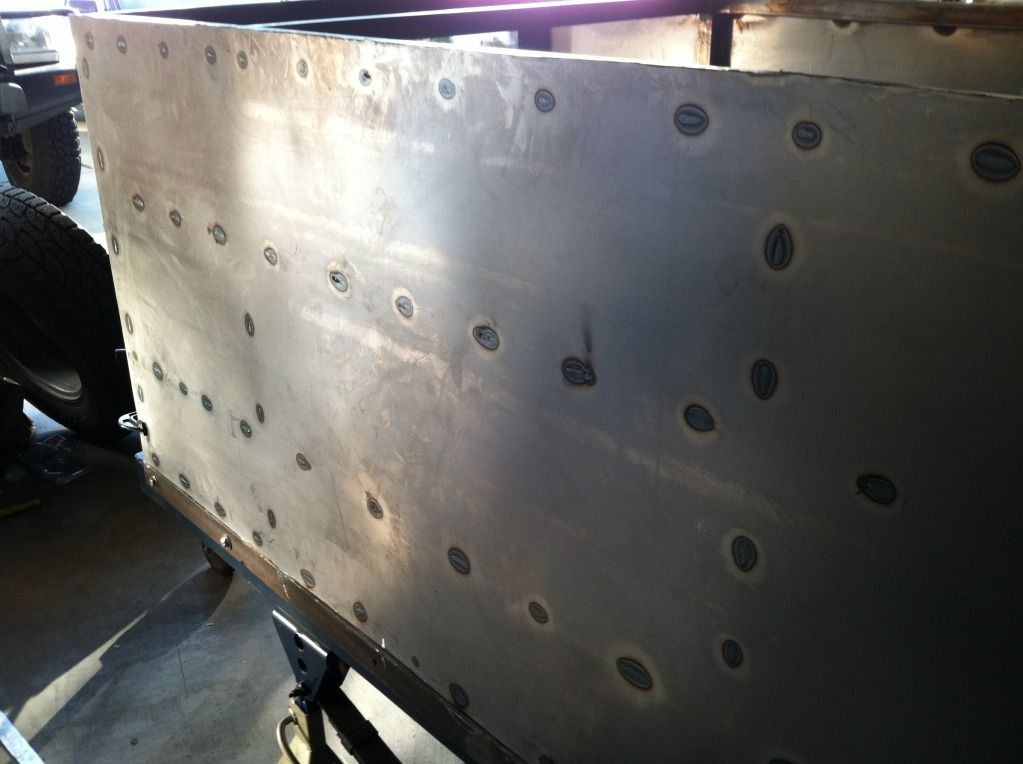
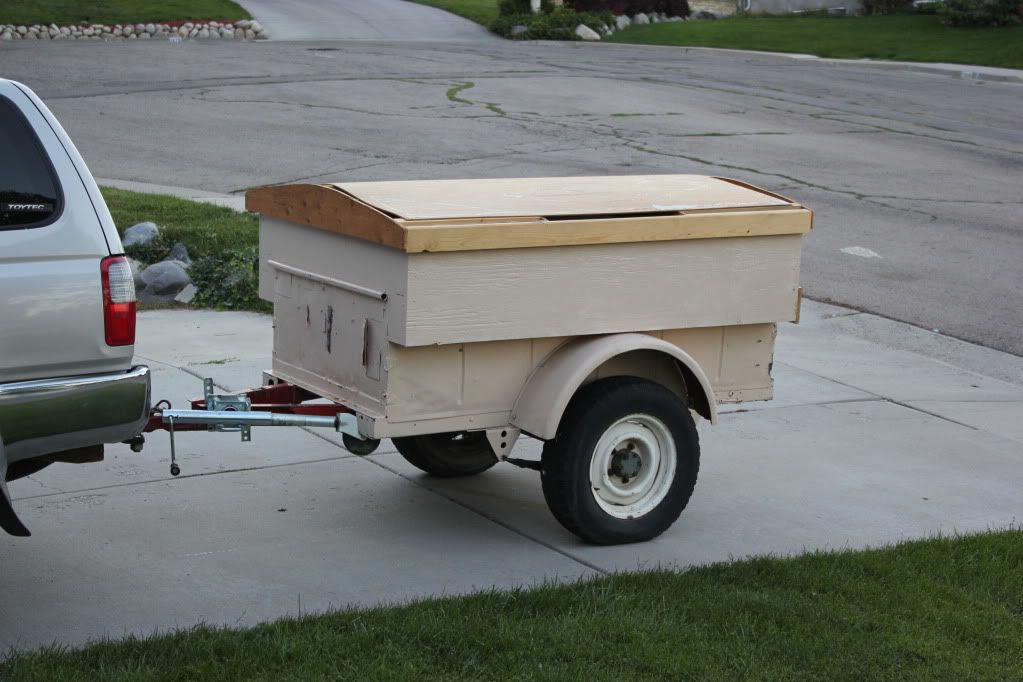
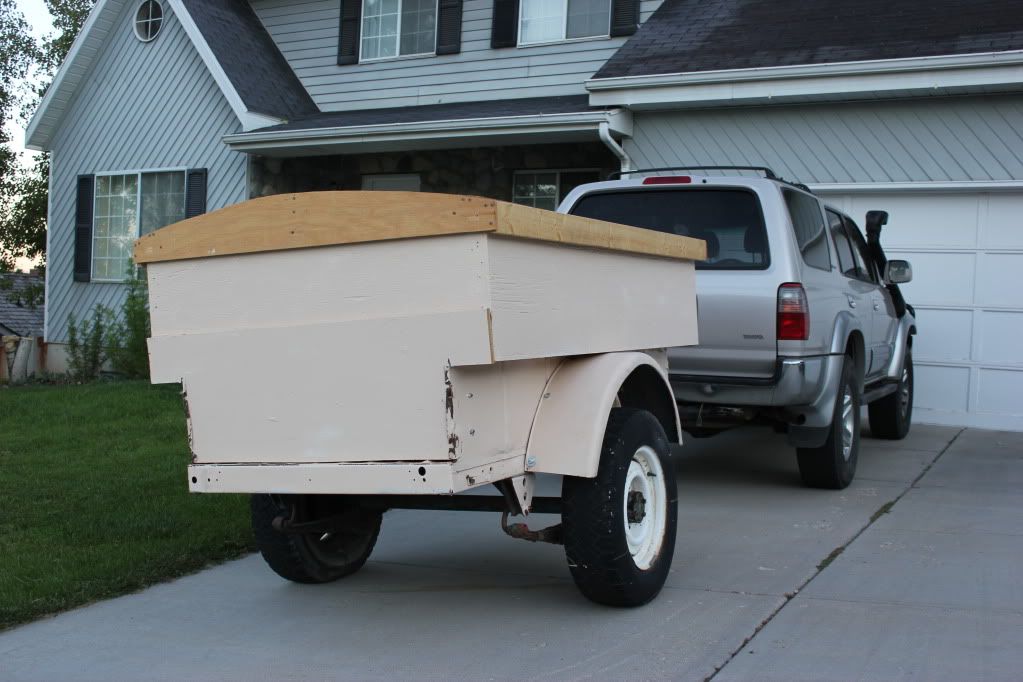
Once I put it aright again, I contemplated how to make a camping trailer out of it. The sheet metal is too old and thin to feel comfortable welding directly on, not to mention, it's probably not perfectly straight. After much obsessing and sleeping poorly:confused:, I decided to head to Metal Mart (a real place) and look for some options.
 

Mark Harley

Expedition Leader
I would pull the floor off too.
blast the frame, clean up the springs and hangers, new matching axle.
Get someone with a metal press and form the sides.
Good start keep us posted on the build.
 

4biker

Observer
I elected to use navy blue as the color for the frame and base of the trailer, maybe going with silver for the main body when it's finished. When it came time to start work again, I picked up a couple of large pieces of angle iron, put them in various orientations, and started working. I put the angle iron so it was wrapping either side of the bed, then planned to tie them together, and use them as the base framework. The angle iron is bolted on (six on each side) to the sides of the frame, so as not to compromise the water & dust resistance of the bed. I picked up some thin square tubing and started making the superstructure. It started SLOW but it's picked up some steam.

I initially planned on dividing the main box into 2 compartment, with the front compartment housing a battery, fuse box, inverter, water tank, and propane tank, but someone already "helped" me on that. Propane and batteries are like peanut butter and jelly, right? :friday: Regardless, I'm still dividing it as planned, but the propane is out on the back porch! The overall length is I think 74" and the front compartment is set now at 17". That should work even if I put in a fridge later (fingers crossed). The height will be about 32" from the bed when the roof is on, not counting the roof rack. The roof will open over both compartments as one piece, and I'm planning on side boxes that run the length on either side.

The back will either have a door or a tailgate, the front will have a door that drops down (need to figure out the dimensions for that still), and maybe side doors for the front compartment on each side. I need it rigid enough to hold either a RTT, or about 5 bikes on the roof (boy scout leader :sombrero:). I also need to install a hitch receiver in the back (someone chime in if there's already something existing I can throw in). I'm going to switch the axle to match the 4Runner, and I'd like to get a multi-axis hitch just in case.

CA4B82B3.jpg


I then painted the rest of the existing trailer blue, and got to work on the superstructure

AF37FD59.jpg


IMG_2153.jpg


IMG_2154.jpg


IMG_2155.jpg


IMG_2157.jpg


IMG_2158.jpg


That's where I finished today.
 

4biker

Observer
I would pull the floor off too.
blast the frame, clean up the springs and hangers, new matching axle.
Get someone with a metal press and form the sides.
Good start keep us posted on the build.

The problem with the M100 is that the floor is welded to the frame all the way around. If I lose the floor, I lose the rigidity of the structure. The frame rails are just c-channel, so there's not a lot of substance. I've tied them together with the superstructure now, so I think it will be a good one-piece unit as long as it's all bolted together. Also, I think the floor gives it some charm. I'll have to be gentle on it, but I want to keep it as "charming" as it is because it's a long history. I'll definitely be working on the springs and hangers when I swap the axle out. Thanks for the feedback!
 

Mark Harley

Expedition Leader
Wow! looks great!
I like the divided space, gear / kitchen?
Your tow vehicle in the drive way looks cool too!
Keep us posted.
 

4biker

Observer
Looks good.

Thanks!

Wow! looks great!
I like the divided space, gear / kitchen?
Your tow vehicle in the drive way looks cool too!
Keep us posted.

Thanks - I wanted to have a separate compartment for everything that isn't camping gear. After I put in the battery, water tank, and (hopefully) a fridge/cooler, I can throw in my recovery kit, jumper cables, and some other odds & ends. I just wanted to keep everything sensitive out of the mud and dust. The kitchen will actually be a separate box on the RH side of the trailer, like the AT Horizon. The 4Runner is 1997 with some stuff added to make it pretty :) The build thread for that is actually on Yotatech, HERE.
 

4biker

Observer
Slowly but surely, things are changing. I got the roof started last weekend. It's all but welded up. I still need to put mounting points for the roof rack on it and maybe stiffen it up a bit. I've got a Moab trip scheduled with the scouts in 3 weeks, and I want the trailer rolling and skinned, at least for that, with a bunch of bikes on the roof.
IMG_2179.jpg

IMG_2180.jpg

IMG_2181.jpg
 
Last edited:

4biker

Observer
Okay, back on topic.

I've had a few moments when I thought my wife was probably going to divorce me because this dang trailer is taking so much time. I almost put it up for sale yesterday. However, I've decided to keep pushing forward, and simplify the design to just get it rolling behind the 4Runner.

First, I got a new axle. I decided to go with 60" to match the 4Runner's track width. The wheels are steel 16x7's and the tires are 265/75/16's I already had lying around from when I put the 33's on the 4Runner.

IMG_3835.jpg


You can see that I capped all of the open tubing and got a lot of it cleaned up. I bondo'd around the door openings to keep it looking clean and keep the dust out as much as possible. I want it to at least look nice. I definitely wanted to put the battery tray in place before skinning the thing, so I did that on Saturday.

Then I cleaned the garage so my wife can fit her car in again. Yay!
More of the same:

IMG_3833.jpg


IMG_3831.jpg


IMG_3830.jpg


Here are some shots of the roof and door panels.

IMG_3837.jpg


IMG_3836.jpg


I actually took it for a spin on Saturday and it's pretty jouncy. It'll obviously need shock absorbers, and it will settle with a little more weight, when I put on the roof with rack, doors and skin.

I still have to complete:

Mounting the doors & roof
Fenders
Skin everything
Paint
Wiring/lights
 
Last edited:

4biker

Observer
Progress has been made!

I picked up 3 sheets of 16g steel and started cutting and welding.

Here is the roof - I wish I were happier about the shape of the skin on it, but I'll be doing some banging, bondo-ing, and sanding before paint anyway.

This is the frame:
IMG_3837.jpg


Here is the sheet on the frame (this is unfinished - I'm gong to set apart a day to weld the rest of this and a bunch more)
0C803808.jpg


Here are the sides - they're cut oversize so I can get them fitted well, but they're clamped to the trailer to get them out of the way
55A401C4.jpg


C0266076.jpg


203C627C.jpg


9FDA5D2B.jpg


9A0BF4FF.jpg


I've got the skin for the doors cut as well, so most of the cutting is done. I just need to fit everything, weld it, and make it look good. Then I can mount the doors and roof. Then I'll start on the fenders. I REALLY want to get this thing out of the garage before the snow flies.
 

4biker

Observer
Ok I pulled the axle off, got it primed and painted, then got new mounting hardware for it, since the ubolts were a little short with that tall leaf pack. Between priming, painting, etc., I got the skin for both sides test fit, cut to size, and finally welded on. I'm super proud of the work I did on this today, but there's more to do still. I managed to get great welds down and keep them small so the sheet didn't warp as bad as on the roof. Even when I bang on it there's no drumming at all, and it's a pretty good fit.

9E303CE7.jpg


752E9E96.jpg


13EDE986.jpg
 

Forum statistics

Threads
188,647
Messages
2,908,416
Members
230,800
Latest member
Mcoleman

Members online

Top