VidereStudios
New member
I often head out to Eastern Oregon with a bunch of buddies to hunt and explore the various nooks and crannies of the desert on our dirt bikes. We will set up a basecamp with our trucks and rig up a bunch of tarps and awnings to keep the weather at bay. We have really had to overcome a few obstacles in the history of the deployment of our awning setups. High winds, lack of trees, hard ground, and ease of setup and take down have all been issues at one time or another. Taking the lessons learned from these experiences, I knew what I wanted in an awning system for my 100 series Land Cruiser.
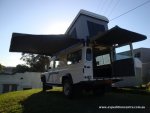
The awnings we can get in the States seem to mostly matriculate out of South Africa or Australia. Both excellent places to perfect the design and construction of an awning. However, sometimes all the elements of a design don’t translate well in actual use. I can appreciate the simplicity of most of the awnings out there. I think there are lots of great designs provided by various manufacturers, but Overland Journal’s review of vehicle-mounted awnings in 2010 showed the weaknesses of the majority of the awning systems out there. I ended up deciding that the simple designs (but heavily dependent on legs and guy lines) of the Eezi-Awn’s, ARB, etc. wasn’t necessarily what I was looking for. I wanted a free-standing system. So it was either a smaller rectangular awning like the Hannibal / Eezi-Awn Swift designs or a bigger coverage awning (Foxwing, Bat / Manta, or the awesome BunduAwn). Both systems are sort of the anti-thesis of each other…great awnings, different usages.
Which brings me to the other major requirement…the ability to resist high winds. The Hannibal is well-known for being one of the most robust awnings out there and very able to deal with high winds. I wasn’t able to find any reviews on the Swift, but I imagine it can’t be much different. The bigger, 270 degree awnings are a different matter. With so much square footage of coverage, they really have to be secured to the ground in high winds. The BunduAwn seems to be the best of the bunch of those with a rating of 60 kmph, or almost 40 mph. However, the necessity of guy lines and poles wasn’t what I was looking for. The decision was pretty easy to focus on acquiring a Hannibal awning.
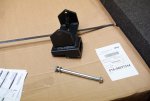
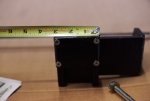
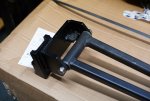
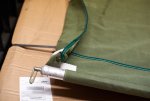
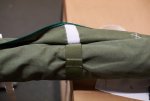
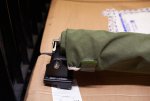
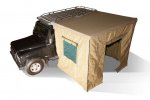
Even though Hannibal stopped importing awnings back in 2012 or 2013, one or two would invariably show up for sale in one of several overland / off-road forums. I decided to just keep a lookout for one. Finally, one popped up here for sale. I didn’t hesitate much and was able to secure the awning for purchase. The awning was only a 1.9m version, so that was my reason for being hesitant. I didn’t think it would work out too well on my 100. Anyway, I pulled the trigger and sent the PayPal payment. It arrived quickly and I started examining it. It was very nicely built and quite robust, however, I could easily see after making some measurements that it wasn’t going to be adequate for my needs. I really needed at least a 2.2m awning. I mounted the awning in the warehouse at one of my jobs and got down to the business of seeing how it really worked and if I could somehow utilize the best elements of the design in my own awning. My conclusions are that it is very doable; I just need to solve three major problems.
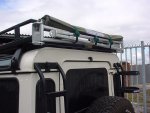
One major issue that will have to be dealt with is the interface of the awning brackets with the particular roof rack I eventually turn out to use. Hannibal racks are even more elusive than the awnings, so I know it will have to be a custom bracket. Right now the FrontRunner Slimline II and the Eezi-Awn K9 racks are at the top of my short list. So I will have to figure out that connection...I am hoping to pick up one of those racks on a post-Thanksgiving sale and then fit the bracket to that. Another major issue is the acquisition of a water-resistant and UV-resistant fabric and the actual sewing of the awning material itself. I could not find much of any information on the particular polycottons used, so I will have to figure out that element. Finally, the smallest issue is dealing with the special radiused square tubing that is used in the construction of the awning frame and the hardware used during deployment. I will have to sort all that out.
This will be an ongoing winter project and I hope to have updates every week or so as I get things figured out and acquired. Looking forward to hearing your feedback and suggestions to make this awning a bit above and beyond what is currently available.

