Building your own custom full size roof rack?

dieselcruiserhead

16 Years on ExPo. Whoa!!
Question sort of says it all.. I am on rack #2 now that I built from scratch.. I have also done mods and put floors in a couple comercial versions (Conferr, etc). I actually have had a lot of fun building them in the past.. I have gotten it so I can get the frame of it all, using steel, to weigh less than 50 lbs for a 100 x 55 full rack.. I found you can keep the weight down with smart boxed contruction using really thin steel.. The weight really comes in when you use a corrugated steel floor... The thin steel is plentiful/free and I sort of stumbled into it by accident as they are former ATV racks for shipping from the local Honda ATV dealer...

Anyway, what features or how would you all build a custom full rack if you could? I am familiar with at least the big land cruiser options.. The ARB rack, the INTI rack that I have taken a lot of inspiration from in the past..

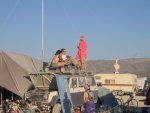
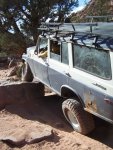
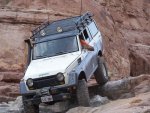
I want it to be multipurpose this time. Bikes, sleep, full rack storage. At least make the back half of it have removable sides for a possible tent if I ever take that route... Lights and fuel storage, and probably the standard shovel mount.. I will probably build it all then galvanize.. Here are a couple pics of the past full racks. The first one (boxed sides) weighed a ton and was a wind resistance. Second one (the flat one seen in Moab) had no wind resistance and I loved it. Weighed probably around 100-120lbs done. Could really take a load but needed help from at least 4 yakima bars to help with stability/load carrying... I loaded and slept on it many times, it was great (still have it)...

I am thinking of modding this rack or building another from scratch based on some of the input you guys put into it... If you have specifics and pictures as well, that would be killer! I wish I could use some aluminum but not set up for welding aluminum so probably more effort than its worth...
 

dieselcruiserhead

16 Years on ExPo. Whoa!!
Here is a pic of the first rack.. This one was actually given to me, then I modded. It had a load spreading design using its own channel that sat in the rain gutter. Bad news was it required drilling through your rain gutters to bolt down, was heavy, the spreaders were so far apart that it bowed the floor. So I cut the mounting system off and use the 4 yakima bars which was great and strong. I had something like 6-8 people up there once and no issues at all...

I replaced bowing steel floor with plywood, which was a mixed bag and you would feel on highway unless you had the rig and particularly the roof loaded.

You also felt it all the time due to its weight. I used it for special instances only, and rarely, and eventually just recycled it... It was also a brick in the wind and noticeably affected my mileage...

You can also see the bike mounts. I basically welded "fake" rain gutters to it and used a Thule setup for bikes. Only thing was it was semi-cumbersome to remove them.. This pic is at Burning Man (check out the middle finger in the back ground, about typical of BM :) ) Last pic shows all loaded up going there. About 500 lbs on the roof I figure...
 

Attachments

  • Picture 141.jpg
    Picture 141.jpg
    315.4 KB · Views: 344
  • IMG_2216.jpg
    IMG_2216.jpg
    743.1 KB · Views: 336
Last edited:

dieselcruiserhead

16 Years on ExPo. Whoa!!
Second one.. This one didn't affect mileage at all and you did not notice it too much. This was sort of a great "platform" to start with. Bonus of the corrugated steel is you can safely walk on it, sleep on it, etc.. But it weighs a ton. The INTI racks use thin aluminum strips that are killer and light, but less functional IMO...

This was about bare bones design, a great platform. (Again I still have this rack). The 4 yakimas was so good last time that I decided to do again with this one. What is not that cool about them is tight areas (trees, etc), they catch them and can do damage if they stick out too much. They are good for additional load carrying though, you can put bikes etc on the part that sticks out, one on each side...

I also liked the 60 degree angle gussets for the side mounts. Made the whole rack much sturdier while requiring a whole lot less material.. The upper pieces were hollow all the way through for less wind resistance. The 120 lbs weight was nice too but I would like to make stronger and even lighter if possible..

Thoughts?
 

Attachments

  • CM06_202_jpg.jpg
    CM06_202_jpg.jpg
    145.8 KB · Views: 263
  • CM06_181_2.jpg
    CM06_181_2.jpg
    345.1 KB · Views: 20,833
Last edited:

Mike S

Sponsor - AutoHomeUSA
Most roof racks are a frame with stuff bolted/welded to it. I would consider building a BOX of welded steel and pass on the frame. The idea is that you build monocoque rather than body on frame.

Get it low as possible, slant the front for a built-in fairing, and weld steel attachment tabs on the bottom of the box for attaching the rail clamps. You could also cut holes in the sides for weight reduction. You could include spring-loaded tie downs for a cargo net or cover, built in lockable storage boxes, etc.

Well, you asked.

Mike S
 

marc olivares

Adventurer
Andre, we need to talk

i have a Jd2 and a few dies, we need to build you a rack with some sexy curves. those yakima tubes and grated the flooring just isnt giving your FJ the love it needs. i'm thinkin' Safety Devices meets YOTA....:drool:
:cool:
 

Gear

Explorer, Overland Certified OC0020
Hello Andre,
Here are some of my ideas. The Yakima bars are great. I would keep them and incorporate an out hoop that gets welded to the yakima bars. Here is a photograph of my Jeep rack. I love the low profile of this rack. The cross bars are Yakima sized tubing(1 1/8 odd size). The outer rack is 1 1/4". The reason the outer is 1 1/4" is most fab shops do not have the odd size that Yakima requires. So I simple had them weld in some cross bars that meet Yakimas specs. With the Yakima I am then able to connect just about anything I would every want on top of this rack. I have used kayak, mtn. bike attachments and a Thule space case. I also use the Yakima quick clips to attach the aluminum panel on top. I would then skin the rack with a giant piece of aluminum just like I did. In Arizona this allowed me to run my AC on a #2 setting and because I have two roofs the interior would stay a lot cooler. I would say forget about the upper bars. Why do you need them. Anything you are going to put up there needs to be secured anyway. Just make some attachment points on the aluminum or better yet just run your strap under the aluminum and around the outer bar. Ok here are some photographs. Let me know if I need to explain any of my comments.

47b7dc30b3127cce812b5dd3862b00000016108EatWzFu0cO


47b6da36b3127cce8821d18faac500000026108EatWzFu0cO


47b7dd25b3127cce825386ea098e00000026108EatWzFu0cO


47b6d633b3127cce8b98cae952d200000016108EatWzFu0cO


47b6da36b3127cce882106536bda00000016108EatWzFu0cO
 

dieselcruiserhead

16 Years on ExPo. Whoa!!
Cool.. Appreciate the responses, and thanks Marc!.. Been down at the shop all night, about to collapse, will reply tomorrow! Cheers, A
 

Grim Reaper

Expedition Leader
After not finding anything that fits my needs I am about ready to build my own as well.

First problem is the Yamika's hanging out the side are trail fodder here with the trees we deal with. The first ride my buddy did with he new rig (Rover) he snagged a cross bar and bent up the gutter pretty good. :( So that is out and the fact that I don't have a usable gutter where I need it it just wont work.

I am going to use a low C track off a Trooper and bolt that to my roof like I did on my Suburban.
http://expeditionportal.com/forum/attachment.php?attachmentid=7576&d=1178463284
http://expeditionportal.com/forum/attachment.php?attachmentid=7577&d=1178463294
You will also notice the short custom mounts I made to keep that rack as tight to the roof as possible. Same goal on the rack for the 4Runner but I want to make the cross bars a little less tall. The roof has less curve so Should not be a big problem.

The floor is going to be my sand ladders in the 4th post of this thread. http://expeditionportal.com/forum/showthread.php?t=3033


For manageability that Fibergrate will be cut in half. Super strong and it will not need much cross support. Bad is it is a little heavy and definitely not aerodynamically friendly. If I need to use them I will have to pull what ever is in the basket off.

I am still very torn on if my HiLift, shovel and what gear will end up being on the rack. Originally I really wanted to keep my spare UNDER the truck and not have to deal with a rack on the back but a 33 will not fit (all though it might fit deflated) and I am trying to get a second battery mounted low under the truck as well. So where everything will end up I really don't know at this point.

A fairing to try to clean up air flow is a given. Low lashing rails but the height may be dictated by the hilift and shovel.
 

dieselcruiserhead

16 Years on ExPo. Whoa!!
Cool...! Took the rack in the thrid post and put it on our funky '77 Ford van, Brown Sugar.. Brown Sugar looks ************ now! Heading down to Moab for DesertRocks.org festival..

Anyway, pretty much means I will fab up another one from scratch... Cool guys keep the ideas coming! What I like about the steel grate is it thin and aerodynamic to an extent.. Will post pics when I come back!

I am still down the the tube idea, something small like 1" or even smaller possibly, if I can bend thin tube and not have it kink..

Cheers!
Andre

:beer:
 

dieselcruiserhead

16 Years on ExPo. Whoa!!
Thanks for the ideas Justin those are great.. That is definitely a good idea, a big piece of aluminum.. I like the idea of the mounting system too.. Only bummer is having to remove the aluminum to mount bikes, etc.. That said still a good design.. I agree about the flat panel.. Doesn't 'look as cool' but still pretty neat..

Gear said:
Hello Andre,
Here are some of my ideas. The Yakima bars are great. I would keep them and incorporate an out hoop that gets welded to the yakima bars. Here is a photograph of my Jeep rack. I love the low profile of this rack. The cross bars are Yakima sized tubing(1 1/8 odd size). The outer rack is 1 1/4". The reason the outer is 1 1/4" is most fab shops do not have the odd size that Yakima requires. So I simple had them weld in some cross bars that meet Yakimas specs. With the Yakima I am then able to connect just about anything I would every want on top of this rack. I have used kayak, mtn. bike attachments and a Thule space case. I also use the Yakima quick clips to attach the aluminum panel on top. I would then skin the rack with a giant piece of aluminum just like I did. In Arizona this allowed me to run my AC on a #2 setting and because I have two roofs the interior would stay a lot cooler. I would say forget about the upper bars. Why do you need them. Anything you are going to put up there needs to be secured anyway. Just make some attachment points on the aluminum or better yet just run your strap under the aluminum and around the outer bar. Ok here are some photographs. Let me know if I need to explain any of my comments.

47b7dc30b3127cce812b5dd3862b00000016108EatWzFu0cO


47b6da36b3127cce8821d18faac500000026108EatWzFu0cO


47b7dd25b3127cce825386ea098e00000026108EatWzFu0cO


47b6d633b3127cce8b98cae952d200000016108EatWzFu0cO


47b6da36b3127cce882106536bda00000016108EatWzFu0cO
 

Grim Reaper

Expedition Leader
dieselcruiserhead said:
Cool...! Took the rack in the thrid post and put it on our funky '77 Ford van, Brown Sugar.. Brown Sugar looks ************ now! Heading down to Moab for DesertRocks.org festival..

Anyway, pretty much means I will fab up another one from scratch... Cool guys keep the ideas coming! What I like about the steel grate is it thin and aerodynamic to an extent.. Will post pics when I come back!

I am still down the the tube idea, something small like 1" or even smaller possibly, if I can bend thin tube and not have it kink..

Cheers!
Andre

:beer:

Conduit thickness is bent easily with a $35 bender you can buy at Home Depot. Harbor freight sells a bender that can handle some stuff.
http://search.harborfreight.com/cpisearch/web/search.do?keyword=bender
 

pray4surf

Explorer
dieselcruiserhead said:
I am still down the the tube idea, something small like 1" or even smaller possibly, if I can bend thin tube and not have it kink..

:beer:

Interesting thread, thanks..

My two cents, pack damp/moist sand into the tube prior to bending to prevent kinking.... especially if not using a tube/pipe bender. My dad and I built hang gliders back in the early-mid 70's and used a plywood form and packed sand to bend aluminum tubing up to 1" dia. We obtained some fairly tight radii (3"-4")

Rick
 

Erick Lihme

Observer
Like that fibergrate, and multitasking gear. Especially with the 4 banger weight is a big deal.

As a wild idea using your grates, using any hard wood like teak, walnut, maple, maybe oak with lots of spar varnish, that is marine varnish, in (3) 2"h x 3"w x 6', the length of the shell or topper, the grates could be easily be unbolted from carriage bolts protruding upwards. Advantage of wood is the low profile, appearance, and especially shaped ends which blend with the top and reduce drag when the grate/rack is removed.
 

ntsqd

Heretic Car Camper
I've only skimmed this (work & all), so apologies if repetitive.

A number of years ago I built a rack for my then '79 Suburban for going to the B1k with LocoMocos. I wanted it to carry their tables (of unkwn size) etc., but also be usable for carrying home sheets of plywood, hauling bikes, or what ever need came along. Additionally I wanted something that would act a bit like a Safari Top and that had minimal aerodynamic signature. (When you're starting with 9 mpg you really don't want to lose any!)

What I came up with was a perimeter frame of 1.125" x .060" wall square tube. It has 3 crossmembers and 2 rails. I tagged 1" x .125" tabs on the inside of each of the two openings, 3/4" down from the top surface. On those I set some 3/4" Marine plywood with mitered corners. The corners were mitered with each leg of the miter being roughly 1.5" long. The idea was to eliminate tie down hooks or loops by exposing the frame at the various tube intersections. The plywood was treated with a marine sealer and then was to be painted with deck-grip additive added to the paint. Additionally some 1/4" plywood was cut to fit up against the tabs from the bottom. The idea being to present a smooth bottom to the airflow. The rear-most cross member was drilled and had threaded inserts welded in to mount a rear facing amber light and for a small deflector to push some of the air flowing btwn the roof & the rack down over the rear window.
On the leading & trailing ends I built & welded on "bike-tite's". I didn't want them sticking up since I had no idea how big any of the tables I was to be hauling would be, plus laying them flat appealed to my aero goals.

Of course, time ran out and the rack went to Baja sans the underside 1/4" ply and the top ply only got sealed but never painted, nor did the air deflector ever get built. It did, however, work very well for it's intended uses and as an "Observation Deck."
 

Forum statistics

Threads
188,370
Messages
2,903,841
Members
230,227
Latest member
banshee01
Top