You are using an out of date browser. It may not display this or other websites correctly.
You should upgrade or use an alternative browser.
You should upgrade or use an alternative browser.
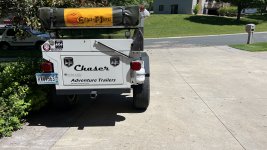
Chaser #14. New adventures
- Thread starter RKRUGER
- Start date
RKRUGER
Adventurer- Toyota Nut
@Rube2K6 I was thinking the same. And then I thought “is it, though?” My Chaser doesn’t have a rear mounted spare/swing out. And what does that weight? And this is 48” long overall which means more than a third of the weight is over or in front of the axel as compared to the spare and swing out which is all aft.
Maybe I will hate it. If so, I can sell it. These move quickly and I have Jack into it.
If I can put my kitchen plus into it, then I can put light gear on top and it’s all good
Maybe I will hate it. If so, I can sell it. These move quickly and I have Jack into it.
If I can put my kitchen plus into it, then I can put light gear on top and it’s all good
Last edited:
RKRUGER
Adventurer- Toyota Nut
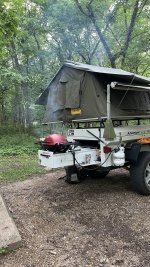
Trying this out… not sure I am sold on it yet and will probably take a few trips to decide if it is an overall positive or negative.
I found a Weatherguard 336-3 a few weeks ago (see back a page) and against some better judgment, I decided to clean it up and mount it in the Chaser.
Before:

During:

After:


It’s a ton of usable and accessible space. It is also heavy, and because of the tailgate latches, it requires mounting directly center of the box. This limits the size of the items that can fit on either side of the box. I removed a section of the center rib to fit a Coleman stove and some cast iron toward the front of the drawer and retained the smaller compartments to the back.
There is enough room in front of the box for a few Wolf Pack sized tubs
A pair of ratchet straps secures it for now. If it works out, I will thru bolt it.
I found a Weatherguard 336-3 a few weeks ago (see back a page) and against some better judgment, I decided to clean it up and mount it in the Chaser.
Before:

During:

After:


It’s a ton of usable and accessible space. It is also heavy, and because of the tailgate latches, it requires mounting directly center of the box. This limits the size of the items that can fit on either side of the box. I removed a section of the center rib to fit a Coleman stove and some cast iron toward the front of the drawer and retained the smaller compartments to the back.
There is enough room in front of the box for a few Wolf Pack sized tubs
A pair of ratchet straps secures it for now. If it works out, I will thru bolt it.
Tex68w
Beach Bum
I remember when these first came out, I wanted so badly haha. I flirted with a few M1101's but it was short lived and I agree, if you can adapt some of the hand brakes to your Chaser I think that would be a worthy venture. I would also consider an adjustable hitch or riser extension so that you can get the trailer level. I love the 100 btw, the only series I have yet to own.
RKRUGER
Adventurer- Toyota Nut
@Tex68w I recall @Scott Brady dragging one through the Arctic Circle behind his Tacoma and I wanted one so badly. But money was tight and I built Homer instead. It served us well and now has gone to a new owner that is giving it some real love again.
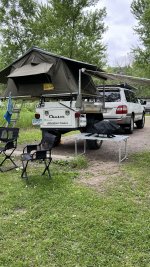
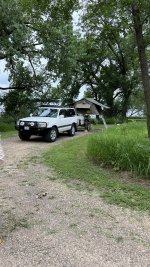
Just returned from MOORE in Springfield l’ Missouri and #14 was a hit. Same sentiment as you expressed. Lots of folks remember seeing them online but never in person. I am still working on sorting out the matching wheels. Might need to source a different set of adapters. If anyone has a used set of Jeep TJ to 5x150 (Toyota Land Cruiser), hit me up.


Just returned from MOORE in Springfield l’ Missouri and #14 was a hit. Same sentiment as you expressed. Lots of folks remember seeing them online but never in person. I am still working on sorting out the matching wheels. Might need to source a different set of adapters. If anyone has a used set of Jeep TJ to 5x150 (Toyota Land Cruiser), hit me up.


RKRUGER
Adventurer- Toyota Nut
Preserving this link: https://expeditionportal.com/off-road-review-at-overlands-flatbed-chaser/
RKRUGER
Adventurer- Toyota Nut
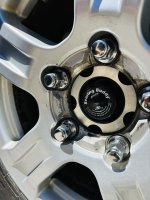
Ordered a set of hub centric adapters from Bronsons @ www.customwheeladapters.com
For reference, my trailer is set up with 5 on 4.5 5 lug hubs with 12 - 20 lugs. The adapter will go 5x4.5 to 5x150 and 2.5" thick to match the 60mm offset Sequoia wheels. Center bore is 74MM internal to 110MM external, adapter studs will be 14mm x 1.5.
will post up photos when I mount them up.
For reference, my trailer is set up with 5 on 4.5 5 lug hubs with 12 - 20 lugs. The adapter will go 5x4.5 to 5x150 and 2.5" thick to match the 60mm offset Sequoia wheels. Center bore is 74MM internal to 110MM external, adapter studs will be 14mm x 1.5.
will post up photos when I mount them up.
RKRUGER
Adventurer- Toyota Nut
Spent some long overdue time cleaning up and updating the electrical in the tongue box. The previous set up was 100% functional but did not allow for expansion or a way to isolate the battery from the system if need be. All loads were directly connected to the battery with inline fuses and there was not a fixed provision for charging from shore power.
Rather than plywood, I used ¾” poly cutting boards on the inside of the box to mount the components and to support the added shelf. The poly boards will never rot, completely water proof and are great insulators. The shelf is ¾ birch ply, liberally treated with boiled linseed oil, because it is pretty. The NOCO charger is secured to the aft board and the plug port adapter now occupies an enlarged outlet on the starboard side of the box. The charger is directly connected to the battery.
4 GA wire connects the battery to the main disconnect (mounted to the shelf), the circuit breaker and the fuse box. The fuse box is grounded to the battery. Circuit breaker and fuse box are screwed to the fore poly board. Currently the fusebox powers two sets of usb charging ports, one on the outside and the second inside the box for secure charging, the rear work lamp, and the parking light circuit.
It has always been a bit of a puzzle how the trailer is wired and I didn’t “mess” with it yet, just cleaned everything up and put components on individual circuits. The trailer battery is trickle charged through the 7 pin plug, and there is a plug in the bed for a fridge. The worklight on the rear seems to have been an afterthought, but it is matched with a second that comes on with the reverse lights, obviously a separate circuit. The heavy ga black and white wires isolated to the right side of the fuse box enter the tongue box through a gland fitting on the front of the box. That is the 7 pin charging circuit, but is also interconnected with the parking lights. There is a junction box on the hitch that I need to tackle at some point.
Parts list:
Blue Sea Systems 9003E e-Series Battery Switch, On/Off, Red
Blue Sea Systems 7184 285 Series Circuit Breaker, Surface Mount, 60 Amp
Blue Sea Systems 1016 Dual USB Charger Socket Two USB Ports with LED
Blue Sea Systems 6 Circuit Blade Fuse Block With Negative Bus
NOCO Genius GEN5X1, 1-Bank, 5A (5A/Bank) Smart Marine Battery Charger
NOCO GCP1 15A AC Port Plug 125V Power Inlet Socket
12V USB Outlet 2 Pack, Dual Quick Charge 3.0, Socket Waterproof Aluminum Charger with LED Voltmeter and Power Switch
Winco CBH-1824 Cutting Board, 18-Inch by 24-Inch by 3/4-Inch
Next up is adding solar charging, likely a Victron Energy BlueSolar MPPT 75V 15 amp 12/24-Volt Solar Charge Controller. That should be more than adequate for my needs, though I have also been scoping out the Renogy 12V 50A DC to DC Battery Charger with MPPT. I like the idea of one box, but also like the efficiency reviews on the Victron units. Anyone have experiences either way?


Last edited:
RKRUGER
Adventurer- Toyota Nut
Bronsons’ wheel adapter/spacer to match the 4.5x5 brake drum to the 5x150 OEM Toyota wheels. Tire size is 265/70 R18 at the moment and were previously on the 100.
Spacer is 2.5” thick to compensate for the drastic difference between the dished Mickey Thompsons to the +60 offset on the Toyota wheels. I can’t say enough about how beefy the adapters are with the lip for the hub centric wheels. The tires also nicely line up with the edge of the fender now.

An additional feature is access to the Bearing Buddies for servicing where before the entire wheel needed to be removed.
Spacer is 2.5” thick to compensate for the drastic difference between the dished Mickey Thompsons to the +60 offset on the Toyota wheels. I can’t say enough about how beefy the adapters are with the lip for the hub centric wheels. The tires also nicely line up with the edge of the fender now.


An additional feature is access to the Bearing Buddies for servicing where before the entire wheel needed to be removed.
Attachments
Last edited:
Forum statistics
Members online
- Todtan
- mark5280
- pjm511
- vwauditech
- Weeds
- cmajo
- blackjack2121
- carsondfuller
- Diamond Jim
- Imgoingonanadvencha
- The Norseman
- Curly42
- jhpcan
- Groverland
- Heyfish
- timtyler
- SDDiver5
- Roverrr
- Rovertrader
- Cgswimmer24
- nargun
- Paintsalot
- swanyo
- kbsd
- jjanos
- Snydmax
- LivinAnAdvntr
- iggi
- nukeandjuke
- ChuckWagonPNW
- wisnerma
- Cabrito
- ///KM
- Pishke
- CuStOm
- SONICMASD
- Savagenut
- hyter
- Jbpeterman
- Sokel
- Hegear
- 2014 LEX 570 GA
- jo60235
- DLM
Total: 792 (members: 49, guests: 743)

