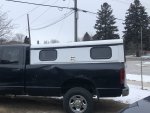
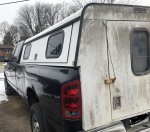
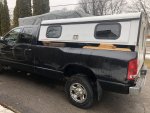
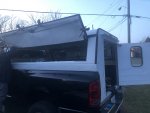
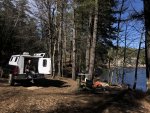
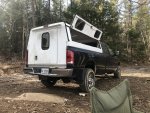
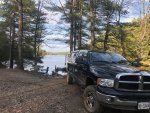
Hey guys its been a while and I hate when people leave empty threads that they started without updates so I had to give an update even though I pushed it off. The camper is pretty much done more or less, I wouldn't consider it ever being done as modifications will always occur but the main part of the building is done and I've successfully taken it out for a trip not long ago. here are some pictures from before the build, throughout it and from my first trip not long ago. I did a lot of research before this and I've been a fan of the van/truck life for years and I personally enjoy/appreciate build guides so I didn't want to leave much out. For everyone else who doesn't care as much, I apologize for the long read below ???. I don't think it came out to shabby for a 21 year old with some help from his dad. Let me know what you guys think!
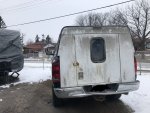
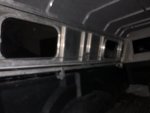
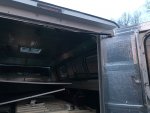
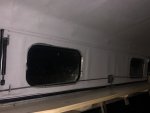
Before we put the cap on (more or less permanently), we replaced the front window and rear window with plexiglass. The previous owner had smashed both and had a piece of plexiglass cut for the front window which I ended up needing to trim anyways and he had screwed on a piece of plexiglass from the inside of the rear door just to cover the hole of the window. We managed to take apart the frames and cut the plexiglass with a metal blade in a jigsaw. Then we dropped the plexiglass in the frame and sealed with silicone.
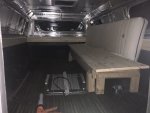
What I ended up doing for the frame of the bed rails is 3 2x4's stacked on top of eachother and put two 4"x4" roofing angle flashing (thank you
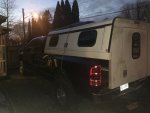
@billiebob for the idea, my dad also gave me the same idea) and made some end caps for the back from the left over flashing, which were installed first, and then the sides and then the front. I sealed the end caps and the front corners with silicone. This process was annoying just because we removed and installed the cap a few times. We mocked it up first as you can see so that we could see it and check if it would be high enough. We went with this height because it just happened to be the height needed to raise the rear end enough to clear the inside of the truck bed. So the bottom of the framing under the rear door is at the same height as the truck bed. we put a 2x4 screwed into the bed to support that framing for when were getting in and out of the camper so as to not bend the frame. We had that aluminum diamond plate from a project years ago and it worked perfectly to cover the 2x4. After putting the 2x4 bed rails with flashing onto the truck bed, we installed the truck cap on top and put 3 bolts on each side through the truck cap lip, 2x4's and the truck bed rail to secure it all down. (We put truck cap foam tape between the layers of course)
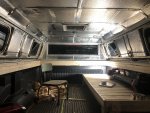
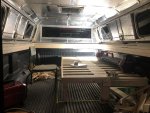
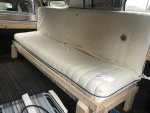
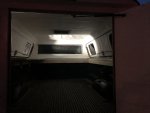
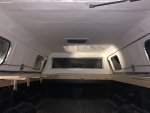
After that we proceeded with making the bed. I wanted something easily removable so that I could use the bed space if I ever needed to which so happened to be yesterday and it worked perfectly. For the bed I wanted something that I could sit upright inside and not be uncomfortable so I made it the appropriate height for that while thinking of the additional mattress height and insulation. I also wanted to be able to convert the bed into a couch so as to make it feel more spacious in case of rainy days where I'm stuck inside. With all this in mind, we made a sofa bed type of thing. Opens up to a full twin and closes to just over half a twin. The mattress was cut in half (we didnt cut all the way through so that it would hold together a little better) and stuffed into an old stained mattress cover. I used zip ties to the tie downs in the truck bed to hold it in place although it doesnt seem to move even without them. The frame of the bed was old 2x4's i had laying around and the slats were 1x3 I bought.
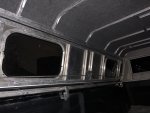
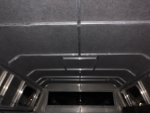
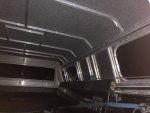
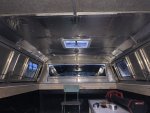
Next was insulation, I used 3/4" closed cell foam insulation between the framing and left the shiny part facing in and foil taped it all. This was a time consuming process but with the help of my dad we got it done in pretty much a day and a half. If I had to do it again I'd try to find a better way to hold the foam in because the tape stuck to the aluminum frame but not very well to the plastic on the foam. Maybe spraying the plastic with spray glue and then taping would have been better.
Following that, I spent a while searching and searching for somewhere to buy automotive carpet that wasnt $50-80+ for a few yards. the cheapest was crutchfield.ca but I happened to luck out and got some carpet/felt material from work that worked out awesome. The only problem is that its white. What I might do in the future is spray paint all of it gray so that any dirt marks are hidden. I just didnt want to spray everything as we cut and wait for it to dry to install so I said f it and put it like that. We cut all the pieces and spray glued both the cap and the carpet and stuck it on. it helps to have some help for this because no way you can do this nicely alone. It stuck on like donkey kong. Hopefully it helps absorb the condensation in the cold winter months while running a heater. I wish I had a chance to test it in the middle of winter but I'll see next winter.
After insulation, I went ahead and got some 1"x16" wood to make a shelf along the left side of the truck bed. I wanted something that could fold down and be out of the way as well as be used as a table to cook/eat when I'm forced to be inside. I got some folding shelf brackets from amazon and they worked awesome. I made one 8' piece two shelfs and sanded+varathaned them. I put some 1x3 leftovers from the bed under the board to prevent any possible splitting and/or bending. I had to put some spacers behind the shelf bracket part that screwed into the 2x4 bed rails. A little hard to explain but I can post pictures if necessary. These also worked just as planned and I'm glad I made it two shelves instead of one folding/rigid shelf.
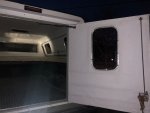
A few minor things that I also did throughout this was making a drip edge for the door, adding a support piece behind the door lip on the floor so the lip wouldnt get beat up, sealing the door, and replacing the lock cylinders, installing an air shock from an old car on the door, and installing an rv vent in the roof (which will soon have a diy fan installed to suck all the hot air out in the summer). I'm sure I'm missing a few things but thats the majority of it, if anyone needs wants any pictures or anything just let me know!
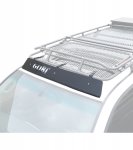
I have a few more things I'm looking into such as building my own power station with a deep cycle battery, running some lights inside, bug screens for the windows and door, running boards and a roof rack for the truck that doesn't cost an arm and a leg. The only one that seems to be difficult to do on a budget is the roof rack because my truck has a flat roof so there isnt a lot of options for mounting it besides either drilling into the roof or having door seal mounts. I'm leaning towards drilling and making my own mounts/roof rack. I also really need to stop putting off making my side steps, I gotta make them soon.
More pictures to follow, I could only attach 10 at a time.