wikid
Adventurer
I decided to look for a permanent air source for my truck. I thought about a co2 tank, but didn't want the hassle of refilling and finding a place to keep it.
Next up would be an air compressor
I have been running a Puma 12 volt that I keep inside over the rear fenderwell for some time. I was trying to find another place to mount it, but it isn't water proof .
The other option would be to install one under the hood. I wanted to save all the space I could, under the hood, in case I decide to run another battery.
Next thought would be to to mount a compressor exterior. Since there is ample real estate available under the back of the truck, this was a good option. So it would have to be waterproof.
That's where the ExtremeAire compressor comes in. These are really good compressors that have great stats, plus they are waterproof to so many meters, for so long. Perfect
They make a few different models, even 24 volt if needed. The standard compressor is 3.4 hp
Here are the details on this one
ExtremeAire 12 volt Compressor
$414.95
The ExtremeAire Severe Duty Compressor is setting standards for high output compressors. By utilizing a 3/4 horsepower fan cooled motor, overheating is a thing of the past. Designed to fill the largest 4WD tires or the highest-pressure RV tires, this unit can fill tires continuously with no fear of motor burnout. With a 150psi working pressure, you can fill air tanks and run impact wrenches to dismount and mount wheels easily. For clean air in the dirtiest environments, the ExtremeAire uses an oversize UNI-Filter that is crush proof, washable and reusable. All major motorcycle teams use UNI-Filters for Baja and motocross racing. In addition, the fan shaft has a sweeper filter to keep dirt and debris out of the motor and brushes, at the same time, allowing moisture and condensation to escape. The ExtremeAire is permanently lubed with sealed bearings so it can be mounted in any position making installation much easier. Every ExtremeAire utilizes stainless steel fasteners Loctited for a long and trouble free life in the highest vibration applications. Uses for the ExtremeAire include 4WD, RV, Agricultural, Construction, Motorsports, etc. No other 12-volt compressor has the speed, continuous duty cycle, output, pressure rating, and reliability that the ExtremeAire can deliver.
Tech Specs:
- Continuous duty cycle
- 3/4 horsepower motor
- 30-amp draw at 35psi
- 40-amp draw at 150psi
- 4 cfm free flow rate
- 150psi max working pressure
- Can be mounted upside down
- 14" long, 6" wide, 9", tall.
Next choice is the ExtremeAire Magnum
ExtremeAire Magnum
Imagine an ExtremeAire Compressor with TWICE the power and speed, all in a package only 2" longer than the original! Now you can have a continuous 12 volt compressor that will put out 6 CFM free flow and a whopping 2.6 CFM at 100 psi. Nothing in its size, class or price range even comes close! The ExtremeAire Magnum utilizes a 1.5 HP fan cooled motor and longer piston stroke to make the impossible possible. The Magnum has all the key features of the original ExtremeAire such as superior filtering, stainless steel hardware, heat dissipation cylinder coating and powder coated filter housing and fan shroud. Plus it can be mounted in any angle or position, even upside down! Sealed bearings mean no servicing or lubrication is necessary. Uses include filling tires, running air tools, air bags, lockers, train horns, etc. It is the perfect unit for jobsite chores or ranch duties. Since the unit is totally sealed from the elements, you can mount it under your truck on the frame rail so valuable storage space is preserved.
Specs:
-1.5 HP Motor
-95 amps @ 12.5 Volts DC
-Continuous Duty @ 150 psi
-6 CFM @ 0 psi
-2.6 CFM @ 100 psi
-Weight: 20 lbs.
-Dimensions: 16" long x 6" wide x 9.5" tall
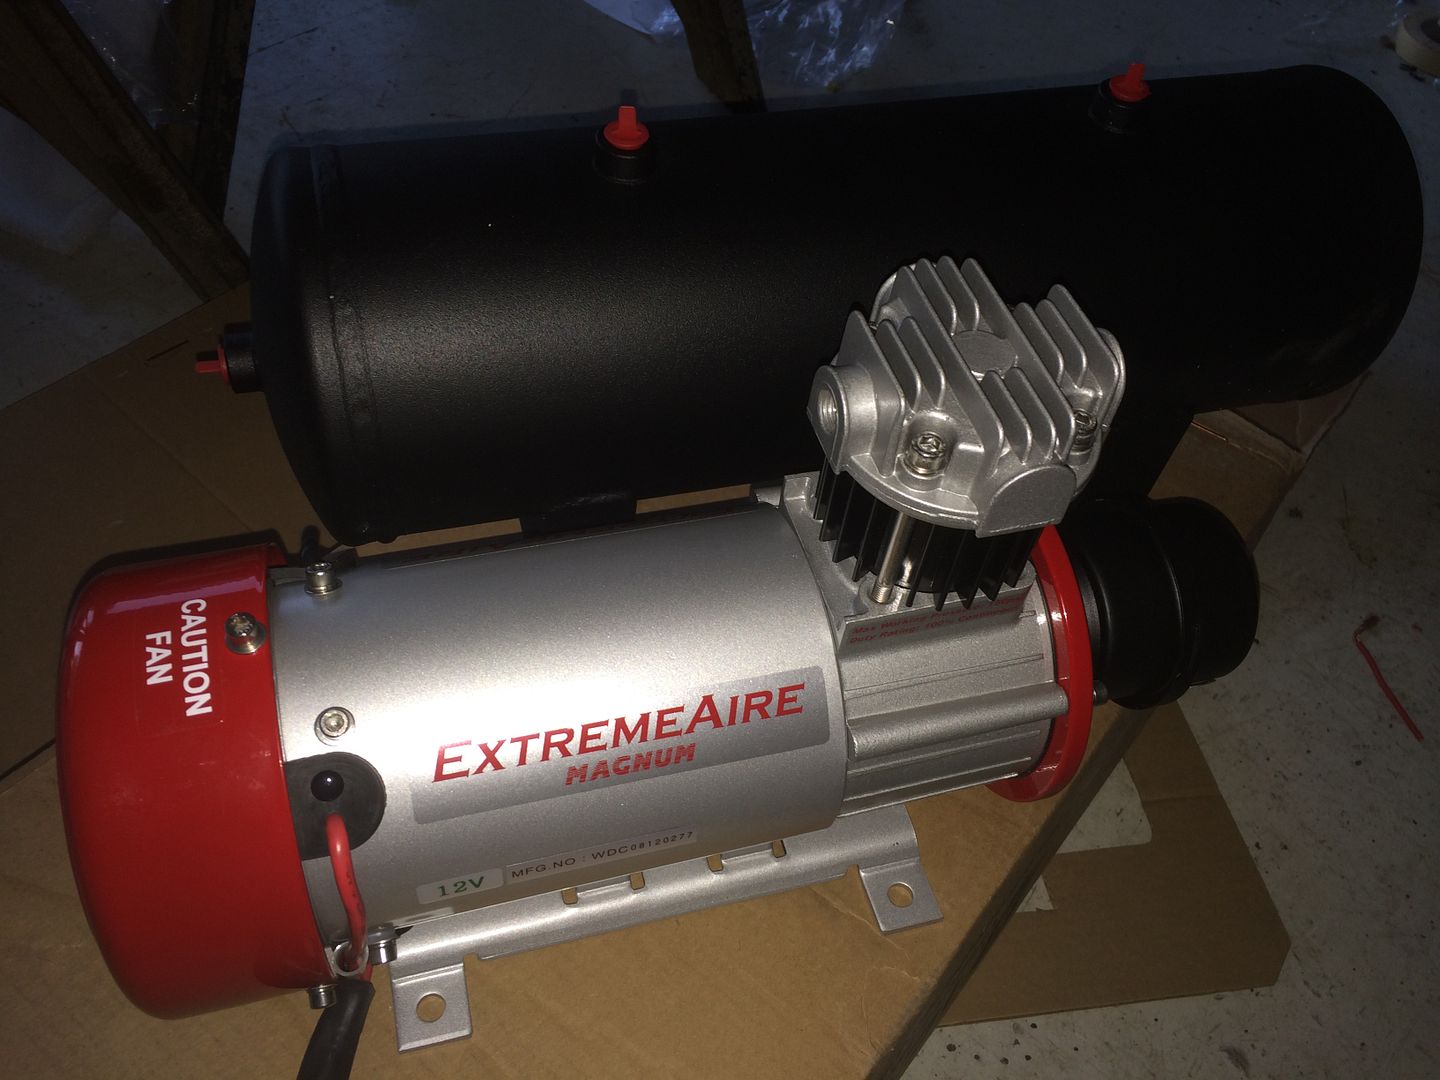
My final decision was to go for the Magnum. I wanted to put the worst case scenario in as far as size goes, Since it was only 2" longer, it still will fit where I want to go.
Here's what brown brought me
Next post I will go through the mounting/install
Next up would be an air compressor
I have been running a Puma 12 volt that I keep inside over the rear fenderwell for some time. I was trying to find another place to mount it, but it isn't water proof .
The other option would be to install one under the hood. I wanted to save all the space I could, under the hood, in case I decide to run another battery.
Next thought would be to to mount a compressor exterior. Since there is ample real estate available under the back of the truck, this was a good option. So it would have to be waterproof.
That's where the ExtremeAire compressor comes in. These are really good compressors that have great stats, plus they are waterproof to so many meters, for so long. Perfect
They make a few different models, even 24 volt if needed. The standard compressor is 3.4 hp
Here are the details on this one
ExtremeAire 12 volt Compressor
$414.95
The ExtremeAire Severe Duty Compressor is setting standards for high output compressors. By utilizing a 3/4 horsepower fan cooled motor, overheating is a thing of the past. Designed to fill the largest 4WD tires or the highest-pressure RV tires, this unit can fill tires continuously with no fear of motor burnout. With a 150psi working pressure, you can fill air tanks and run impact wrenches to dismount and mount wheels easily. For clean air in the dirtiest environments, the ExtremeAire uses an oversize UNI-Filter that is crush proof, washable and reusable. All major motorcycle teams use UNI-Filters for Baja and motocross racing. In addition, the fan shaft has a sweeper filter to keep dirt and debris out of the motor and brushes, at the same time, allowing moisture and condensation to escape. The ExtremeAire is permanently lubed with sealed bearings so it can be mounted in any position making installation much easier. Every ExtremeAire utilizes stainless steel fasteners Loctited for a long and trouble free life in the highest vibration applications. Uses for the ExtremeAire include 4WD, RV, Agricultural, Construction, Motorsports, etc. No other 12-volt compressor has the speed, continuous duty cycle, output, pressure rating, and reliability that the ExtremeAire can deliver.
Tech Specs:
- Continuous duty cycle
- 3/4 horsepower motor
- 30-amp draw at 35psi
- 40-amp draw at 150psi
- 4 cfm free flow rate
- 150psi max working pressure
- Can be mounted upside down
- 14" long, 6" wide, 9", tall.
Next choice is the ExtremeAire Magnum
ExtremeAire Magnum
Imagine an ExtremeAire Compressor with TWICE the power and speed, all in a package only 2" longer than the original! Now you can have a continuous 12 volt compressor that will put out 6 CFM free flow and a whopping 2.6 CFM at 100 psi. Nothing in its size, class or price range even comes close! The ExtremeAire Magnum utilizes a 1.5 HP fan cooled motor and longer piston stroke to make the impossible possible. The Magnum has all the key features of the original ExtremeAire such as superior filtering, stainless steel hardware, heat dissipation cylinder coating and powder coated filter housing and fan shroud. Plus it can be mounted in any angle or position, even upside down! Sealed bearings mean no servicing or lubrication is necessary. Uses include filling tires, running air tools, air bags, lockers, train horns, etc. It is the perfect unit for jobsite chores or ranch duties. Since the unit is totally sealed from the elements, you can mount it under your truck on the frame rail so valuable storage space is preserved.
Specs:
-1.5 HP Motor
-95 amps @ 12.5 Volts DC
-Continuous Duty @ 150 psi
-6 CFM @ 0 psi
-2.6 CFM @ 100 psi
-Weight: 20 lbs.
-Dimensions: 16" long x 6" wide x 9.5" tall
My final decision was to go for the Magnum. I wanted to put the worst case scenario in as far as size goes, Since it was only 2" longer, it still will fit where I want to go.
Here's what brown brought me

Next post I will go through the mounting/install


