Wes Craiglow
Member
Forgive me for the condition of my truck. Sorry it's dirty. Was out in the woods last week and did nothing more than hose it off after coming back. All that redness is good ole Arkie clay, not rust. Hope it didn't mess up the photos too badly.
-----------------------------------------------
So the 470 is at about 150k on the ticker, and I've been feeling a bit of play from the front driver's side for a couple of months now. At first I thought is was a loose hub bearing, for when I raised the front end and shook the tire, I had the 12 to 6 play, but no 9 to 3. (Which would usually indicate a steering issue.) So, I pulled everything and tightened the bearing. No dice. Still that rattle, and getting a bit worse daily, or so it seems.
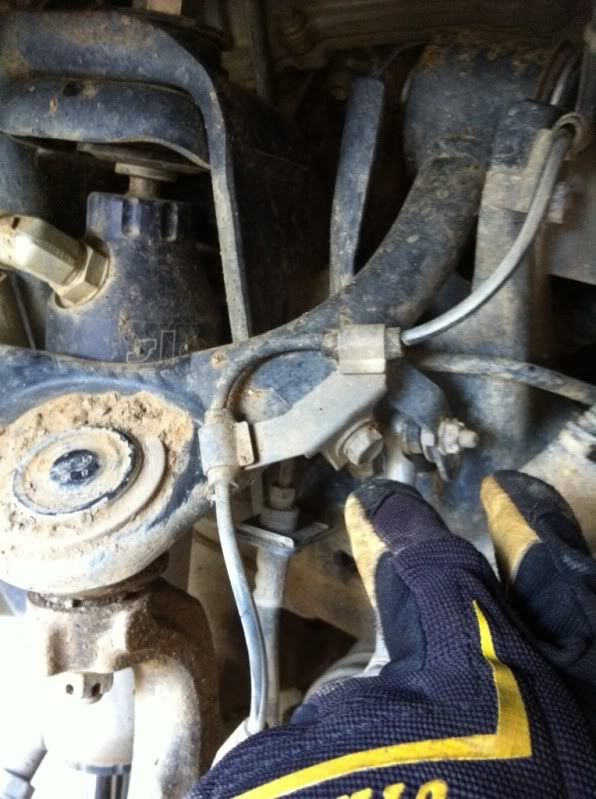
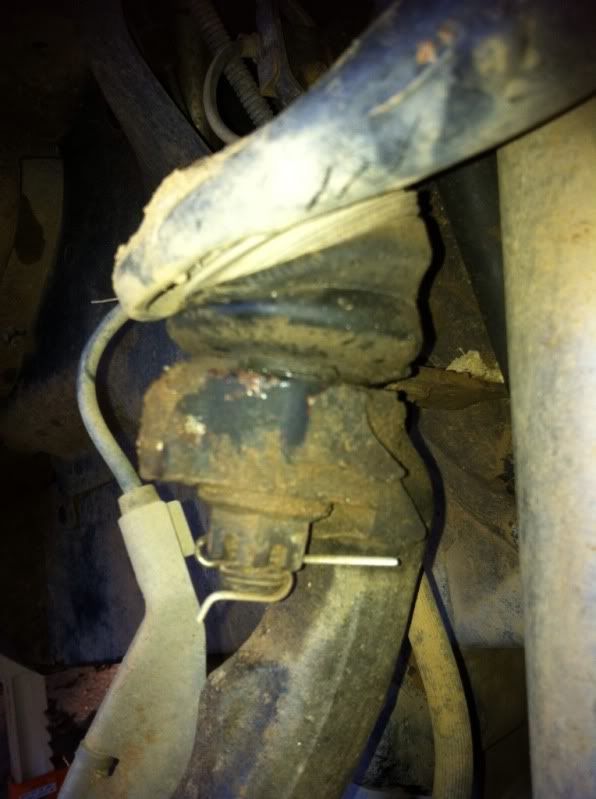
After a close inspection a month or so ago, I noticed a tear in the outer ball joint boot.

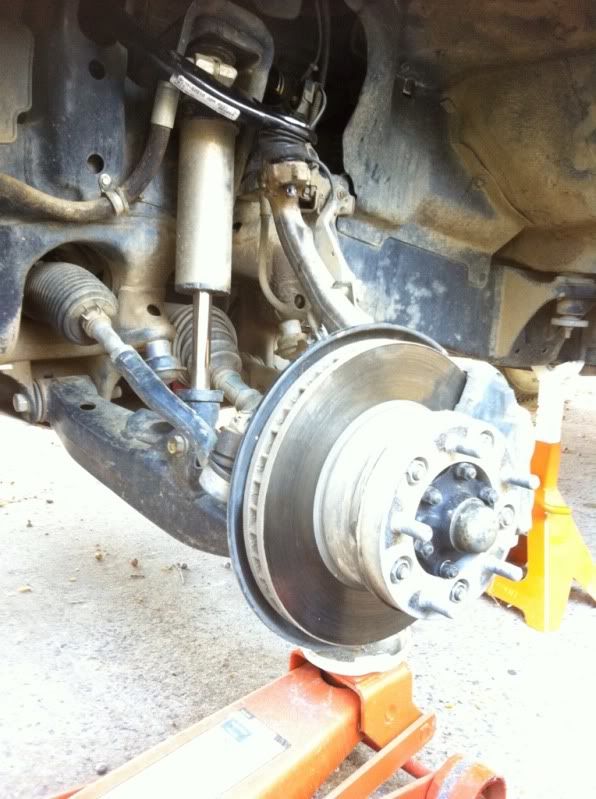
This is the driver's side at full droop. Hard to see the tear here, but it's there. Simple math told me that if it's not the wheel bearing, then it must be this ball joint I'm feeling vibrate and rattle during rough roads.
Any tear in this dust boot allows grease to leave the ball and dirt and water to get in. Of course, the metal begins to break down pretty quickly at that point and the loose play becomes more and more apparent with every mile. The fear? That the ball wears down to the point where it can actually pull from within its socket. That's catastrophic failure, gang, and will certainly mean the end to forward travel for a while.
-----------------------------------------------
NOTE: Everything you need to know do this job is in the Toyota LC Factory Service Manual on page SA-70.
-----------------------------------------------
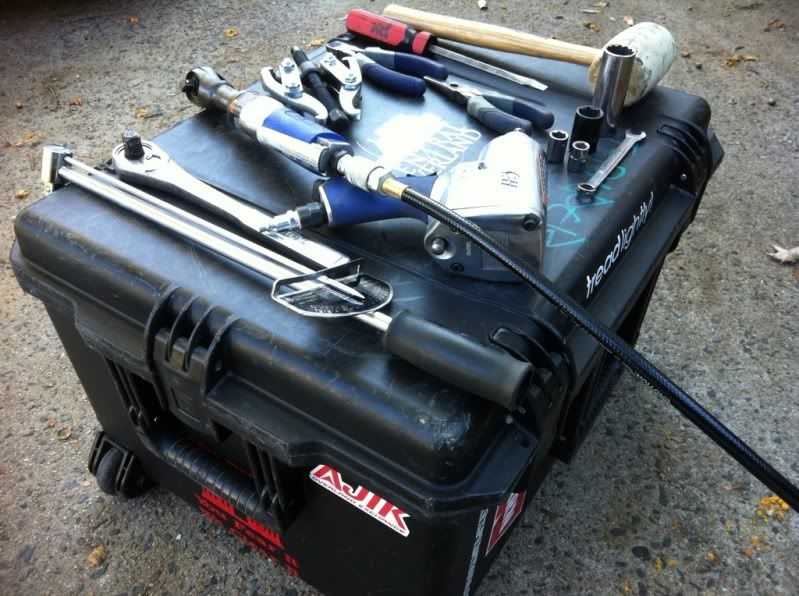
The day began with the right parts and tools. In this case, it's pretty basic:
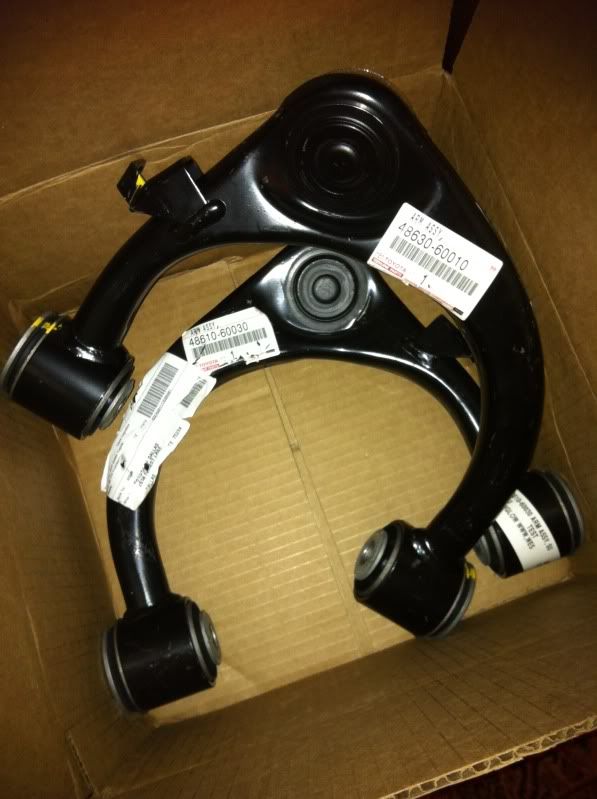
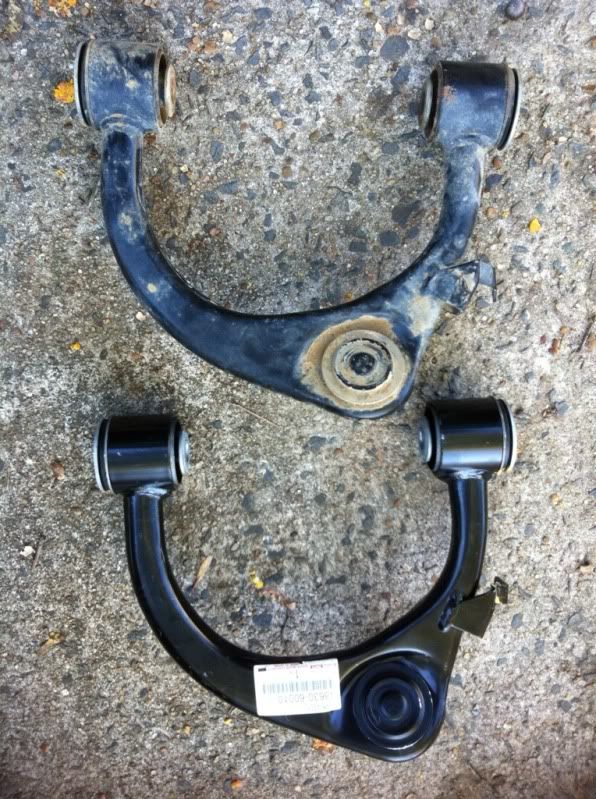
New Toyota OWE UCAs from our friends at TRDParts4U.
From near to far:
1. Torque wrench
2. 1/2" ratchet
3. Impact wrench (Only for pulling tires)
4. 3/8" air ratchet
5. Adjustable Pittman arm pullers
6. 10mm combo wrech
7. Sockets at 9mm, 10mm, 19mm, and 22mm
8. Needle nose pliers (Ignore the wire snips. Used those for trimming zip-ties only.)
9. Big flathead screwdriver for minor "loving" of stubborn parts
10. Rubber or brass hammer for major "loving" of stubborn parts.
------------------------------------------------
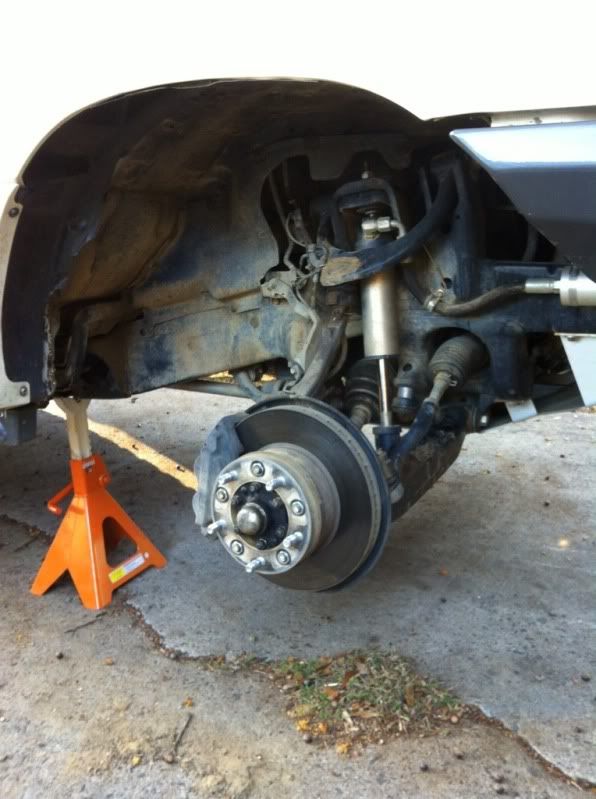
Everything begins by pulling the wheels and placing the truck on jackstands:
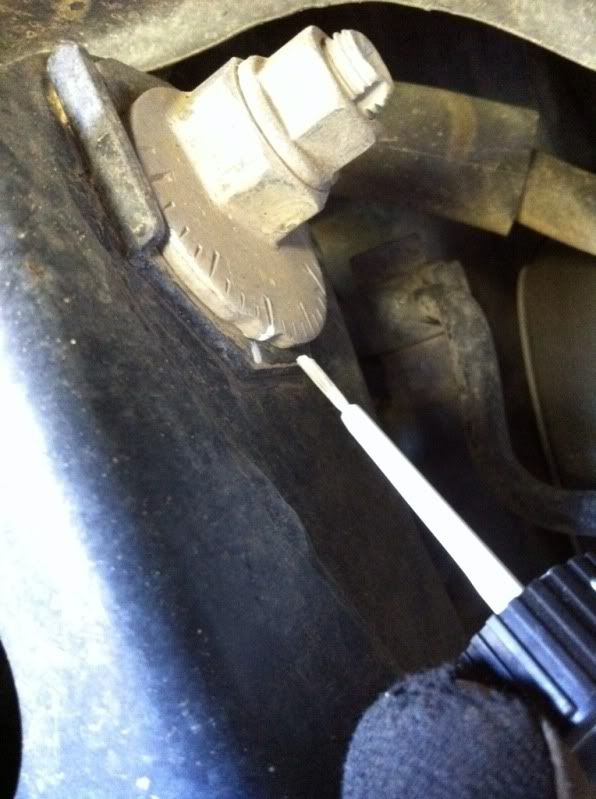
Remove the two small bolts that connect the brake line and the AHC sensor to the UCA. (The AHC sensor is a Lexus-only part.):
Drop a couple of matchmarks on the alignment cams on each side of the UCA:
This will help get your alignment close during reassembly. You must still go to your fave shop for a realignment, but being somewhat close will make the trip there a little less painful and your friendly tech a little less pissy.
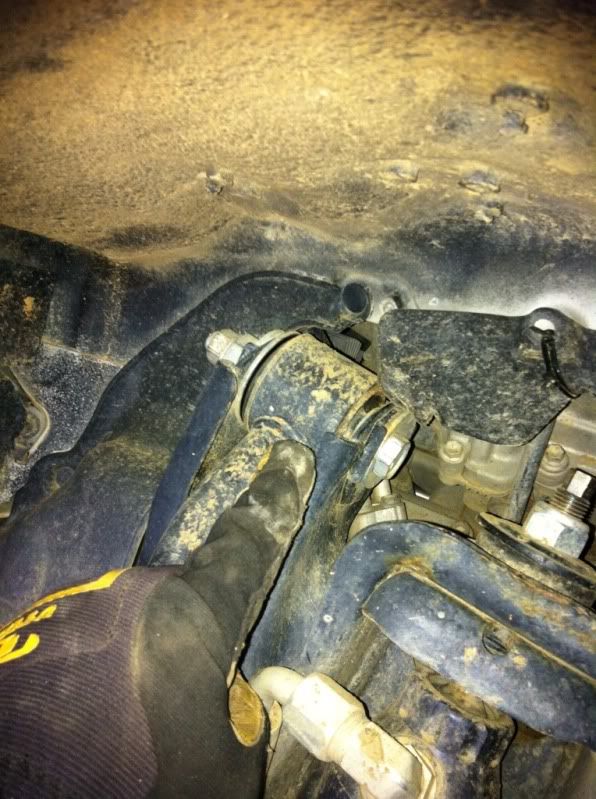
Remove the two bolts at the top of each side of the UCAs, here for rear:
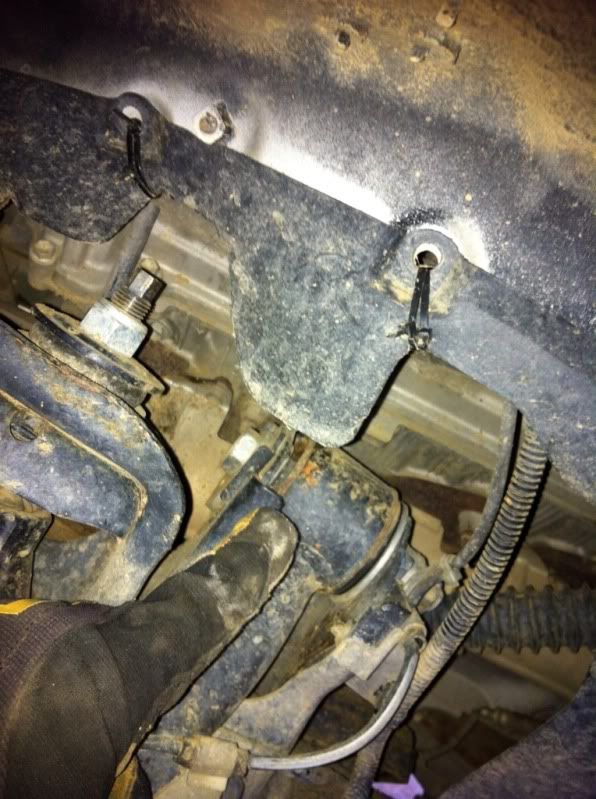
...and here for front:
Use the jack to support the weight of the IFS prior to the next step. If you don't, the rubber brake line will be supporting this weight. That's a no-go.
Now you're clear to remove the cotter key and the 19mm nut that holds the UCA to the steering knuckle:
Things moved pretty quickly here, and I didn't get a photo of using the Pittman arm puller to draw the knuckle from the ball joint. My bad. I think you get the idea. It's pretty straightforward and laid out well in the FSM.
Once that's done, go ahead an pull that dude on out of there:
Yep, there's yer problem:
The ball joint was mostly dry and had surface rust on it. No question that it had play in it, as I could wiggle it around in my hand and feel it roam around inside the socket. Scary.
So that's pretty much it. I didn't do pics for the reassembly, as it's the exact opposite of the removal. Be sure to torque everything to spec prior to rolling off. I think the two inner bolts at the cams were 72lb-ft, and the ball joint was 81. The brake like bolt was like 10 or 12. I found that it helped to remove a bit of the splashguard to help me use the torque wrench. You can see where I've removed three pop rivets and I'm holding it back here:
Really, it's an easy one. Took me two hours in my driveway, and that was with a tire rotation to finish things up. I think any of you who go to aftermarket UCAs like Carl's or Total Chao would follow pretty much the same workflow. Hope this helps someone!
Wes
-----------------------------------------------
So the 470 is at about 150k on the ticker, and I've been feeling a bit of play from the front driver's side for a couple of months now. At first I thought is was a loose hub bearing, for when I raised the front end and shook the tire, I had the 12 to 6 play, but no 9 to 3. (Which would usually indicate a steering issue.) So, I pulled everything and tightened the bearing. No dice. Still that rattle, and getting a bit worse daily, or so it seems.
After a close inspection a month or so ago, I noticed a tear in the outer ball joint boot.
This is the driver's side at full droop. Hard to see the tear here, but it's there. Simple math told me that if it's not the wheel bearing, then it must be this ball joint I'm feeling vibrate and rattle during rough roads.
Any tear in this dust boot allows grease to leave the ball and dirt and water to get in. Of course, the metal begins to break down pretty quickly at that point and the loose play becomes more and more apparent with every mile. The fear? That the ball wears down to the point where it can actually pull from within its socket. That's catastrophic failure, gang, and will certainly mean the end to forward travel for a while.
-----------------------------------------------
NOTE: Everything you need to know do this job is in the Toyota LC Factory Service Manual on page SA-70.
-----------------------------------------------
The day began with the right parts and tools. In this case, it's pretty basic:
New Toyota OWE UCAs from our friends at TRDParts4U.
From near to far:
1. Torque wrench
2. 1/2" ratchet
3. Impact wrench (Only for pulling tires)
4. 3/8" air ratchet
5. Adjustable Pittman arm pullers
6. 10mm combo wrech
7. Sockets at 9mm, 10mm, 19mm, and 22mm
8. Needle nose pliers (Ignore the wire snips. Used those for trimming zip-ties only.)
9. Big flathead screwdriver for minor "loving" of stubborn parts
10. Rubber or brass hammer for major "loving" of stubborn parts.
------------------------------------------------
Everything begins by pulling the wheels and placing the truck on jackstands:
Remove the two small bolts that connect the brake line and the AHC sensor to the UCA. (The AHC sensor is a Lexus-only part.):
Drop a couple of matchmarks on the alignment cams on each side of the UCA:
This will help get your alignment close during reassembly. You must still go to your fave shop for a realignment, but being somewhat close will make the trip there a little less painful and your friendly tech a little less pissy.
Remove the two bolts at the top of each side of the UCAs, here for rear:
...and here for front:
Use the jack to support the weight of the IFS prior to the next step. If you don't, the rubber brake line will be supporting this weight. That's a no-go.
Now you're clear to remove the cotter key and the 19mm nut that holds the UCA to the steering knuckle:
Things moved pretty quickly here, and I didn't get a photo of using the Pittman arm puller to draw the knuckle from the ball joint. My bad. I think you get the idea. It's pretty straightforward and laid out well in the FSM.
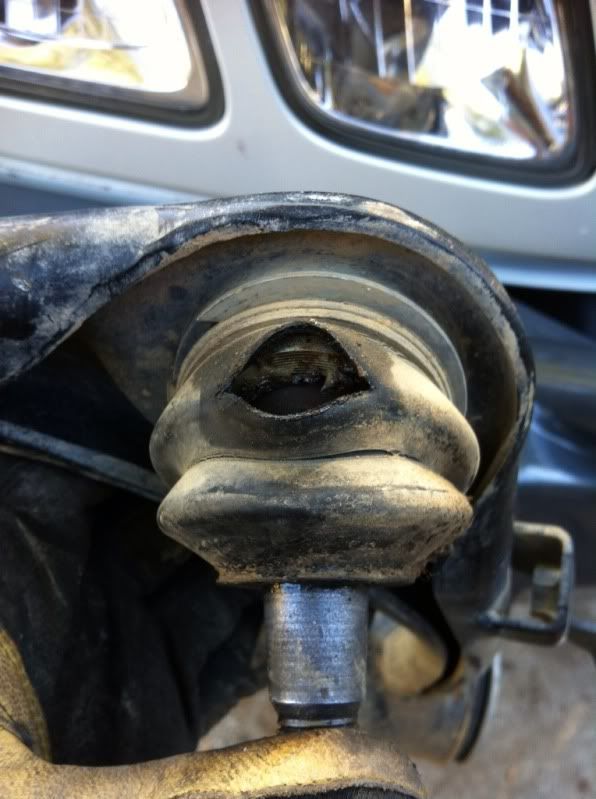
Once that's done, go ahead an pull that dude on out of there:
Yep, there's yer problem:
The ball joint was mostly dry and had surface rust on it. No question that it had play in it, as I could wiggle it around in my hand and feel it roam around inside the socket. Scary.
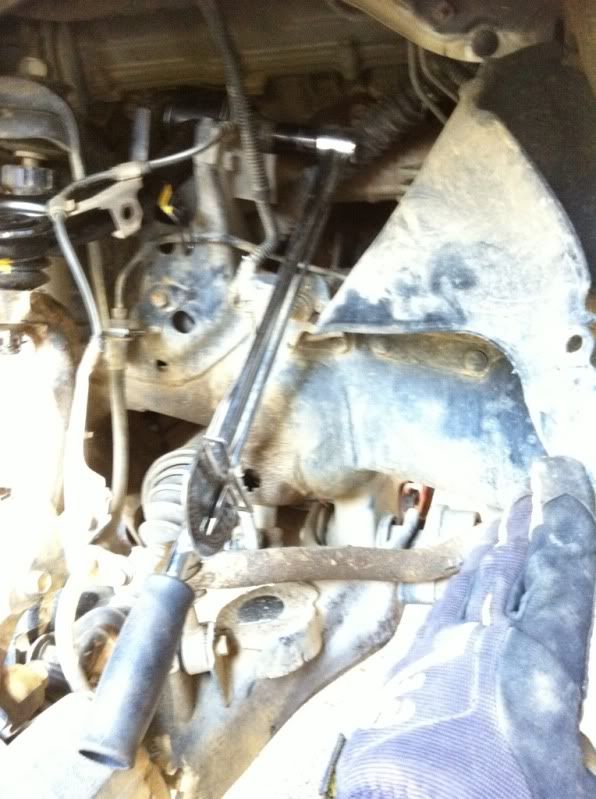
So that's pretty much it. I didn't do pics for the reassembly, as it's the exact opposite of the removal. Be sure to torque everything to spec prior to rolling off. I think the two inner bolts at the cams were 72lb-ft, and the ball joint was 81. The brake like bolt was like 10 or 12. I found that it helped to remove a bit of the splashguard to help me use the torque wrench. You can see where I've removed three pop rivets and I'm holding it back here:
Really, it's an easy one. Took me two hours in my driveway, and that was with a tire rotation to finish things up. I think any of you who go to aftermarket UCAs like Carl's or Total Chao would follow pretty much the same workflow. Hope this helps someone!
Wes