My cargo trailer mods.

orangeTJ

Explorer
You could say I have an obsession with trailers. I now own four trailers, and a 5th one is on order.

I bought this one last Saturday to serve the purpose of hauling my wares to local shows and swap meets, typically towing it behind my TJ Rubicon....to be replaced by JK-U at some point in the future.

It's a 5x8 Wells Cargo Fastrac enclosed trailer.

The dealer was able to install a few upgrades before I picked it up.

I had them install some rear stabilizer jacks - one on each corner.

2nd upgrade was a 36" high diamond plate stone guard to replace the original which was 12" high. They had it fabbed at a local metal shop.

DSCN2005-s.jpg


The trailers in the background have the 12" high stone guard.

DSCN2006-s.jpg


DSCN2008-s.jpg


DSCN2009-s.jpg
 
Last edited:

orangeTJ

Explorer
One side at a time, I removed all the screws from the new stone guard and put a dab of silicone on each hole, between the skin and stone guard. Some holes were unused - it's impossible to match up the existing holes when doing this type of project (installing a new, taller stone guard).

I also ran a bead of silicone along the top of the stone guard to keep water an muck from running down behind it.

I didn't think of this until a day or so after having the trailer. If I'd have thought of it sooner, I'd have asked the dealer to do it when they installed the new stone guard.

DSCN2030.jpg


DSCN2033.jpg


DSCN2032.jpg


Dab of silicone on each hole before I reinstalled the screws.

DSCN2034.jpg


I rounded the corner :

DSCN2031.jpg
 

orangeTJ

Explorer
The lighting upgrades and fixes:

These are a common light to the trucking industry and are very widely used on cargo trailers.

The bracket is held in place with two screws. One screw provides the ground connection.

Because I'm OCD about water intrusion and corrosion on the negative connection, I removed all the brackets (mounting bases) and dabbed some silicone where the wire goes through as well as the non grounded mounting screw. On the other screw I put a dab on di-electric grease.

DSCN2035.jpg


DSCN2038.jpg


The base had a bead of silicone across the top, so I just flipped the base up to work behind it.

DSCN2037.jpg


DSCN2027.jpg


DSCN2039.jpg


DSCN2040.jpg


DSCN2041.jpg
 

orangeTJ

Explorer
Lighting upgrades

I also put a dollop under the screw head:

DSCN2042.jpg


Silicone:

DSCN2044.jpg


DSCN2045.jpg


Opps, I made a mess:

DSCN2046.jpg


The new light:

DSCN2047.jpg


Tape covers the electrical contacts, revealing some di-electric grease.

DSCN2048.jpg


I added more grease:

DSCN2051.jpg


DSCN2052.jpg


DSCN2053.jpg
 

Mark Harley

Expedition Leader
The trailer will look good with a spring over conversion,
soft 8 wheels and aggressive tires to match the jeep.
Keep us posted on the conversion.
 

elmo_4_vt

Explorer
That's nice... I think I'll have to do that with my lights when I pick up my new cargo trailer... Should extend the life by a good bit... and I hate when lights don't work correctly.

Don

-
 

jeep-N-montero

Expedition Leader
I have 6 trailers and my wife wants to strangle me sometimes, add to that 2 Jeeps and 2 other cars and it is surprising that we are still married!
 

orangeTJ

Explorer
The 5th one (the one that's on order) is a 7x16 Haulmark Edge Pro. I will use for motorcycle camping trips, as well as setting up outdoor displays at events like Overland Expo. I don't know if I will make OX12. I will be lucky to get time off work.
 
Last edited:
superdutyjeff

New member
check this trailer out

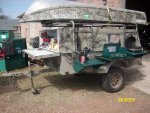
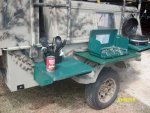
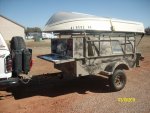
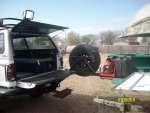
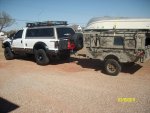
i built this trailer for xtream off road adventures and has worked well for 2 years, it has plenty of covered cargo space which also doubles as a bed for two, a front mounted chuck wagon kitchen with a micro wave for fast meals and plenty of dry grocery storage, an exoskelleton rack witch hauls the boat or additional cargo, also doubles as a tower blind during hunting season, its light, tough and goes were the truck will go
 

Attachments

  • super duty 2011 032.jpg
    super duty 2011 032.jpg
    513.9 KB · Views: 70
  • super duty 2011 044.jpg
    super duty 2011 044.jpg
    511.6 KB · Views: 58
  • super duty 2011 046.jpg
    super duty 2011 046.jpg
    475.2 KB · Views: 50
  • super duty 2011 034.jpg
    super duty 2011 034.jpg
    491.7 KB · Views: 47
  • super duty 2011 047.jpg
    super duty 2011 047.jpg
    422.4 KB · Views: 47

orangeTJ

Explorer
I just finished a straight 7 hour work session on the trailer. It's done for the most part. it's 11:30pm pacific time and I'm too tired to post pictures.

Accomplishments for the day, including an earlier work session today:

Finished the interior wiring, which involved fishing some wire down the wall and installing some really nice rocker switches for the interior and exterior lights.
Mounted the wiring j-box under the floor, secured the 7 pin cord as well.
Installed the brakes and ran the wiring for them.
Installed a "Flip-Jack" foot on the tongue jack.
Painted the undercarriage in places that needed it.

Tomorrow it will come down off the service ramps and go for a road test to check operation of the brakes.

I may upgrade to 15" wheels / tires.

Here's a few wheels I found:

http://www.etrailer.com/dept-pg-Tires_and_Wheels-co-Aluminum-pc-15_Inch.aspx

It still needs the breakaway battery and breakaway switch installed.
 

orangeTJ

Explorer
It needs different tires - the ones on it are so out of round, it feels like a train wreck below 25mph. Balancing won't fix the problem.

around 5 mph, I can watch the trailer dance around in side view the mirror.

I'm stealing a pair of tires off my tandem axle cargo trailer to see how the new trailer sits on 205 15s in relation to the hitch ball height.
 

orangeTJ

Explorer
The dealer traded my out of round 14s for a set of 15s. It towed fine with the new tires... no vibration or bouncing. I will take the tires/wheels off the trailer and get them balanced at a local tire shop this weekend.
 

orangeTJ

Explorer
The J box.

DSCN2020.jpg


DSCN2016.jpg


The wires in the J Box.

I mentioned earlier that the color of the wires do not match the trailer color code.
I need to elaborate on that. All the colors DO in fact match the colors used for trailers, but they do not match up in the 7 pin plug with what that color should do.

I tested each pin on the connector with what its function is (based on a diagram of the connector), then installed that color wire to the correct spot on the terminal block.

Blue is wrong though, it should have went to the RED stop terminal, if you match up per the label. Makes no sense because BLUE is always "trailer brake" color code.

Black is the battery charge line, Aux would typically be back up lights I think.

DSCN2026.jpg


I globbed some silicone around the grommet and cable.

DSCN2024.jpg
 

Forum statistics

Threads
186,763
Messages
2,887,852
Members
227,160
Latest member
roamingraven
Top