Skamper roof rebuild

dfrank

Observer
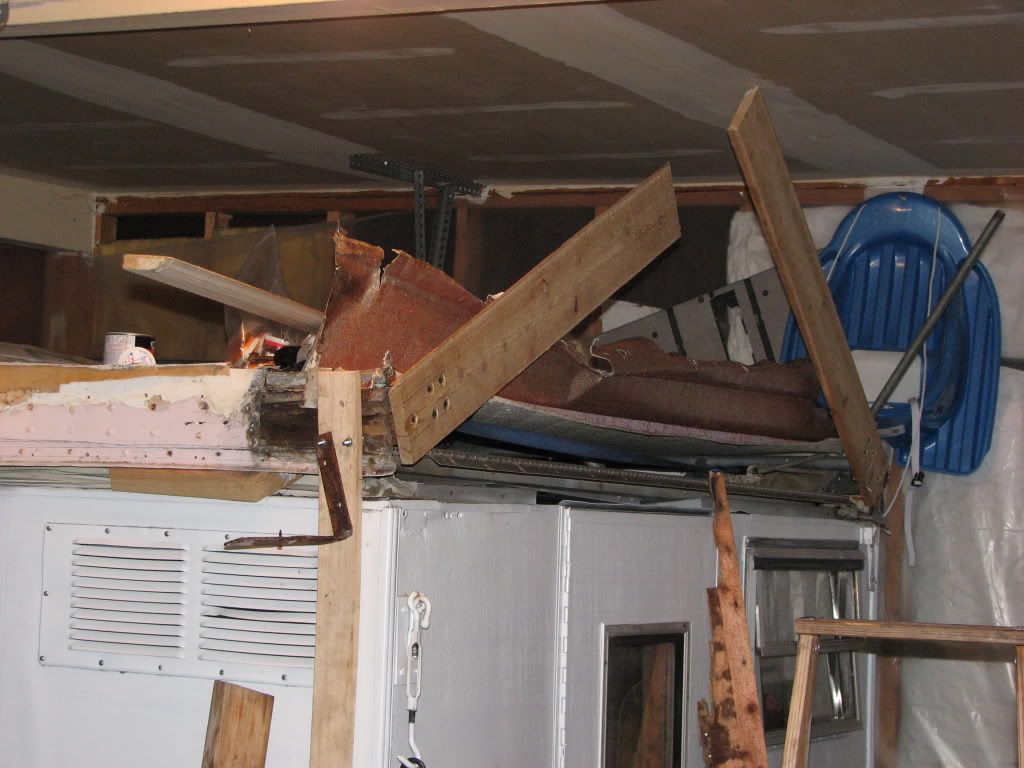
I just picked up an '88 skamper pop up 100S. Its the +- ten foot long version.

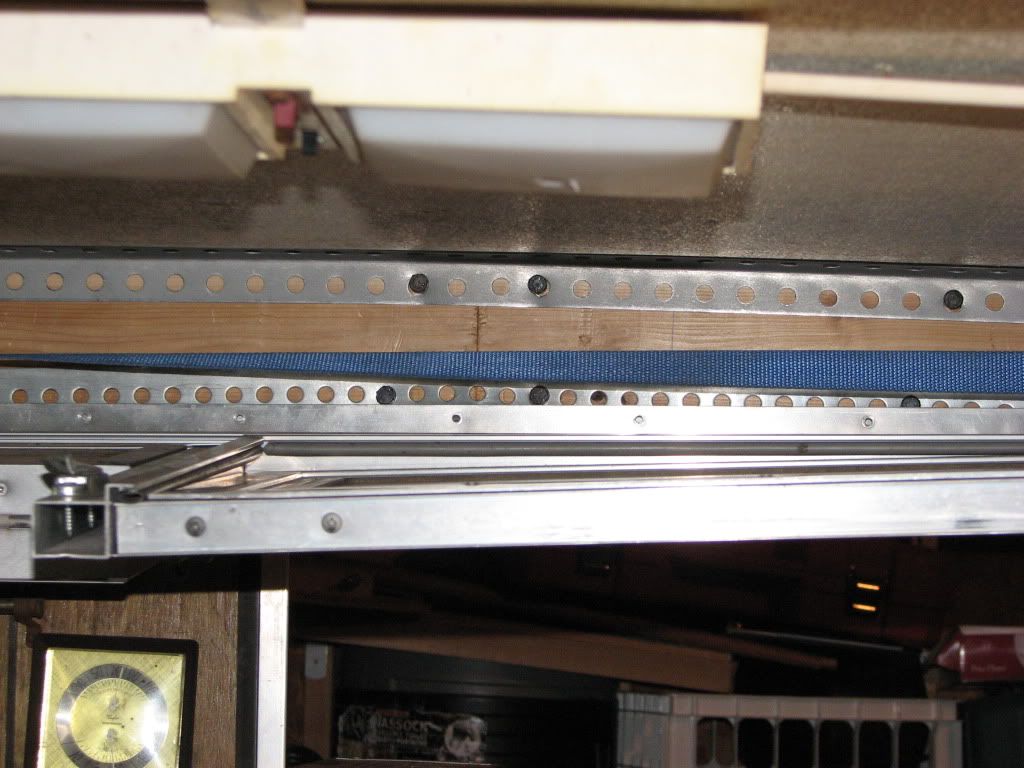
The last owner tried to rebuild the roof and failed thouroughly. I might paste it back together for a little bit, but really it needs the roof rebuilt from scratch.

If someone has done this, or knows about threads, your direction would be appreciated.

I'm tempted to build it out of aluminum C- channel for strength and weight, but I am a carpenter by trade, so if I can do it out of wood, that will be easiest.

I haven't figured out what all works or doesn't, but the price was right.

Can anyone steer me towards the right tie down scenario for my Dodge?

Thanks a lot. Hoping to have this thing cleaned up by the weekend.

Dave
 

SLO_F-250

Explorer
Hey Dave! Nice work on the Skamper. I've am having a great time with mine.

I didn't rebuild the entire roof, but re fiber glassed those plastic corners and rebuilt the front of mine. Picts and description are somewhere in my build thread. link in my sig. Ive gone through mine fairly well. From what I did it is just 1/2" sandwiched ply on the sides and some sort of structural stringer system on top with Styrofoam insulation. The aluminum sheet is just glued on.

Dig in, take pitures, and we'll help you out. :coffee:
Good luck!

Paul
 

xdbx

Adventurer
Agree'd Dave. Try a few approaches and post some pictures. We'll help you out.

As for those corner brackets, I'm in the process of curing a permanent mold to make new fiberglass corner brackets. As paul's thread shows, they're pretty much a DIY project as they dont really exist anymore, and I didnt have the convenience of pulling them off as nicely as he did. A tree took the honors last summer.
 

dfrank

Observer
I'll get some pics up here before too long. All three propane appliances seem to work fine.

The wire that connects the RV battery is dead ended, with no obvious place to add battery power to the inverter. Anyone know where to find a wiring diagram for the converter?

ALso the tail lights seem shorted out. The wiring looks lo clean and simple, other than all the lines to the roof being severed.

Dave
 

xdbx

Adventurer
And for others/future reference:

blue wire: 12vDC output to lights and motors

white wire: 12vDC negative for lights, motors, battery

red wire: 12vDC positive from R.V. Battery
 

dfrank

Observer
Thanks X. Pm sent, though your description is sufficient, assuming they're the same.

I started from scratch on the roof last night. I took the last guys efforts down to the double plywood perimeter band.

I am hoping I am not making it too heavy.

The last guy used 2x2's @ 4 feet o.c. with stress skin panels that are like foam with FRP or skinny plastic laminates like a melamine face. These panels are super light, but way too wimpy for 7' long 2x2 framing. I used tapered 2x4's at 2' centers, which will probably add 40 lbs.

My next concern is the metal lift system. It goes up and down ok, but I don't understand why the rear brackets don't pivot freely like the front ones.

If you haven't removed your ceiling, you'd never even see the bracket in question. They are the small 90 degree brackets that in the front swivel freely, but in the back are semi fixed in line with the lifters, which want to roll close to 90 from dropped to raised. The brackets have a hex inside that goes on a hex shaped inner shaft. I'm guessing that shaft is spring loaded, and it helps lift. It seems frozen, but maybe the spring is just super stiff.

I plan to reuse the foam panels and do a line-x type urethane coating for the roof.

Anyone know the target weight for this roof system.

One of my favorite mods so far is the socket for the titan jacks. The RV dealer wanted $56 bucks for socket made out of galvie pipe. A 7/8" deep well socket with a slit cut in it raises those jacks so nicely with a 1/2 drill.


Does anyone run roof racks on these? I want to make 3-4 aluminum cross bars, that can take a ski box, even if I have to unload it to raise and lower.

I assume it could handle ladders and light limber loads while in the down position.

Thanks guys,

Dave
 

dfrank

Observer
Just answered my own question on the "spring" thing. The inner bar is welded back in the middle, and it must twist and act like a spring, to help raise the rear.

The crank handle won't come out of the track, and it wants to slip or strip if you don't push in hard on it while raising or lowering. Anyone have thoughts on that?

I tried to load pictures on my last post but it didn't take.
Sure wish I didn't have to go to work right now.


dave
 

xdbx

Adventurer
I had planned to use a modified hole saw as the raise/lower chuck, since it was already configured to be run in a drill. Socket might work better. thanks!

My handle doesnt come out at all, and I can leave it in there and prop it up with the cushion to hold the top up half way, so i can walk around and tuck in the canvas. Sounds like you've got some play in your tracks causing the whole assembly to bow outwards, or perhaps your crank gear is stripped/tapered from wear. Post up a picture of the assembly, so we can confirm it looks the same as ours.
 

SLO_F-250

Explorer
Interesting guys. My Handle comes right out no problem. There is a latch on the left side to lock the arms in place. While Fully extended.

40lbs distributed over the whole roof would probably be fine, but as far as racks and more weight, I am not sure. You see a lot of older palaminos, sunlights, etc with racks on top. To my knowledge they have very similar construction and lifting mechanisms, so Im sure it would be ok. Make sure those racks are bolted though a cross brace for sure. Its going to take a lot of dynamic loading just on the roof from wind and driving. As far as weight, if you go too heavy I would be worried about stripping the crank and putting lots of stress on an old lifting system. Push on the roof to help it up. Pictures would help dfrank. Sounds like you are on the right track though. :smiley_drive:
 

eugene

Explorer
Sounds similar to my palimino, the rear has some sort of spring, very strong, I could not pivot the rear brackets even with a pipe wrench. I ended up cutting my replacement rear board in half and bolting each half on then using ratchet straps to pivot those down then bolting them together.
IMG_12841.jpg

IMG_12850.jpg

Nearly split the rear of the camper apart trying to get them. I'm wondering how much pressure would be on them if I tried from the up position, but was afraid it would be like a garage door where its a big spring thats wound 100 turns or something.
The crank knob should come out, I bet you have a stripped tooth or two holding it, the gear strips out real easy.
I've thought about a roof rack but was afraid I'd just strip the gear again, thought about using gas lift struts to help it (like the car trunk ones).
2x material sounds too big, my roof was all 1x material.
 

xdbx

Adventurer
--snip --

As for those corner brackets, I'm in the process of curing a permanent mold to make new fiberglass corner brackets. As paul's thread shows, they're pretty much a DIY project as they dont really exist anymore, and I didnt have the convenience of pulling them off as nicely as he did. A tree took the honors last summer.

Despite natural clay taking over a week to cure to a handle-able state, its a good start to a portable male corner mould. What you see is a sheet of thin plexiglass I formed to the naked corner of my Skamper with a heat gun, some hot glue, and a pair of helping hands. From here, I'll sand it down and coat it with filler and confirm fit one more time. Then it should be ready to lay glass/kevlar, and I bet I could get a few full sets done on this clay block alone. First time doing something like this. :chef: Let me know if you need some made.

smugshot8811572-L.jpg


smugshot2501979-L.jpg


smugshot8287466-L.jpg
 

SLO_F-250

Explorer
Despite natural clay taking over a week to cure to a handle-able state, its a good start to a portable male corner mould. What you see is a sheet of thin plexiglass I formed to the naked corner of my Skamper with a heat gun, some hot glue, and a pair of helping hands. From here, I'll sand it down and coat it with filler and confirm fit one more time. Then it should be ready to lay glass/kevlar, and I bet I could get a few full sets done on this clay block alone. First time doing something like this. :chef: Let me know if you need some made.

Dan Nice work!!! Honestly I didn't even think about making a mold. Looks like you have a good handle on it for the first try. So far the ones I reinforced with fiberglass in my thread have held up no problem. No evidence of cracking or wear. Been on the camper for about 8 months and numerous trips and weather. Keep those pictures coming as you progress.
Happy Holidays guys!
Paul
 

dfrank

Observer
After a few days off for Christmas and skiing with the family, I got after the roof again today.

I reframed the roof with a double 1/2"plywood perimeter rim, with 2x2 ledgers inside of that. The cross rafters are 2x4's that taper from the inch and a half ledger to 3.5" in the center for both strength and drainage. I reused the last guys styrofoam/melamene panels with 1/4" luan plywood above that.

The spring loaded corner bracket seemed to cooperate at about 3x4 lift. Not sure if they are in the right spot for optimal tension or not. I'm guessing they should have been tighter.

There is no "Garage like spring". There is just an inner rod that twists about 90 degrees to help with the lifting.

Screwing the tent back up to the frame has been the hardest work so far.

It seems heavy but manageable. The Urethane roof shouldn't add too much weight.

The screens and windows are a little worse than I thought. Some of the vinyl windows are cracking where they were stored rolled up, and some of the screen have small rips and seem like they'll rip easily.

Still need to work on tail lights and adding power to the converter.

I tried adding a picture of the roof framing. We'll see if it loads.

Dave
 

eugene

Explorer
Thats good to know on the spring, sounds like a simple torsion bar so I should be able to unload it to do it right.
Part of the problem with mine is the p.o. cut the drivers side tubing going between the front and back so the crank lifts the front but not the back, that corner comes up last. He cut it to put in an overhead cabinet but I think I can either lower the cabinet so that the tubing can clear it or shorten the cabinet a little so the arm can swing under it. Either way I still have to replace the tubing, it looks close to electrical conduit but slightly thicker walled. Most of my screens are ripped too. I have been able to remove and resew stitches in other things before so I may end up doing that here, its just going to take a long time.
 

Forum statistics

Threads
188,515
Messages
2,906,067
Members
230,547
Latest member
FiscAnd
Top