4RunAmok
Explorer
I get asked all the time about installing NMO mounts. Especially since I have a 4Runner with a Sunroof that I'm still able to use... (This write up will be specific to my 4runner, and it's headliner. Everything else applies to any other vehicle)
I did do the job myself, with a small amount of help from a friend for the extra arms when I needed them. I did not take pics during the installation. I wasn't on forums back then, and didn't document everything I did like I do now for the sake of the forums, lol
Items you need:
Regarding the headliner. Yes it has to come down, but not all the way unless you want it to, but that’s more work.
Now the headliner edges are exposed from the rear, remove the 4 clips (these will break, so pick up the matching color clips from the dealer, they're cheap), the headliner should now be dangling from the front, you should see the sunroof and the sheet metal behind it. Make sure nothing is in the way, like wiring. Either proceed with complete removal by moving to release the headliner from the front, or just deal with it being in the way a little bit.
Exit to the exterior. Put some thought into the placement... because where you put this hole will determine some things later in life: Such as how big of a cargo rack you can use, Such as how far forward a roof top tent can be mounted, etc... I chose the exact middle between the roof rack rail fronts and the sunroof (which only put it a few inches behind the sunroof. Lay down some masking tape, the tan or blue kind, where you believe center of the truck to be and above that point behind the sunroof you want the mount to be. Measure from one side of the truck to the other (I chose to use the crease in the sheet metal, measured from crease to crease) and find the center, and mark a center line on the tape. Double check your distance from the rack rails and sunroof, and mark that distance along your centerline.
The tape is not only to mark your measurements, but it will protect the paint from chipping while you drill your hole, so press it down onto the paint firmly. Say your prayers, realize there is no turning back, and drill the hole. It also helps to use a very good sharp sheet metal drill bit
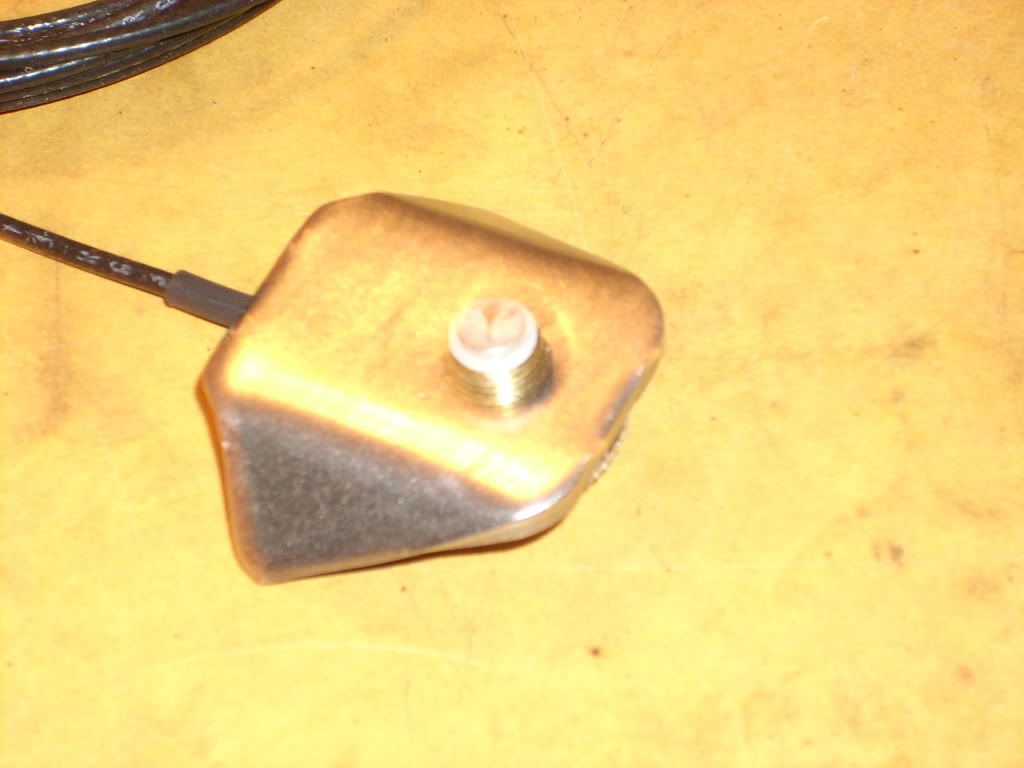
I used a Diamond NMO because of its low profile beneath the roof AND because it uses a 3/8” hole instead of the usual 3/4” hole others use.
I used the Silicon Gel Lubricant to coat the underside of the NMO piece that sits atop the roof (keep it away from the threads, just "bead" the outside edge), the part with the o-ring that I also coated with the lube, both as a lubricant, and as a waterproofing method. I used the Loctite on the threads to waterproof them as well as secure the mount from coming loose.
The help of the friend really comes in handy here, because someone is going to have to hold the bottom of the mount on the inside, while someone puts on the Loctite and screws on the top piece and tightens it from the outside. Tighten firmly with a wrench, and the mount is installed.
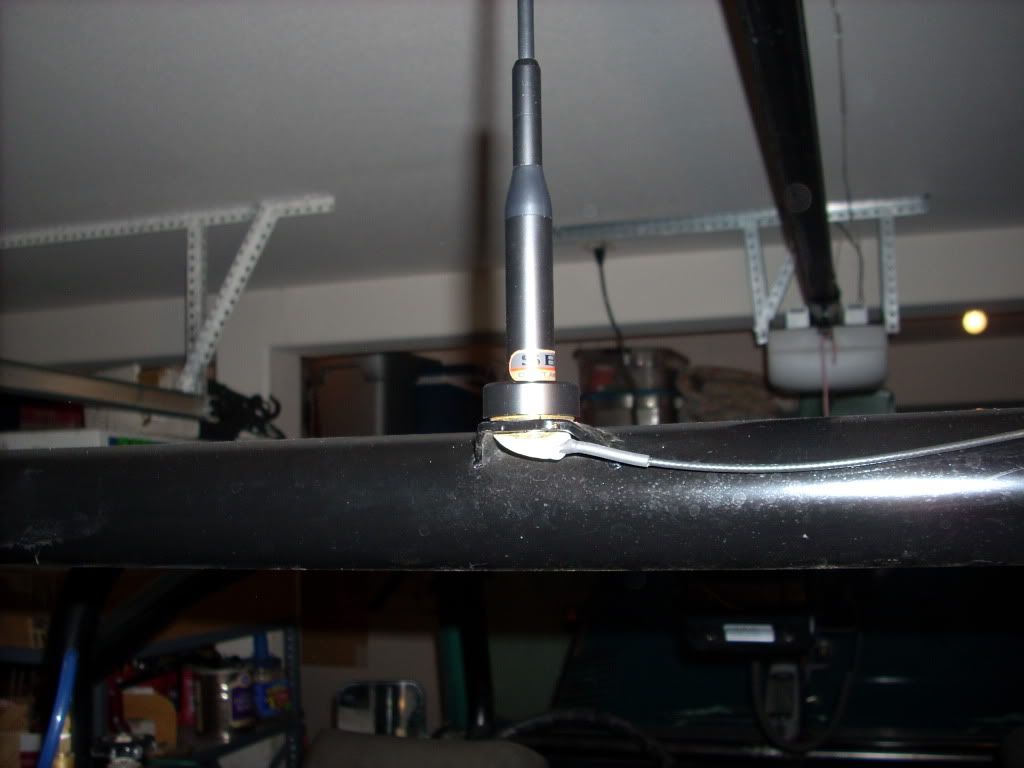
Now for the duct tape, I chose this because it handles extreme temps that a rooftop might get sitting in the sun. I used this to secure the coax to the roof, and in 5 years, that tape isn't even peeling. This is a MUST so that the sunroof doesn't snag the coax. Clean the sheet metal with some acetone or 409, put a strip from the NMO mount to the pillar you chose to run the coax down the side of the vehicle. Now take a small piece of the tape and secure the coax at the pillar, and run a second piece of tape, sandwiching the coax between the two pieces of tape. This just gives the tape a nice surface to stick to, one that it's used to sticking to, and maybe protects the coax from the heat of the sheet metal...maybe.. I didn't do any tests to confirm, I'm just OCD that way, I'll take whatever extra protection I can get.
Now that that coax is run down the pillar, you can button up the headliner. It was no easy task getting that coax down the pillar, so have the right tools (which I did not at the time) or have some patience. I chose to go down INSIDE the pillar, because that coax is thin and fragile, and I camp and offroad and I didn't want it getting pinched between my gear and the body, eliminating my communication if I needed to use it and no practical way of field fixing it. OCD kicking in again.
From this point, you now have the coax inside the vehicle, free to run it almost anywhere you want, it’s not long enough to run to the other side of the vehicle, but that’s why you should choose the proper pillar to bring the coax down!
I did do the job myself, with a small amount of help from a friend for the extra arms when I needed them. I did not take pics during the installation. I wasn't on forums back then, and didn't document everything I did like I do now for the sake of the forums, lol
Items you need:
- Diamond NMO mount: http://www.hamradio.com/detail.cfm?pid=H0-009384
- Silicon Gel Lubricant (available from Radio shack in a tube like toothpaste)
- Loctite 262 (Search for it on google shopping, or locally) 262 is waterproof and non-removable
- High Temp Duct Tape (3M 1160-HTA) (http://www.plumbersurplus.com/Prod/...l-HVAC-Duct-Tape-2-x-60-Yards/201943/Cat/1444)
Regarding the headliner. Yes it has to come down, but not all the way unless you want it to, but that’s more work.
- Remove the rear dome light first.
- Remove the top rear panel (The one that had the light in it)
- You will need to remove rear-most side panels either entirely (which will require removing the plastic kick panel at the bottom of the rear door) or just pull the tops down and use a bungee cord to hold them down.
Now the headliner edges are exposed from the rear, remove the 4 clips (these will break, so pick up the matching color clips from the dealer, they're cheap), the headliner should now be dangling from the front, you should see the sunroof and the sheet metal behind it. Make sure nothing is in the way, like wiring. Either proceed with complete removal by moving to release the headliner from the front, or just deal with it being in the way a little bit.
Exit to the exterior. Put some thought into the placement... because where you put this hole will determine some things later in life: Such as how big of a cargo rack you can use, Such as how far forward a roof top tent can be mounted, etc... I chose the exact middle between the roof rack rail fronts and the sunroof (which only put it a few inches behind the sunroof. Lay down some masking tape, the tan or blue kind, where you believe center of the truck to be and above that point behind the sunroof you want the mount to be. Measure from one side of the truck to the other (I chose to use the crease in the sheet metal, measured from crease to crease) and find the center, and mark a center line on the tape. Double check your distance from the rack rails and sunroof, and mark that distance along your centerline.
The tape is not only to mark your measurements, but it will protect the paint from chipping while you drill your hole, so press it down onto the paint firmly. Say your prayers, realize there is no turning back, and drill the hole. It also helps to use a very good sharp sheet metal drill bit
I used a Diamond NMO because of its low profile beneath the roof AND because it uses a 3/8” hole instead of the usual 3/4” hole others use.
I used the Silicon Gel Lubricant to coat the underside of the NMO piece that sits atop the roof (keep it away from the threads, just "bead" the outside edge), the part with the o-ring that I also coated with the lube, both as a lubricant, and as a waterproofing method. I used the Loctite on the threads to waterproof them as well as secure the mount from coming loose.
The help of the friend really comes in handy here, because someone is going to have to hold the bottom of the mount on the inside, while someone puts on the Loctite and screws on the top piece and tightens it from the outside. Tighten firmly with a wrench, and the mount is installed.
Now for the duct tape, I chose this because it handles extreme temps that a rooftop might get sitting in the sun. I used this to secure the coax to the roof, and in 5 years, that tape isn't even peeling. This is a MUST so that the sunroof doesn't snag the coax. Clean the sheet metal with some acetone or 409, put a strip from the NMO mount to the pillar you chose to run the coax down the side of the vehicle. Now take a small piece of the tape and secure the coax at the pillar, and run a second piece of tape, sandwiching the coax between the two pieces of tape. This just gives the tape a nice surface to stick to, one that it's used to sticking to, and maybe protects the coax from the heat of the sheet metal...maybe.. I didn't do any tests to confirm, I'm just OCD that way, I'll take whatever extra protection I can get.
Now that that coax is run down the pillar, you can button up the headliner. It was no easy task getting that coax down the pillar, so have the right tools (which I did not at the time) or have some patience. I chose to go down INSIDE the pillar, because that coax is thin and fragile, and I camp and offroad and I didn't want it getting pinched between my gear and the body, eliminating my communication if I needed to use it and no practical way of field fixing it. OCD kicking in again.
From this point, you now have the coax inside the vehicle, free to run it almost anywhere you want, it’s not long enough to run to the other side of the vehicle, but that’s why you should choose the proper pillar to bring the coax down!


