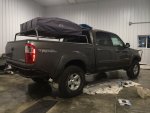
TaTundra 1 gen DC build

tyv12

Adventurer
I've owned this truck for quite some time now and have benefited from many build threads on expo so I figure that it's only fair that I add some info to the site as well.
So bought the truck used in 2009 with only 13000km on it and it was absolutely mint! Instantly fell in love with the truck and the fun began. Found an Arb sahara and after fitting it up realized i had to make my own mounts for it to fit it nice and tight. Ran a coil spacer for a little while in the front and after realizing how bad of an idea that was went with SAW 2.5" coilovers and TC UCAs. Wheel spacers and 285 duratracs and it worked real well...then at 37000km we had really bad flooding and I found out the hard way that Toyota puts the intakes in a vulnerable location. Sucked water into the motor going down a flooded road and blew a hole in the side of the block the size of a toonie. Really bad day but because of the flooding the insurance company covered the replacement and ended up getting an engine out of a 2007 tundra with 45000km. Right after that modified the intake to pull from really high in the fender near the antenna and did a deck plate mod on the stock air box for highway driving to make sure that didn't happen again. Remved the from nasty chrome hoop when I bought a tube bender and began learning how much skill it actually takes to make the roll cages and bumpers that some guys do, really impressive. Since then I've been learning doing my own front hoops(which now that I know more need to be redone cuz I think I can do a better job), sliders, and rear bumper. Thats about where I'm at and I'm gonna start adding along as I go to keep track. Had a build going on another site and it went down one day and I didnt have a chance to retrieve the build info but thats the way it goes so anyway heres some pics...
tundra first day.jpgH and L 072.jpgH and L 064.jpgTundra california3.jpgtundra california4.jpg
 

Attachments

  • tyler work 030.JPG
    tyler work 030.JPG
    138.4 KB · Views: 209
  • DSC_0717.jpg
    DSC_0717.jpg
    630.3 KB · Views: 218
  • DSC_0771.jpg
    DSC_0771.jpg
    640.3 KB · Views: 209

tyv12

Adventurer
some more...
 

Attachments

  • IMG_1582.jpg
    IMG_1582.jpg
    573.7 KB · Views: 201
  • IMG_2119.jpg
    IMG_2119.jpg
    548.5 KB · Views: 190
  • IMG_2406.jpg
    IMG_2406.jpg
    538.2 KB · Views: 181
  • IMG_2427.jpg
    IMG_2427.jpg
    534.9 KB · Views: 178
  • IMG_2429.jpg
    IMG_2429.jpg
    537.7 KB · Views: 179
  • IMG_2704.jpg
    IMG_2704.jpg
    572.6 KB · Views: 191
  • IMG_2725.jpg
    IMG_2725.jpg
    7.6 KB · Views: 182
  • IMG_2731.jpg
    IMG_2731.jpg
    523.8 KB · Views: 180
  • IMG_2747.jpg
    IMG_2747.jpg
    12.5 KB · Views: 191
  • IMG_3394.jpg
    IMG_3394.jpg
    527.8 KB · Views: 189

tyv12

Adventurer
...
 

Attachments

  • IMG_3395.jpg
    IMG_3395.jpg
    531.8 KB · Views: 172
  • IMG_3638.jpg
    IMG_3638.jpg
    566.4 KB · Views: 167
  • IMG_3649.jpg
    IMG_3649.jpg
    581.5 KB · Views: 162
  • IMG_3847.jpg
    IMG_3847.jpg
    521.9 KB · Views: 158
  • IMG_3408.jpg
    IMG_3408.jpg
    600.8 KB · Views: 172

snekvasil

Adventurer
I like this build a lot. Sharp looking rig. As soon as I read "toonie" I figured you were a Canuck =). Whereabouts are you located?
 

tyv12

Adventurer
For the rear bumper trimmed the box on a 45' angle and behind the rear wheel and gained tons of departure angle


Sent from my iPhone using Tapatalk
 

TwoTrack

Buy Once, Cry Once
I'm still kicking around ideas for a rear bumper. I've drug my hitch to many times to count.
 

tyv12

Adventurer
so I've been having trouble with noisy uniballs, these are 4 years old. So ordered teflon lined uniballs, UCA bushings, safari ltd power steering rack as the factory one had started sweating and poly rack bushings. The TC ucas have been good but some of my ignorance at first has caused me grief. First I learned the hard way that if you are going to put more than 1 pump with a grease gun into the UCAs then loosen off the through bolt else it pressures up inside and causes the poly bushings to bulge, theyre never the same after that. They always have some play. Also had some trouble with the end nut on the UCAs cinching down over time all by itself and these you don't want the bolt insanely tight. So its tough to see in the pic but I always double nut the end and then theres guaranteed the correct tension. While I had it apart did brakes and I've started painting any frame rail or really anything I can hit with chassis paint as I have it apart to try and keep stuff rust free.
Also was back and forth with Sway away and on this truck I'm running 14" springs in the coilover with a 700# spring rate. As you can see I have to have a 1.75" preload to allow for the front bumper and weight of the truck. If you ever want to know what you're best spring weight and length is get ahold of Eric Tice there, he sent me a worksheet and I send back measurements he wanted and after giving me some options I ordered a set of 16" 700# springs that I will be able to run at the cap height of the coilover and it should ride better, those havent shown up yet but I figured i'd get the rest done at this point. As you can see the UCAs were in rough shape as at the end the only way I could keep them quiet was really messy bike chain wax but theyre sorted now!!
 

Attachments

  • IMG_4036.jpg
    IMG_4036.jpg
    578.8 KB · Views: 112
  • IMG_4037.jpg
    IMG_4037.jpg
    547.2 KB · Views: 114
  • IMG_4048.jpg
    IMG_4048.jpg
    551.5 KB · Views: 118

seanpistol

Explorer
I loosened my through-bolt and the bushings on my UCAs still bulged when I shot grease into them. They're 3 years old. Sometime in the near future I'll need to replace those bushings as well.

Curious to know how your teflon lined balls work out for ya. I throw some tri-flow dry lube on my balls at least once every two weeks. I like my balls lubed. Keeps the balls happy.
 

tyv12

Adventurer
Ya as soon as they bulge ur pooched, I realized now the upper control arm bushings need a lot less lube than I thought like Maybe half a pump at a time. And as for the univalve they look way better and are supposedly self lubricating they just need to be kept clean so well see


Sent from my iPhone using Tapatalk
 

tyv12

Adventurer
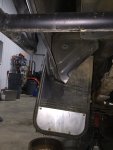
So found some pics from when I started the rear bumper. As it sits right now is just the bare bones bumper because I couldnt decide if I wanted to do a swing out tire carrier and jerry can holder. But I have decided as I will soon have 2 kids and no more rtt, looking for an offroad tent trailer, that I will have tons of cargo room so I'll just skid the tire underneath and keep the tailgate more useable. So the rear bumper build started when a friend backed the truck into a tree wrecking the bumper and crunched the bed corner. I was actually kinda excited as it gave me an excuse to hack up a clean body. Started by slowly cutting strips at different angles until I came out with the angle from behind the flare to where the body on the tundra curved in to accommodate the factory bumper. Cut the edge a 1/2 inch long then used a body working hammer and block to slowly bend the edge around. Not this took HOOOOUUUURRRRSSSS!! to stretch the metal and slowly give it a factory edge but the result is that I believe it looks like a factory edge. Bent up the bumper and fit it all up. It's stinkin strong and also works well for a corner step to get into the box. Now I am going to build a license plate block as well as I have some reverse LEDs to install in the bumper. Going to fill in the large rectangular gaps in the back but still deciding if I should weld tabs the bolt aluminium plates as in prerunner style or weld in plate steel to finish it off, still undecided.
 

Attachments

  • IMG_2658.jpg
    IMG_2658.jpg
    530.4 KB · Views: 103
  • IMG_2733.jpg
    IMG_2733.jpg
    515.4 KB · Views: 96
  • IMG_4077.jpg
    IMG_4077.jpg
    506 KB · Views: 100
  • IMG_4079.jpg
    IMG_4079.jpg
    527.8 KB · Views: 101
  • IMG_4081.jpg
    IMG_4081.jpg
    517.3 KB · Views: 106
  • IMG_4082.jpg
    IMG_4082.jpg
    518.4 KB · Views: 106
  • IMG_2725.jpg
    IMG_2725.jpg
    7.6 KB · Views: 93

Forum statistics

Threads
188,126
Messages
2,902,437
Members
229,582
Latest member
JSKepler
Top