"TrailTop" modular trailer topper building components

jscherb

Expedition Leader
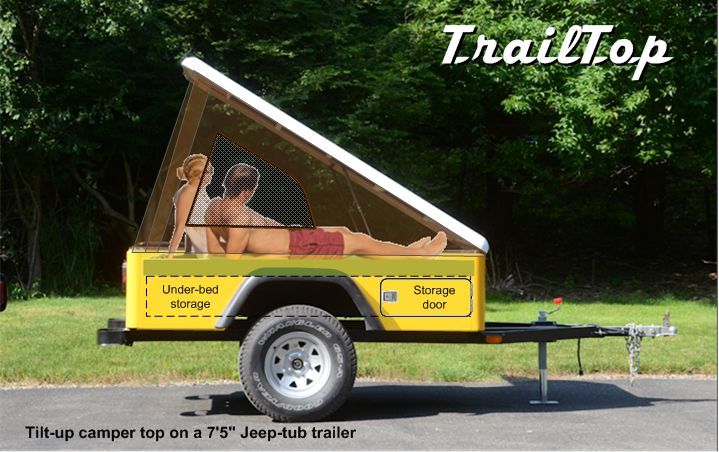
If a raised bed platform were built like in my concept illustration from the last post, there needs to be some way to access the storage underneath. One way would be to hinge the floor of the platform, and access the storage from inside the trailer. Perhaps the back half would be hinged, and you'd lift that up (along with lifting the mattress) to access the stuff under the platform.

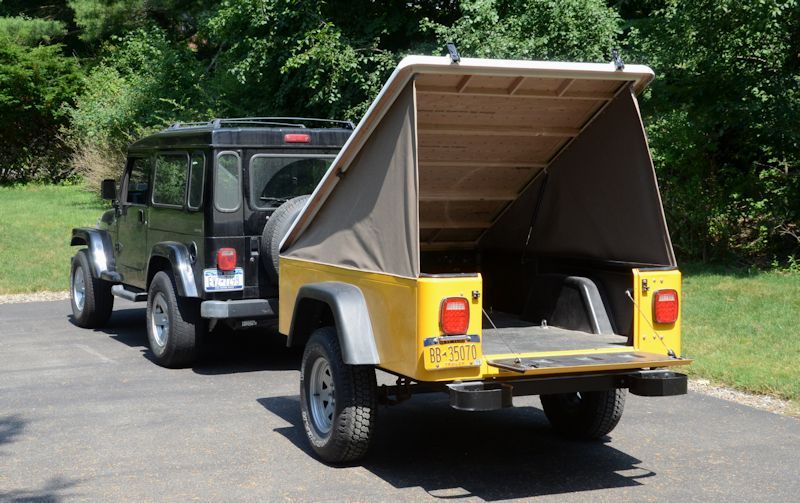
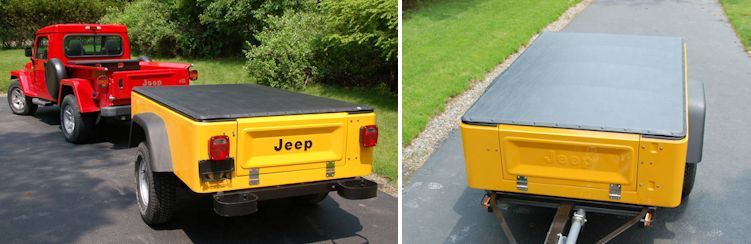
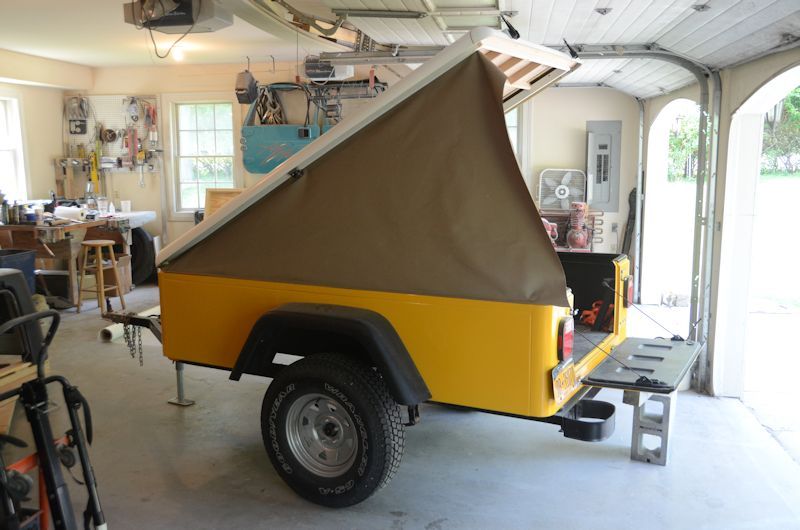
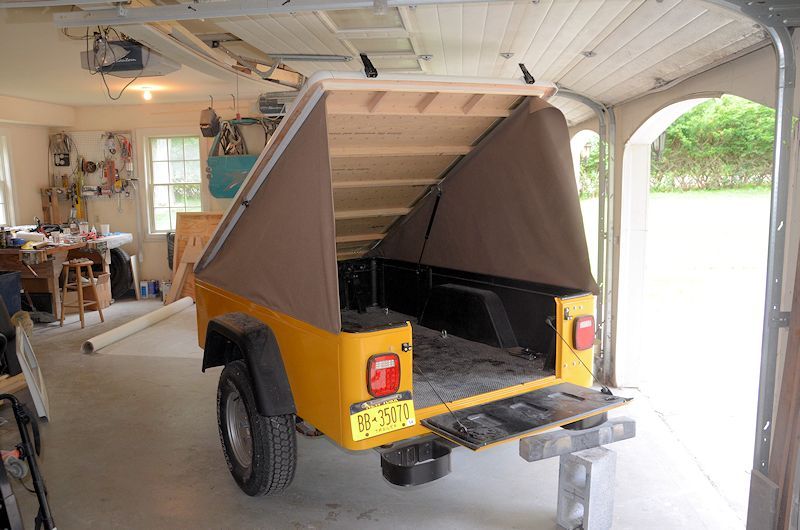
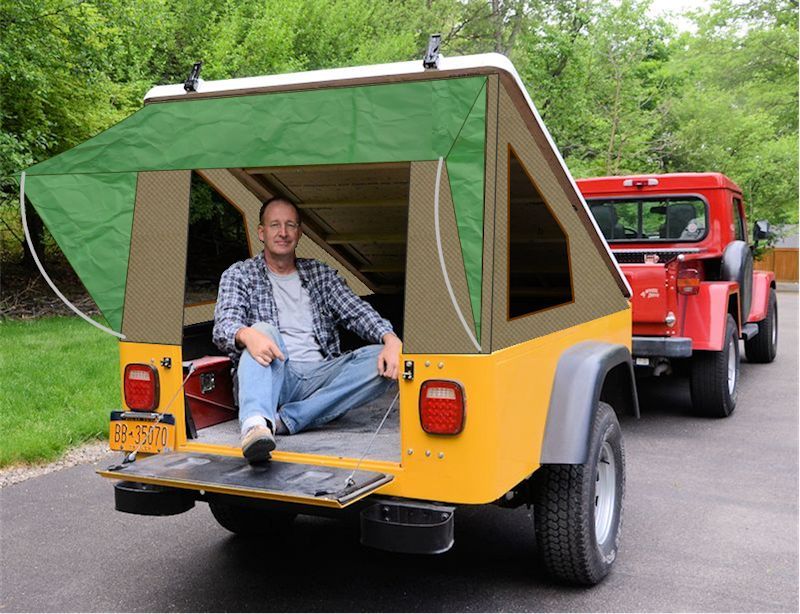
Or you could build the Dinoot Jeep-tub trailer with tailgates on both ends like mine - the Dinoot kit is modular, so you could easily assemble one with two tailgate end panels. You'd use the front tailgate to access the front half of the storage, and the rear gate to access the rear.

TwoTailgates_zps099d1272.jpg


You could also put a tray on heavy-duty drawer slides in the tub so it pulls out of the tailgate opening to provide really easy access to cargo.

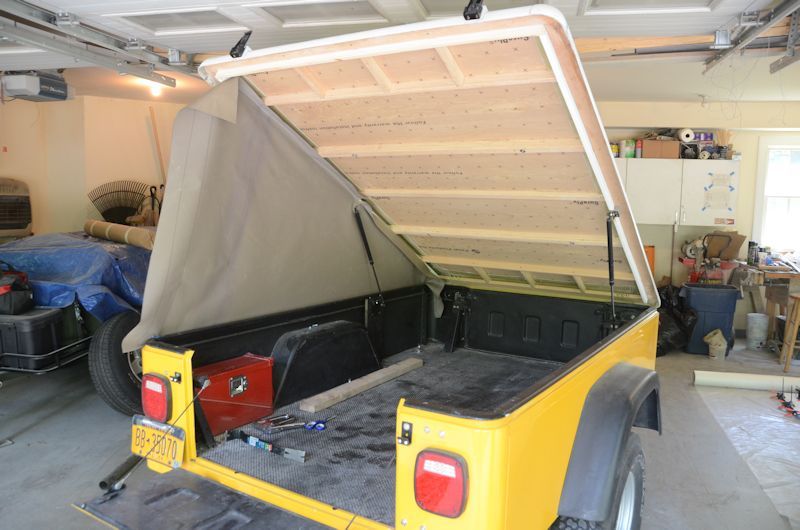
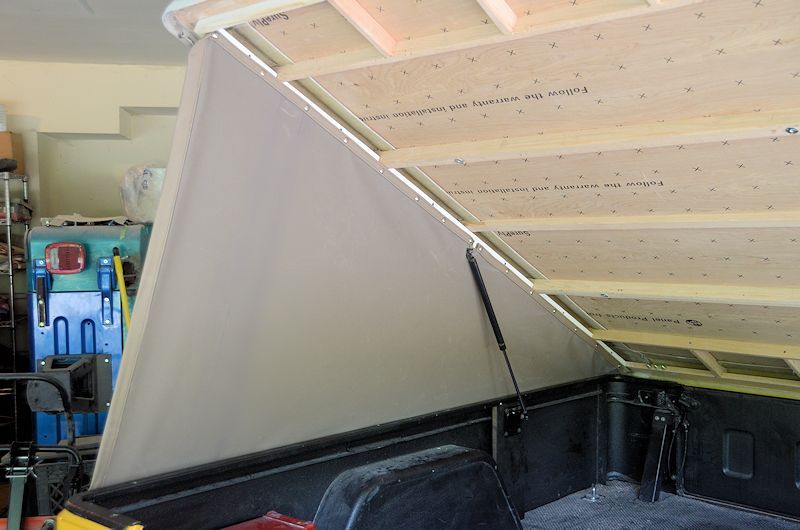
Or if you planned to do storage or something on the trailer tongue which would prevent the use of a front tailgate, you could put RV cargo doors in the side of the tub to access the front half of the storage area. The back half could be accessed through the rear tailgate, or by having the rear half of the platform hinge up:

CanvasXRay3_zps29077f5b.jpg
 

jscherb

Expedition Leader
I finally got some time today to start the sewing of the tilt-up tent canvas. Didn't get too far yet, but here's the first side panel in place. The plastic retainer strip has been sewn into the bottom of the panel, and it's tucked up under the retainer rail on the tub in these photos. The use of the Jeep soft top retainer rail system worked out really well.

For the moment, the top of the panel is temporarily stapled to the wood rail under the cover; that gives, that gives me a chance to adjust it perfectly and mark the exact location for the top seam and snaps. The tall end is not yet hemmed.

SideSewing1_zpsa458cb4e.jpg


SideSewing1b_zps355318cb.jpg


Tomorrow I'll get the top seam/webbing and snaps in place.
 

bonomonster

Adventurer
Did you make a slit for the canvas to go around the lifting strut? It's hard to tell in the pic...
How are you going to bend the plastic for the curved Jeep tub rail at the corner? Do you think a heat gun will work?
 

jscherb

Expedition Leader
Did you make a slit for the canvas to go around the lifting strut? It's hard to tell in the pic...
How are you going to bend the plastic for the curved Jeep tub rail at the corner? Do you think a heat gun will work?

Yes, there's a temporary slit there right now, I've got to finalize it and hem it tomorrow when I'm working on the top edge of the panel.

The plastic won't have to curve, I'll do some pie-cuts in it so it bends at the cuts.
 

jscherb

Expedition Leader
I finished sewing the first side panel. Here's an inside view showing where it snaps to the hard cover. I'll put a window in it after the other side panel and the end panel are complete - my goal is to get the complete shell done first, then add the windows.

SideSewing2b_zpsd469e18b.jpg


Next I'll make the other side, it's a mirror image of this one, so this one will serve as the pattern for it.
 

jscherb

Expedition Leader
The second side panel starting to take shape:

SideSewing3_zpsb0bbfad1.jpg


Tomorrow I'll finish the second panel and then I'll start on the end panel.
 

Ozarker

Pontoon Admiral
Jscherb, Looks like you're guy got a new girlfriend and he's taking things a bit slower keeping her interest. LOL

2 other thoughts, the bed; two mattresses (I suppose you're using thick foam) I really like my backpack self inflating air mattress, the XL size, two would make a bed in the tub. The Camper DeVille we had used 1/4" ply set on top of a metal frame with simple finger holes in the top to left them. There were no hinges but a simple frame that fit snug against the frame work, this way you could grab the lid and lift it or lift and slide it off to one side out of the way while using the storage underneath. When inside, in bed, you'd reach under one mattress, grab the hole and just lift up. I was a kid and I could easily lift the bed by one of 3 lids with the mattress. This does mean having a bottom sheet for each mattress (singles or twin). Those top access storage compartments were very nice to have on a rainy night, being able to lift half the bed and get snacks, etc.

(when I get my long list of to-dos done, I'm doing the same thing with my pickup fiberglass bed cover)

In the old days we used 5' foam mattresses, now, as I mentioned the backpack style mattress is about as comfortable and takes up much less space. With the bed raised, (I know you figured this) but the top of the mattress needs room to fold the material inside on top (if it's dry, if not we folded the wet side up keeping it off the bedding). There was usually room to toss in a lawn chair or two on top of the canvas (carefully) along with small stuff. It was handy to open the top and reach over to get things to set up camp before putting up the camper. It's nice just to open up and have a bed ready too.

The other thought was as to the material at the back. What I'd try to add would be a small extension off the back so that the tailgate would be enclosed too. Under the top I'd swing out a aluminum frame or insert a U (wider and more square than a U) into a bracket affixed to the underside of the top. Nothing big, just enough to bring a porch out over the tailgate, snap around the tailgate and rear opening with a door almost as wide as the tailgate. This will give you more headroom and a more open space, the material going down at the back is at an angle otherwise and your usable sitting space, this extra work may increase 50%+. Nice space for shoes and boots too away from the bedding.

Your future project might be a real porch attachment. The DeVille had a 7X14 screen porch that sipped on out the front, took the rig from a 7x7 trailer to a 7x28 under roof living space! Nice small porta-pottie area for that late night run.

We use to rent campers too. We found there was little use for the outside storage doors when you had access from above, outside access was handy at the gas station or along the road, but at camp they were rarely opened.

I'd also opt for tongue storage over an access door under the bed from the front. I'm thinking propane and a few sticks for the fire. Where's the spare tire?

I'll stop, really like what you're doing, concept is great and it's going to look great. Just tossing out ideas from the tent trailer days.

Oh, I'd also put a small cooler under the bed. I always have a contingency for storms or just that steady rainy day around here, a backpack stove (or small stove) and a cooler is great. With 2 mattresses you can flip one over on top of the other to give you a space to cook inside.
 

jscherb

Expedition Leader
...The other thought was as to the material at the back. What I'd try to add would be a small extension off the back so that the tailgate would be enclosed too. Under the top I'd swing out a aluminum frame or insert a U (wider and more square than a U) into a bracket affixed to the underside of the top. Nothing big, just enough to bring a porch out over the tailgate, snap around the tailgate and rear opening with a door almost as wide as the tailgate. This will give you more headroom and a more open space, the material going down at the back is at an angle otherwise and your usable sitting space, this extra work may increase 50%+. Nice space for shoes and boots too away from the bedding...

Thanks for the long and thoughtful post - great information! Much appreciated.

My current goal is to get the basic tilt-up sewn, but I am thinking about adding some sort of awning over the tailgate area. A month ago I posted the drawing below, I'm still considering something like it. It isn't enclosed or with a door like you're suggesting, but it would offer more protection from the elements when the main door and tailgate are open.

CanvasSim3_zpscaf9c688.jpg


If I were actually going to camp in this I'd probably want to make a larger porch/changing room as you go on to suggest, but since this is a proof-of-concept project, I'll probably just finish sewing the main tilt-up, and possibly an awning something like the illustration above, and then consider it "concept proven".

Thanks again for all your good ideas and input.
 

Ozarker

Pontoon Admiral
Ah, looks good! Now I recall you're mission, I agree. Add-ons could go on and on and on and on.

From that illustration it appears you may not be able to raise the bed above the wheel wells with sitting in a more hunched over position, just judging from your stature......but it's a picture. Can't really tell. You have things well in hand! Looks great! :)
 

jscherb

Expedition Leader
Ah, looks good! Now I recall you're mission, I agree. Add-ons could go on and on and on and on.

From that illustration it appears you may not be able to raise the bed above the wheel wells with sitting in a more hunched over position, just judging from your stature......but it's a picture. Can't really tell. You have things well in hand! Looks great! :)

Thanks!

I did increase the headroom since the photo that drawing was based on was taken (see post 549). I swapped out the gas struts for some longer ones and got about 10" more headroom. Even I, at 6'6" would have enough headroom to sit on a raised bed platform with the new gas struts.
 

jscherb

Expedition Leader
Basic sewing of the tilt-up side panels is complete. Next I'll sew the back end panel, and when that's done, I'll add the windows. Some shots with a tow vehicle:

SidesSewing4a_zpsfba48591.jpg


SidesSewing4c_zps6e7dfa5e.jpg


SidesSewing4d_zpsc1111ce3.jpg


This is probably all the sewing I'll get done on this project this month. Tuesday we're off in this Jeep to Prudhoe Bay, Alaska, a trip that will take most of the rest of the month. Between now and Tuesday I doubt I'll have much time for sewing, lots to do to get ready for the trip.
 

jscherb

Expedition Leader
I managed to get a little more sewing time in today, so I was able to get the end panel mostly done. I haven't done the zippers between the end panel and the side panels yet, but the main structure of the end panel is complete. You can see the untrimmed edges of the end panel overlapping the sides, they'll be trimmed and hemmed when the zippers get sewn in.

TiltUpEndPanel1_zps175c1cf6.jpg
 

Forum statistics

Threads
186,004
Messages
2,880,792
Members
225,705
Latest member
Smudge12
Top