You are using an out of date browser. It may not display this or other websites correctly.
You should upgrade or use an alternative browser.
You should upgrade or use an alternative browser.
The Woofwagon. Beginning pictures
- Thread starter Woofwagon
- Start date
Woofwagon
Adventurer
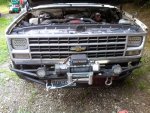
Found the whole procedure of removing the entire front end of the Suburbillac online. This way I can remove all the body panels in one shot for the engine/transmission upgrade. I can do the entire engine break in with the Cadillac engine fully mounted in the frame with radiator and oil coolers. No fighting with lifting all that weight up and over the core support and radiator.
chilliwak
Expedition Leader
Can't imagine it would be any easier than working on a Ford van of the same era! Talk about tight!
But who in their right mind would ever work on one of those things? I was once hired to replace a serpintine belt on a diesel Fraud van. It took me and a helper 12 hours to complete it. I even heard that you have to remove the cab to replace injectors! Now that is sheer stupidity to make a vehicle that is so hard to maintain! No wonder you see so many of them in the junk yard!:Wow1:
 :REOutShootinghunter:av-7::smileeek:ROFSheriffHL::violent-smiley-031::violent-smiley-031::violent-smiley-031:
Woofwagon
Adventurer
Delayed update
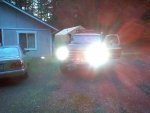
Installed a pair of LED replacements for the sealed beam headlights. Bright suckers to be sure. Also, I think I forgot to post a pic of the Caddy cylinder heads all painted up ready for install on the short block.
Installed a pair of LED replacements for the sealed beam headlights. Bright suckers to be sure. Also, I think I forgot to post a pic of the Caddy cylinder heads all painted up ready for install on the short block.
Attachments


chilliwak
Expedition Leader
Ok, but aren't you in NC? I would like to plan an "engine pull party" kind of like a barn raising. Bring food for the BBQ and we all work on the truck.
Now that would be cool.:iagree: Barbeque :steak::steak::steak:and motor pull! Ingenious!:wings:
boll_rig
Adventurer
Woof, really loving how the burb came together just re read the thread and gotta say very impressed. I was wondering about the bedliner and whether by now, if any of it has chipped off. Did you rough up the paint below?
Also what is the height of your platform, id always dismissed the idea too because at 6' plus sleeping in the back is always a tight fit, however now that ill have an extra 10 inches above my head I may go in on a short platform like you've done.
Great work and keep us posted!
Also what is the height of your platform, id always dismissed the idea too because at 6' plus sleeping in the back is always a tight fit, however now that ill have an extra 10 inches above my head I may go in on a short platform like you've done.
Great work and keep us posted!
Woofwagon
Adventurer
Thanks! It's been a fun project thus far! On the bedliner, I haven't had any chipping of the coating as I put on 3 coats and used an entire gallon of the material. Harbor Freight sells a gallon of it for $50. I masked off the areas, ran an orbital sander with 200 grit and then put it on with a roller. I had to coat the hood as the glare from the LEDs on the sand beige hood was too much. I have noticed some small bubbles in the spray on coating I put on the hood, maybe that's due to engine heat.
My Burb has no rear seats but a steel partition as this was a survey vehicle. The back platform is constructed of 2 4'x8' sheets of 3/4" plywood with 2x6 beams to form the structure. I'm just a shade under 6'6" and 240 pounds so having enough area to be comfortable is a big thing for me.
I'm trying to get things in motion here soon to sell some things off and roll that money into the Cadillac build. I've got all the cam, valve train and what not done. I'm going to take it to a machine shop and have the block inspected, new bearings installed, new rings, pistons, and a full balancing. I want this engine to run as smooth as a turbine for a very long time.
Woof, really loving how the burb came together just re read the thread and gotta say very impressed. I was wondering about the bedliner and whether by now, if any of it has chipped off. Did you rough up the paint below?
Also what is the height of your platform, id always dismissed the idea too because at 6' plus sleeping in the back is always a tight fit, however now that ill have an extra 10 inches above my head I may go in on a short platform like you've done.
Great work and keep us posted!
