WreckDiver1321's 2003 Frontier CC SC

Slicky72

Adventurer
I haven't had any of these issues you mentioned except for the deformed washer on the idler arm and after 3 or so years it hasn't given me any problems. You should pass your observations on to Brian at Grassroots. It sounds to me like things have changed a little since I bought my CL .
 

wreckdiver1321

Overlander
I didn't have anywhere solid to recover or be recovered from in the front. So I went down to my local Tractor Supply and got some tow hooks. $24. I know Chevy ones bolt right up, but there have been many stories about them snapping when being tugged on. So I went this route.


I drilled two holes in the factory tabs that come off the frame. I put them as close as possible to the actual frame rail and the welds, because I figure the closer I am to the solid anchor point, the less likely I am to bend the tabs.


The other thing I did was install my Yakima Loadwarrior cargo basket. It should be a good place to keep lighter items or things like firewood. Super simple install, very clear instructions.


While I was at it, I removed the factory wind fairing. Looked goofy with two.
 
Last edited:

duckhunter71

Adventurer
While I was at it, I removed the factory wind fairing. Looked goofy with two.

I was sitting here thinking "something doesn't look quite right about that.." and it was the absent stock fairing. Then I read the rest of your post. Looks good! Does it still fit in the garage with the basket?
 

wreckdiver1321

Overlander
I was sitting here thinking "something doesn't look quite right about that.." and it was the absent stock fairing. Then I read the rest of your post. Looks good! Does it still fit in the garage with the basket?

Yep, plenty of clearance. Haha but ask me after I fiddle with the suspension!
 

wreckdiver1321

Overlander
After doing some research online, I decided to tackle the resonator delete/air box mod. It's a pretty easy and straightforward process. Basically it allows the engine to breathe better by a) opening up the "mouth" of the intake, and b) removing resonators that will cause the airflow through the intake to move less efficiently. I mostly used this write up: http://www.xterraownersclub.com/forums/ubbthreads.php?ubb=showflat&Number=676492

I removed the resonator on the fender, as well as the one near the radiator. I capped off the openings I left with a couple of plumbing test plugs I got at Home Depot.


Then, I removed the rather restrictive baffle/chamber that the air cleaner assembly feeds from. It's very small and restrictive, so I just took it out. The air filter now pulls air from inside the fender.


The piece on the right is the baffle, and the piece on the left is the large resonator from the wheel well. I highly recommend this little mod. It costs about $8, took an hour, and it woke my engine up for sure. Much crisper throttle response and a noticeable power gain. Hopefully it will give me a little better MPG too. Also on the plus side, I can really hear that supercharger wind up now :D

After all this, I took the opportunity to do a little playing at the local ORV park.


I found out just how far the axle will flex. The left rear is actually off the ground.


And I found out this thing is a very capable trail runner. I took it up this steep and rocky hill (way worse than it looks in the picture) with absolutely no drama whatsoever. Didn't even spin a tire. Imagine how it will be with some real tires!

 
Last edited:

Co-opski

Expedition Leader
I agree the Air Box Mod is a great cheap upgrade. I ran it for about 2 years then I got a deal on an AEM cold air intake. Now that is a joke, more like hot air intake. I used to run cool 70 to 80 degrees in slow traffic and off road now I'm running 120 to 140 air intake temps measured with my scangauge II. No MPG increase to speak of. I kept the stock air box just in case, going to run it through the winter up here and see how it does.
 
Last edited:

wreckdiver1321

Overlander
Not much new has happened. Since I have one headlight that has broken mounting tabs and sits cockeyed, I ordered a new one. To make it look better, I used a headlight restoration kit on the headlight that was still good. Made a big difference!

Here's the bad, broken one.


And the one I refinished.


And the side by side comparison. I'm very happy with the results.


After this all got finished up, I decided I needed to do a little further flex testing on a friend's property. I am impressed, this little truck doesn't mind being on 3 wheels that much.


Going to make a call to AC soon to order all kinds of new suspension parts. :D
 

wreckdiver1321

Overlander
Updates are slow. Life gets awful busy during the summer! Luckily, I'm back on track to getting the truck where I want it. I recently took delivery of a Xoskel low profile light bar and got the wiring finished up for it. Overall I'm really pleased with the results and extra light I get. I'll do a full write up (including how I wired everything) later once I have a chance to get more pictures.

But for now, here's a few samples!


220 watts of retinal scorching illumination!


Just the headlights


All lights on
 

wreckdiver1321

Overlander
Okay, so in the past few months I've spent a lot of time traveling and I recently moved, so updates have been painfully slow. Right now, I'm tearing into the boxes I just got from AC. Inside are 2 OME Dakars, an Energy Suspensions bushing kit, the steering enhancement package with Bilstein stabilizer, and HD tie rod adjusters. Lots to do :)
 

Allof75

Pathfinder
I'm a little envious of your Fronty to be honest. Tough little bugger. That's precisely the combo I would buy, and your mods are very elegant. (can't wait to see more!) Great work, keep us posted!

P.S. Take off those running boards! :elkgrin:
 

Co-opski

Expedition Leader
Okay, so in the past few months I've spent a lot of time traveling and I recently moved, so updates have been painfully slow. Right now, I'm tearing into the boxes I just got from AC. Inside are 2 OME Dakars, an Energy Suspensions bushing kit, the steering enhancement package with Bilstein stabilizer, and HD tie rod adjusters. Lots to do :)

Sounds like a nice set up. Some people don't like steering stabilizers but the older wd21 pathfinders and d21 hardbody trucks came with them stock. I felt that it did help in the bumpsteer feeling I had running bigger load range E tires. The HD tierod ends are huge I put them on and the plan was to forget them, never have to worry about them again. You will notice the OME like to carry weight and the truck will handle well with a load, but the poly Energy Suspension bushings do get creaky and squeaky so lube them up will with that grease they give you.

That light bar is on my list of my to do mods also. Thanks for posting up how you wired it. BTW Congrats on the new pup scout. Aussy are such good dogs.
 

wreckdiver1321

Overlander
Okay, so long overdue, here's how it all got wired. Be forewarned, this wiring job is definitely not the cleanest, and it's not entirely permanent. Due to the amount of electrical accessories being put on the truck, I will be adding a completely separate fuse box to make wiring cleaner and easier. That will probably go in the cab, under a seat or something. Still looking into possible solutions.

So! The install!

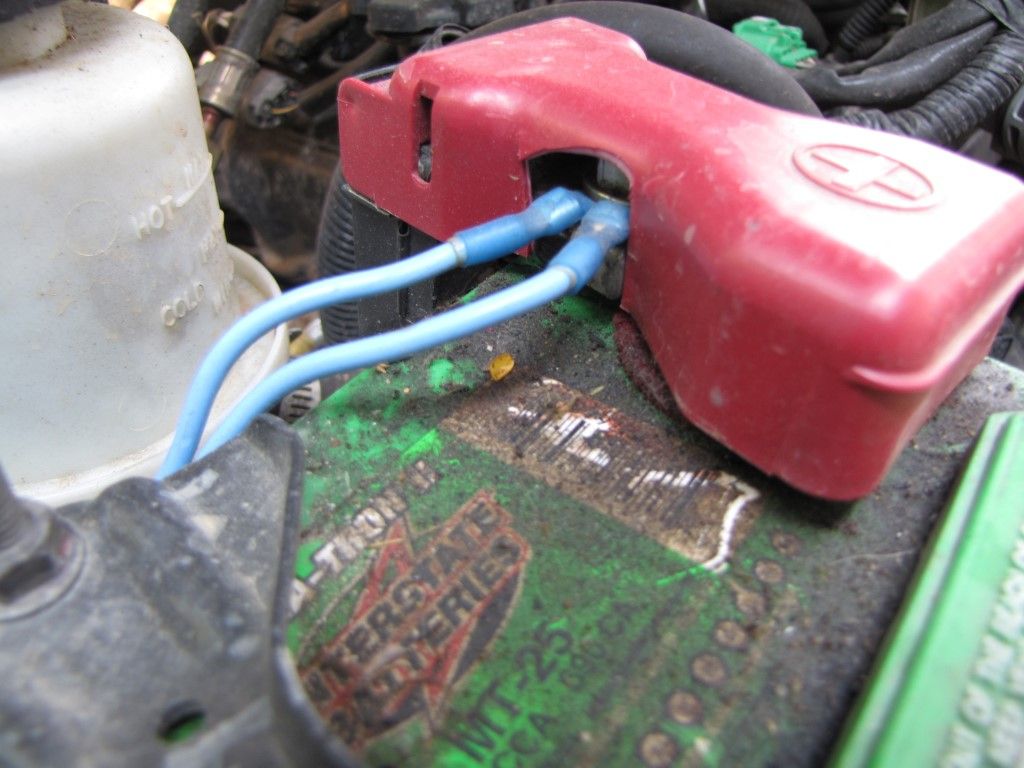
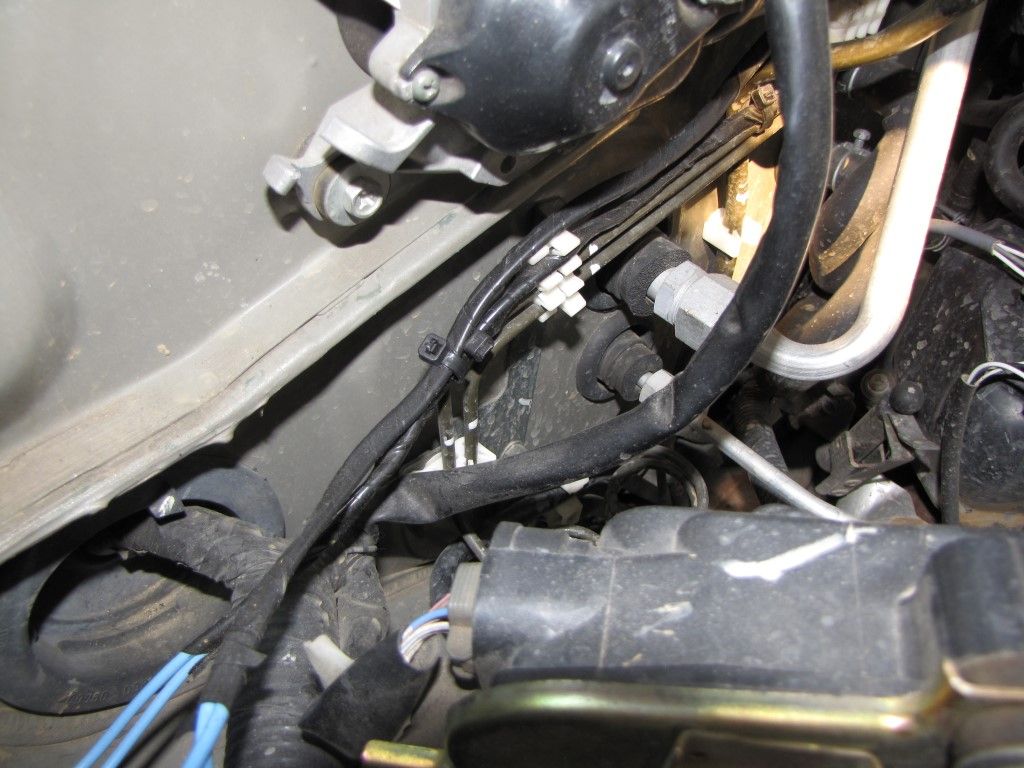
I hadn't planned on doing this all at once and by myself, but that's how it ended up. I started by bolting on the relays and running the ground and power wires. The relays I have have four terminals, marked 30, 85, 86, and 87. I attached ground wires roughly 8" long to the 85 terminal at one end and to a sheet metal screw in the engine bay at the other. I made power wires, complete with inline fuses, and ran them from the 30 terminal to the positive terminal on the battery.


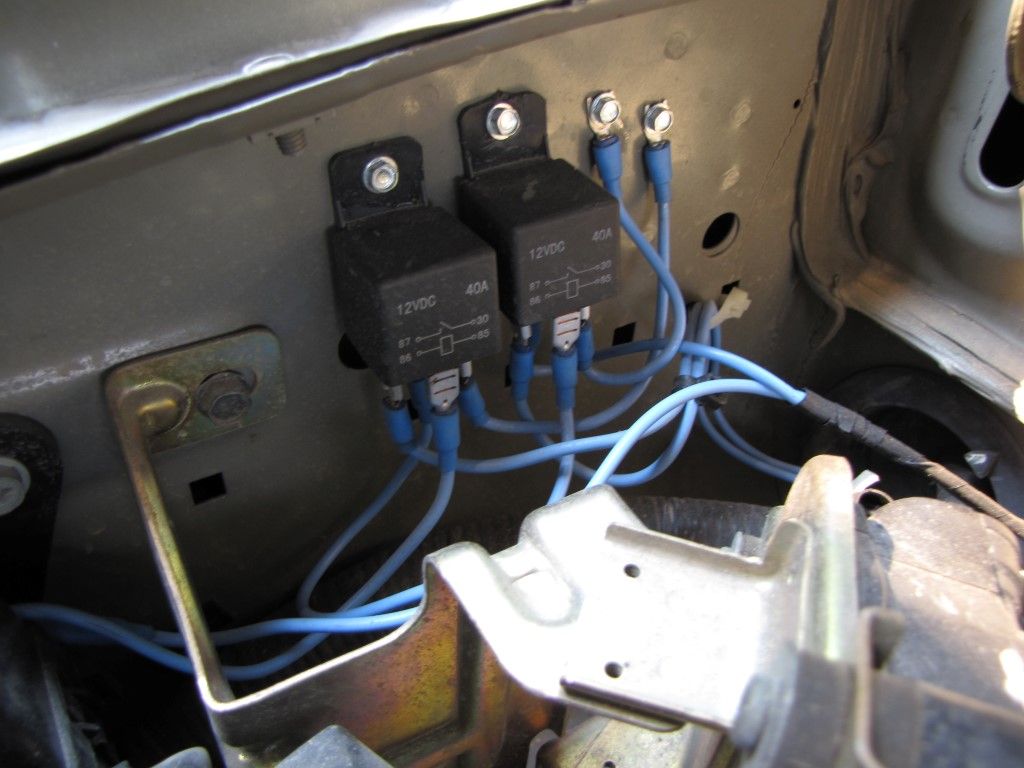
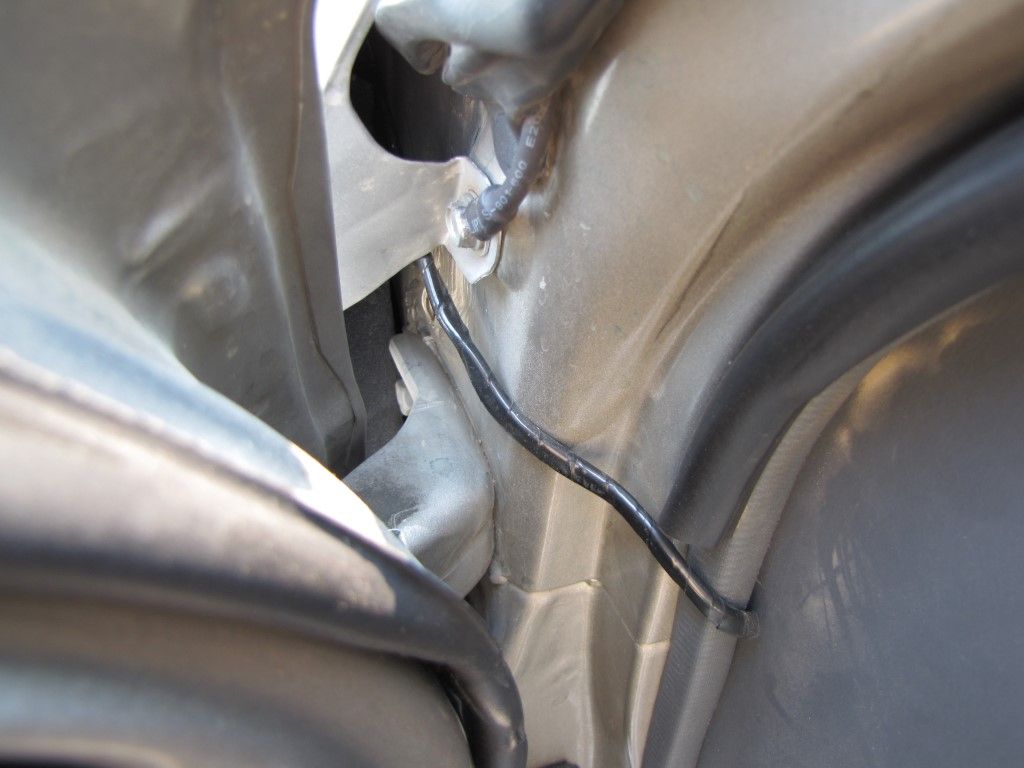
At this point, I figured I had gotten this far, so I might as well build wires for the switches. I measured out the amount I'd need by running it from the 86 terminal to the switch via whatever path I wanted. I decided to simplify for now by not running them through a grommet in the firewall, but by going through the door jam. I know this isn't the cleanest or the best way to do it, but as I said, this is only temporary. It will all get cleaned up once I put the accessory fuse box in place.

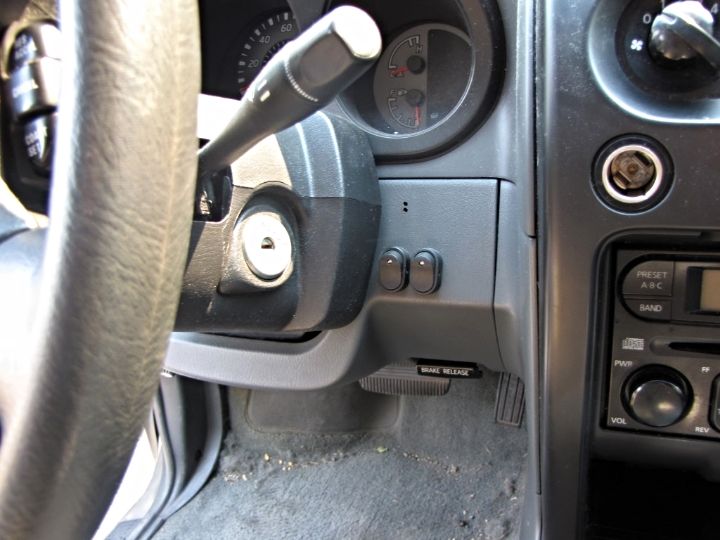
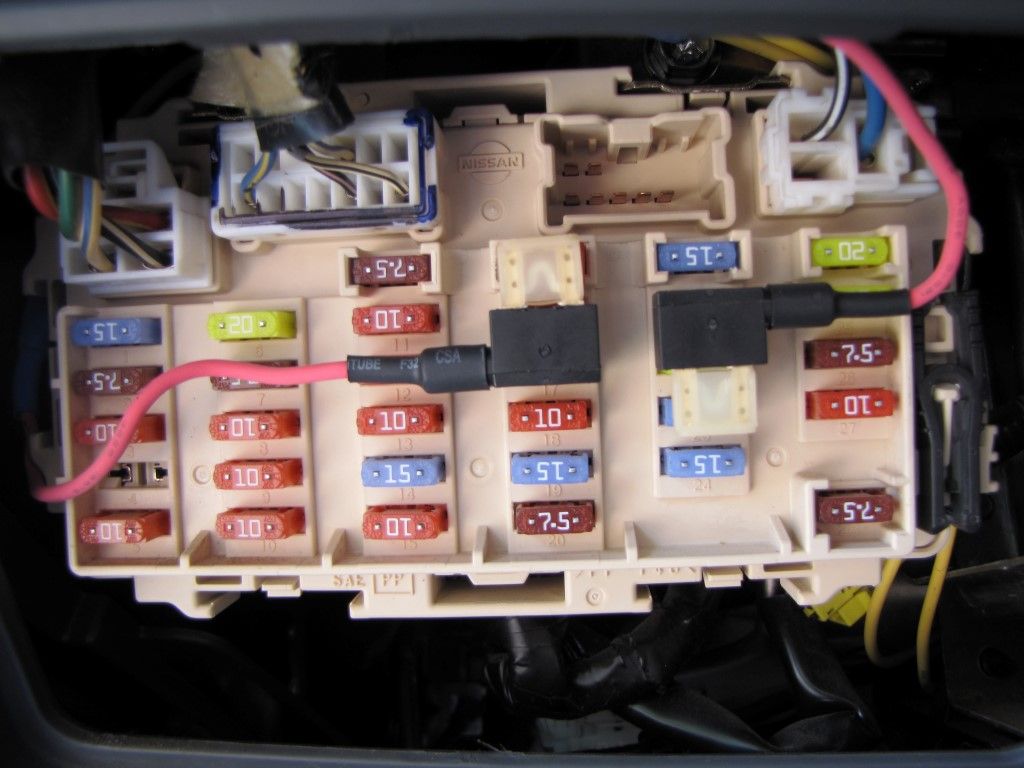
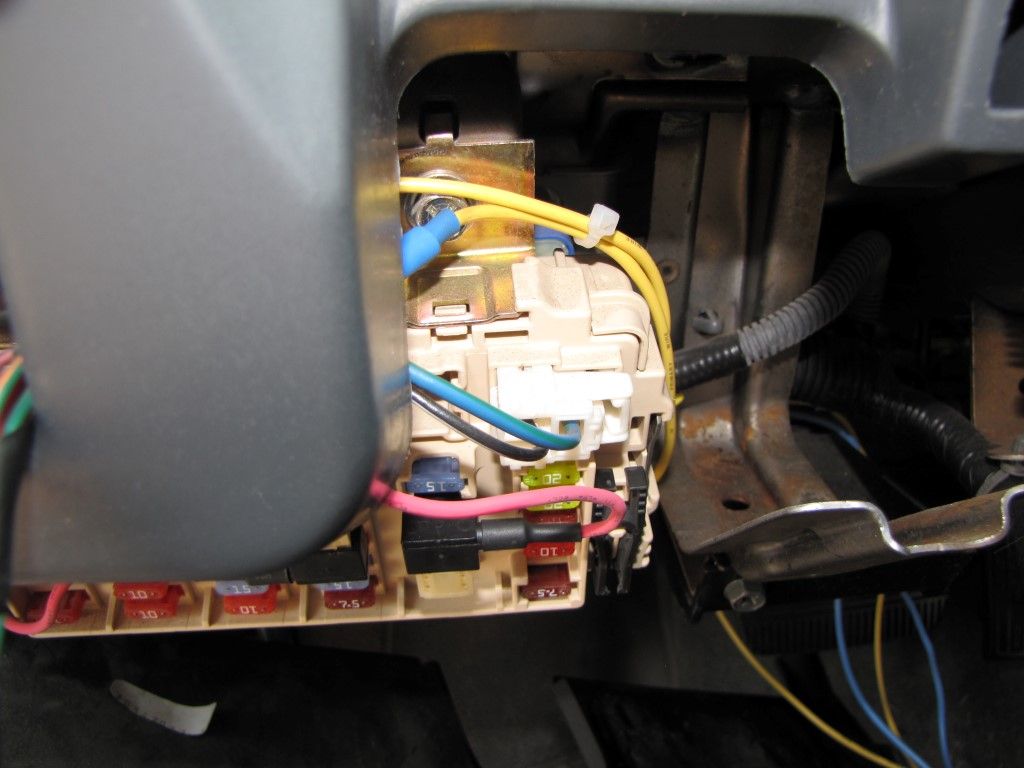
I was now far enough along that I figured I might as well buy and wire in the switches. After a $25 trip to O'Reilly, I drilled the holes into the dash where I wanted the switches to go (and two where I couldn't put them. Oops!) After installing them, I hooked up the wires from the relays to the switches. I had come this far, so I thought I might as well wire them up the rest of the way. I ran fuse taps from each switch to the fuse box, and then I grounded each switch to a bracket behind the dash panel.


After that, I was nearly done! I had enough wire left over to build wires that would run to the lights, so all I had to do was wait for the Xoskel bar to show up.

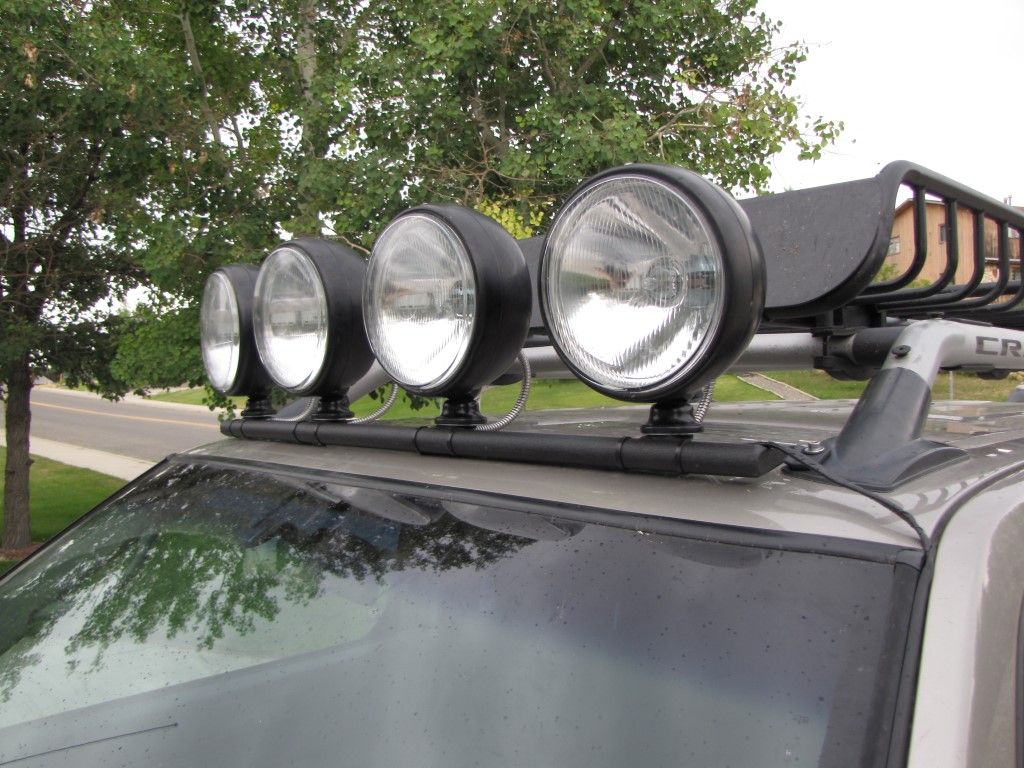
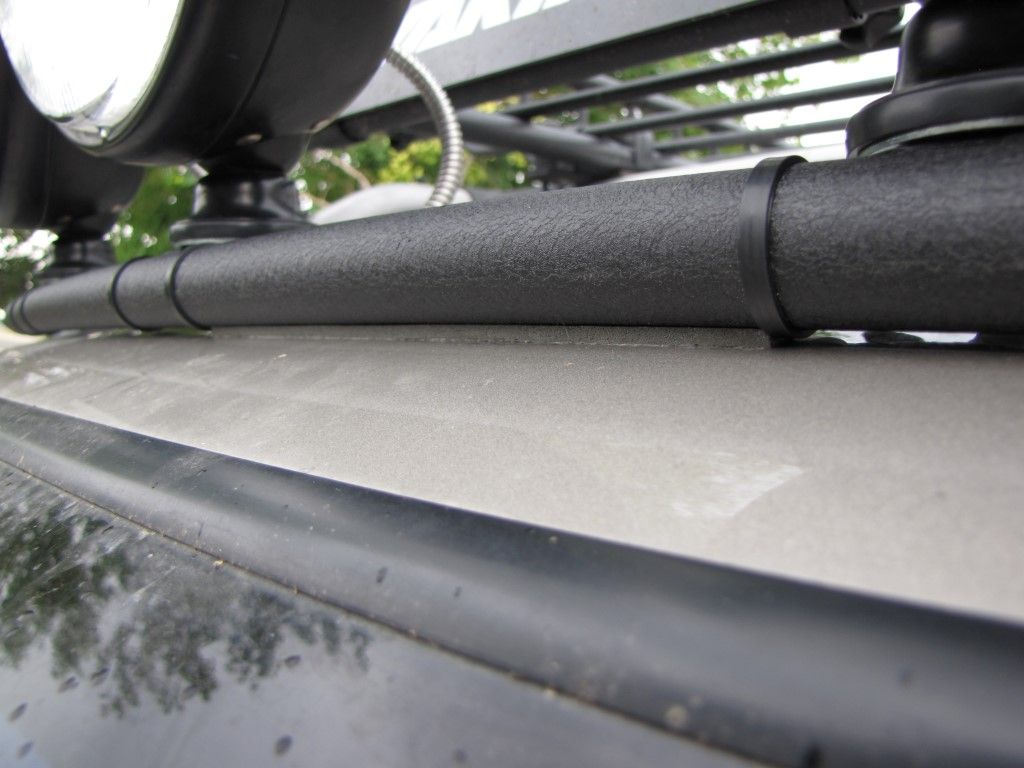
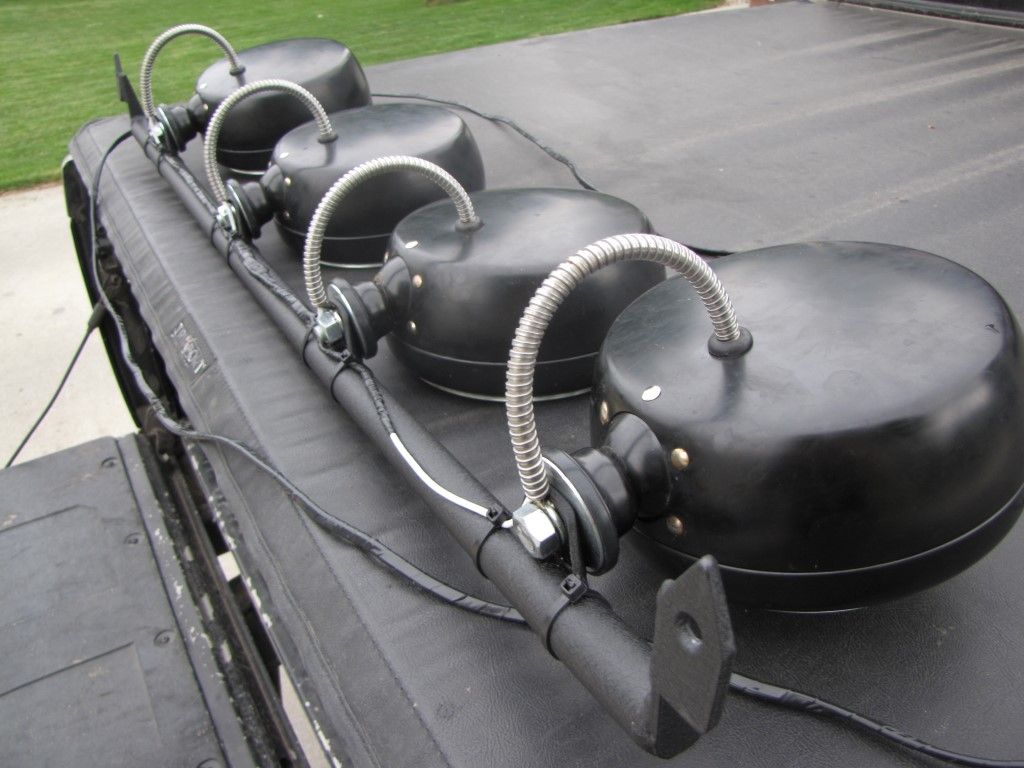
After getting it and having to mess with it, I have some mixed feelings about the Xoskel light bar. Looking at it, you know it is a very well made product, with all the fit and finish. Good welds, nice coating, all that. But the design is a bit strange. The first problem I ran into was that the mounting holes for the lights were a bit small, so I had to drill them out. The bar mounts to the factory crew cab roof rack via the forwardmost factory bolt holes. There are only two bolts holding the whole thing in place, which strikes me as a bit underbuilt. Also, I don't know if there are variances here, but the light bar I got had holes that were 1/4" closer together than the factory mounting holes, which means I had to loosely screw one side in, then pull on the bar while I wrestled the other bolt into place. The idea of the light bar is to sit low to the roofline and be low profile, but this does present some problems. Primarily, the bar sits so close to the roof that the mounting bolts on your lights, whatever they may be, will likely be too long and actually hit the roof of the truck. So, the bolts must be either cut or replaced with ones that are short enough. The other issue with the low profile design, as well as the fact that it is only mounted with two bolts, is that once you add the lights, and therefore, weight, to the bar, it sags and comes into contact with the roof. I was able to fix this with narrow foam rubber tape between the bar and the roof. Once I got these little hiccups worked out, I was able to get to the wiring.


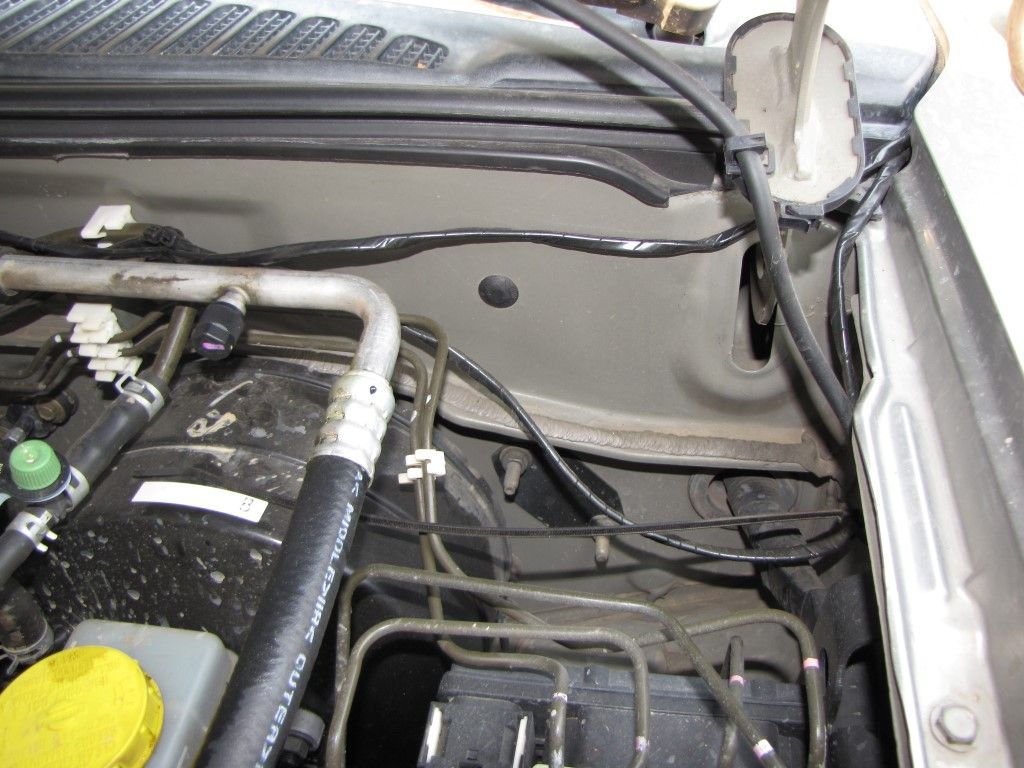
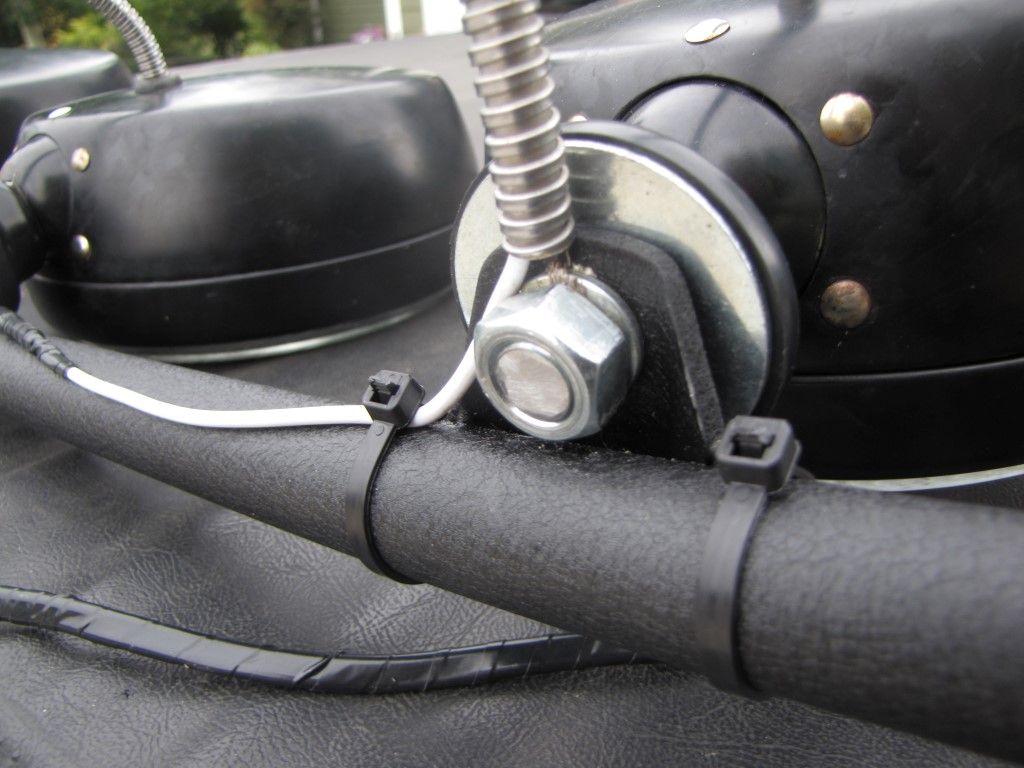
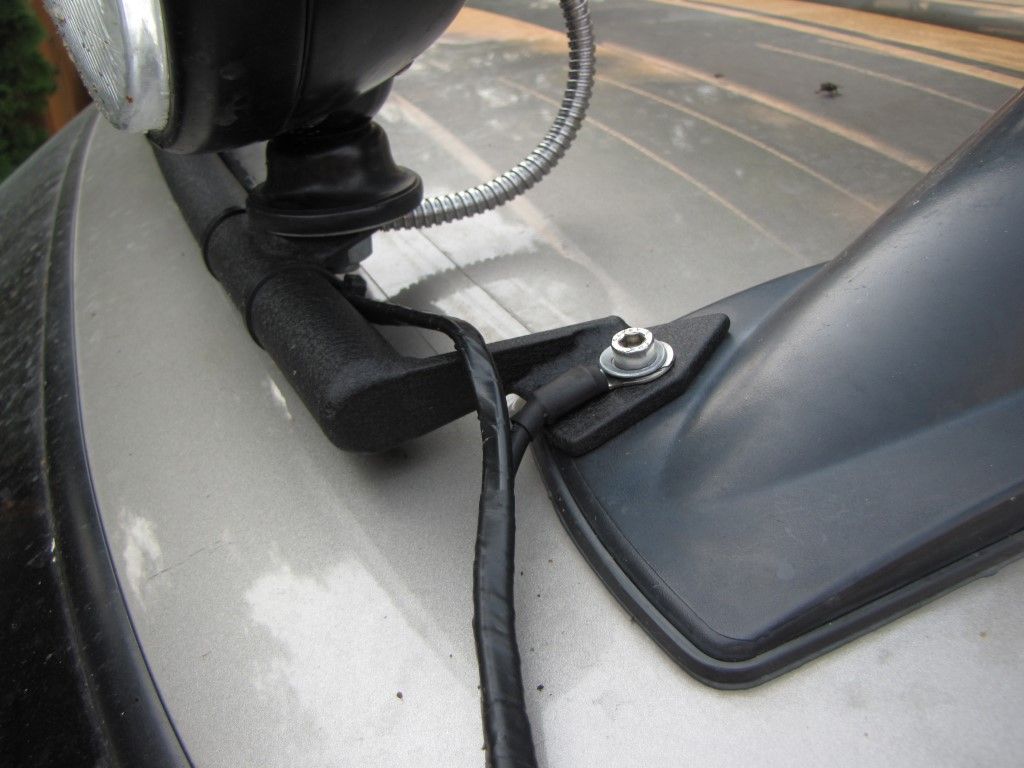
Wiring the lights got a bit fiddly. The idea was to eliminate the need for a ground wire by grounding the lights to the bar and then using the bolts to ground the bar to the truck. Turns out it doesn't work that way, though I'm not entirely sure why. What I ended up doing was soldering the ground wire of each light to a washer that I would put on each light's mounting bolt. This made the wiring look pretty clean. For the power wires, I ran a wire up from the 87 terminal of each relay, through the engine bay, and up through the door seal to the back of the light bar. Again, not the cleanest, but this particular method suits me just fine. Then each wire splits into two power wires, one for each light. Once I was here, I stopped, disassembled everything, and covered most of it with electrical tape to make it cleaner.


Once I had everything back together and in place, I tried the lights. They didn't work. I decided it was probably a bad ground, and so I made a jumper wire to test it. I connected one end to a body panel bolt, and the other to the light bar bolt. Worked like a charm. So, to fix the problem, I built a 10 gauge ground wire and ran one end to a body panel bolt, and the other one to the light bar bolt. I taped everything up, and I was done! All I had to do was aim the lights.


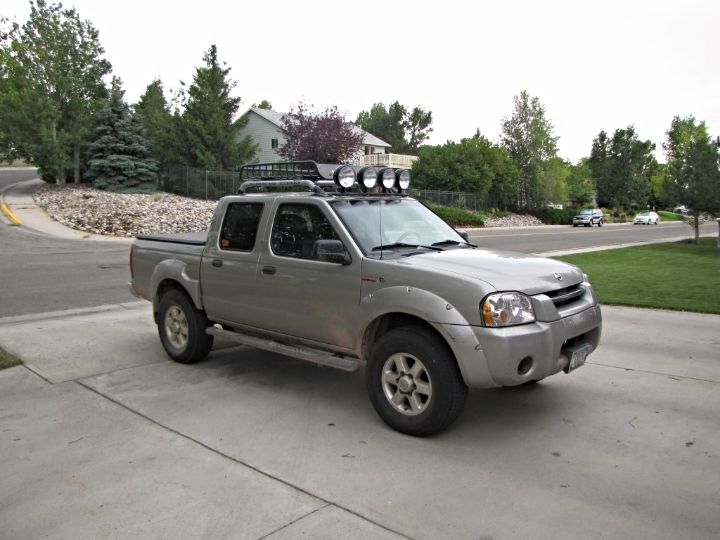
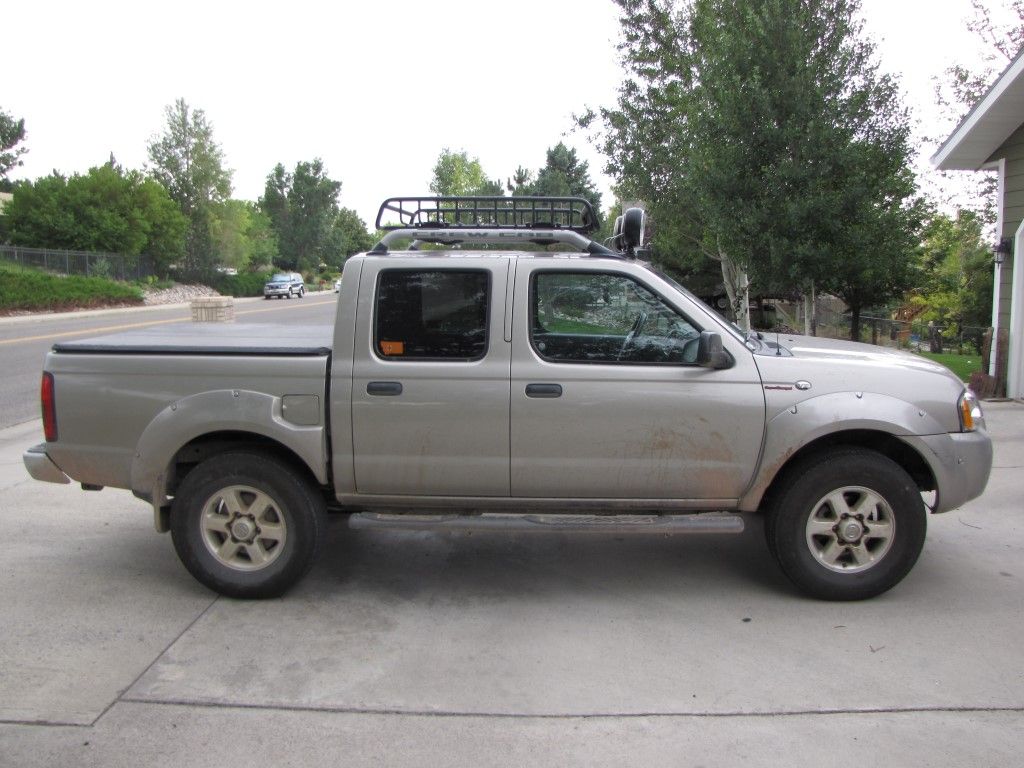
So there it is! I'm very happy with the way everything turned out. I think the end result looks great. The lights work really well too, the only downside is glare you get from the hood and windshield. While this is prevalent, the visibility is still better with the lights on than off.


wreckdiver1321

Overlander
I'm a little envious of your Fronty to be honest. Tough little bugger. That's precisely the combo I would buy, and your mods are very elegant. (can't wait to see more!) Great work, keep us posted!

P.S. Take off those running boards! :elkgrin:

Thanks! She's going to be one hell of a truck by the time I get finished building her! It never ceases to amaze me just how tough and capable this little truck is. The times I've wheeled with it, it's never let me down, and knowing it has Nissan's reliability makes me confident that it won't leave me broken down somewhere 30 miles from civilization.

I'm working on a solution to get rid of the running boards! Some rock sliders are in my future! :D

Sounds like a nice set up. Some people don't like steering stabilizers but the older wd21 pathfinders and d21 hardbody trucks came with them stock. I felt that it did help in the bumpsteer feeling I had running bigger load range E tires. The HD tierod ends are huge I put them on and the plan was to forget them, never have to worry about them again. You will notice the OME like to carry weight and the truck will handle well with a load, but the poly Energy Suspension bushings do get creaky and squeaky so lube them up will with that grease they give you.

That light bar is on my list of my to do mods also. Thanks for posting up how you wired it. BTW Congrats on the new pup scout. Aussy are such good dogs.

Actually this truck is the first thing I've ever owned that didn't have a steering stabilizer fitted. I want one badly, partially for the help with bump steer, and partially to reduce the wear on the steering components. I'm going to upgrade to HD TREs soon.

I greased the ever loving hell out of the bushings. I ended up going with the medium duty Dakars, since I felt that I wasn't going to be constantly loading this truck to overland capacity (it's my daily driver). The MD springs should give the lift I want and add about 250lbs of load capacity. Which is handy, seeing as how the RTT, rear bumper, and toolbox (with second battery) I'm planning to do on the truck will end up being around that much. Hopefully it will work out the way I'm planning.

Thanks for everything. And yeah, Scout is a great little guy. Such good manners. He enjoys riding in the back seat and being outside, so he's a perfect fit!
 

Forum statistics

Threads
185,919
Messages
2,879,675
Members
225,497
Latest member
WonaWarrior
Top