You are using an out of date browser. It may not display this or other websites correctly.
You should upgrade or use an alternative browser.
You should upgrade or use an alternative browser.
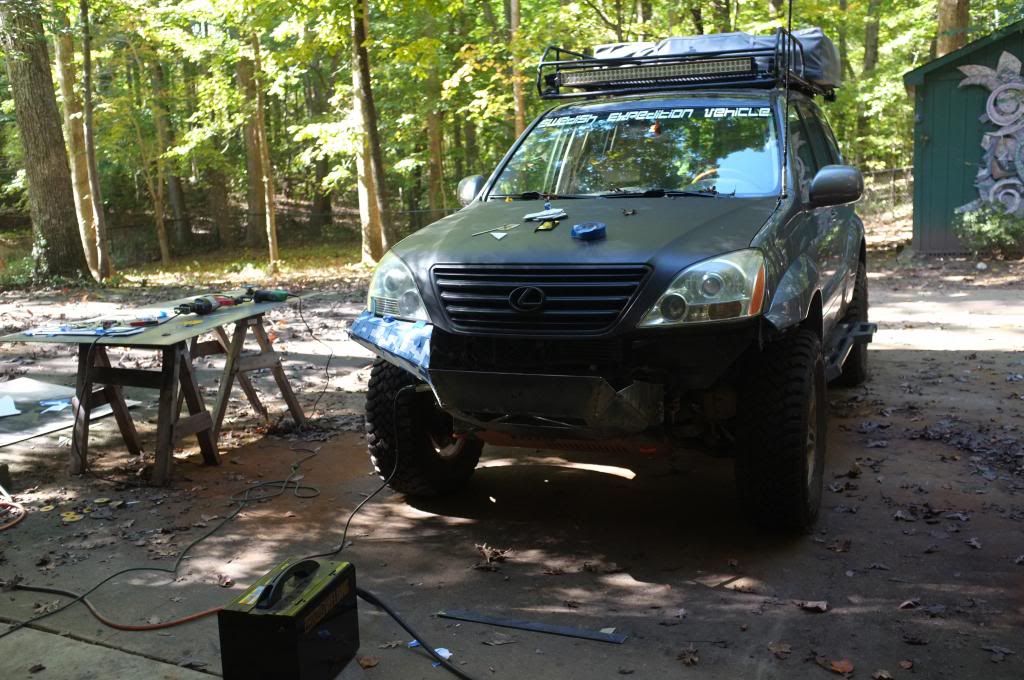
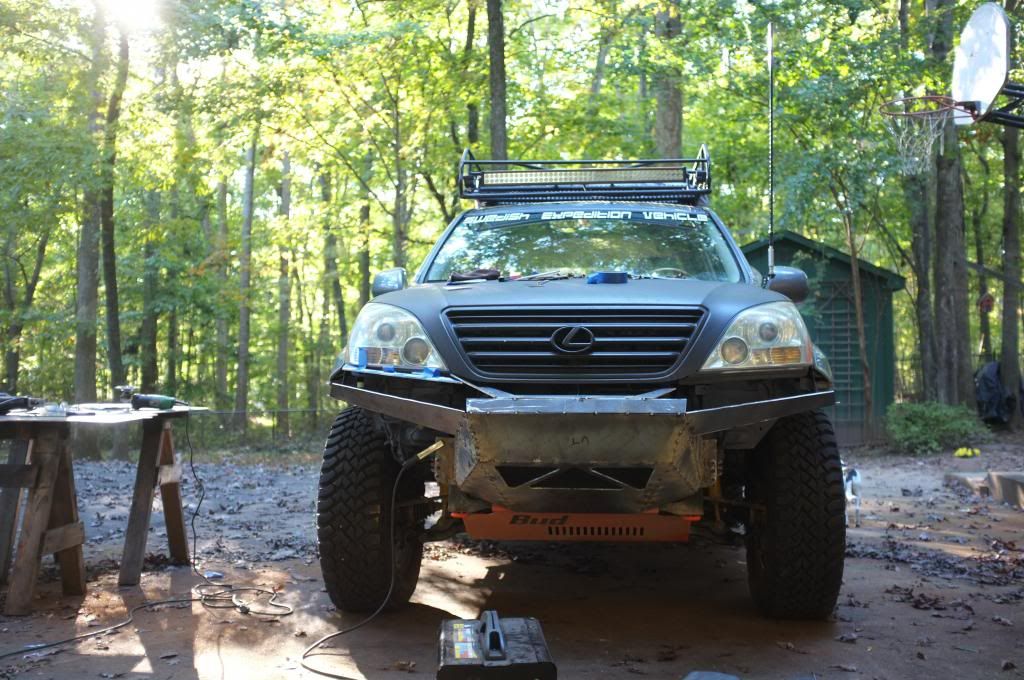
Front bumper build. Step by step guide...
- Thread starter boo471
- Start date
Wh1t3nukle
I gotz dis
Talking the same language is a win. ")
It's been about 5-6 years since dealing with hypermesh and nastran in terms of FE codes. NX and Pro/E are primary CAD codes with ANSYS WB and Classic being the core usage. If there is another code involved it typically means converting into our core and converting backout or starting with our core and converting back out for customer needs.
Again, excited to see this come about!
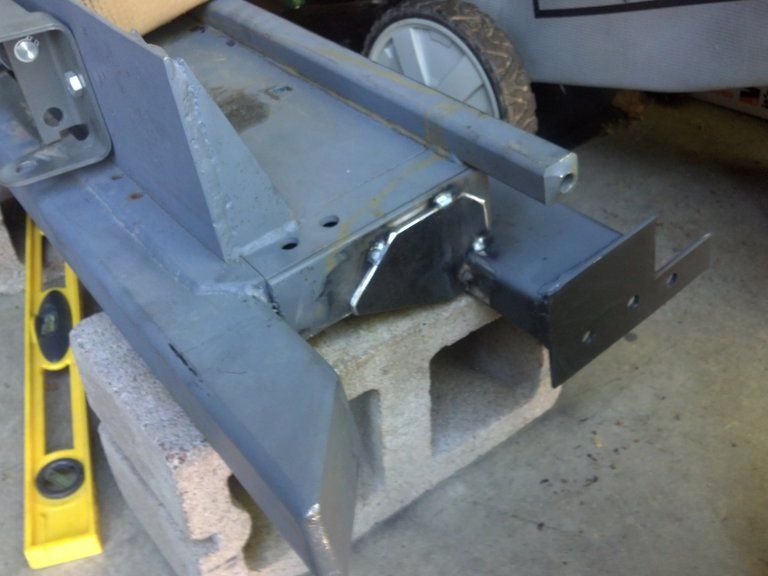
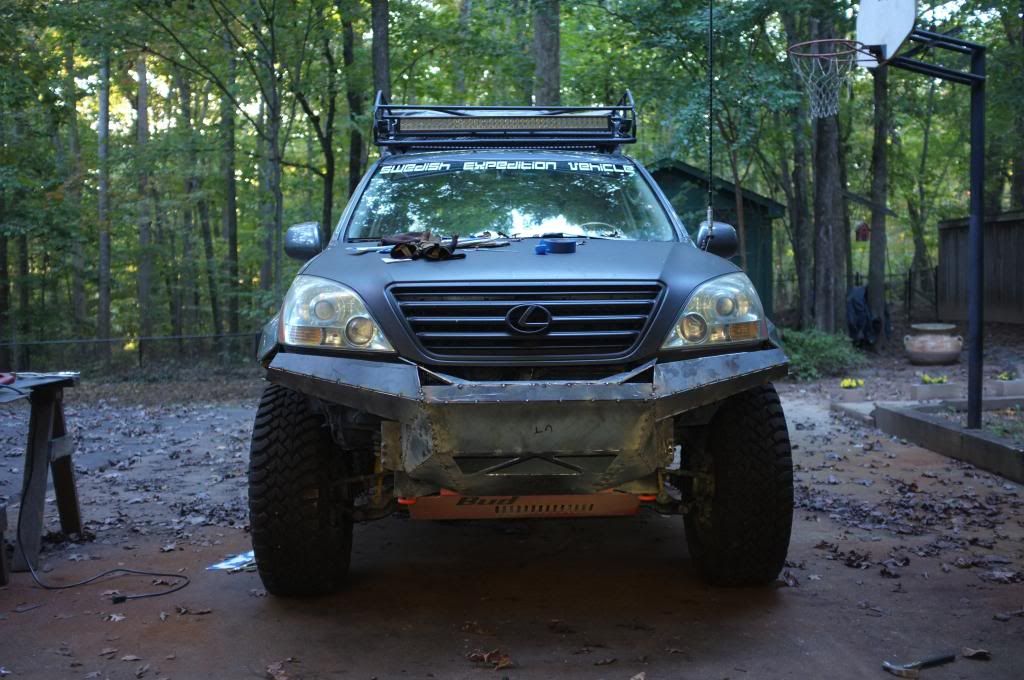
Here's my starting platform when I did mine. I was provided a winch plate (all boxed in) and desired still being able to remove the entire bumper. 2x4.25 square tube x-member with .25" plate to utilize factory mounting location.
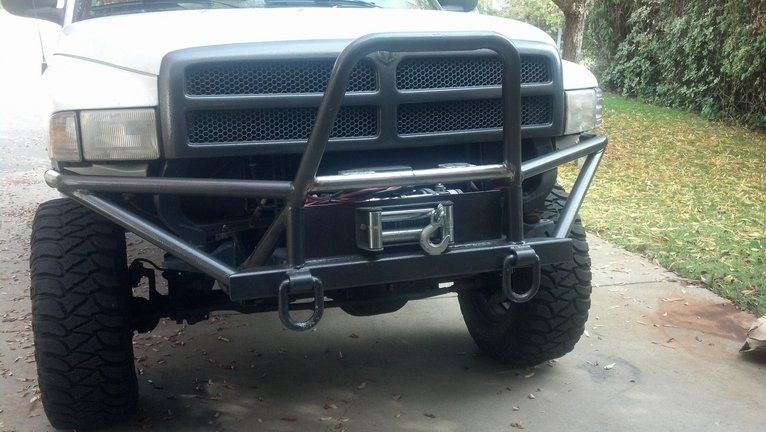
Pretty much done just before painting by the kids
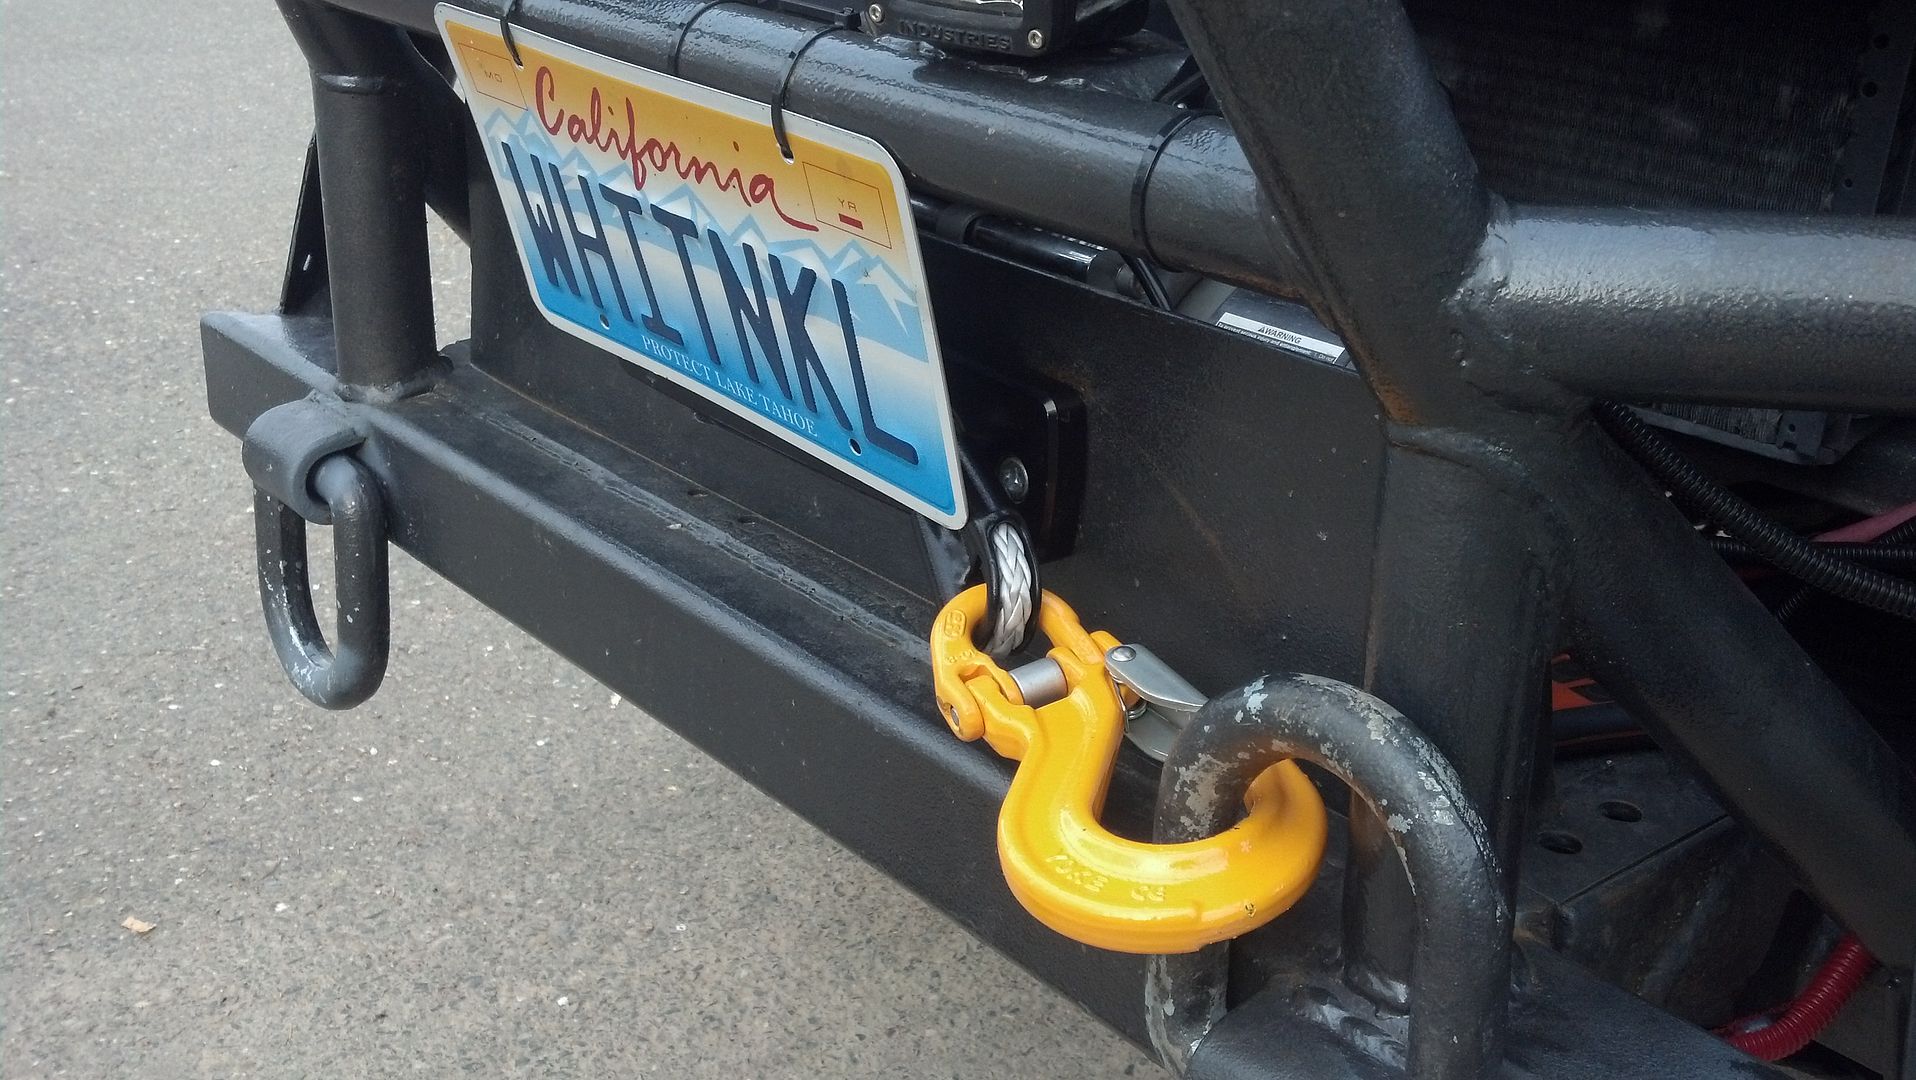
Changed out to MasterPull rope
It's been about 5-6 years since dealing with hypermesh and nastran in terms of FE codes. NX and Pro/E are primary CAD codes with ANSYS WB and Classic being the core usage. If there is another code involved it typically means converting into our core and converting backout or starting with our core and converting back out for customer needs.
Again, excited to see this come about!
Here's my starting platform when I did mine. I was provided a winch plate (all boxed in) and desired still being able to remove the entire bumper. 2x4.25 square tube x-member with .25" plate to utilize factory mounting location.
Pretty much done just before painting by the kids
Changed out to MasterPull rope
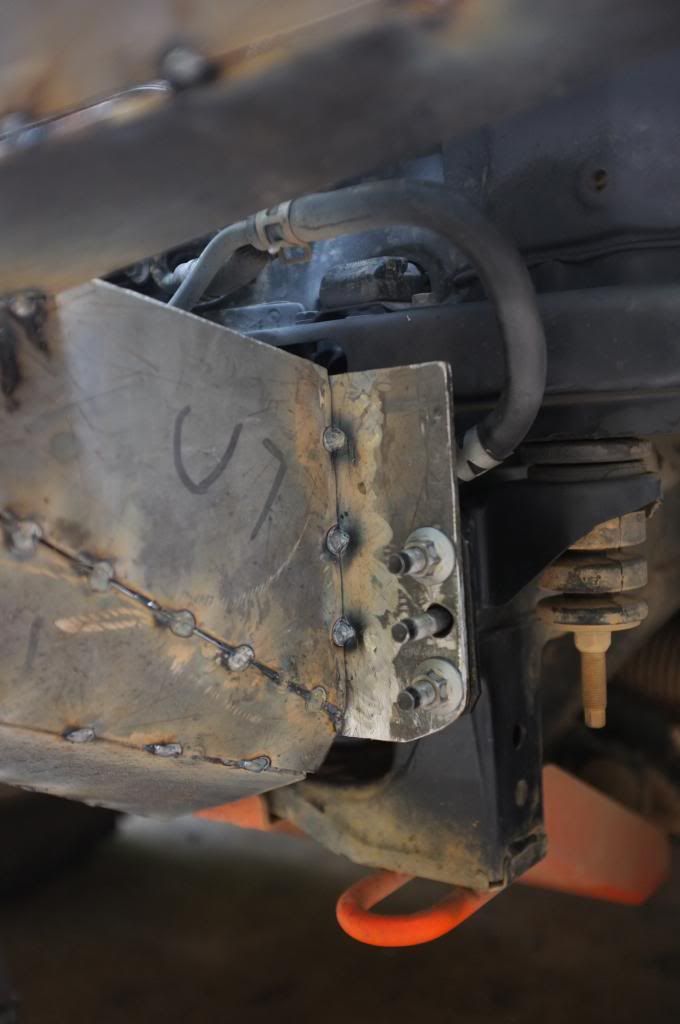
Thanks for the feedback. My rig is around 6.3k as is sits right now. I don't have the winch plate at the moment. I will build my own. And I will definitely box in the tow points with the winch plate, cross member and mounting plate.
The 1,75" tube will be integrated in all of these structures and should be sufficient for my needs one all the gussets are in place. I don't think it will act as a simple 1.75" tube on any point of its length. It will have a piece of steel sheet strengthening it at some point all the way.
Just curious. Do you have any experience with hypermesh, nastran or similar softwares? I'm in need for another FEA analyst to my office.
Sent from my iPhone using Tapatalk - now Free
boo471
Adventurer
Talking the same language is a win.
It's been about 5-6 years since dealing with hypermesh and nastran in terms of FE codes. NX and Pro/E are primary CAD codes with ANSYS WB and Classic being the core usage. If there is another code involved it typically means converting into our core and converting backout or starting with our core and converting back out for customer needs.
Again, excited to see this come about!
Here's my starting platform when I did mine. I was provided a winch plate (all boxed in) and desired still being able to remove the entire bumper. 2x4.25 square tube x-member with .25" plate to utilize factory mounting location.
Nice build! Thats a serious heavy duty bumper you got there! I will do some boxing on mine as well but probably not as heavy duty as yours is.
Cool, always fun to find another engineer to chat with.
boo471
Adventurer
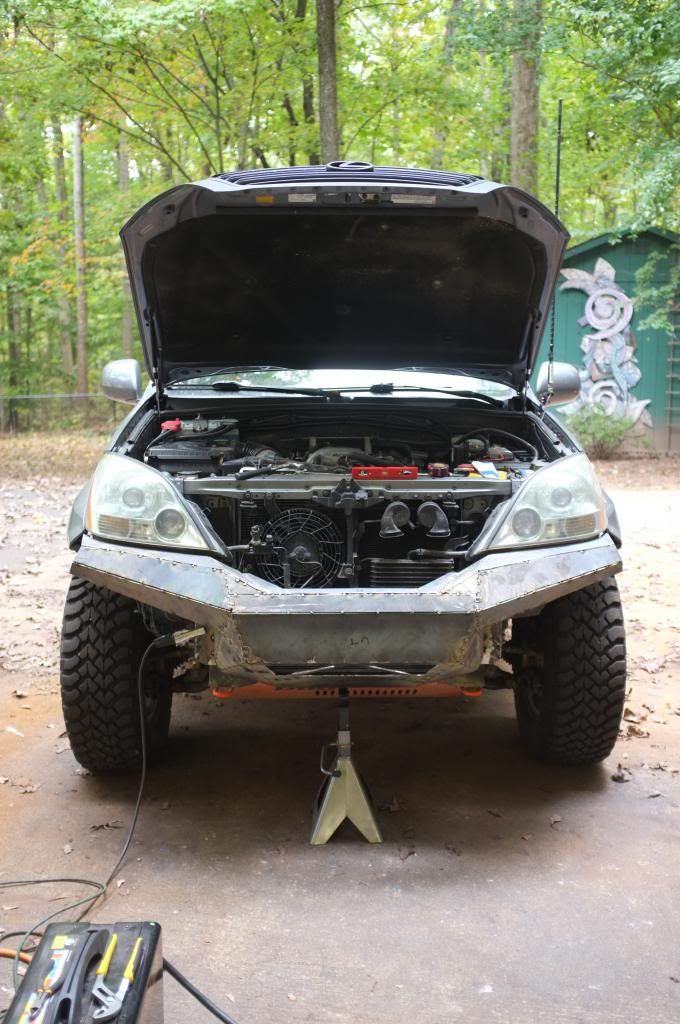
Front bumper build continues....
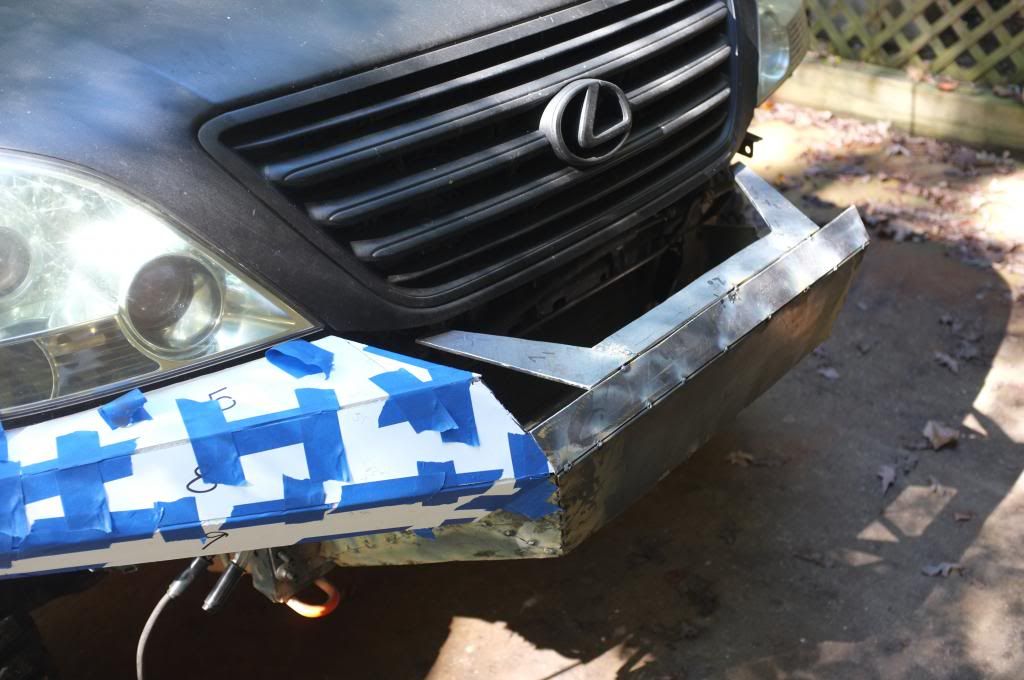
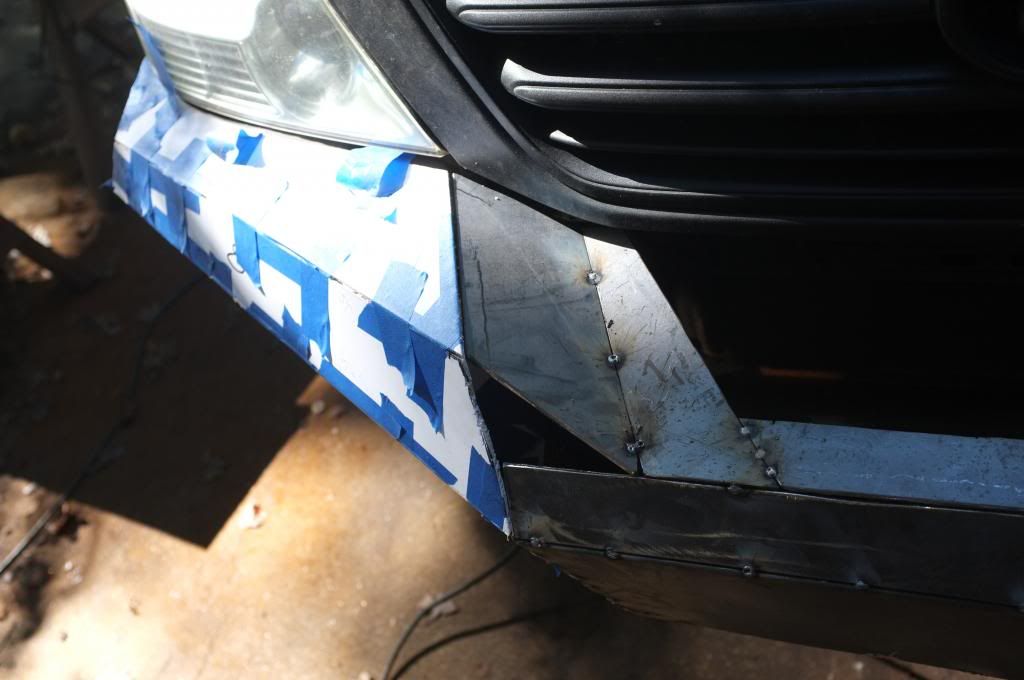
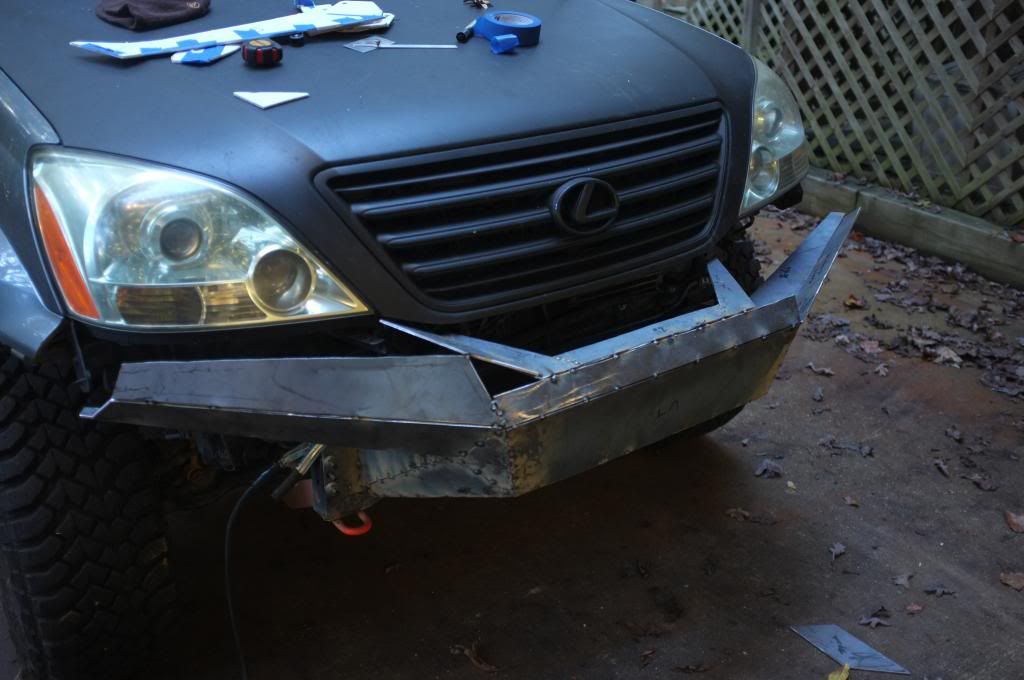
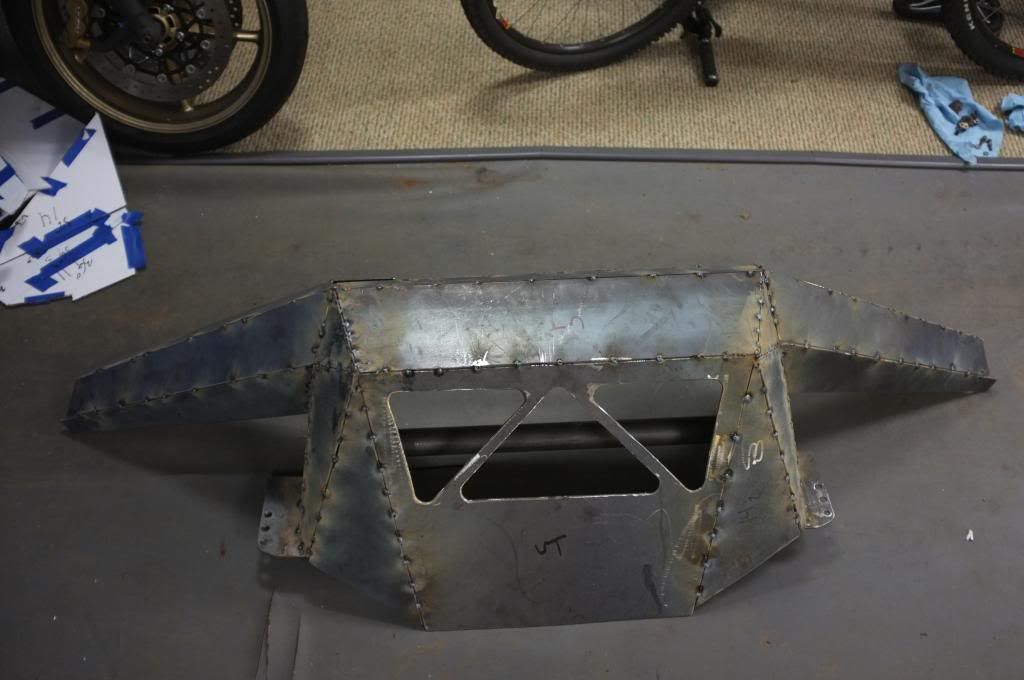
YEEEEES!!!! I was finally able to get a squared up bottom part of the bumper. It took me a couple of hours and some heavy beer drinking to get it right. But in the end it was worth it.
What I did in the end was to follow Wh1t3nukle's advice and tack weld the side plates. Add a "cross member" and work from there.
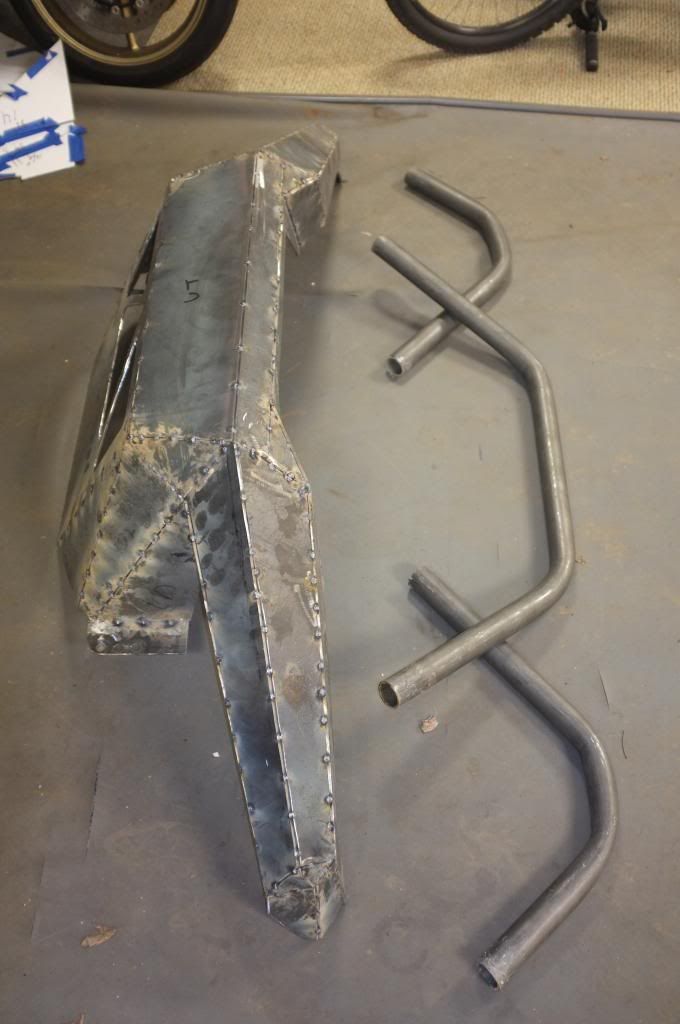
The first thing I did was to mount the mock up back on the truck and write down all the angles between all the different plates. That gave me a good baseline to work from. I tack welded the side plates. Added a tube on top of them ("cross member") and then positioned the center skid plate and tack welded it in place with the help of some tubes. From there I just added the pieces that was left and used the angles I had written down earlier.
Most of the plates are tack welded in place.

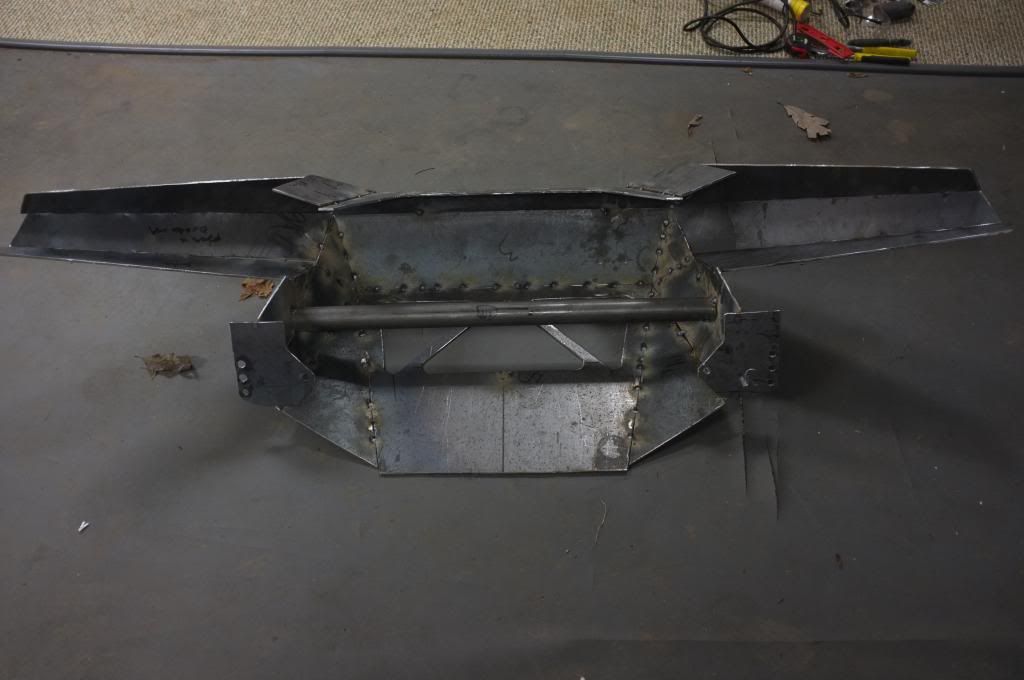
I added the front plates and some more welds and removed the temporary cross member.
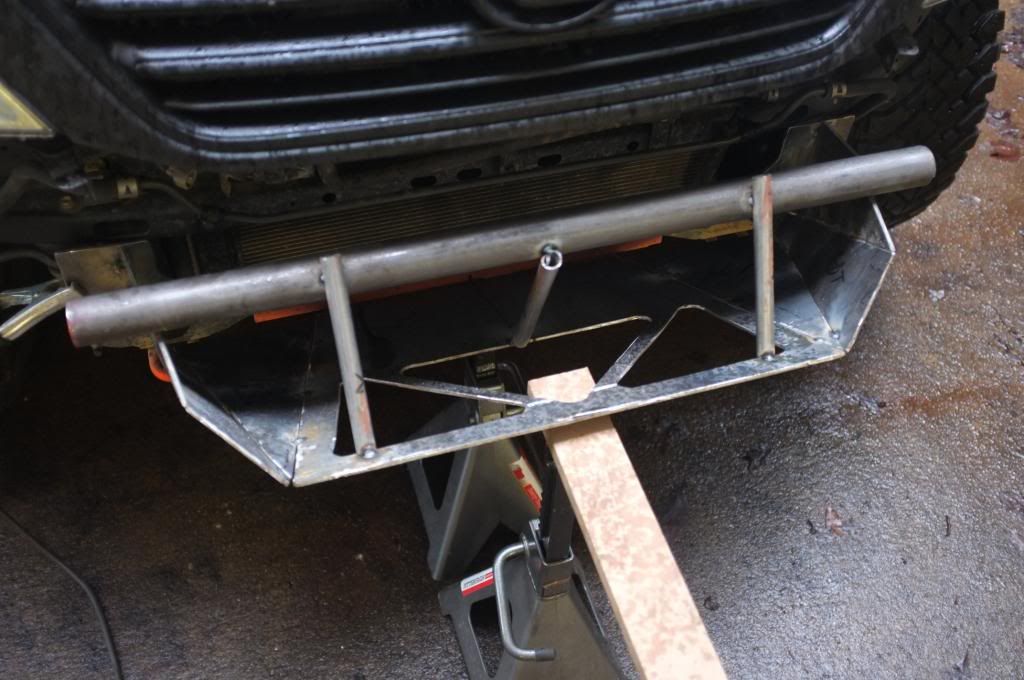
I cut the 1.75" tube to length and started playing with its position. I might move it around some but for now I will keep it there to keep things straight. This was the end result for this afternoon. Hopefully I get some time to work on it tomorrow as well and can start boxing in the crossmember and add a winch plate.

//Marten
YEEEEES!!!! I was finally able to get a squared up bottom part of the bumper. It took me a couple of hours and some heavy beer drinking to get it right. But in the end it was worth it.
What I did in the end was to follow Wh1t3nukle's advice and tack weld the side plates. Add a "cross member" and work from there.
The first thing I did was to mount the mock up back on the truck and write down all the angles between all the different plates. That gave me a good baseline to work from. I tack welded the side plates. Added a tube on top of them ("cross member") and then positioned the center skid plate and tack welded it in place with the help of some tubes. From there I just added the pieces that was left and used the angles I had written down earlier.
Most of the plates are tack welded in place.
I added the front plates and some more welds and removed the temporary cross member.
I cut the 1.75" tube to length and started playing with its position. I might move it around some but for now I will keep it there to keep things straight. This was the end result for this afternoon. Hopefully I get some time to work on it tomorrow as well and can start boxing in the crossmember and add a winch plate.
//Marten
Last edited:
Wh1t3nukle
I gotz dis
@boo -- nicely done! also, don't let anyone tell you flux core sux. If you know how to do it, as with anything, then you got it. You have way more patience then me with all that plate. Just ensure you have some good jigging setup to thwart movement/warping/etc. when throwing down the long beads.
It looks really good and I further applaud you with the jack stand shimming! Funny what we do in our drive ways to get it set! hahahhaha
@4x4woody -- you made it!
It looks really good and I further applaud you with the jack stand shimming! Funny what we do in our drive ways to get it set! hahahhaha
@4x4woody -- you made it!
boo471
Adventurer
Front bumper build continues...
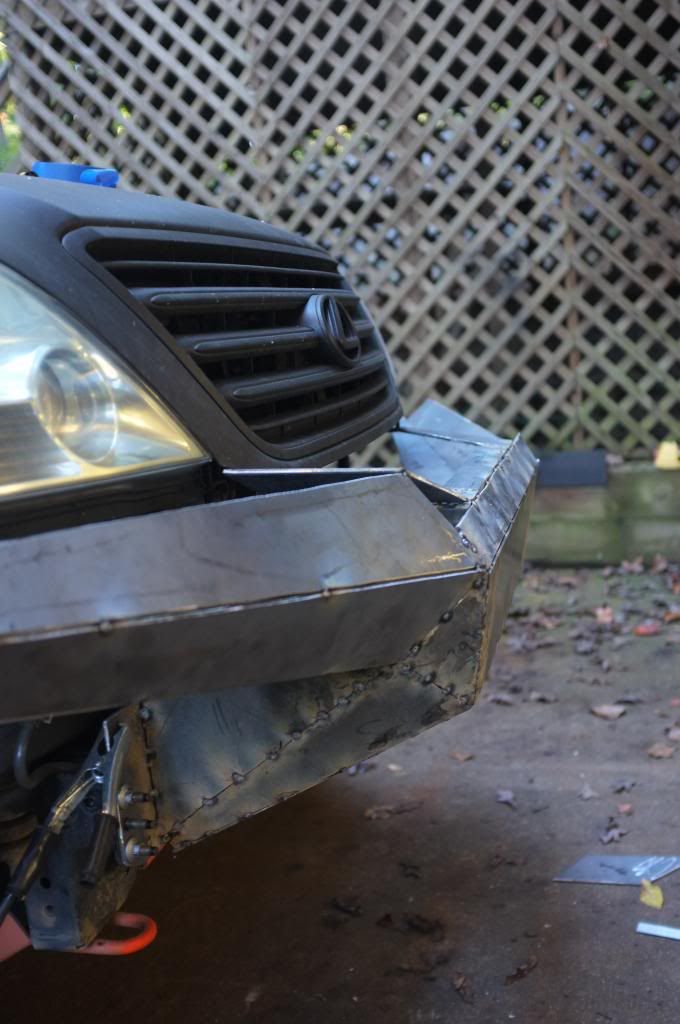
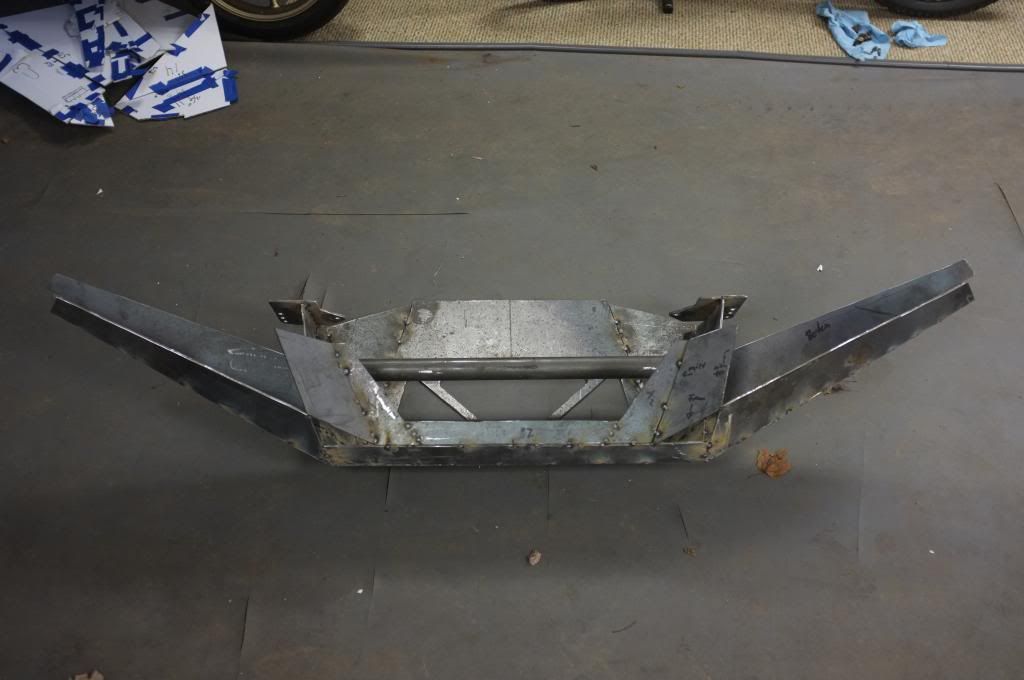
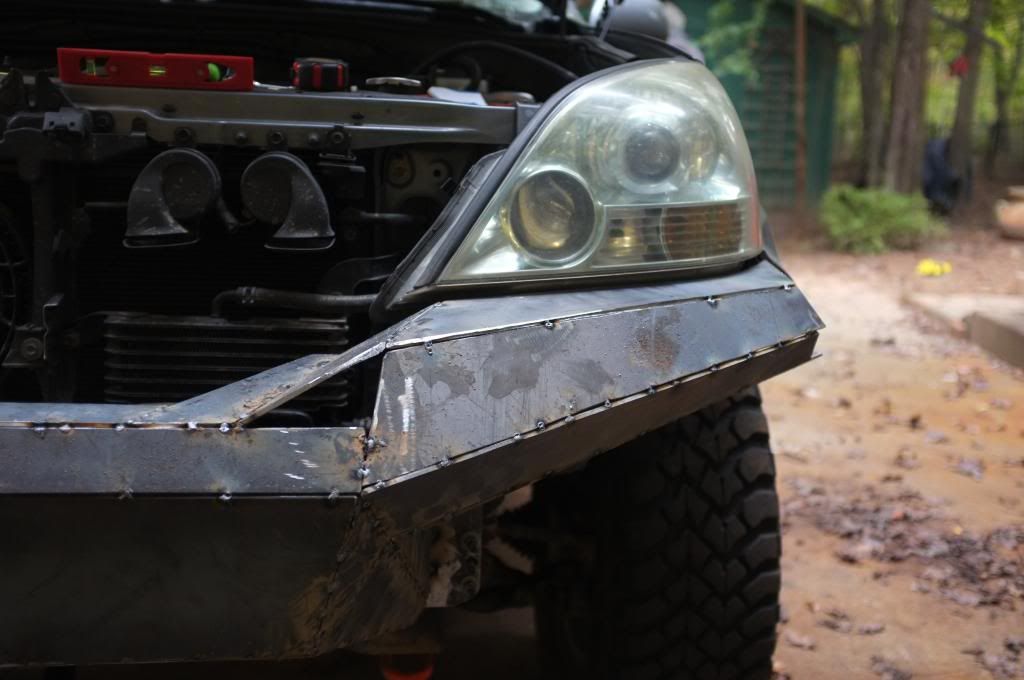
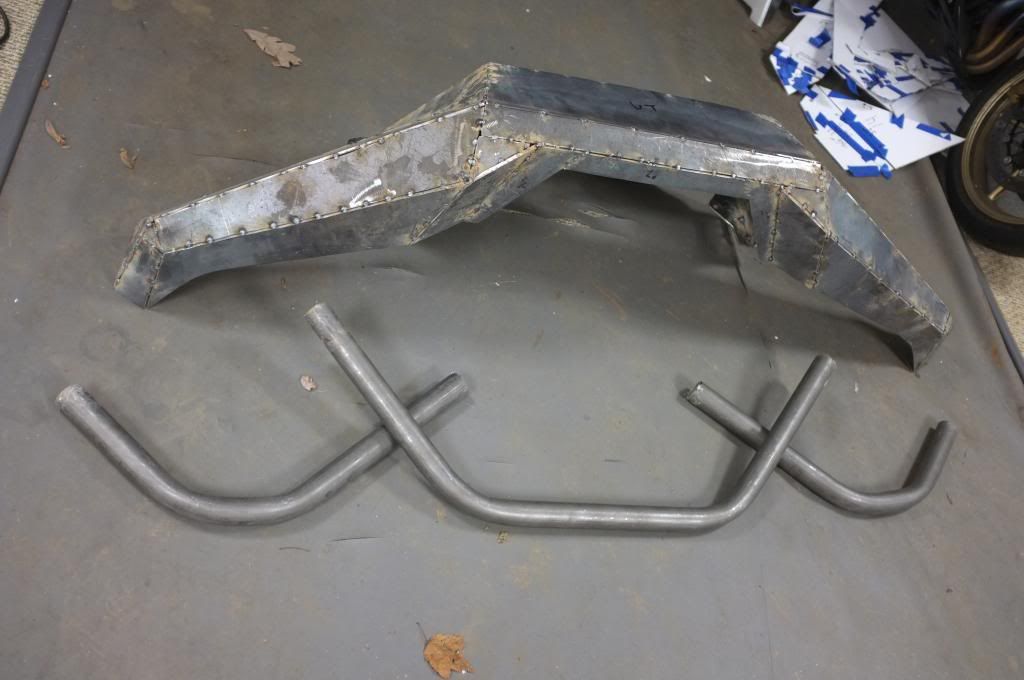
My Sunday was spent on the drive way (go figure). I decided to finish up the plating before I start boxing process. This way its easier to see where I need to add more strength to the design.
Progress is a lot quicker now when I have a straight bottom "box" to work from. I did notice that the body is not perfectly lined up with the frame. If I make both side with perfect symmetry there will be a deviation and wont look to good if you compare the left and right sides. So some tweaking is necessary to get it to look good. I also need to do some fine tuning on where the bumper mounts to the mounting plate. These side plates don't have a perfect symmetry so I will look in to this shortly as well.
Here is the progress so far.
I added the mock up back on to use as a template
Then I continued to add pieces to the bumper
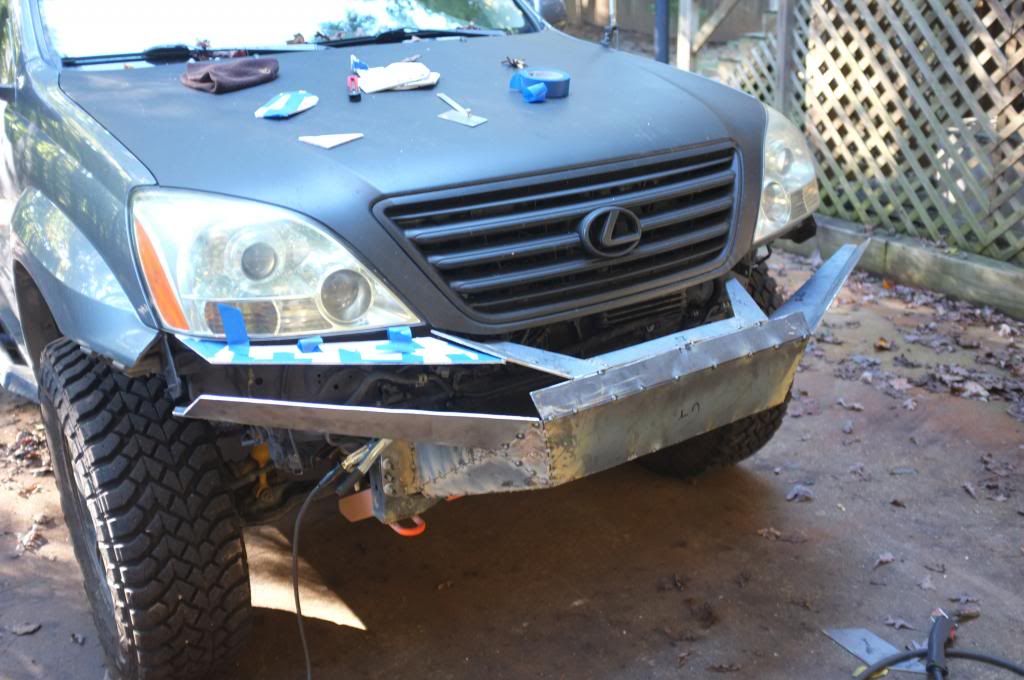
This is what it looked like after a hard days work.
To be continued....
//Marten
My Sunday was spent on the drive way (go figure). I decided to finish up the plating before I start boxing process. This way its easier to see where I need to add more strength to the design.
Progress is a lot quicker now when I have a straight bottom "box" to work from. I did notice that the body is not perfectly lined up with the frame. If I make both side with perfect symmetry there will be a deviation and wont look to good if you compare the left and right sides. So some tweaking is necessary to get it to look good. I also need to do some fine tuning on where the bumper mounts to the mounting plate. These side plates don't have a perfect symmetry so I will look in to this shortly as well.
Here is the progress so far.
I added the mock up back on to use as a template
Then I continued to add pieces to the bumper
This is what it looked like after a hard days work.
To be continued....
//Marten
boo471
Adventurer
Nice Lexus bumper. Who did the fab on the Jeep? That guy is good. Bty the clevis mounts are from Ruffstuff.
@4x4woody -- you made it!
LOL, @4x4woody I like your humble style
@boo -- nicely done! also, don't let anyone tell you flux core sux. If you know how to do it, as with anything, then you got it. You have way more patience then me with all that plate. Just ensure you have some good jigging setup to thwart movement/warping/etc. when throwing down the long beads.
It looks really good and I further applaud you with the jack stand shimming! Funny what we do in our drive ways to get it set! hahahhaha
Flux might be a little more sloppy, but it works just fine for my needs. If I was to do some body work on thin sheet metal. Then gas might be something to look at. But for this kind of work flux works fine. Not as easy to weld but I don't mind the challenge.
Yeah, warping is something that I am causes about. Since there will be looooooong beads on this bumper. I will try and brace it enough before doing them and also do one bead on the left side. Then move over and do the same one on the right side to keep it moving in symmetry. I'll also use my ruler to measure the warping and pick my weld order smartly.
Thanks for kind words and for the feedback.
//Marten
pappawheely
Autonomous4X4
I used to design fixtures for robotic welding cells. As the weld cools it contracts, pulling the metal. No fixture will prevent the part from from moving or springing completely. You need braces and a planned sequence of welds that will pull the part the same on both sides. The more tacks you put in place and let cool before the final weld, the better chance you have that the part will stay true.
boo471
Adventurer
I used to design fixtures for robotic welding cells. As the weld cools it contracts, pulling the metal. No fixture will prevent the part from from moving or springing completely. You need braces and a planned sequence of welds that will pull the part the same on both sides. The more tacks you put in place and let cool before the final weld, the better chance you have that the part will stay true.
Thanks for the feedback. Yeah hopefully I have tack welded it enough before I do the full length beads. I will also make sure I do one bead on one side, and then do the same bead on the other side to make sure I have a similar movement on both sides.
boo471
Adventurer
Awesome thread, I cannot WAIT to get out of my apartment and into a place with a garage so I can learn to weld and start making my own stuff!
Just do it!
//Marten
Stitebunny
Adventurer
Nice job man! That is a lot of work, and it's looking great!!
boo471
Adventurer
Thanks for posting all the pictures. I always love watching something amazing coming from seemingly nothing.
Sent from my SCH-S720C using Tapatalk 2
Nice job man! That is a lot of work, and it's looking great!!
Thanks Gents!
boo471
Adventurer
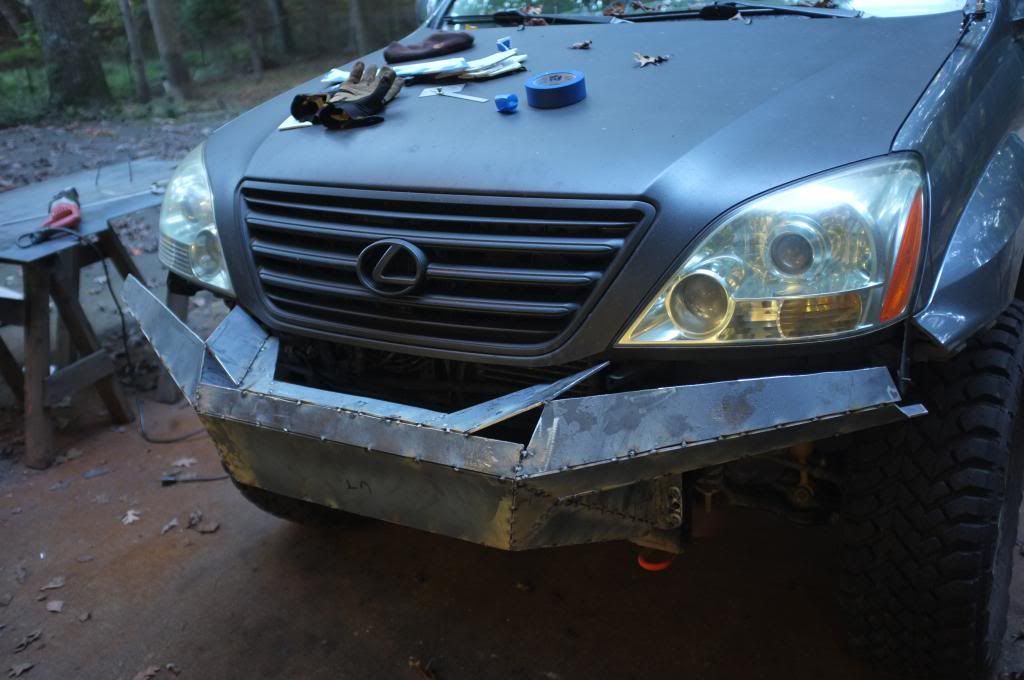
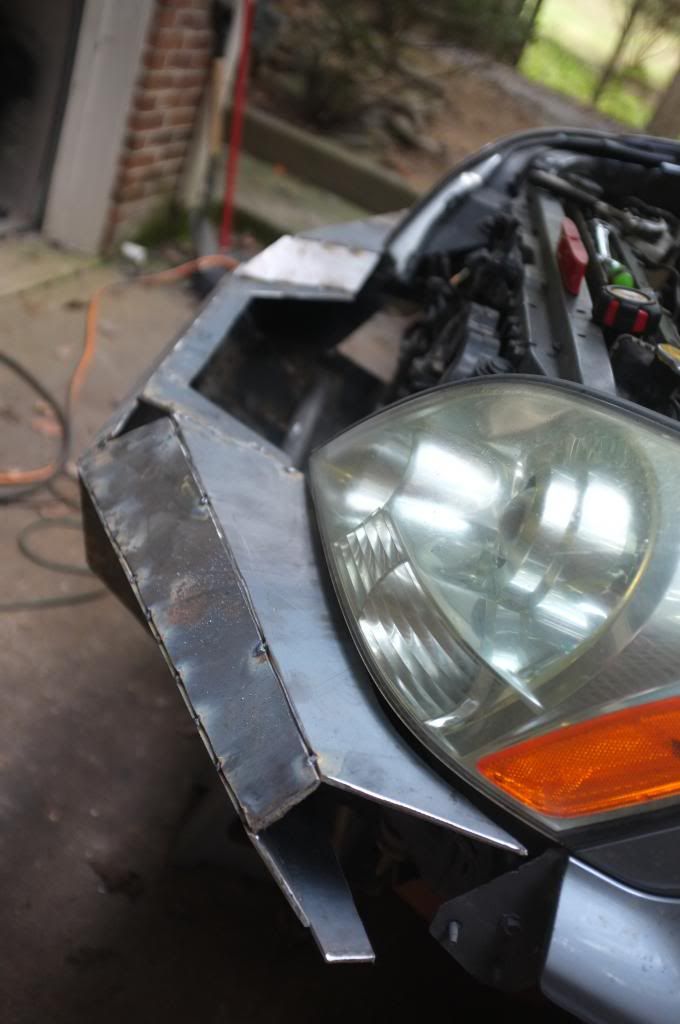
Front bumper build update.
I continued to work on the front bumper last night. I got some much appreciated help from my friend Dorton . But that also meant I forgot to take pictures. So there is not many pictures for this post.
What I did yesterday was to Cut away the bumper from the mounting plates to line it up properly. Then I finish all the the metal plating for the bumper. So now it actually looks like a bumper. It was easier and easier the further you got on the build. The hardest part with this build was creating a square straight box to use as a base.
I also bent the hoop and the tubes going around the head lights. I wanted this done so I know where the tubes will fit on the bumper before I start doing reinforcements on the bumper.
Bending the tubes was done with a simple Harbor Freight Tools pipe bender. I took a 1.75"x.120 DOM tube. Taped one end with duck tape. Then filled it with water. After that I filled it up with sand and taped the other end. This is done to minimize have the tube flatten out while bending it. Then I just went at it and started bending. Work pretty well. The tube flatten out some anyways But not to bad and no tube's cracked like they have done for me before.
Bumper cut away and refitted to the mounting plate in a centered position.
Continued with the plating
Then I bent the tubes. This is the hoop that will hold my 2 9" HIDs.
And here is the end result of the day.
More to come soon....
Forum statistics
Members online
- jwhites82
- gildigger
- dcanzalone
- dizzydom
- fattycharged
- mistermustard
- robbob10
- mark5280
- DT75FLH
- fadagnes
- Raspy
- Danny_D
- TexasSixSeven
- chrispxj
- DTAdventure
- aoel11
- BlackDogTravelers
- Silverback3
- d110pickup
- MarDan518
- Freeze Plug
- Teardropper
- EpicPlanet
- Gravelette
- aknightinak
- ToExplr
- 67unimog
- Ties
- LostJ8
- Uncle Jeffy
- hbabler
- Outono
- Diamond Jim
Total: 2,843 (members: 37, guests: 2,806)