You are using an out of date browser. It may not display this or other websites correctly.
You should upgrade or use an alternative browser.
You should upgrade or use an alternative browser.
2003 Mitsubushi FG Overland Camper Renovation
- Thread starter PaulJensen
- Start date

rffarm
New member
How are you fastening cabinets, seats, etc., to the walls? Are there internal wall studs on the Unicell box? Some of your fastenings are to a sub-floor. Again, are there joists to secure to?
Can you describe, or send pictures, of the mounting of the Unicell box to the Fuso chassis, please? Very interested to see if it's on a flexible spring mount.
Finally, what's the plan for the linoleum floor?
Can you describe, or send pictures, of the mounting of the Unicell box to the Fuso chassis, please? Very interested to see if it's on a flexible spring mount.
Finally, what's the plan for the linoleum floor?
PaulJensen
Custom Builder
How are you fastening cabinets, seats, etc., to the walls? etc...
Finally, what's the plan for the linoleum floor?
Hi rffarm...
Luckily the Unicell cabin is sheathed in solid plywood over the foam...Super solid... Screws anywhere that seems right... Adhesives when there is a question... The subfloor is 2x6 T&G solid lumber...
I haven't looked much at how the box attaches to the frame, but I'll post some pictures ...
The plan for the floor is something corky...
Stay tuned...
PaulJensen
Custom Builder
29
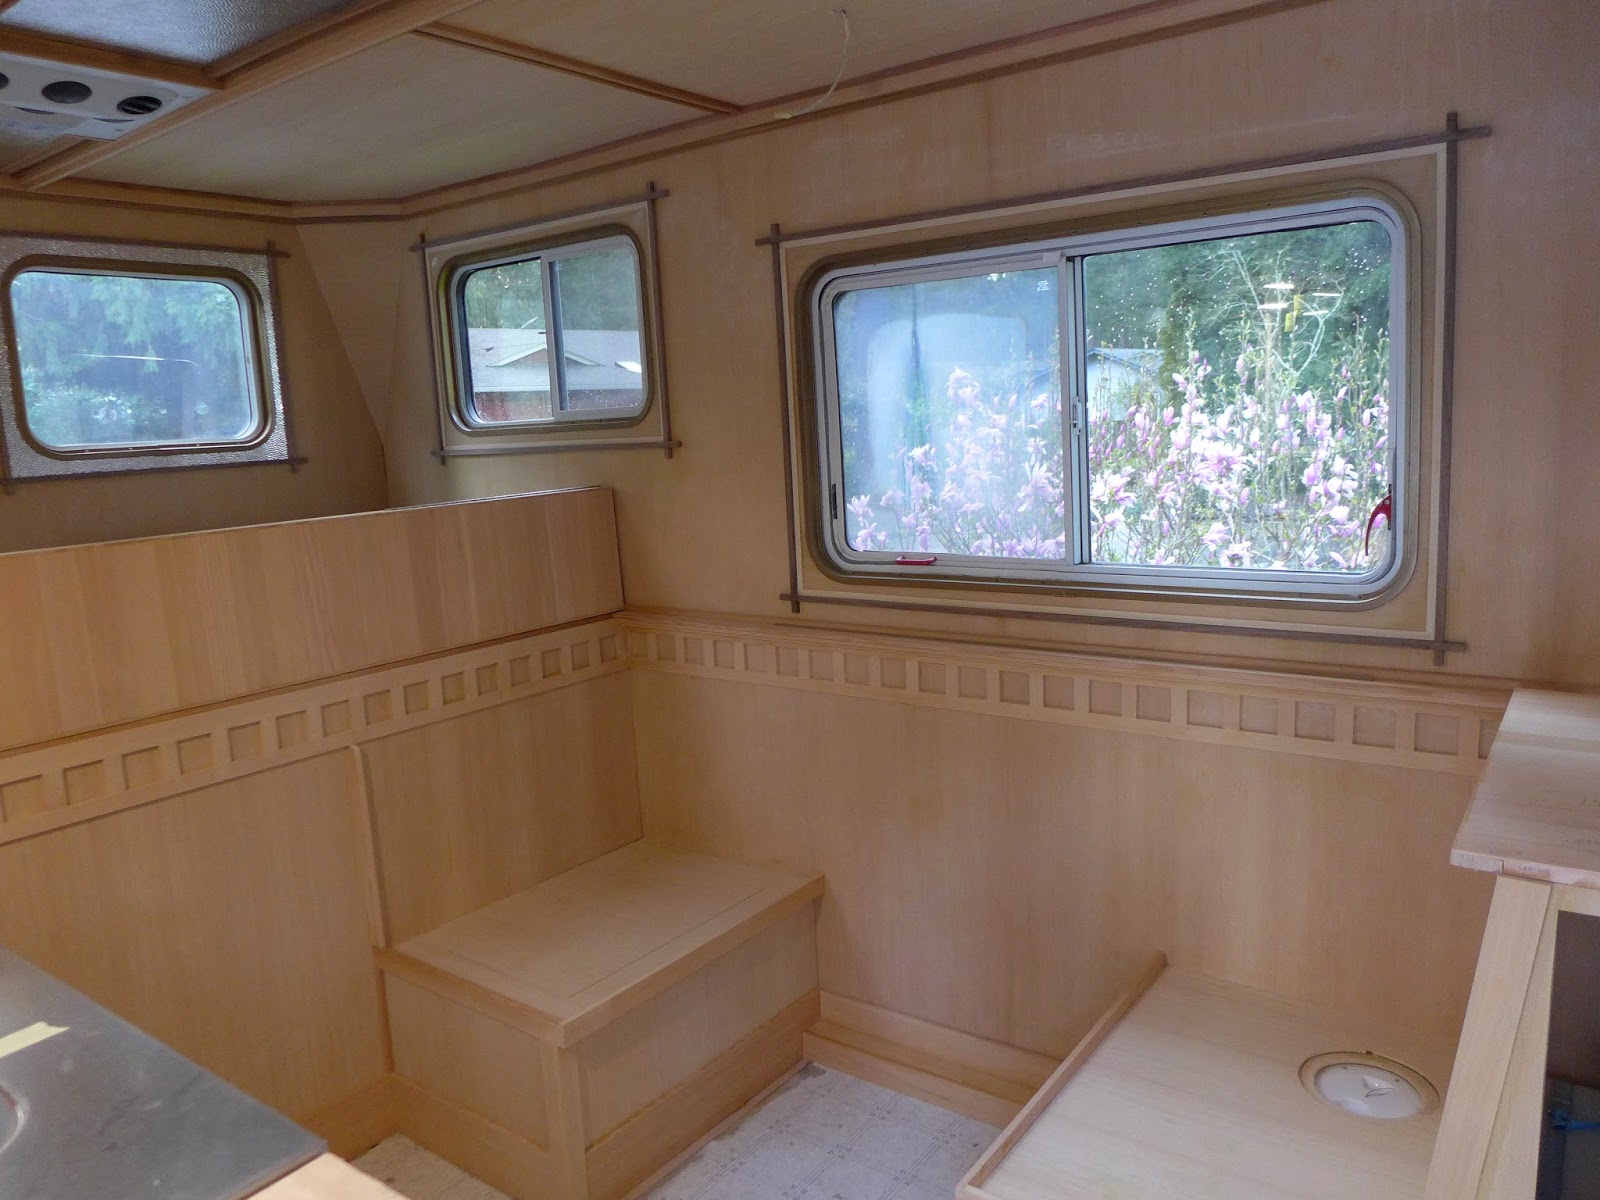
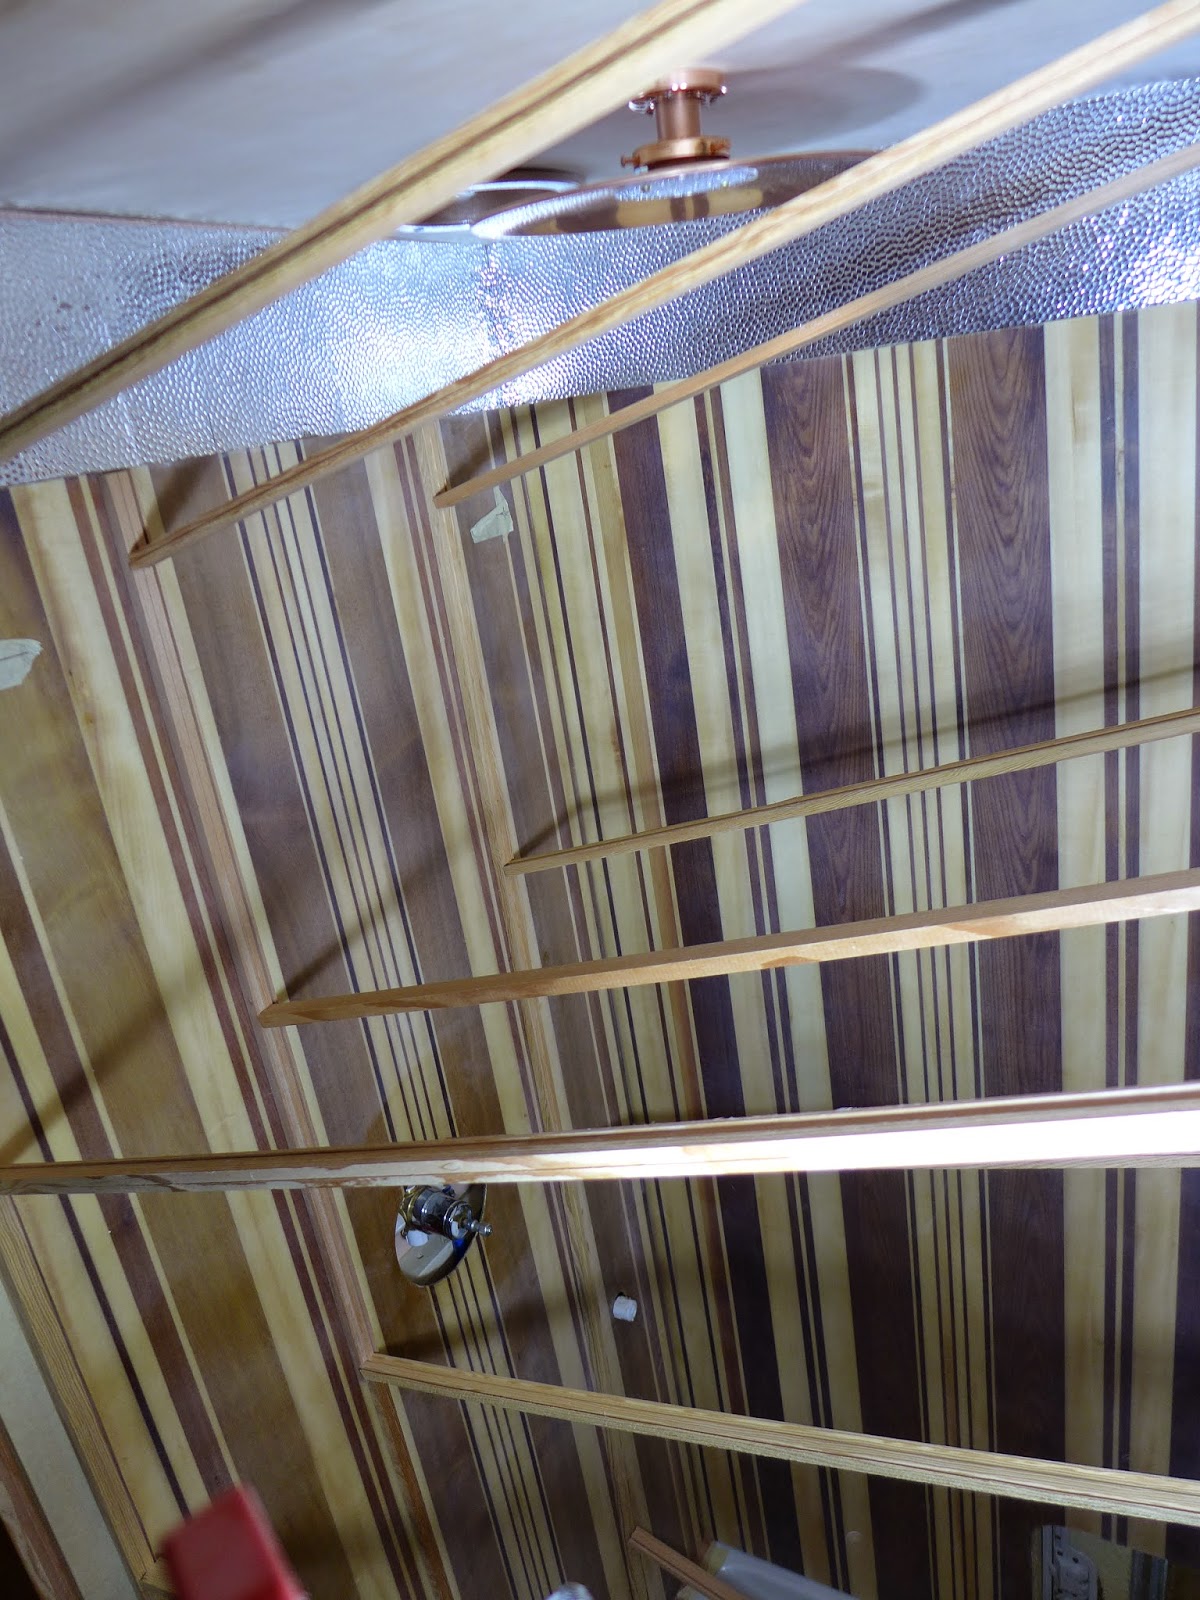
(above) The trim work in the cabin has been ongoing since I last posted... Having so much free, clear VGDF has been a blessing... No cost means I can do whatever I want... I like that feeling...
(above) Getting closer to the finish line...
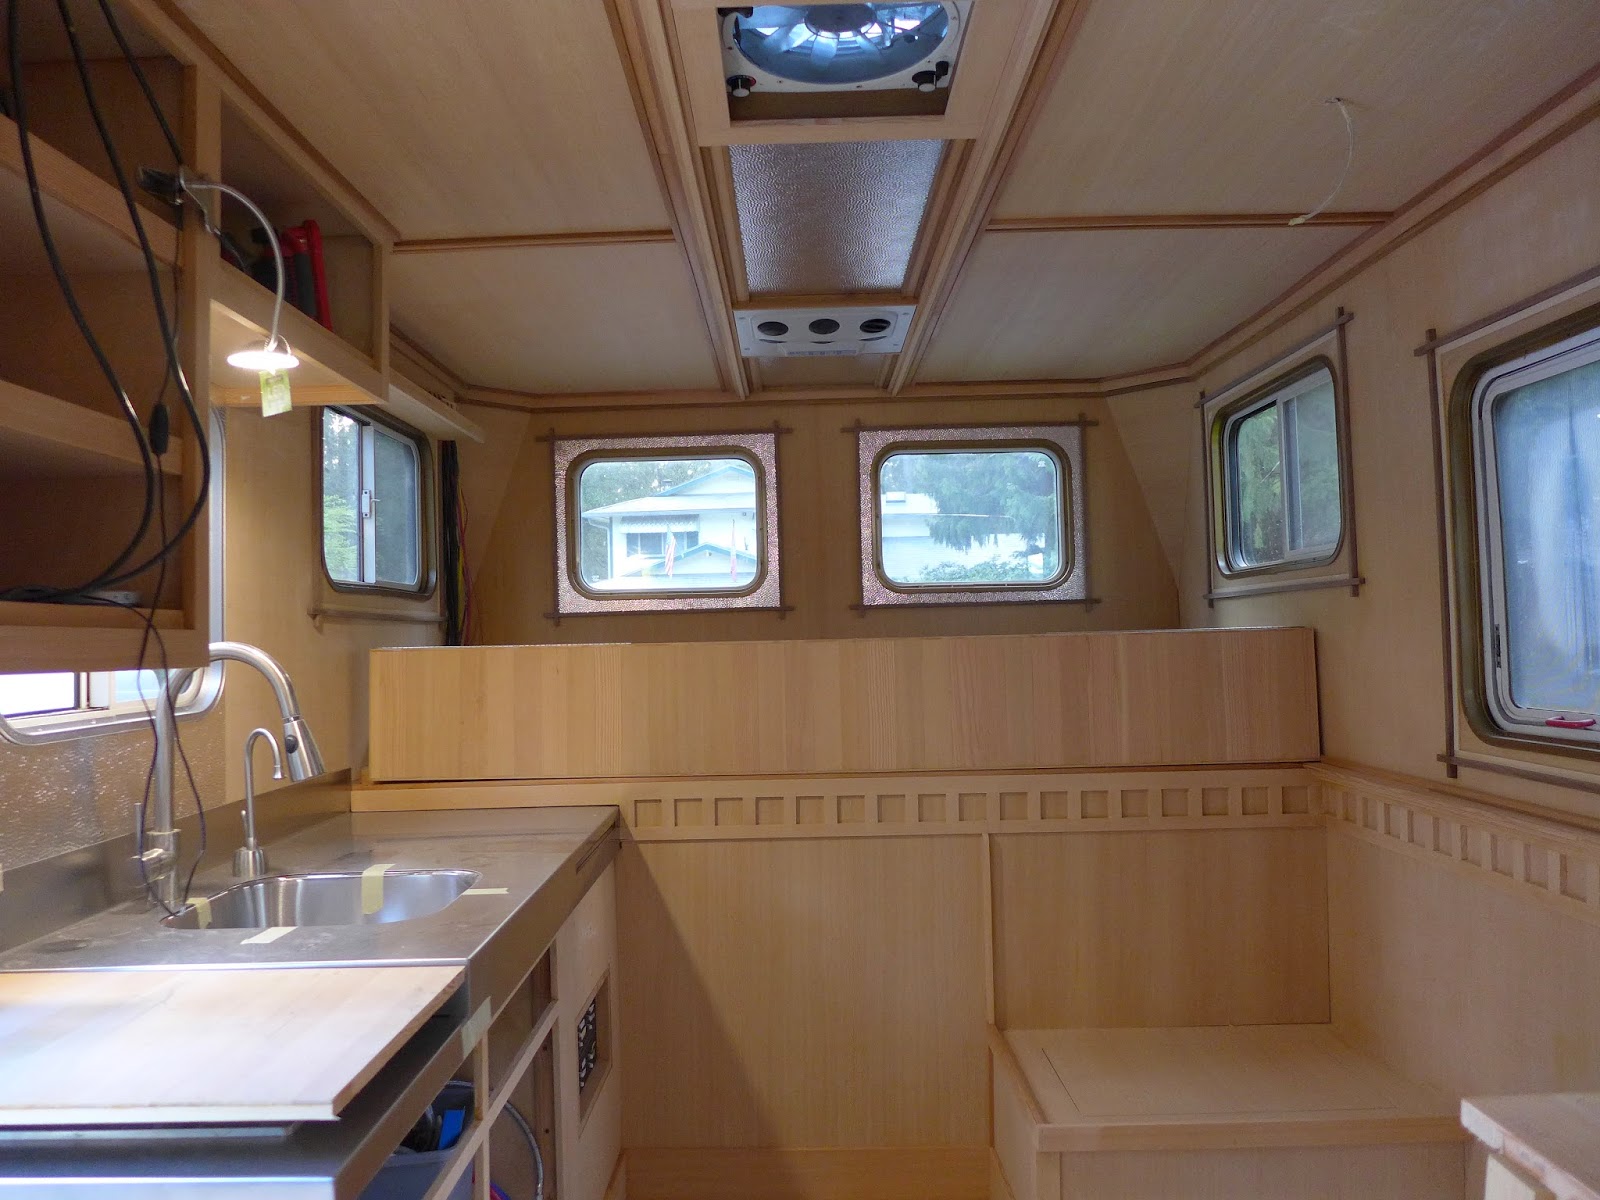
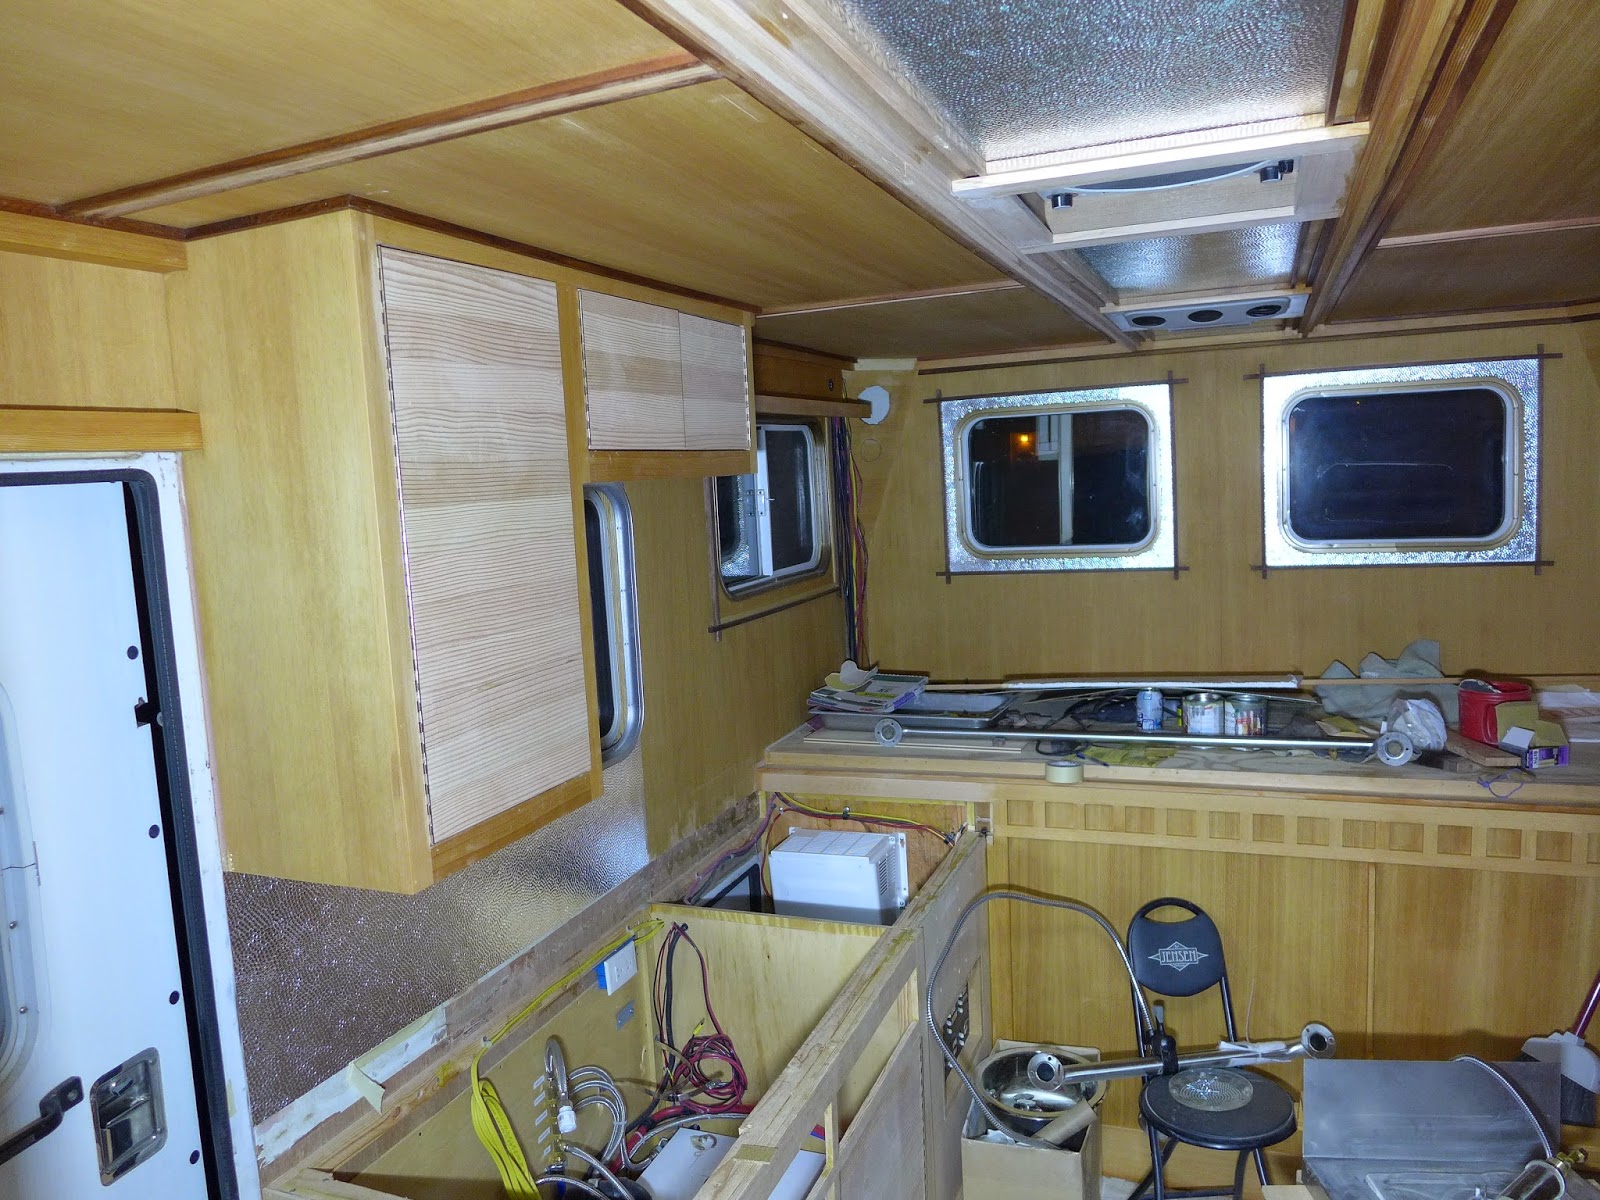
(above) Kitchen side looks like this...
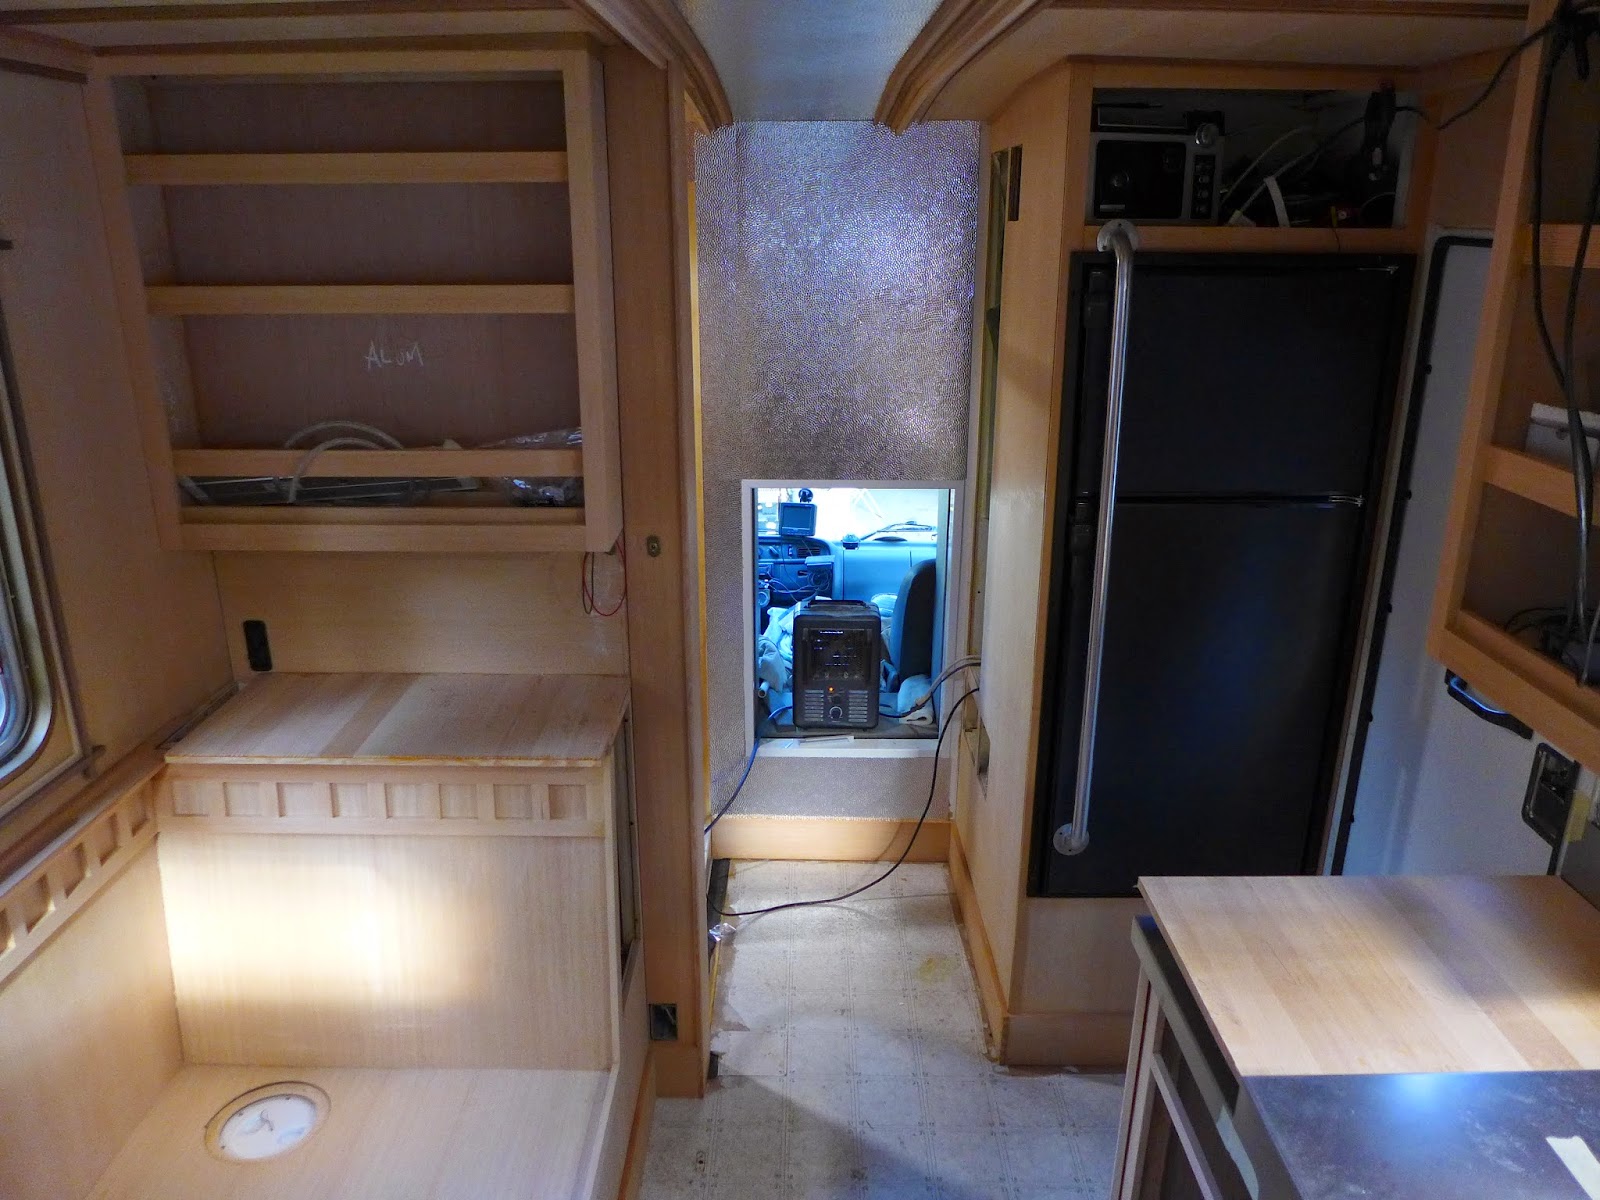
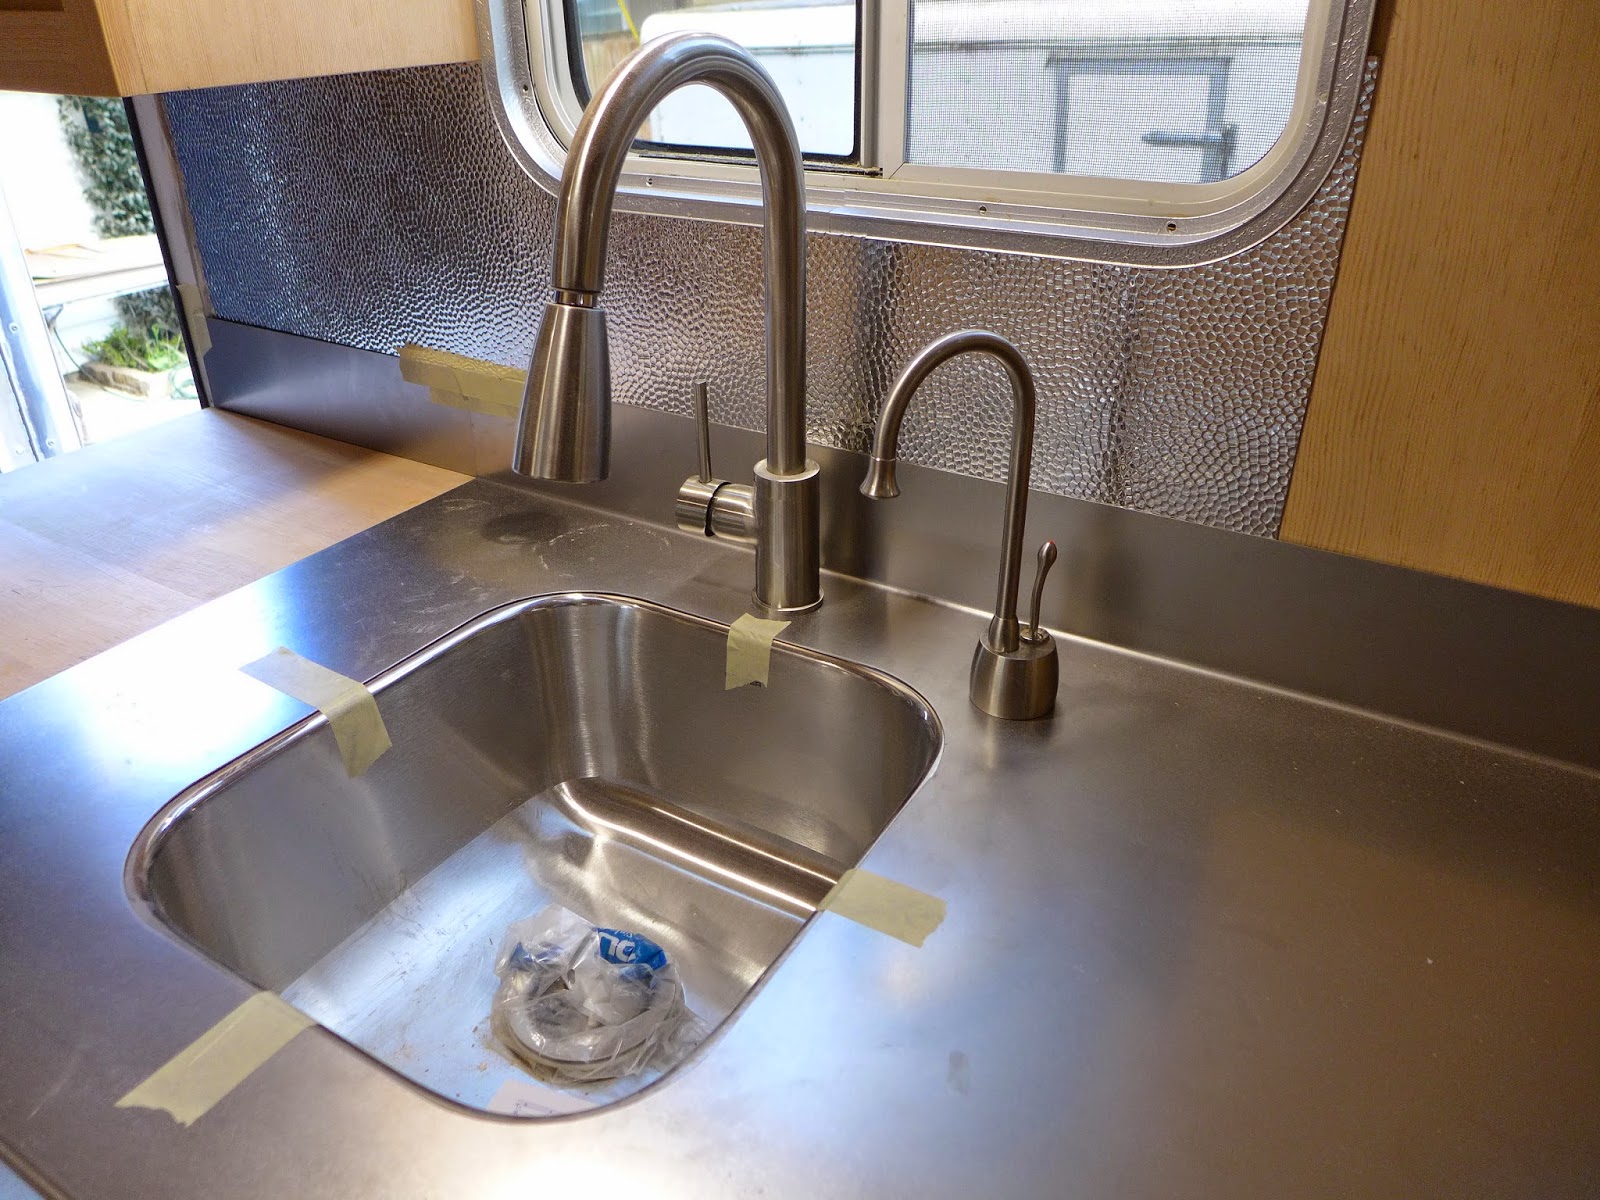
(above) Back near the shower, the walls are also hammered aluminum... Waterproof, reflective and it ties together the other aluminum accents... The pass through will have a vertically sliding door hammered aluminum door to secure the cabin from the cab...
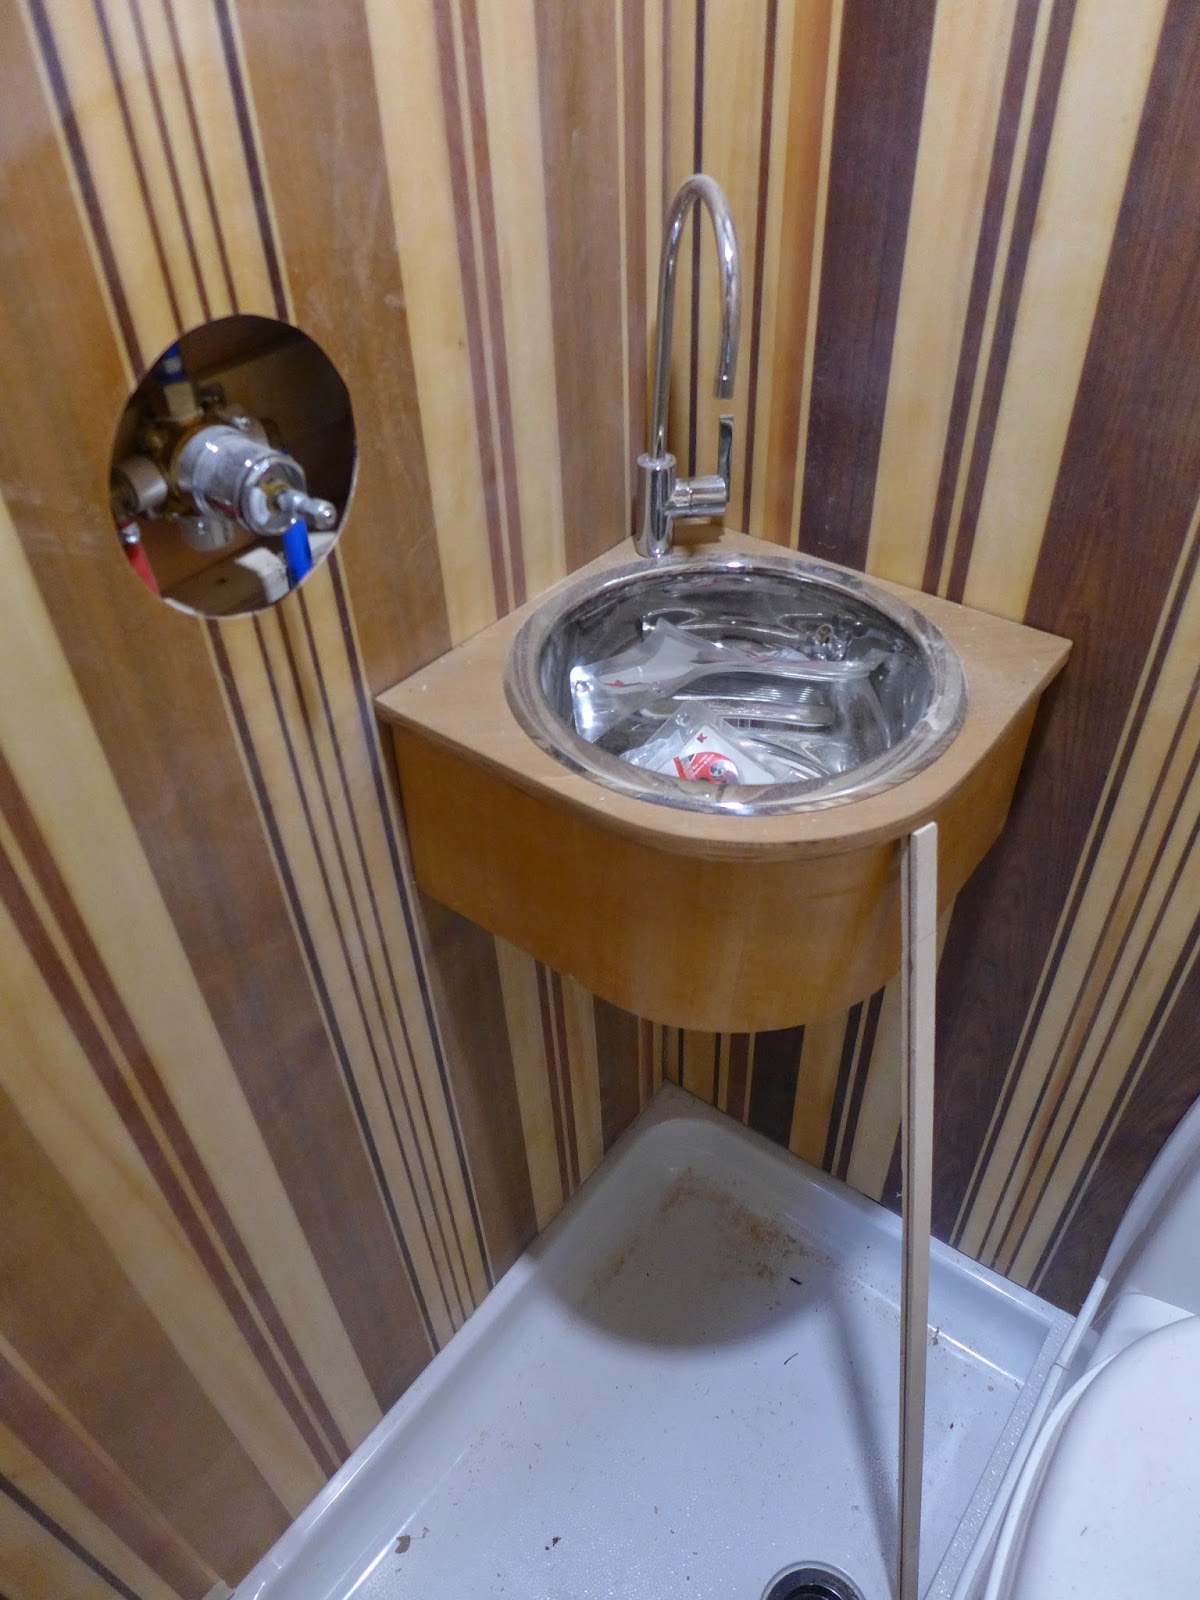
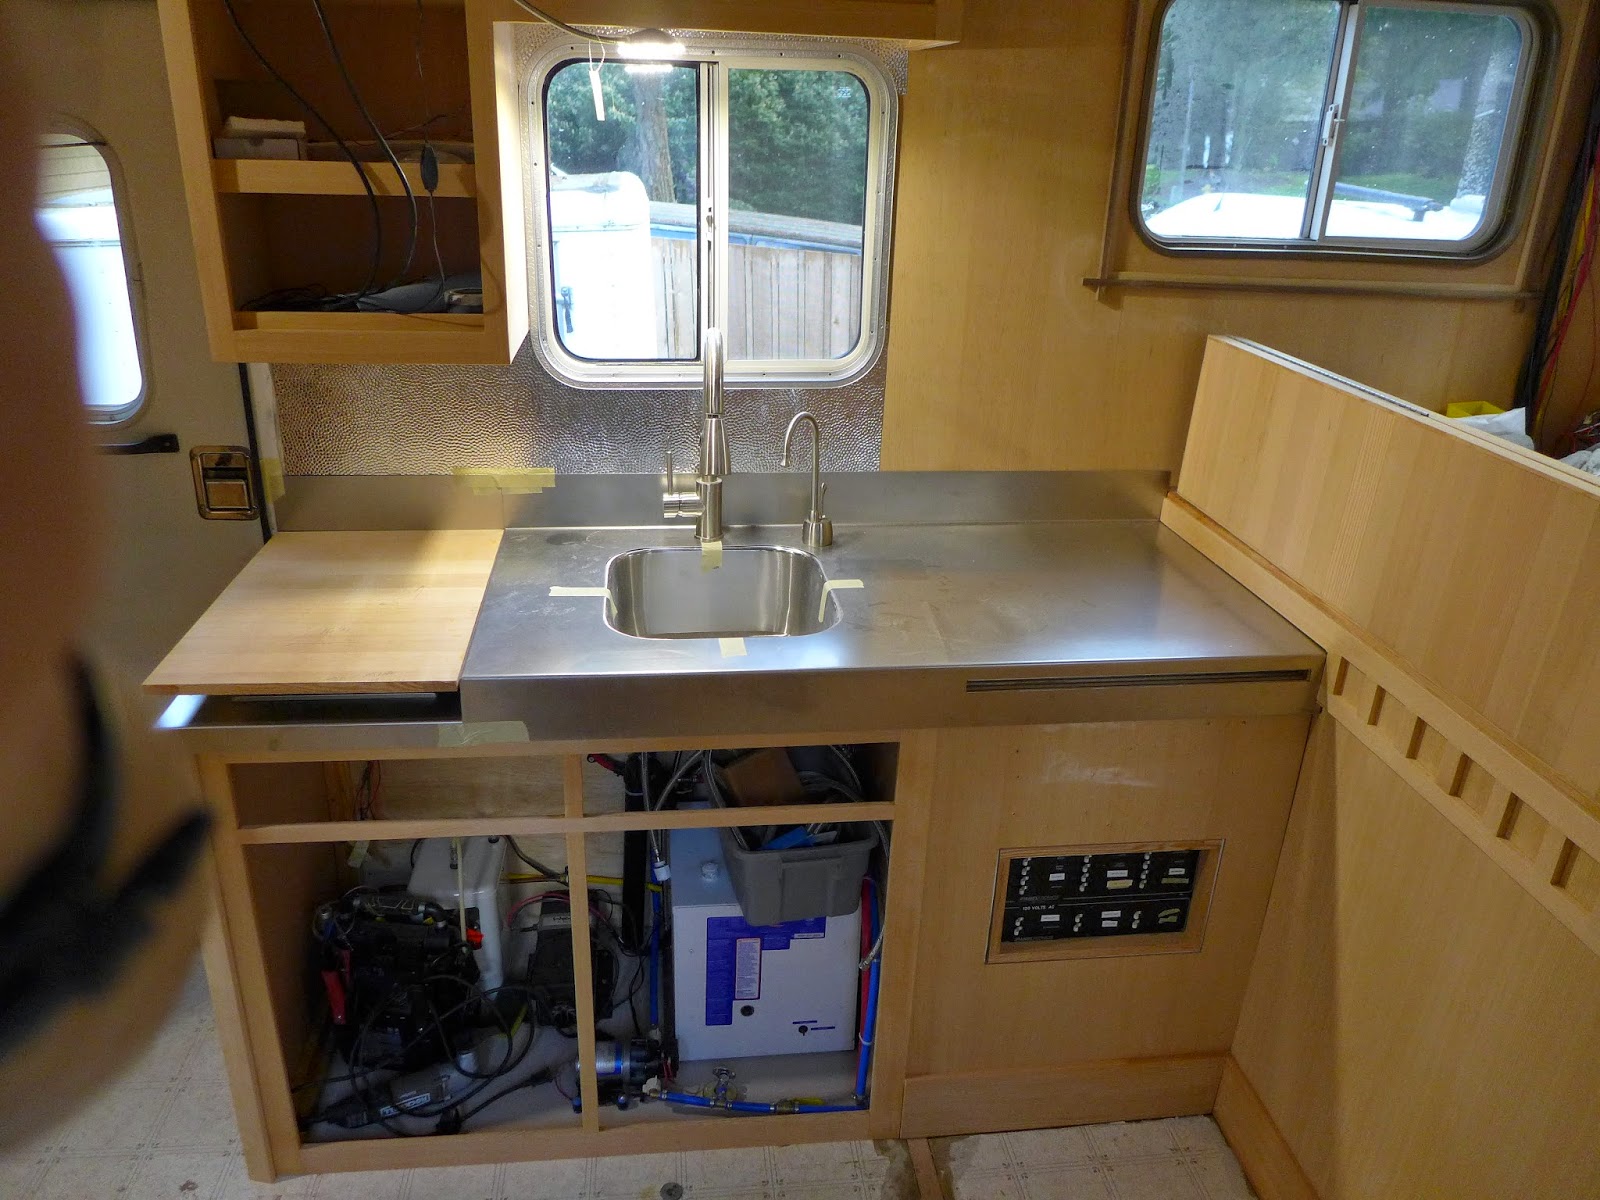
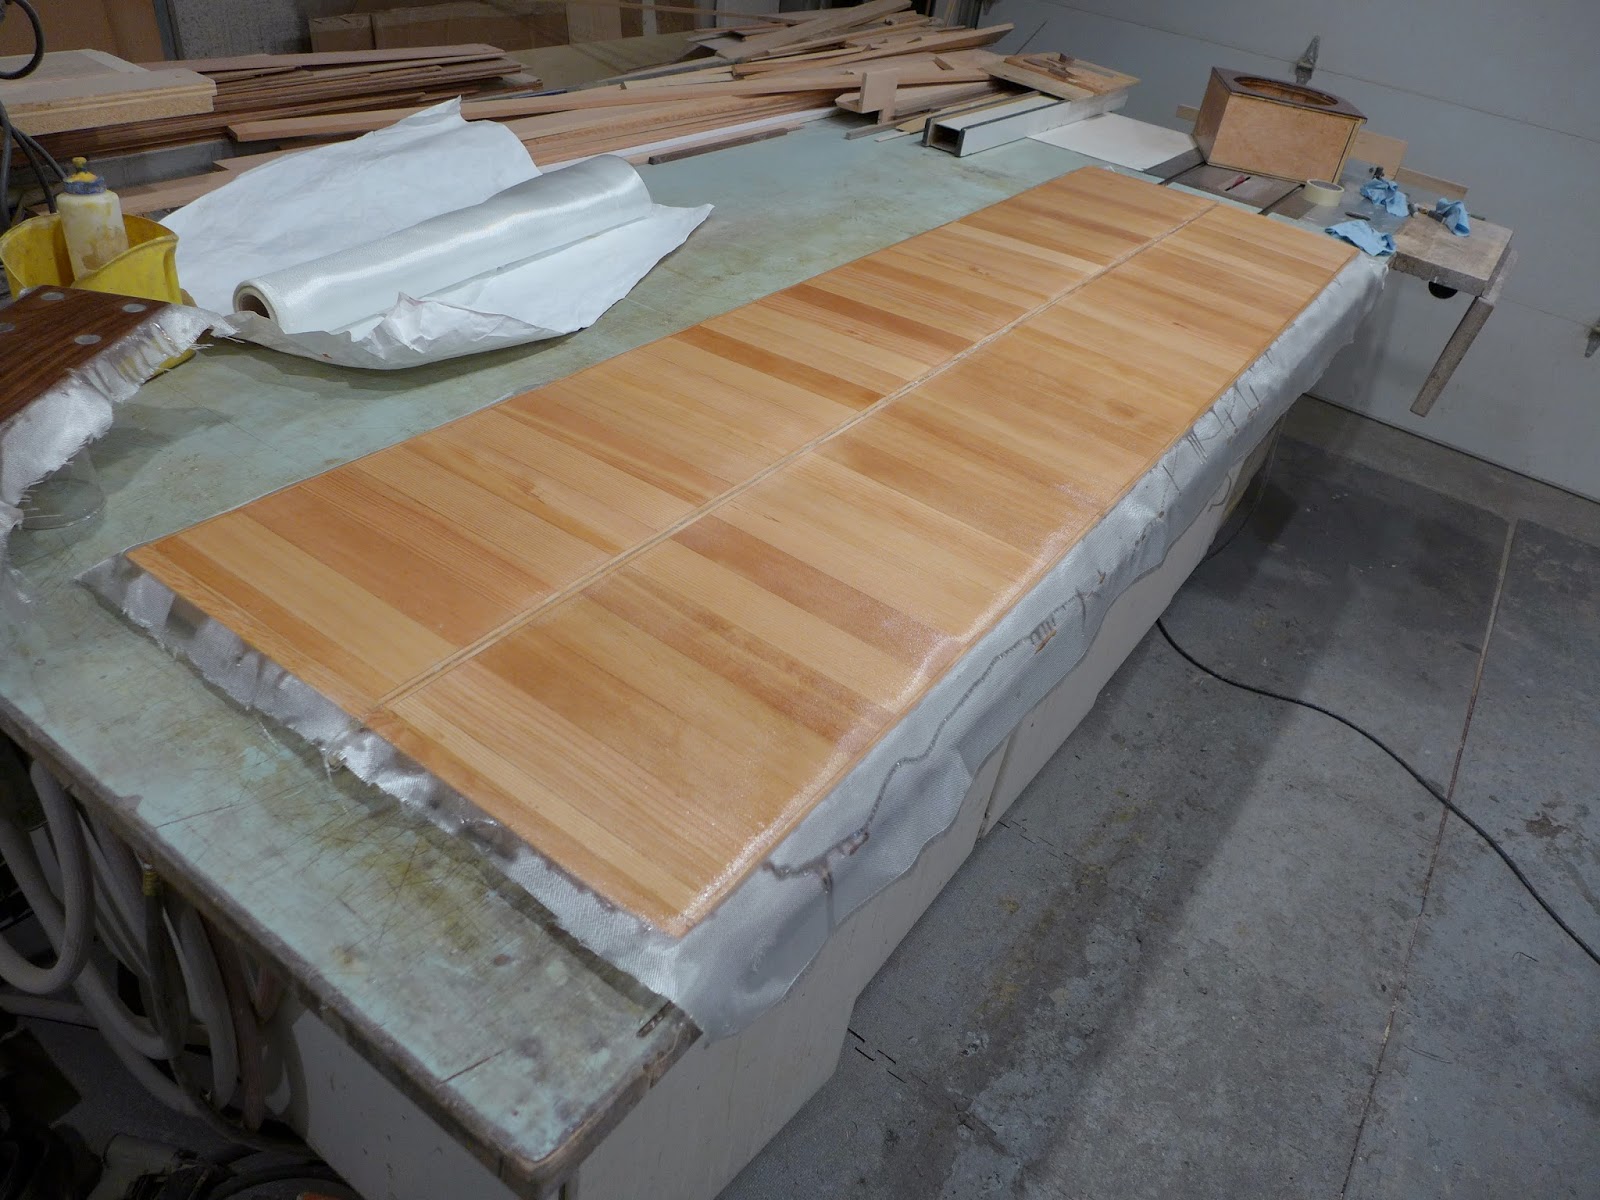
(above) The sink top is cedar...Still needs fiberglassing...
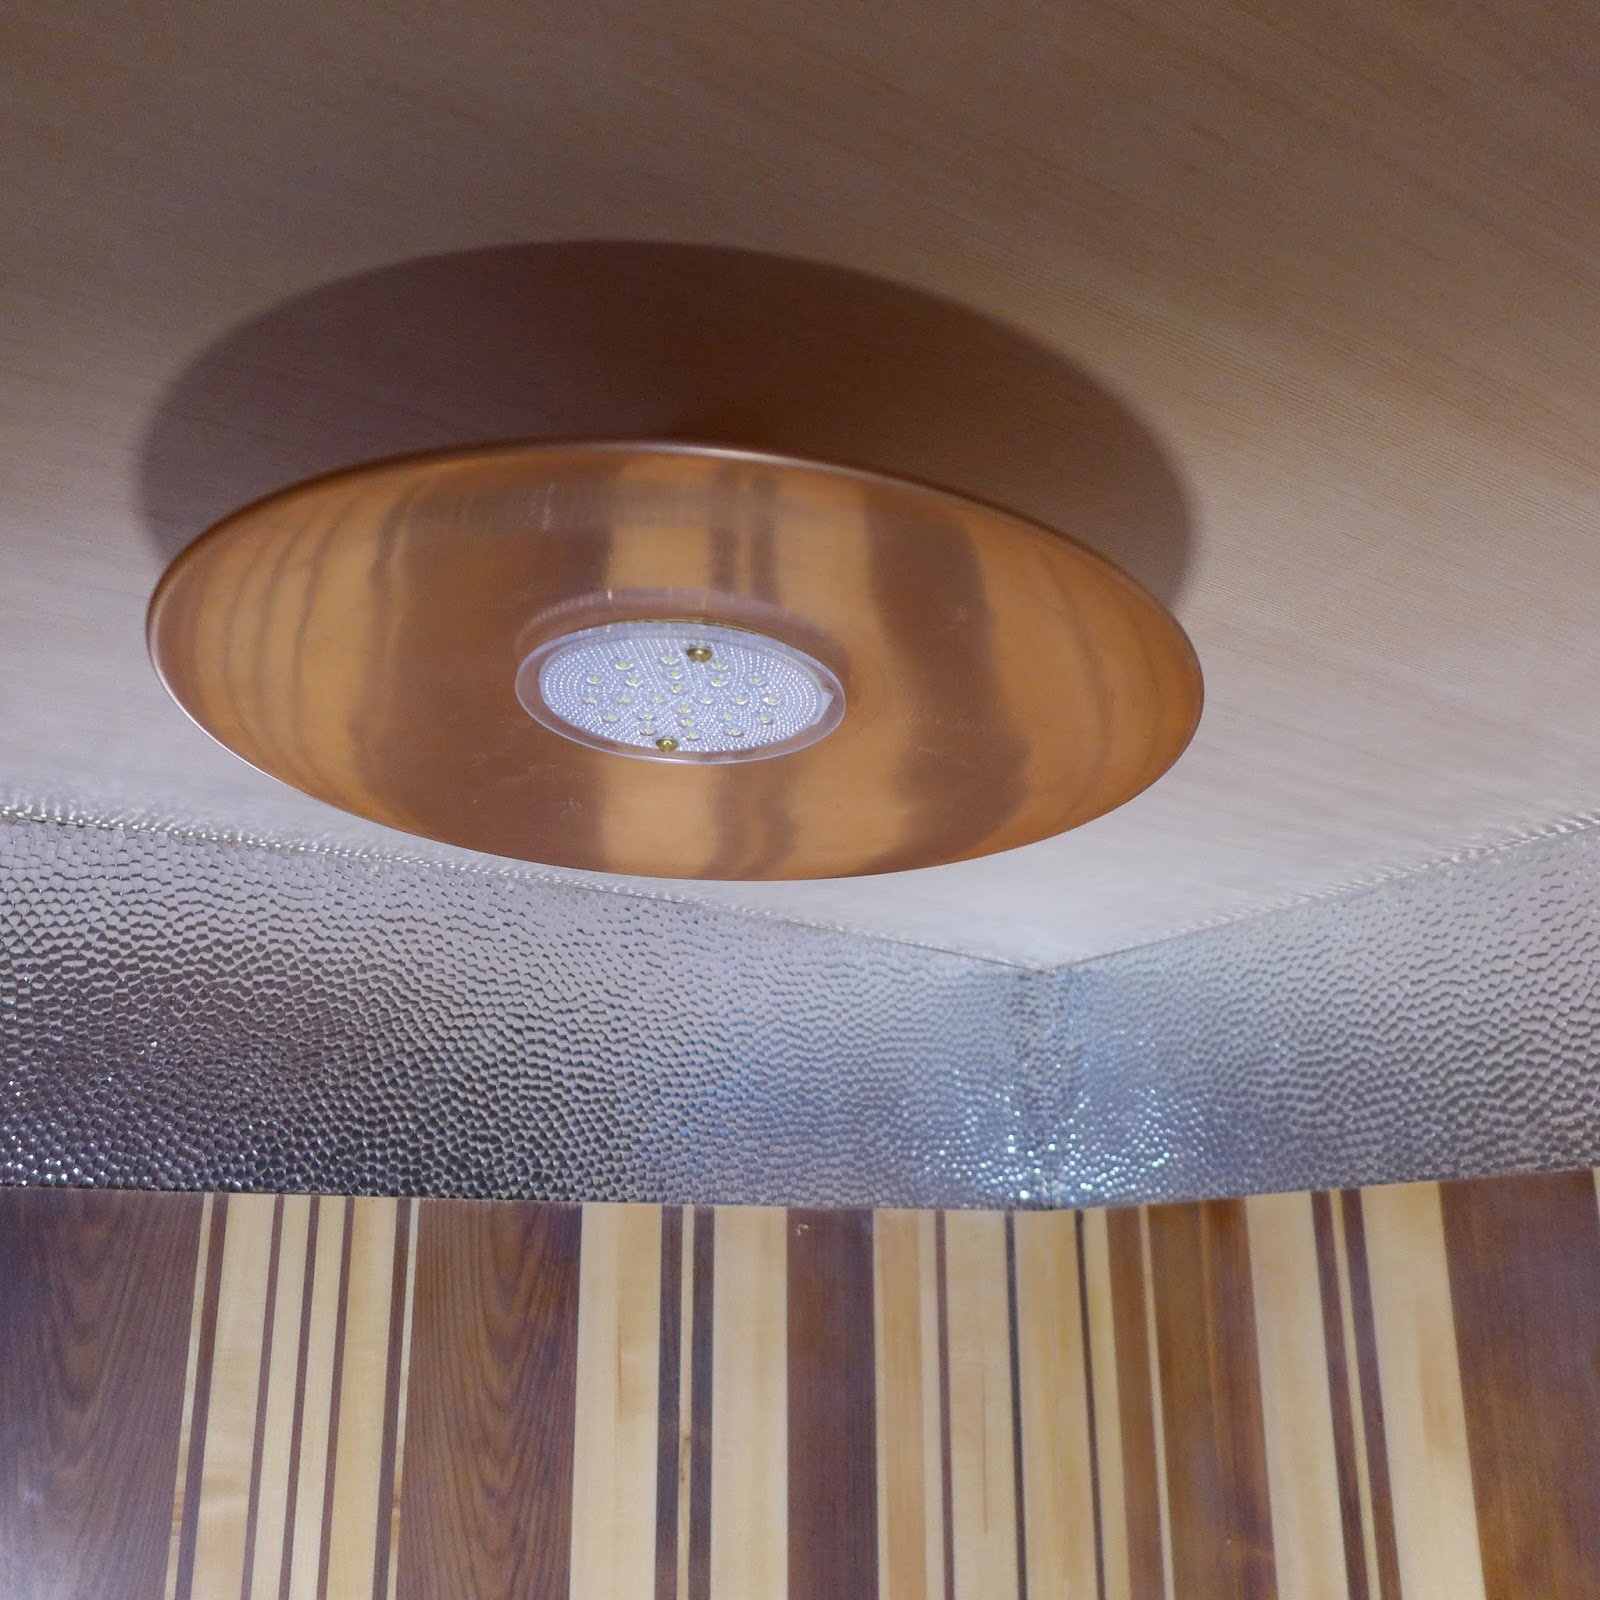
(above) Shower/ bathroom light... Something I put together from random stuff...
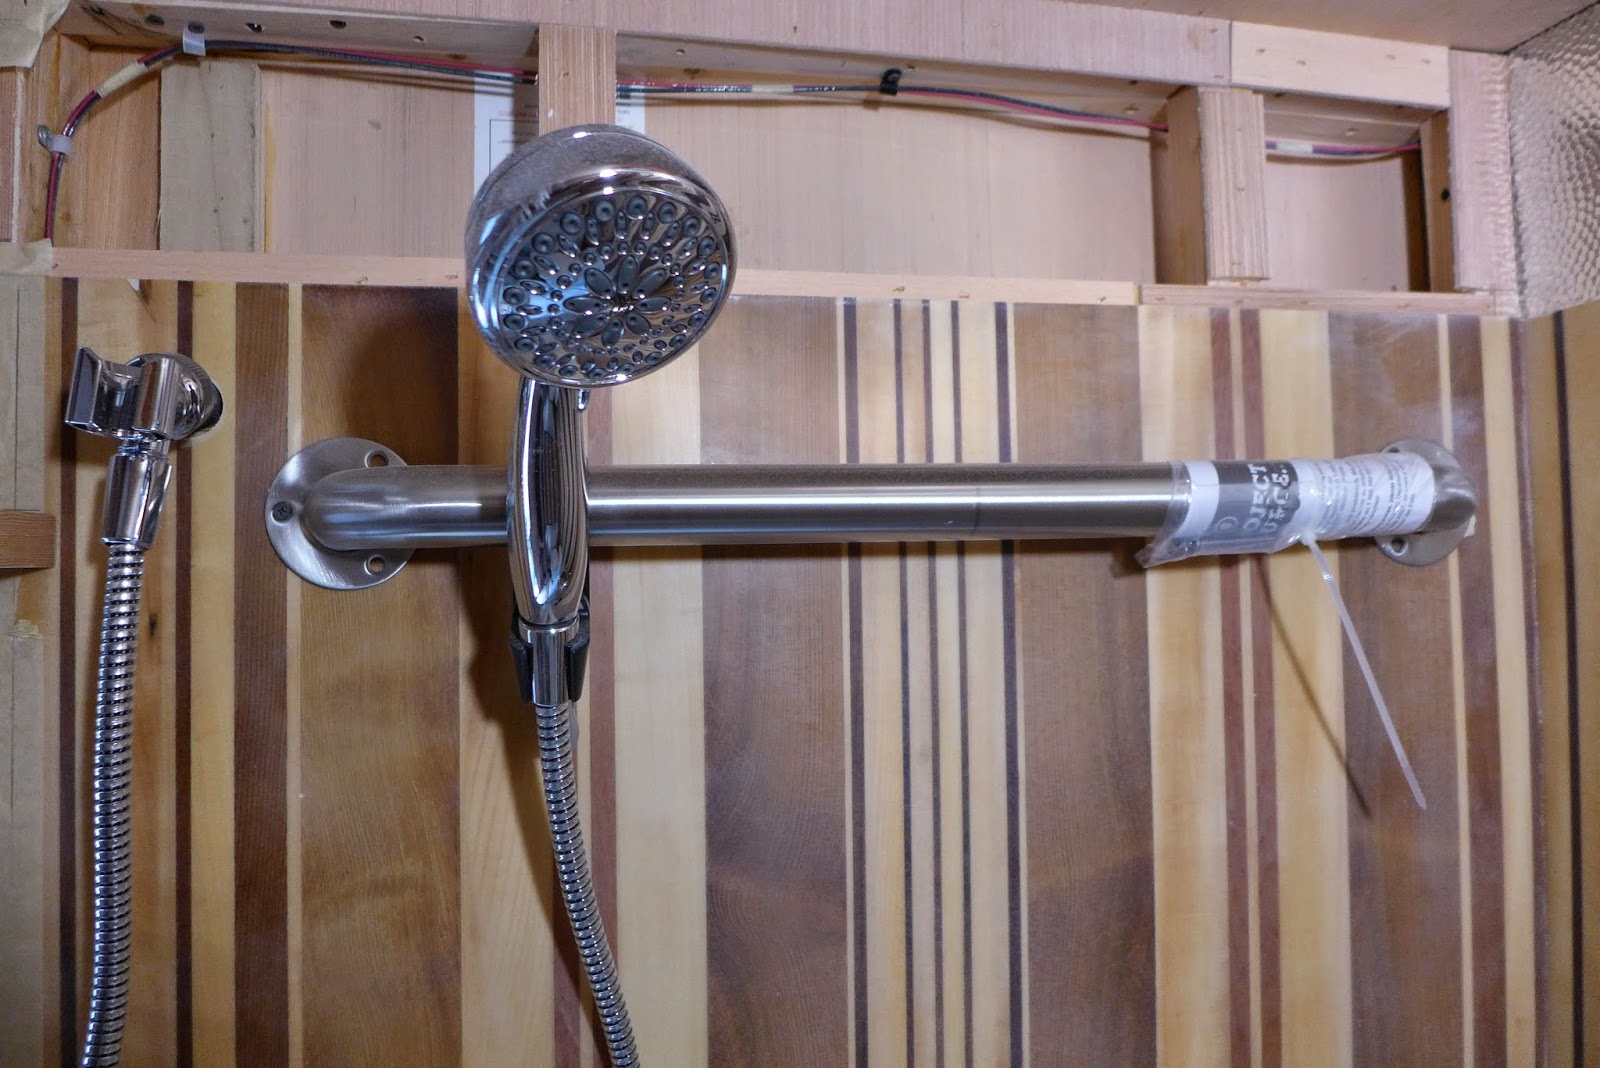
(above) The shower head is mounted to a handicap grab bar... Adjustable and it offers options for hanging wet things or support if the need arises...
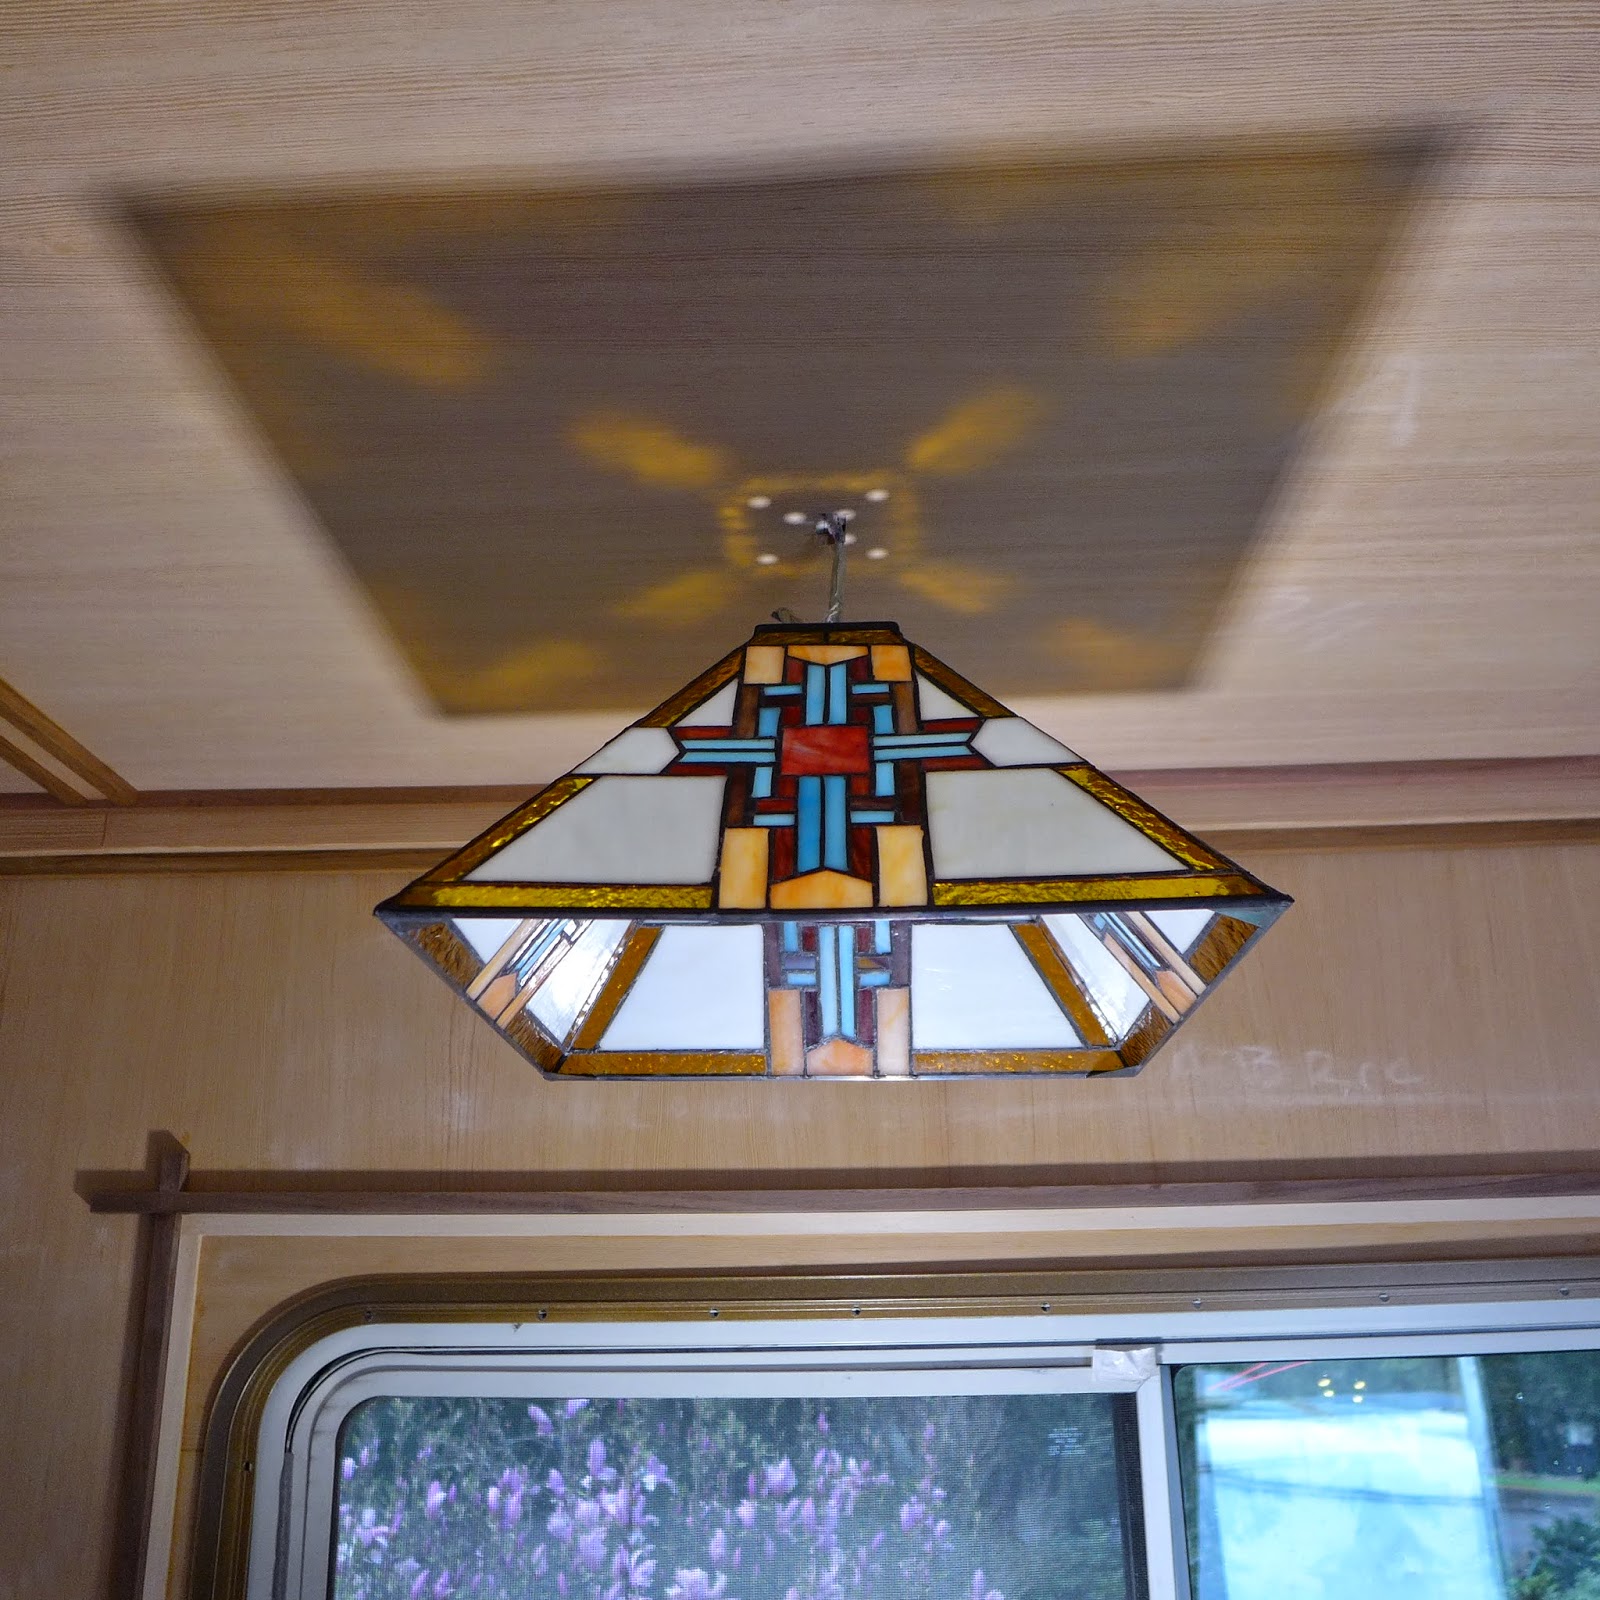
(above) Late in the day, the light shade for over the table arrived...
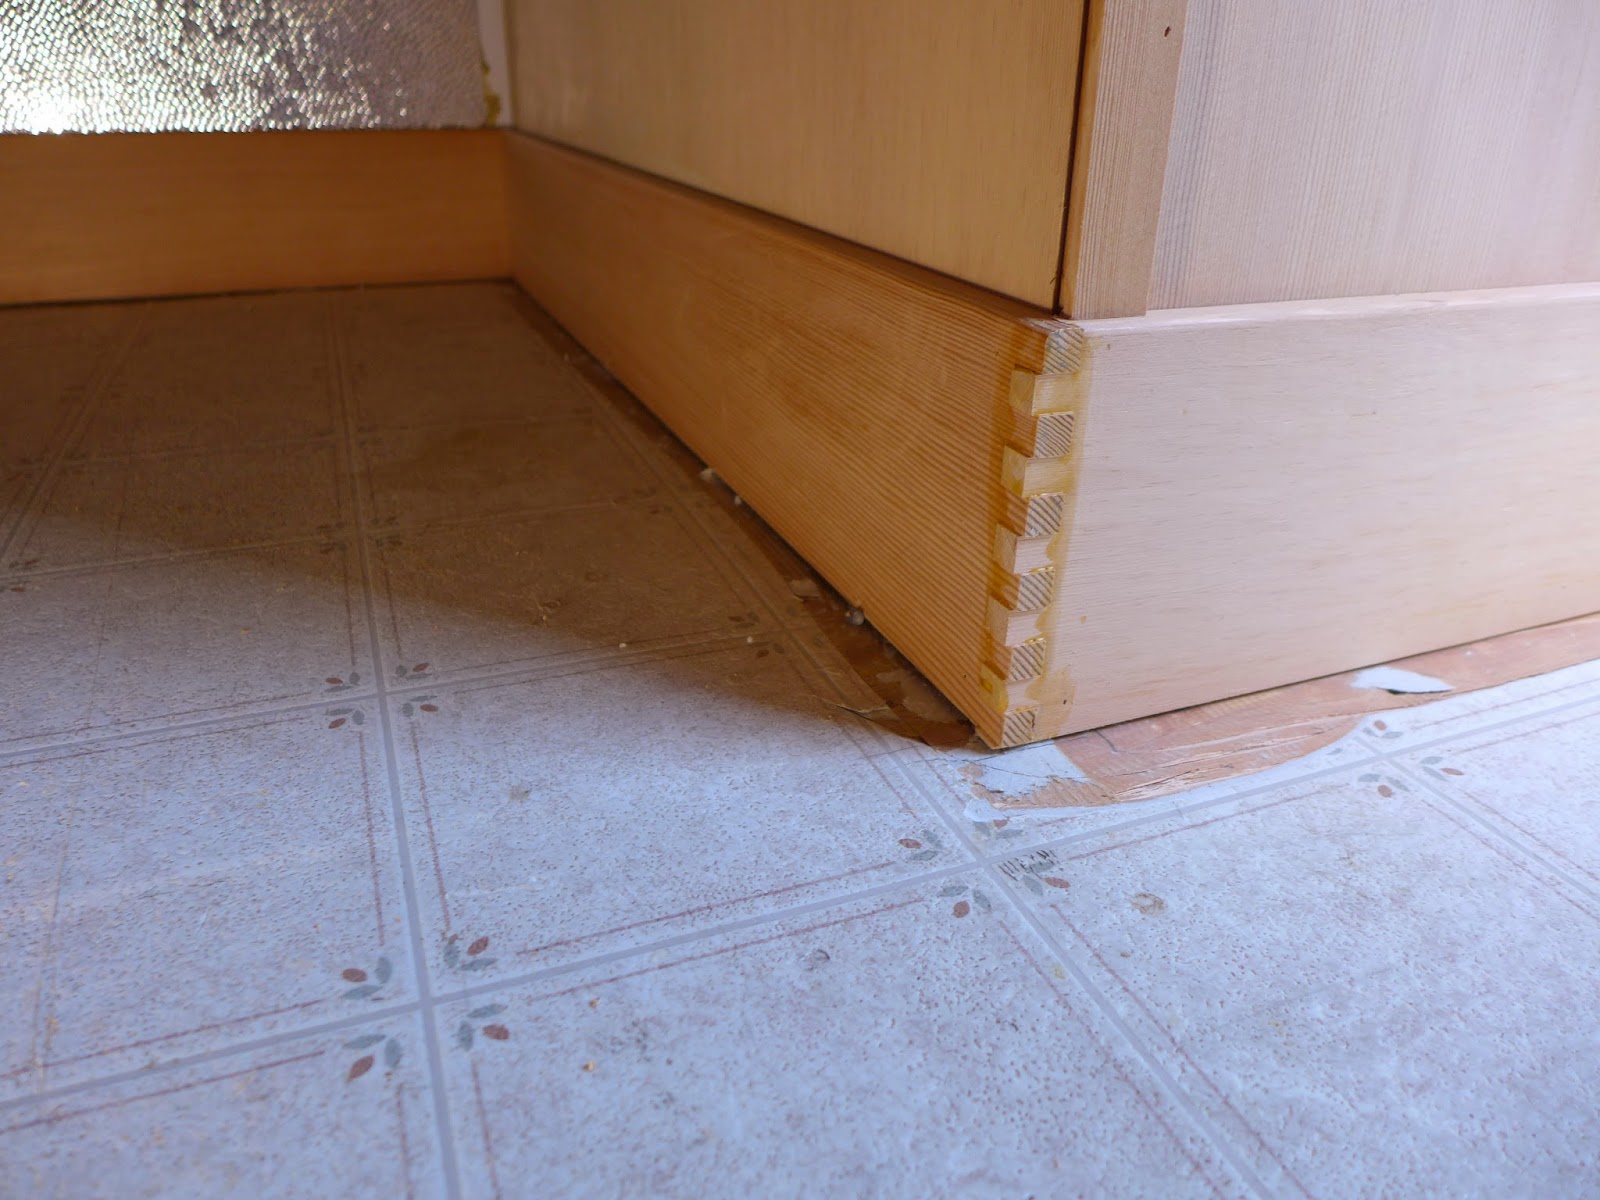
(above) Baseboard detail... Still needs sanding...
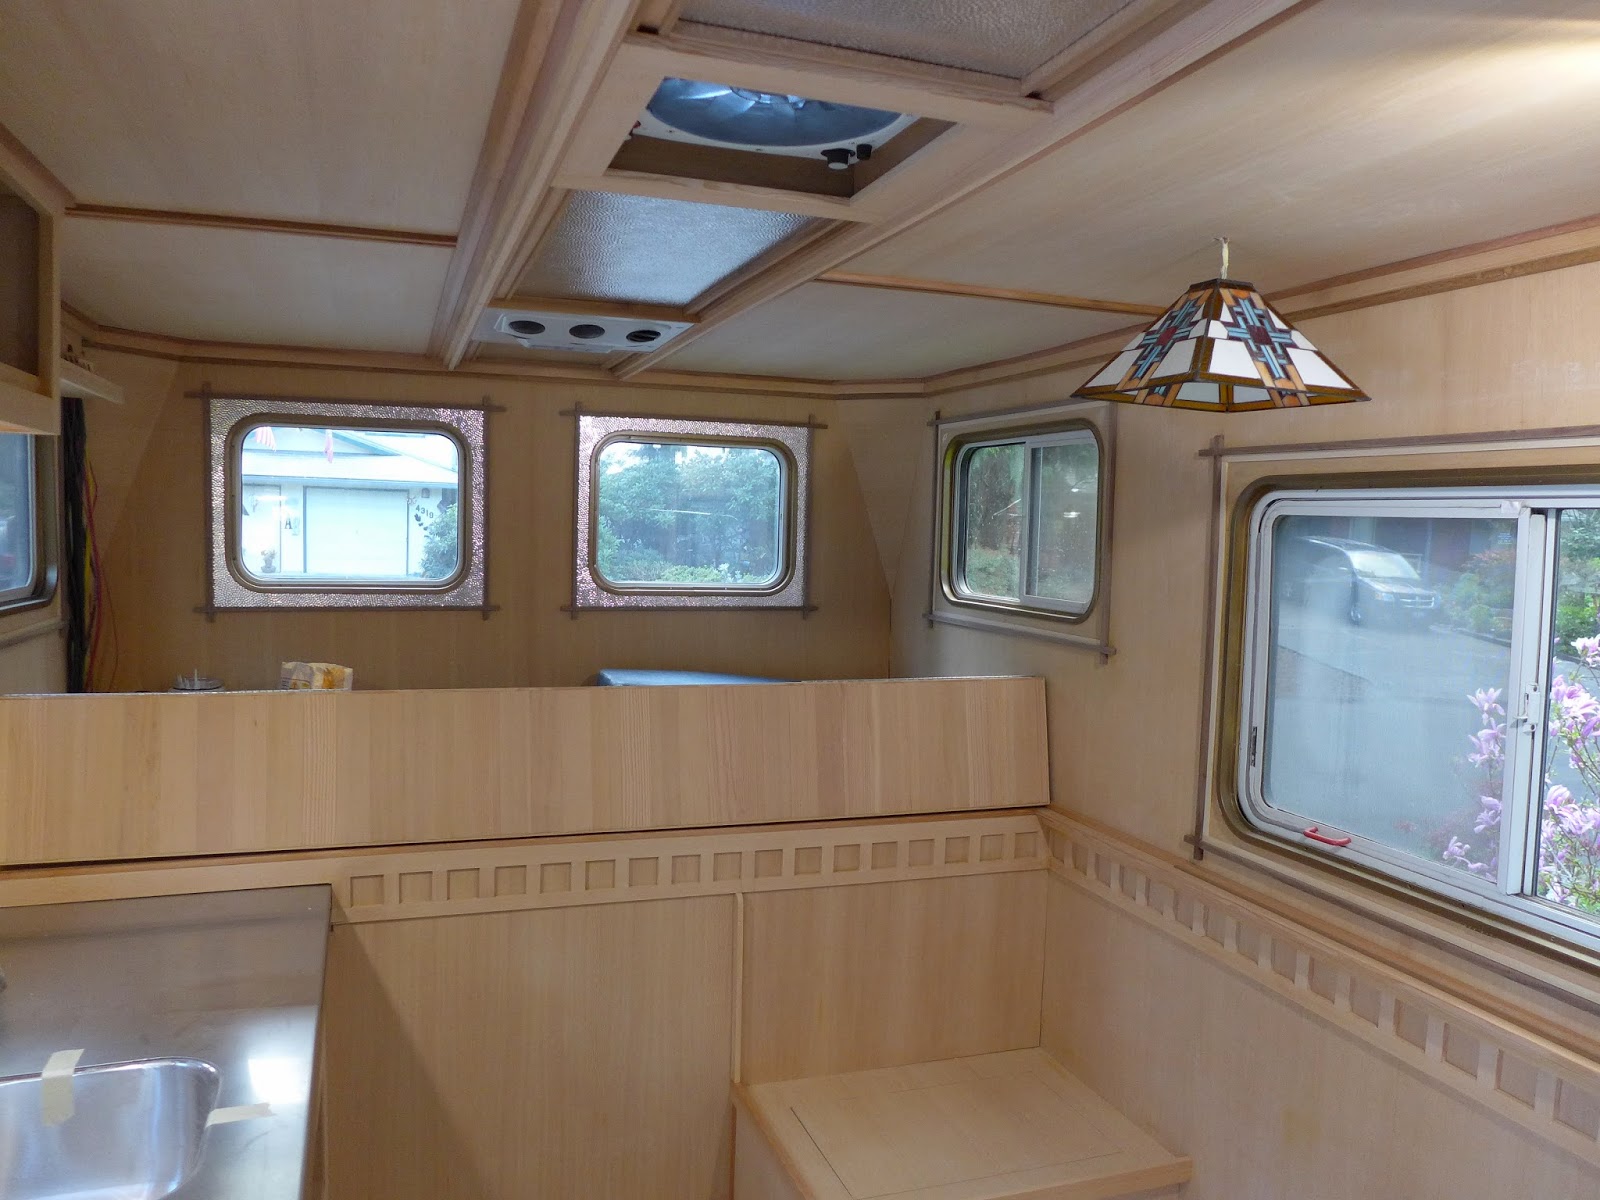
(above) Stoked on how this is turning out ...
(above) This is what custom looks like...
(above) The trim work in the cabin has been ongoing since I last posted... Having so much free, clear VGDF has been a blessing... No cost means I can do whatever I want... I like that feeling...
(above) Getting closer to the finish line...
(above) Kitchen side looks like this...
(above) Back near the shower, the walls are also hammered aluminum... Waterproof, reflective and it ties together the other aluminum accents... The pass through will have a vertically sliding door hammered aluminum door to secure the cabin from the cab...
(above) The sink top is cedar...Still needs fiberglassing...
(above) Shower/ bathroom light... Something I put together from random stuff...
(above) The shower head is mounted to a handicap grab bar... Adjustable and it offers options for hanging wet things or support if the need arises...
(above) Late in the day, the light shade for over the table arrived...
(above) Baseboard detail... Still needs sanding...
(above) Stoked on how this is turning out ...
(above) This is what custom looks like...
PaulJensen
Custom Builder
30
At this point in the renovation, progress is measured in getting the final details right...
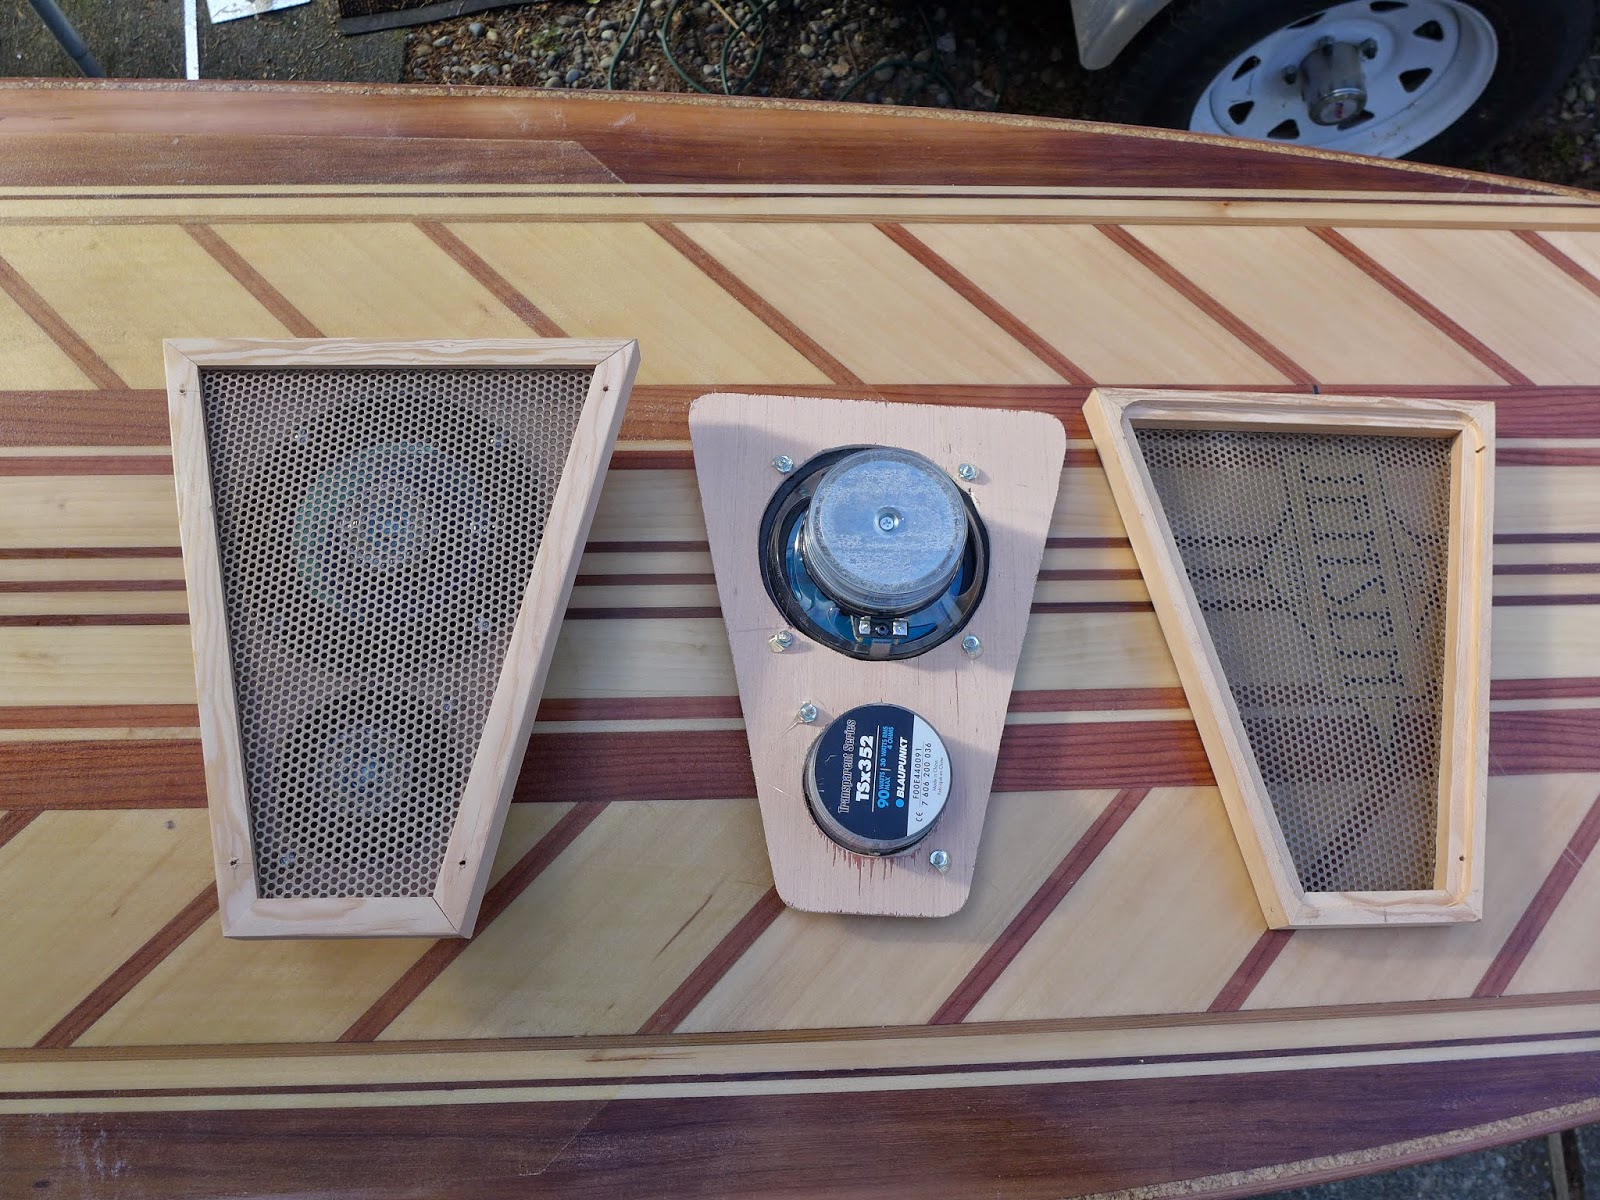
(above) The existing speakers are mounted in frames with covers to fit the rear triangles... Before there were no covers on the smaller speakers and the larger ones had clear plastic covers... Very boat-ish... These will screw to the triangles on the walls... The metal grills are perforated metal painted with rustic bronze rattle can paint...
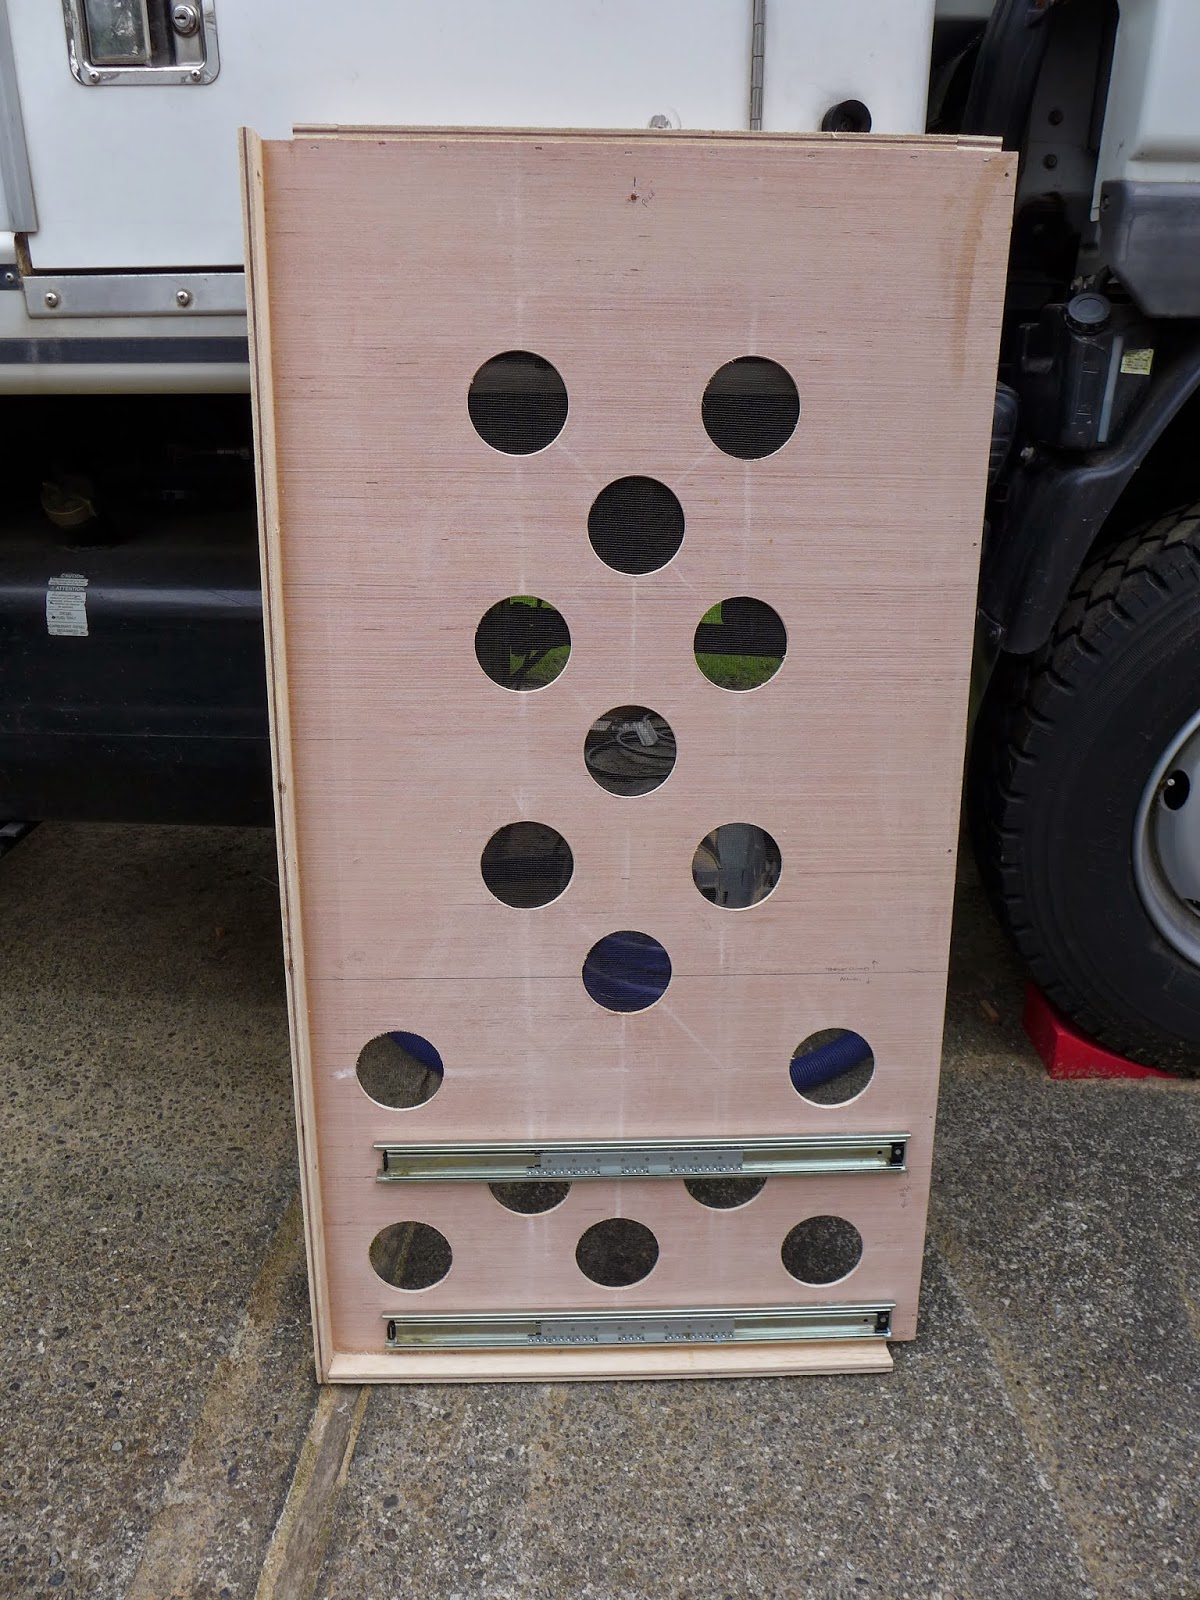
(above) The wall panel behind the fridge had 3" ventilation holes drilled into it.. Mesh insect screen is attached to the back side...Drawer guides are bolted to the panel...
(above) The shower sink base is ready to install...
(above) The folding bed panel is final fit with hinges, removed for sanding and the final layer of fiberglass...
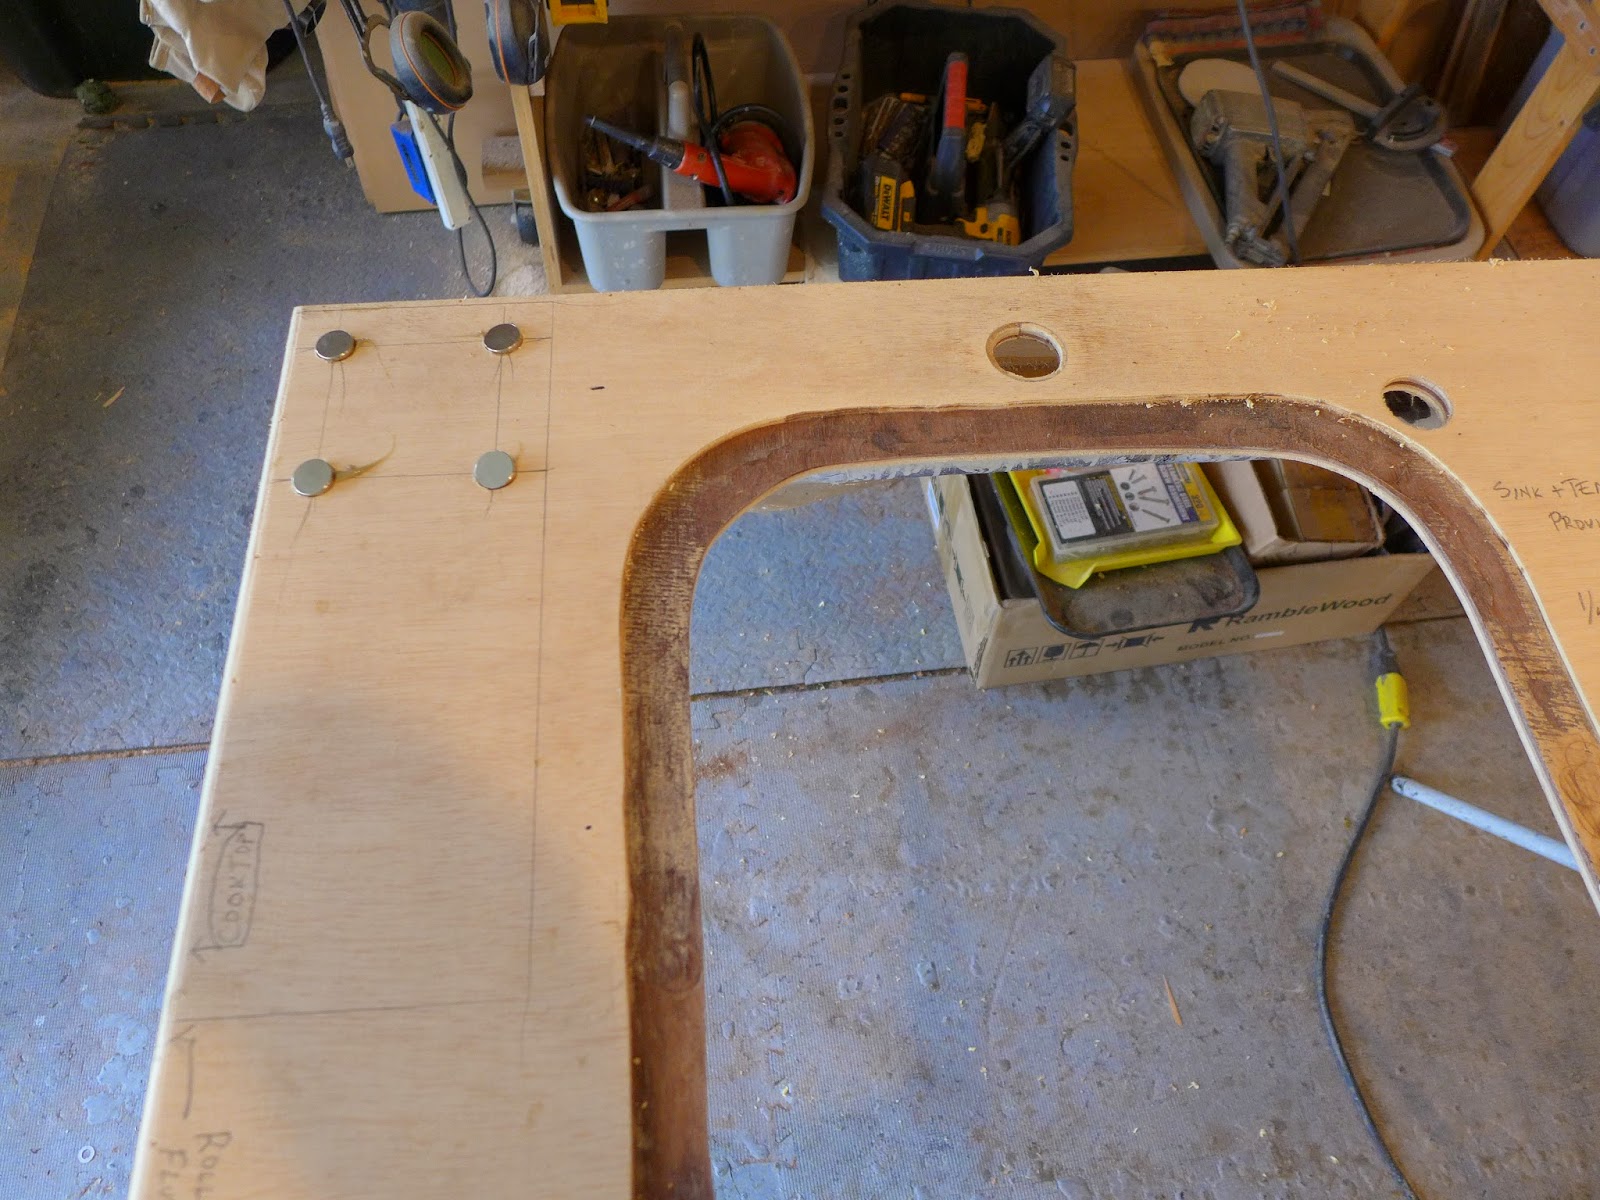
(above) The kitchen sink countertop plywood base has four strong magnets built into it...

(above) With the magnets set, the sink and stainless countertop are glued together...
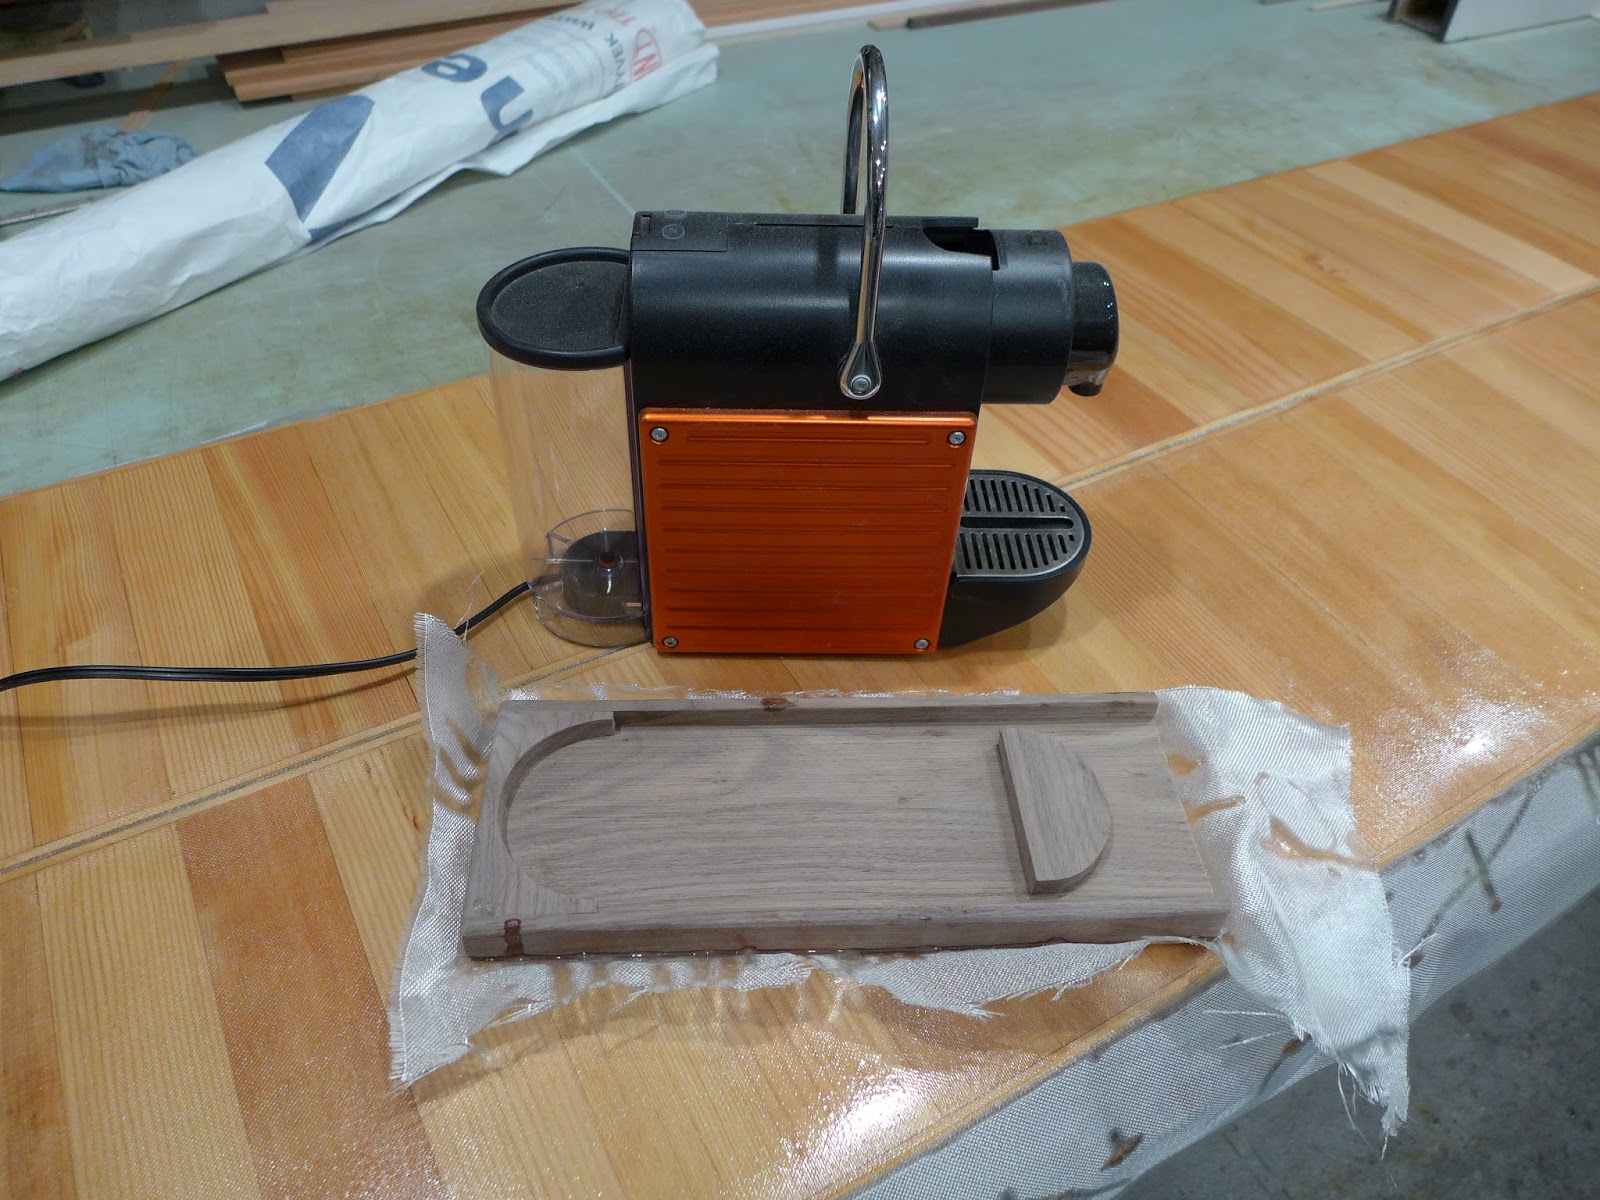
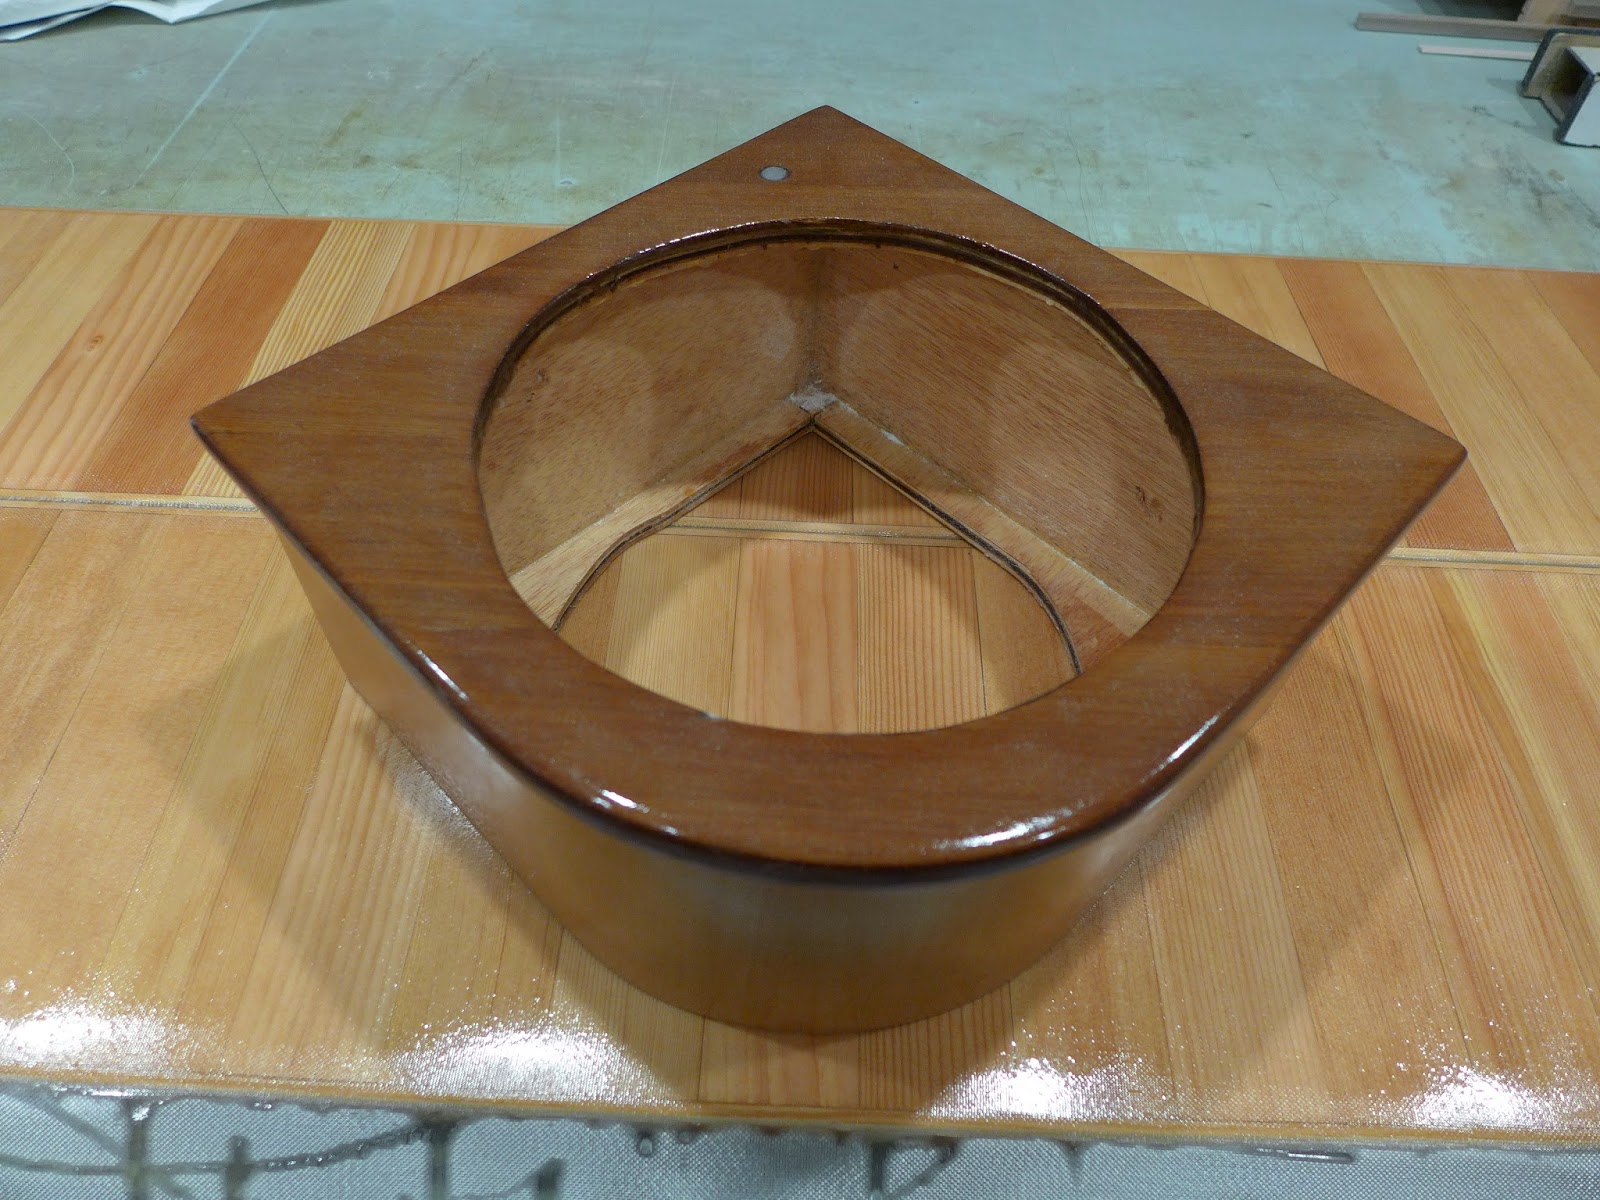
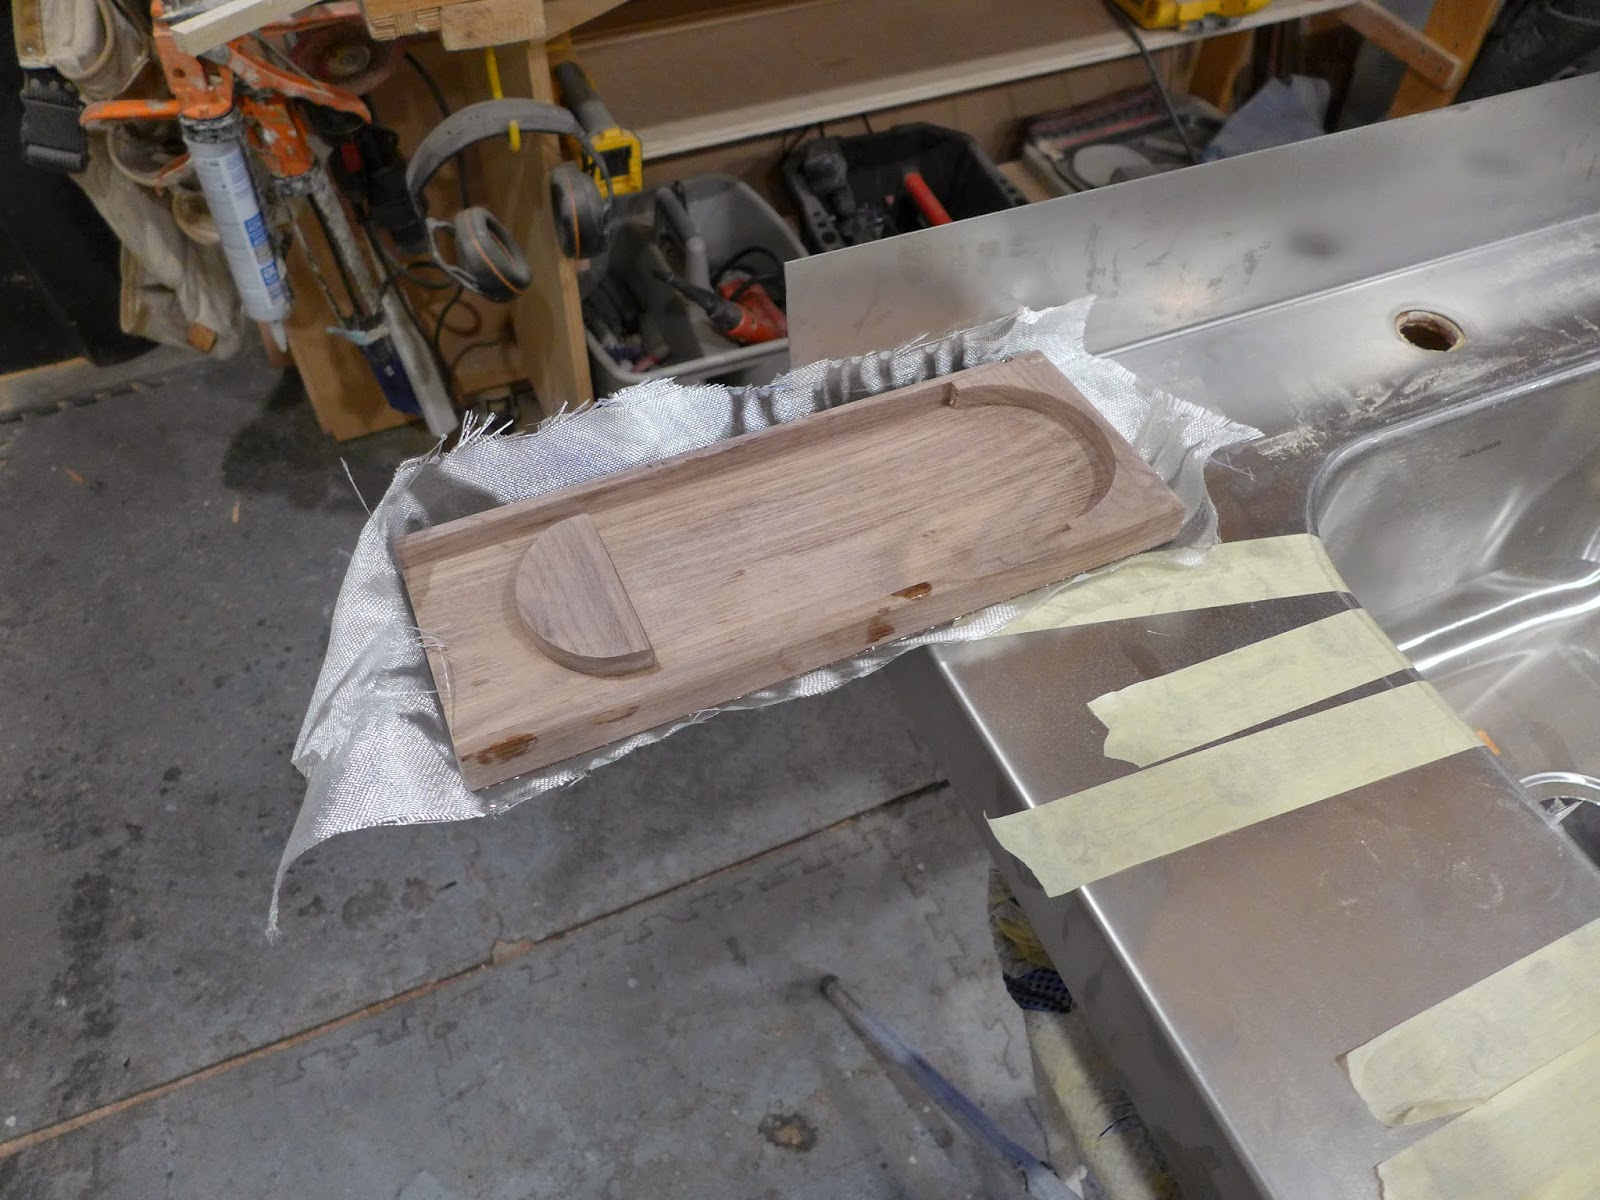
(above) A specific design request was for the coffee maker have a home on the countertop... To house the coffee maker, a chunk of walnut was plowed with a dado blade, then a hole saw cut went through another piece and finally the cut curves were glued to the straight piece...

(above) On the underside, magnets were countersunk and fiberglassed over...
(above) The walnut base goes over the magnets in the countertop...
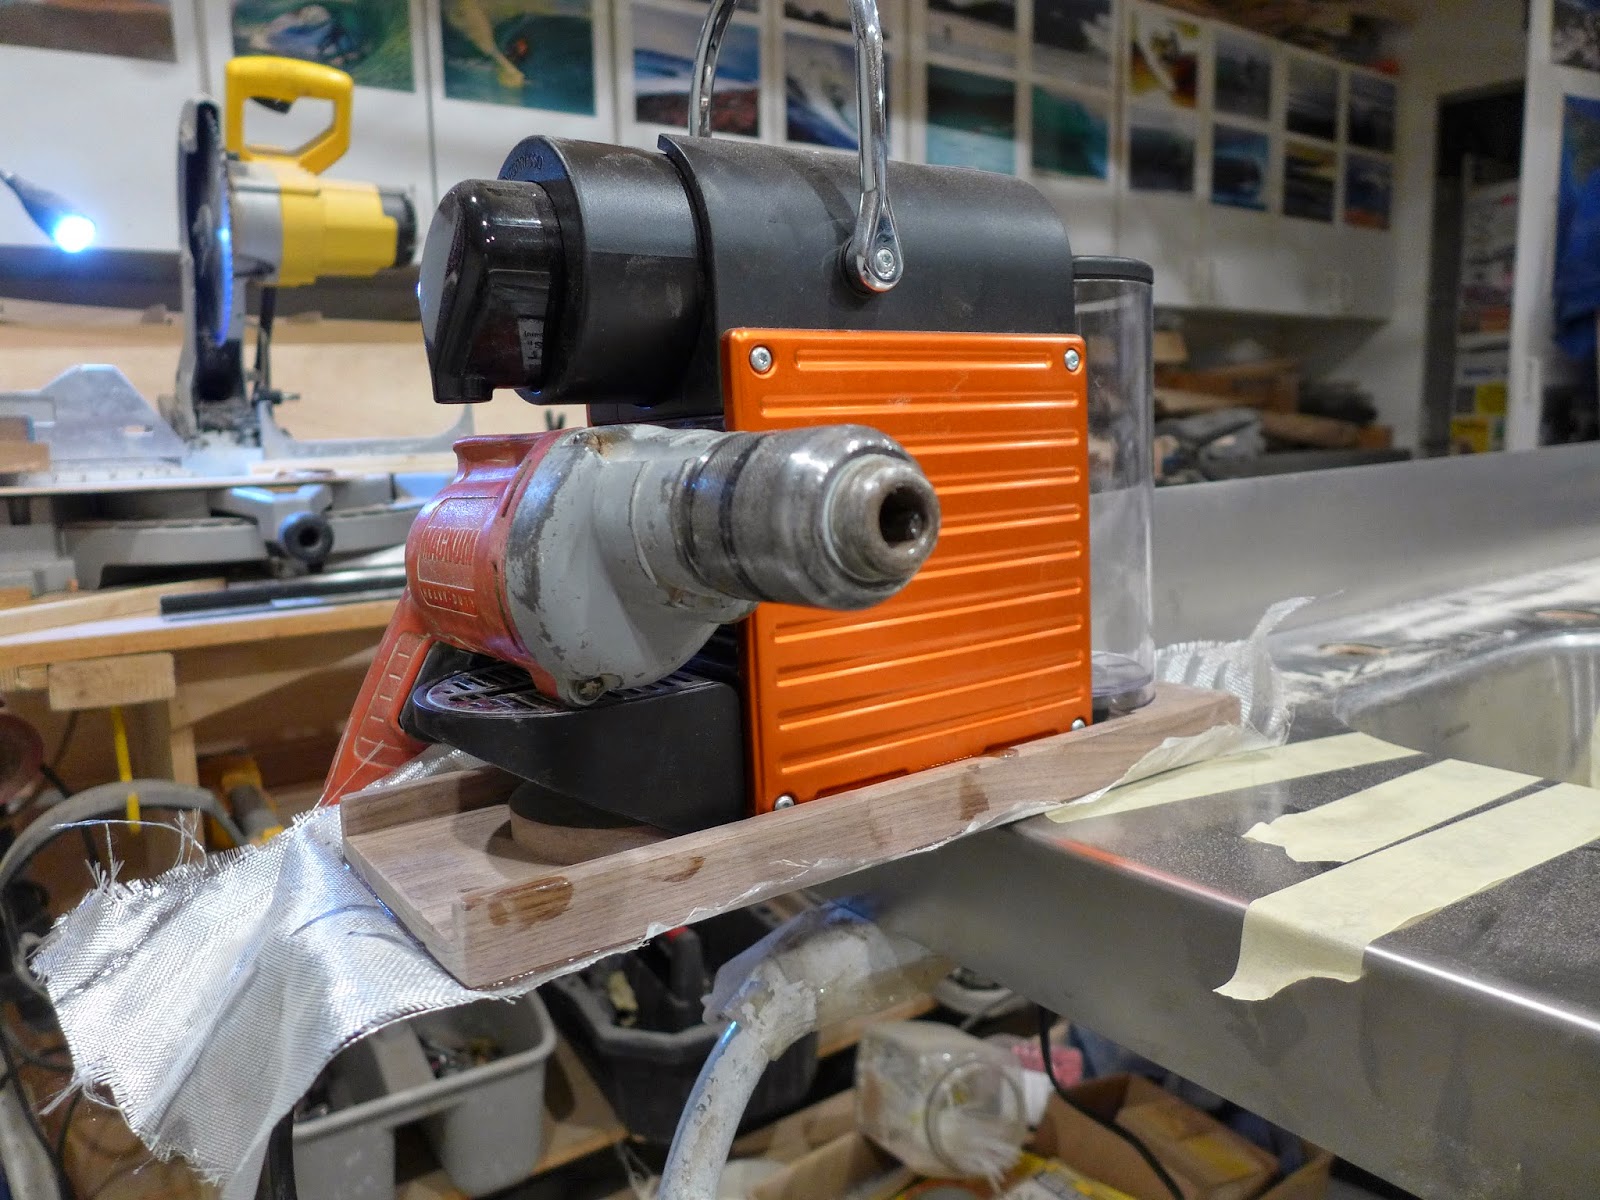
(above) The coffee maker and some added weight were placed on the walnut pad to test holding strength.... In use there will be a flush wood cutting board under the walnut, so there will be no cantilevered weight, but I think without it, it would still be fine...

(above) Pivot there walnut base and it locks in place this way, with enough clearance from the faucet...
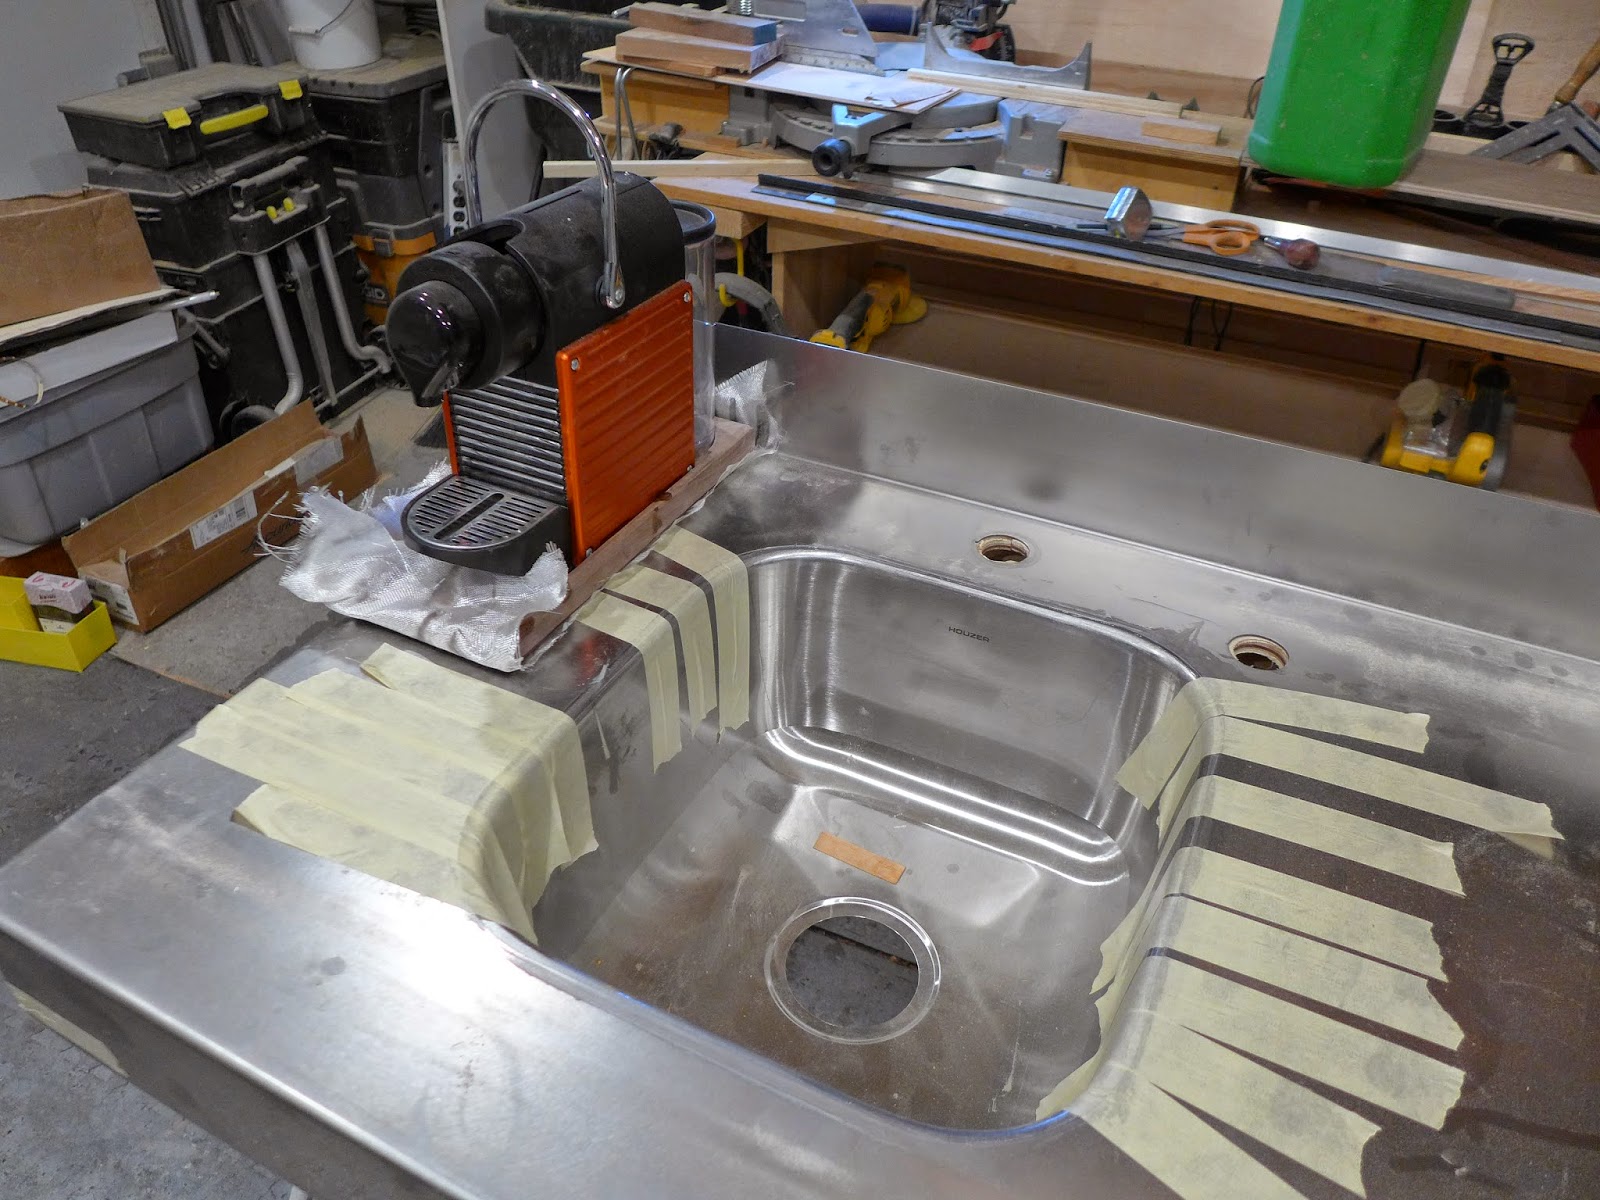
(above) Rotate it again and it's ready to use this way...
(above) After a water tank test and a pressurized water system test, the final shower wall panel is glued and braced in place...
(above) Horrible color from the LED work light, but you can see the walls and ceiling have the first coat of OSMO and the cabinet doors are fitted...
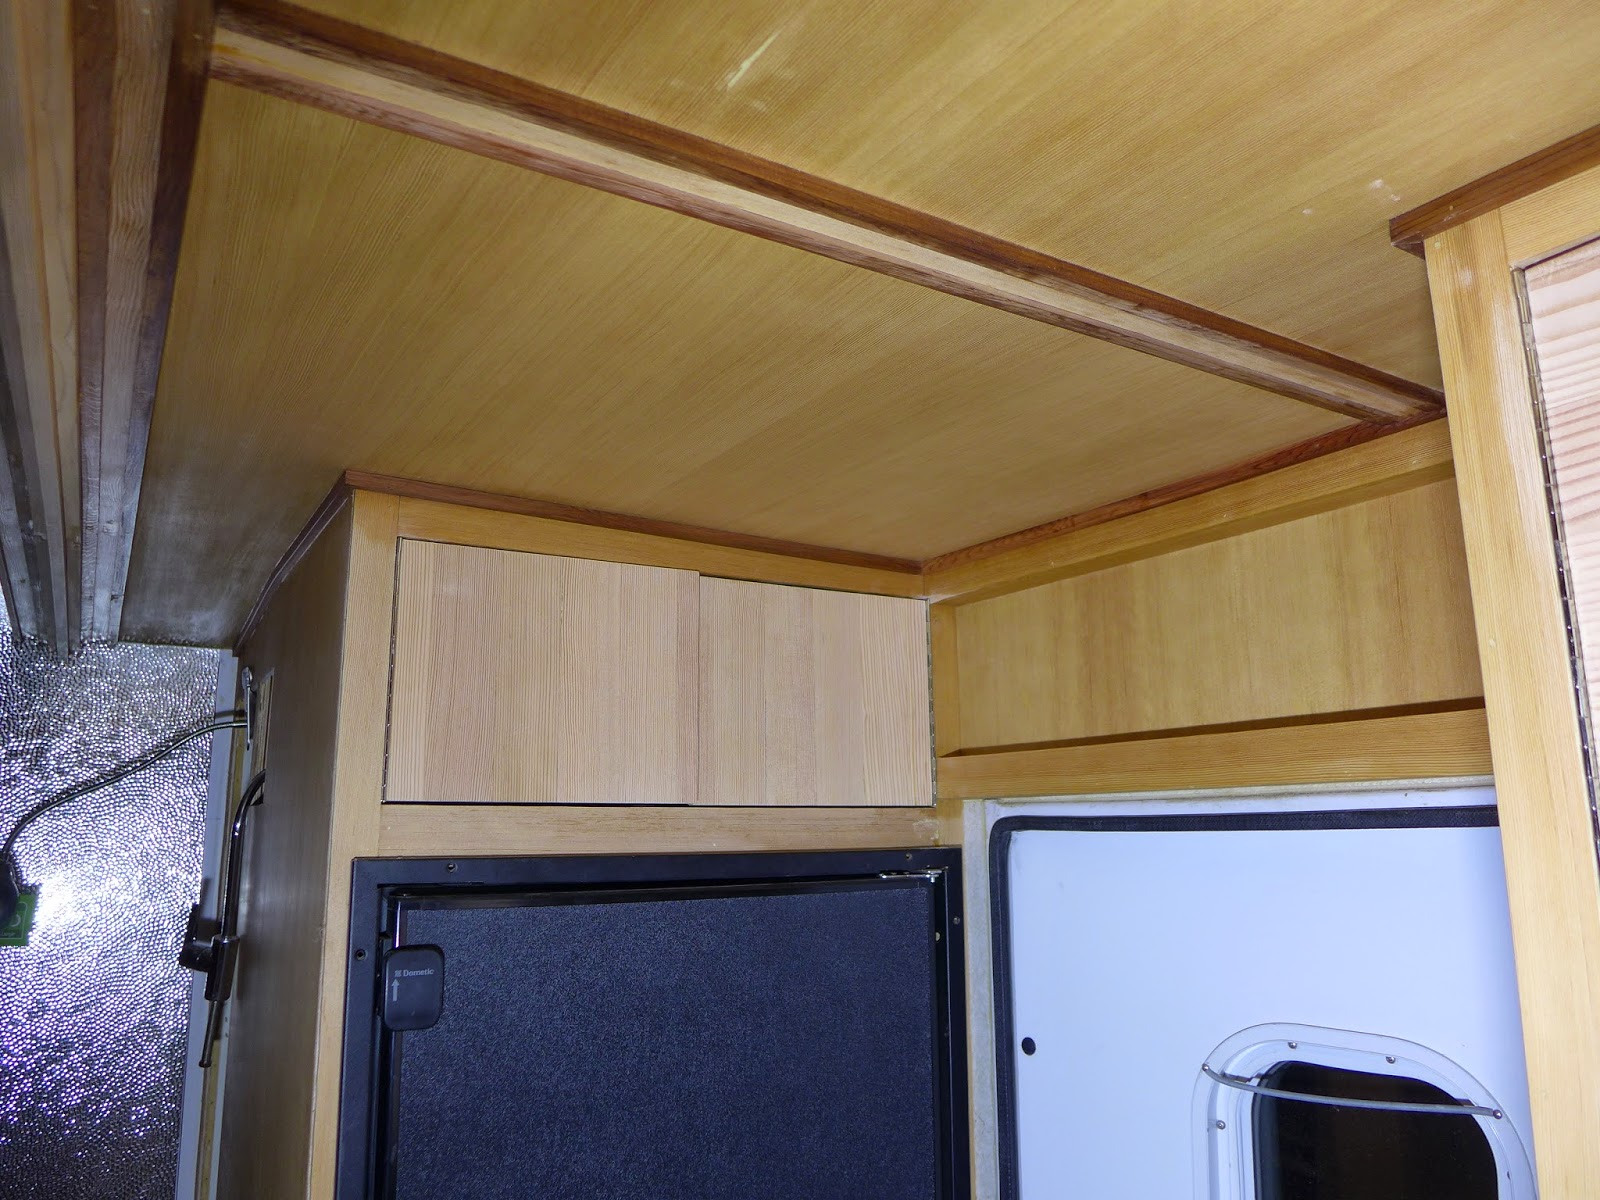
(above) The cabinet doors over the fridge installed... A small narrow shelf is over the door...
Getting close, but still a lot to do...
At this point in the renovation, progress is measured in getting the final details right...
(above) The existing speakers are mounted in frames with covers to fit the rear triangles... Before there were no covers on the smaller speakers and the larger ones had clear plastic covers... Very boat-ish... These will screw to the triangles on the walls... The metal grills are perforated metal painted with rustic bronze rattle can paint...
(above) The wall panel behind the fridge had 3" ventilation holes drilled into it.. Mesh insect screen is attached to the back side...Drawer guides are bolted to the panel...
(above) The shower sink base is ready to install...
(above) The folding bed panel is final fit with hinges, removed for sanding and the final layer of fiberglass...
(above) The kitchen sink countertop plywood base has four strong magnets built into it...
(above) With the magnets set, the sink and stainless countertop are glued together...
(above) A specific design request was for the coffee maker have a home on the countertop... To house the coffee maker, a chunk of walnut was plowed with a dado blade, then a hole saw cut went through another piece and finally the cut curves were glued to the straight piece...
(above) On the underside, magnets were countersunk and fiberglassed over...
(above) The walnut base goes over the magnets in the countertop...
(above) The coffee maker and some added weight were placed on the walnut pad to test holding strength.... In use there will be a flush wood cutting board under the walnut, so there will be no cantilevered weight, but I think without it, it would still be fine...
(above) Pivot there walnut base and it locks in place this way, with enough clearance from the faucet...
(above) Rotate it again and it's ready to use this way...
(above) After a water tank test and a pressurized water system test, the final shower wall panel is glued and braced in place...
(above) Horrible color from the LED work light, but you can see the walls and ceiling have the first coat of OSMO and the cabinet doors are fitted...
(above) The cabinet doors over the fridge installed... A small narrow shelf is over the door...
Getting close, but still a lot to do...
Ford Prefect
Expedition Leader
Why not a bed lift?
I honestly don't understand why you didn't do this… It seems to me the weight difference would be negligible, and you could use a nice U shaped lounge underneath it, thereby giving all the current location for the lounge up for free space.
[video]https://m.youtube.com/watch?v=HifqkgniJD0[/video]
To me this seems the obvious solution to Comfort on a single mattress, in a Limited space. So what am I missing here? (Please)
What am I missing here? You can even put lights in the bottom of the bed to illuminate the table.
GR8ADV
Explorer
Ok
The bed sits on the external storage areas. Thus lifting the bed would not provide open seating as in the video.
I honestly don't understand why you didn't do this… It seems to me the weight difference would be negligible, and you could use a nice U shaped lounge underneath it, thereby giving all the current location for the lounge up for free space.
[video]https://m.youtube.com/watch?v=HifqkgniJD0[/video]
To me this seems the obvious solution to Comfort on a single mattress, in a Limited space. So what am I missing here? (Please)
What am I missing here? You can even put lights in the bottom of the bed to illuminate the table.
The bed sits on the external storage areas. Thus lifting the bed would not provide open seating as in the video.


SkiFreak
Crazy Person
I totally agree that a bed lift is a brilliant addition to a camper and am always surprised at how few of them I actually see installed.
The initial plan for my camper included a bed lift, but I could not find an easy way to incorporate one into my hard sided pop-top design. Sigh...
The initial plan for my camper included a bed lift, but I could not find an easy way to incorporate one into my hard sided pop-top design. Sigh...
mhiscox
Expedition Leader
Welcome back, Ken. I hope all went well.Been out of town for a while.
GR8ADV
Explorer
Welcome back, Ken. I hope all went well.
Thanks Mike, it did indeed. 3 weeks trekking around Peru. Found several roads that AV2 could not be taken on
")
It is great to see all of the updates, and the little details that makes working with Paul so much fun. I think I may need to take a trip down to see it in person. Although Paul thinks we may be wrapped in a week.
Forum statistics
Members online
- emulous74
- volvota
- jadmt
- cheesehd
- Alwaysstranded
- RoverGS
- Slickrock Slim
- jchasse
- Jackem
- highwest
- Euro6
- flydream
- MustLikeMud
- Doslocos
- Colin Hughes
- Shermanator
- knutsCO
- kidphc
- RDinNHand AZ
- CORunner
- BritKLR
- rudedan4x4
- wrestler034
- ErWinB
- OVRLND
- Romer
- Tymeryder
- Kevint888
- Shiro
- Gravity
- roamingyak
- jetbuilt
- mark5280
- TheDeliverator
- DCH109
- Ozarker
- corsair
- JaSAn
- Stranger45
- norcaltortuga
- runandcycle
- Elkfitness
- 4runnerteq
- vogelt4
- Somecallmetimm
- 287sds
- Littlefish
- martinf
- 25.4
- patch_
Total: 1,002 (members: 58, guests: 944)