Blender, My LX450/FZJ80 + FJ45esk + GM + Land Rover crazy concoction

94Discovery

Adventurer
For the fuel tank ,your highest point is the coil towers so draw aline to the rear end and go 90 degree down till the botom limite of the chassy and folow the shape then it is simple measure and calculate the volumetric capacity,and if you want more ,you can go below the chassy on the diff side .
 

Metcalf

Expedition Leader
For the fuel tank ,your highest point is the coil towers so draw aline to the rear end and go 90 degree down till the botom limite of the chassy and folow the shape then it is simple measure and calculate the volumetric capacity,and if you want more ,you can go below the chassy on the diff side .

I might need a picture with that....
 

Metcalf

Expedition Leader
Today was just one of those days where I just stood back and looked, measured, and farted around with some different ideas...


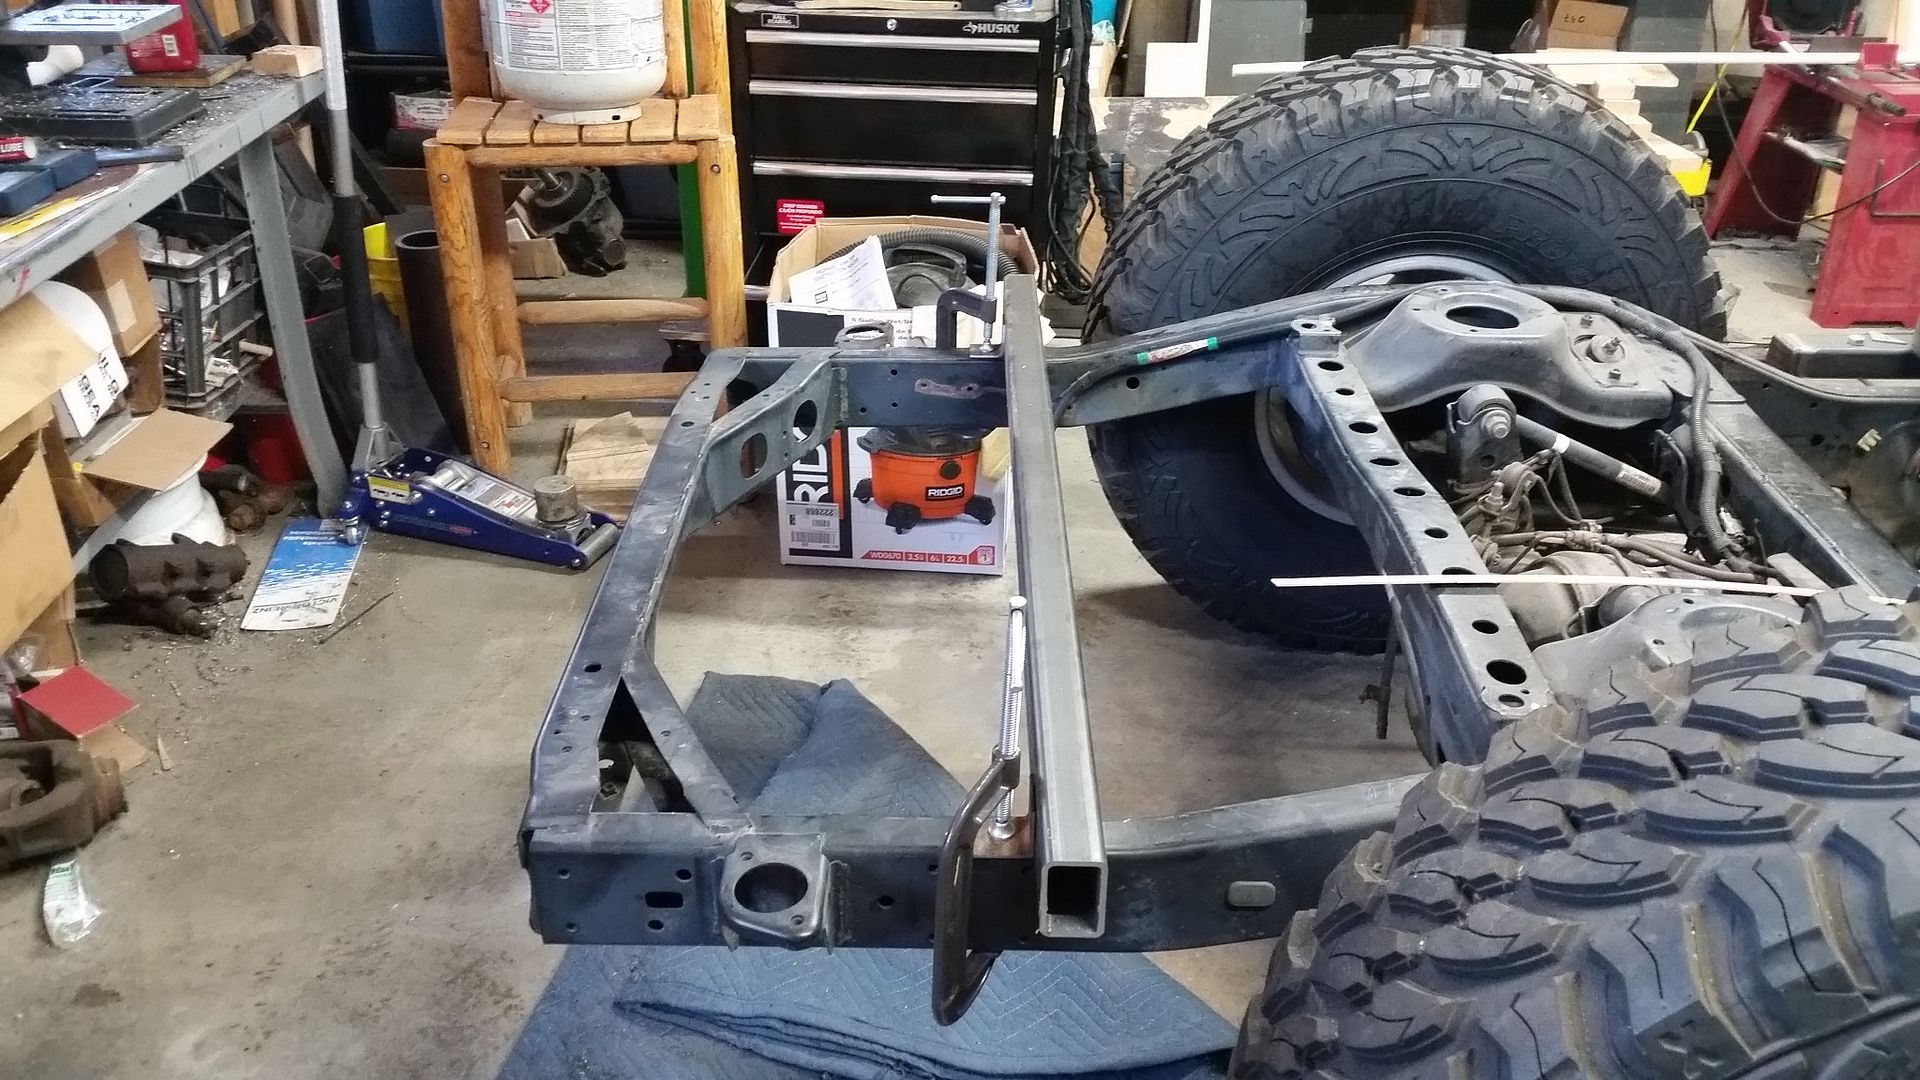
This is going to be the final rearward position of the bumper. The frame is going to be bobbed about 18" or so. I will need to drop the bumper about 2.5" I believe. I will be trying to do this similar to the front bumper where I can get the bumper into place before completely cutting the bumper off. I don't know if this really helps anything, but it can't hurt. The departure angle should be pretty good. The chassis is at full bump right now. I suspect the suspension will be about 5-6" up at ride height.

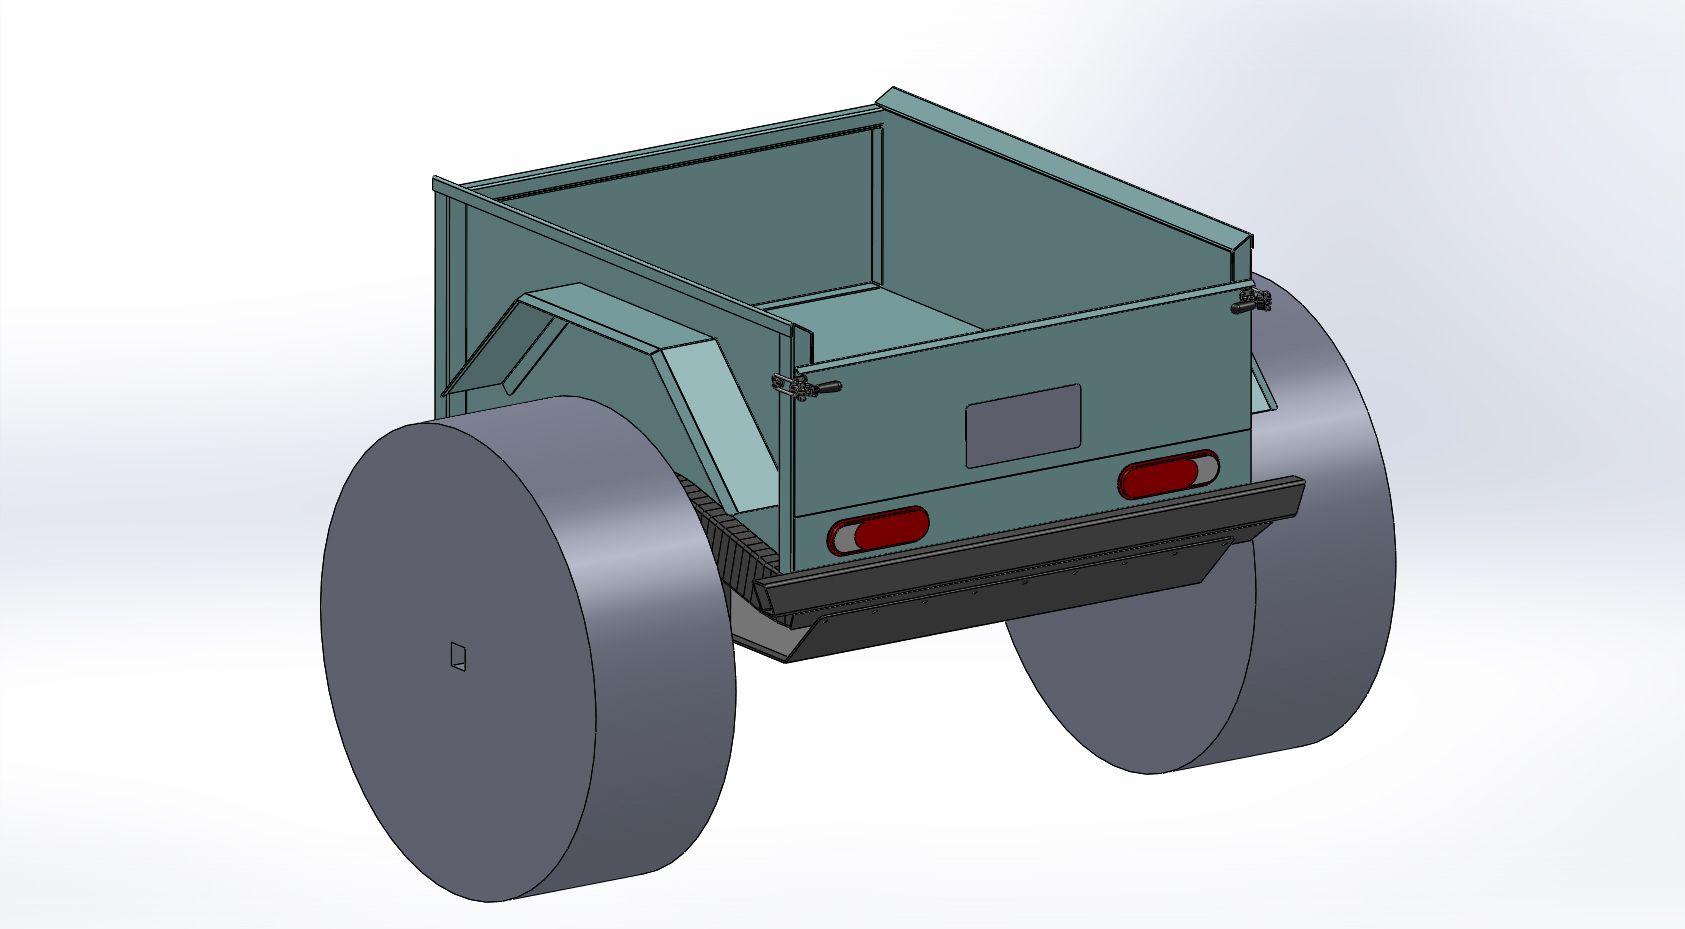
This should give me a bed about 51.5" long depending on how much space I have from the back of the tub to the front of the bed. I think about 1/2" should be enough gap/space?


Here I am just trying to get a better idea of the scale of everything. Originally I thought I wanted the bed to be level with the lip of the rear of the tub. In the end, I think I decided to drop the bed slightly to help make the bed a little obtrusive. I am going to drop the bed about 1.25" below the lip on the back of the tub.

I believe this will leave me with a bed that is about 17-18" deep to the top of the rail. The bed should be about 42" wide and 51.5" long. That seems like a decent amount of space for a guy coming from a flat fender. I should have no problem laying the spare tire down in the bed with room to spare. With a 40" tire I should have almost a foot of extra space.


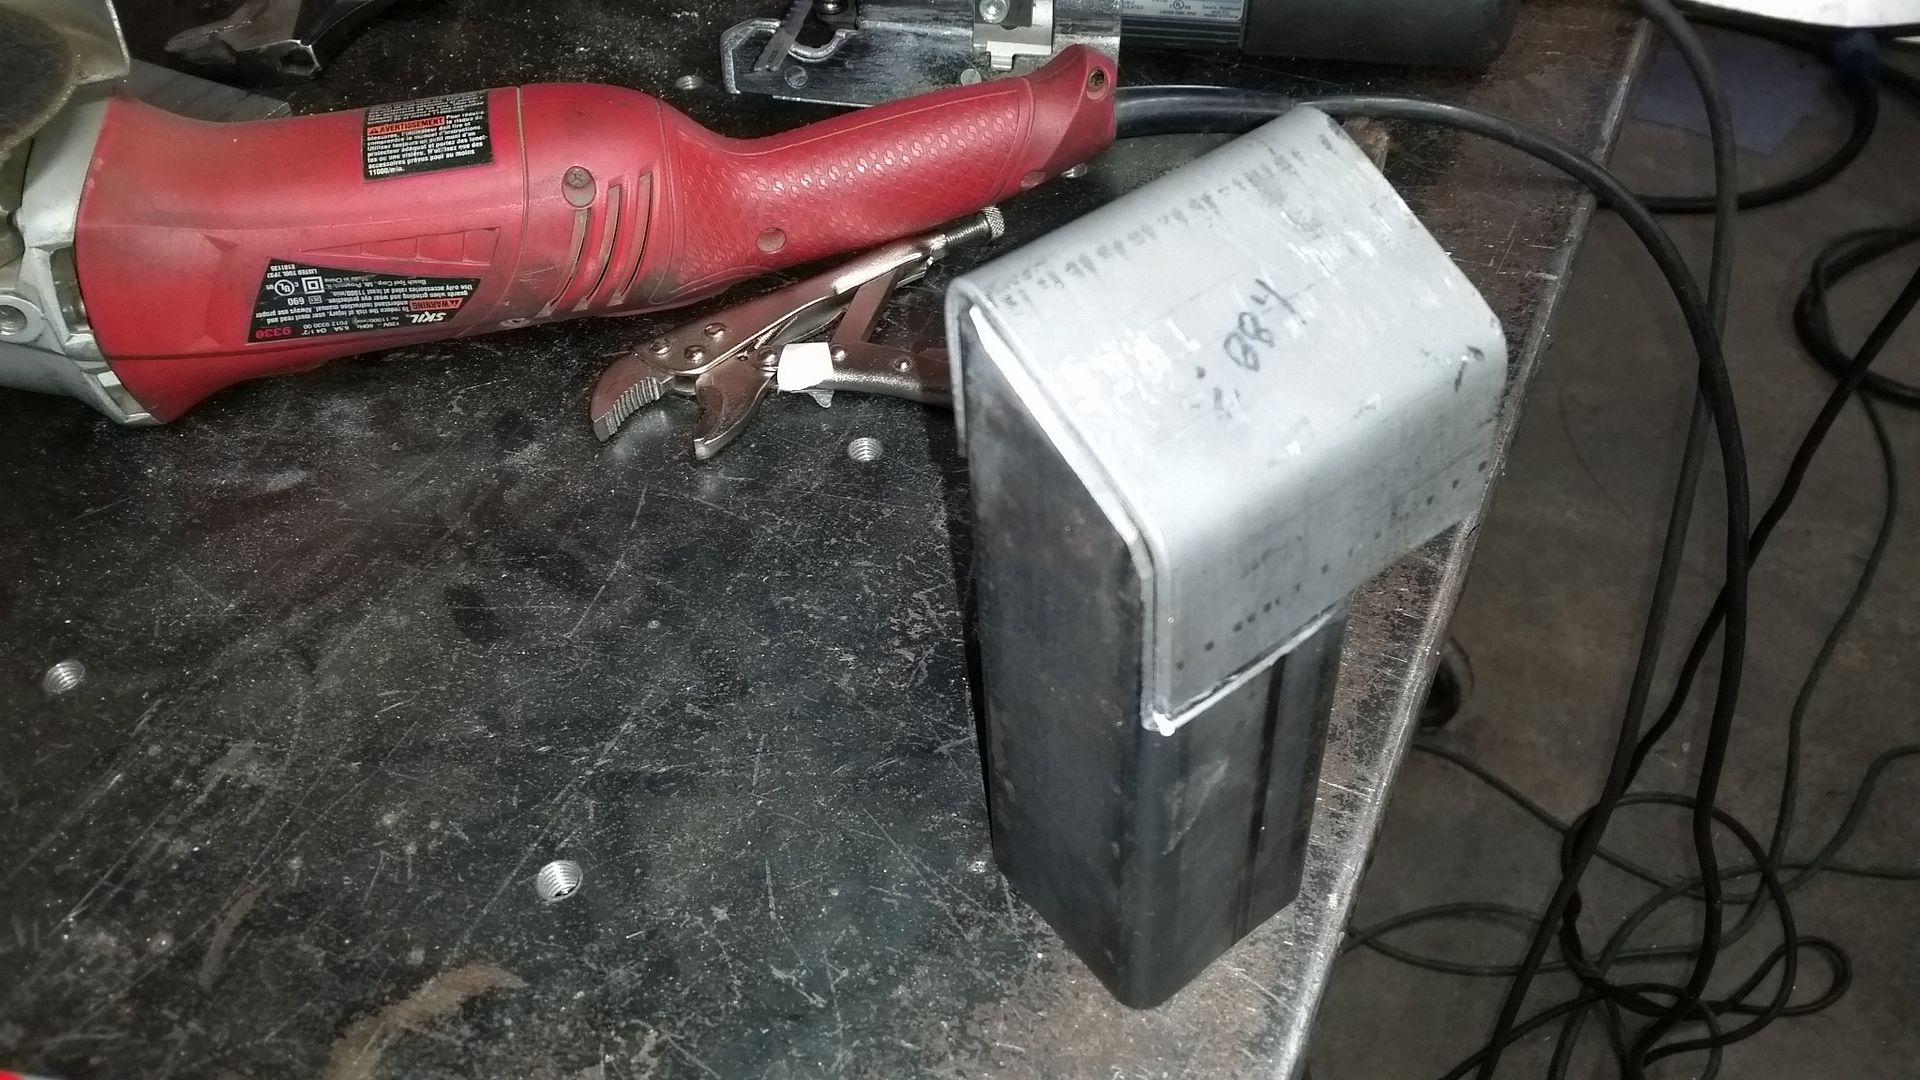
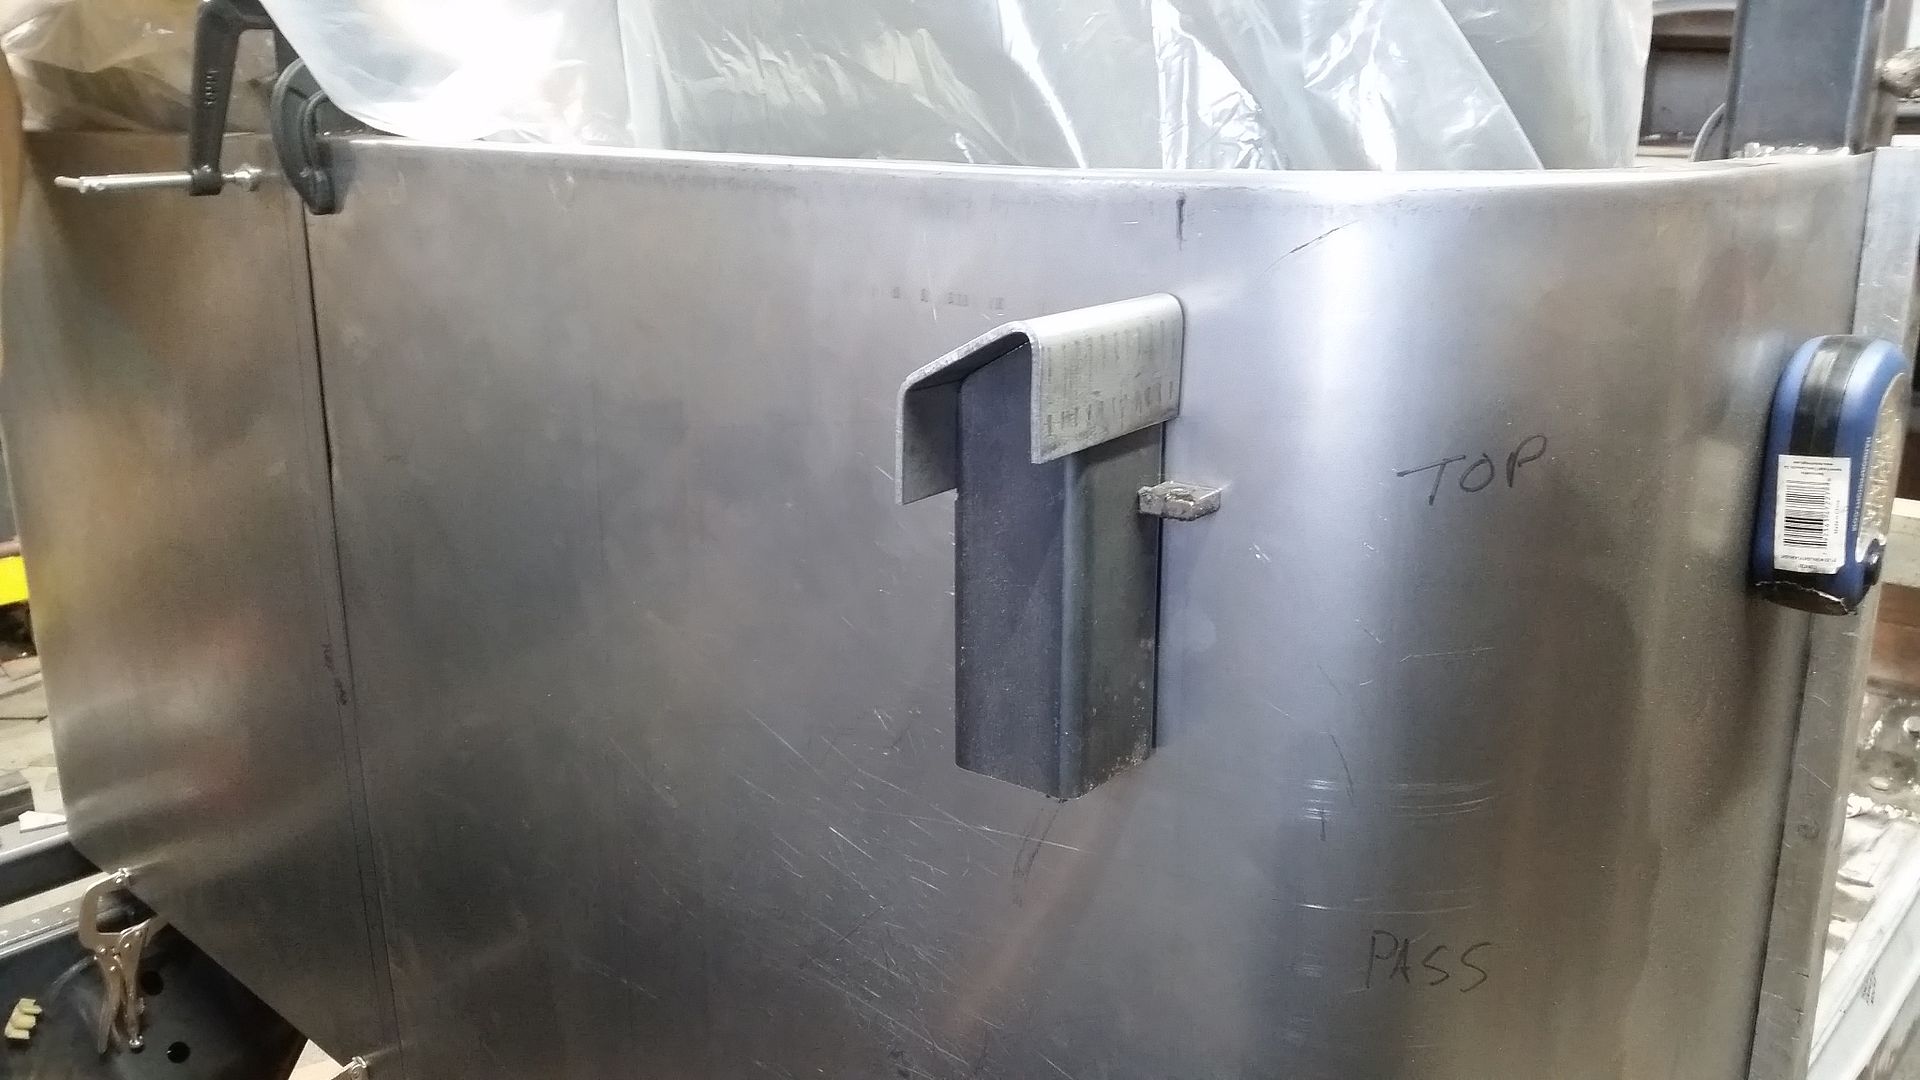
This was my experiment on how to build the bed rail system. The top of the tube as been cut to a 30 degree angle with the a section of what would be the inner wall removed. That should allow a flush surface for inner bed wall to attach to. That would give me a nice perimeter flange to secure the bed wall panel onto.

The tube is 2x2x1/8" wall. I will have those at the 4 corners of the bed. I need to come up with a way to have them easily and cleanly attach to the frame. I don't want the bed to be a completely welded to the frame assembly. I want to be able to remove the bed frame for paint. I believe it will be body color while the frame/bumper will just be black.

One crazy idea I have is to use one of the vertical bed posts as the fuel filler for the fuel tank. I could french in one of those pop-up motorcycle fuel fillers in the bed rail. Run the fuel down the post. Then french in some kind of 90 bend to the bottom which would turn towards the tank. That would completely hide the filler system?

The top cap is a piece of 5" wide sheet/plate/bar that I formed in my press brake. I think I might shorten up the outer vertical flange a little bit. It looks a bit tall to me. Taking off like 1/4-1/2" might make it look a bit better?
 

Metcalf

Expedition Leader
Just a wee bit...


Working on the rear bumper prep and getting ready for the frame cut. The bumper will be the same design as the front with the tapered/pocketed ends along with the JATE rings for recovery. I believe I will also add a mounting plate for a pintle hitch. If I don't do it now it will be really hard later.

I added a few updates to the computer model also....


The departure angle looks like it is going to be about 65 degrees with the fuel tank tucked above the tire centerline at ride height. The fuel tank looks like it will be about 26 gallons give or take.

Things will probably be pretty slow as parts trickle in for the next week or two.
 

Metcalf

Expedition Leader
I like those days I get to make big visual changes.....


Today I got the rear bumper tacked into place and was able to remove the 'extra' 18" of frame I didn't need any longer. This made a MASSIVE visual difference to the feel of the vehicle as a whole. It also made the shop feel a few feet larger too!

There is 14" between the bumper and the next crossmember for the fuel tank. I believe I can get about a 25 gallon tank in that location before things start to get in the way. The departure angle should be about 65 degrees. My hope is that will let me make the most of the 112" wheelbase. I have a few things in Moab that are on my bucket list which I have been denied continuously in the 85" wheelbase on the flatty.

Now I need to make all the brace plates for the bumper to the frame along with the mounting flange for the rear of the fuel tank skidplate.

Some misc pictures...


I think the frame bob was a net loss on weight. I forgot to weigh the new rear bumper but I can get it off the computer tomorrow and it should be pretty close.
 

slowtwitch

Adventurer
Regarding hole saws, I've found the best to be Starrett fine pitch. They don't have the raker teeth, so cut closer to true diameter. I also tune each saw, and run them on precision arbors http://www.paragonmachineworks.com/cgi-bin/commerce.cgi?search=action&category=HS07
Mount on arbor and put an old file in the mill vise,, feed file into side of teeth/saw to help get a nice concentric circle and smooth out the seam. Sometimes the face where the arbor mates needs to be cleaned up as well. Never order one saw... get a few and inspect for defects (off center threads) even on the Starretts. Send em back if bad.. that's why you order a few.

Most hole saws are made for putting holes through floors, walls, etc, and suck for any fine work. On the flip side fancy annular cutters, etc cost too much and get dull. The fine Starretts are the best imo with a little tuning, and last quite a while.
 

Metcalf

Expedition Leader
Regarding hole saws, I've found the best to be Starrett fine pitch. They don't have the raker teeth, so cut closer to true diameter. I also tune each saw, and run them on precision arbors http://www.paragonmachineworks.com/cgi-bin/commerce.cgi?search=action&category=HS07
Mount on arbor and put an old file in the mill vise,, feed file into side of teeth/saw to help get a nice concentric circle and smooth out the seam. Sometimes the face where the arbor mates needs to be cleaned up as well. Never order one saw... get a few and inspect for defects (off center threads) even on the Starretts. Send em back if bad.. that's why you order a few.

Most hole saws are made for putting holes through floors, walls, etc, and suck for any fine work. On the flip side fancy annular cutters, etc cost too much and get dull. The fine Starretts are the best imo with a little tuning, and last quite a while.

Good tip, thank you.
 

SheepnJeep

Active member
I have to say this is going to be a really great truck when it is done! Spent a couple of days lurking through the whole process and it was fun. You are right, there isn't any rocket science behind building a good vehicle. Just simple math and a good imagination. I wish more people would give things a try too.

Noticed you were in wildland... That makes sense. Most of the guys I knew where really the "philosophical" type. We spent a lot of time writing short stories for others to read, making sketches etc. It would seem from the outside that wildland firefighters are sort of rubes, but I really think the opposite is true. Lots of practical knowledge at play in that environment.

Your truck really inspires some good ideas for my next project. I would like to do something similar to your Willys with a custom frame, but stretch the wheel base out to maybe 100 inches or so. Also would like to cut the body down the middle and widen the whole thing to be in proportion to wider axles. Maybe do the whole drivetrain from a cherokee or something similar. Then I would like to finish out the interior and have a permanent hard top sealed and bolted down. I love my own willys jeep, but I am imagining a modern one that I could use more often. It was really cool to see you make those curved rear panels. I was thinking I would end up buying jeep panels and modifying them, but it would be much easier to make my own from scratch after seeing your approach.

I would like to share something with you but I'm not sure what I have done is really on par with your work... So far my biggest stroke of genius was putting velcro on the back of an old wristwatch and sticking it to my dash.

Perhaps someone can make use of this idea. I had a few scraps of C channel that were very short, so I welded them under the 4 corners of my jeep. Front bumper and under the drawbar in the back. They serve to keep a jack from going -Shwooop- sideways on the flat surface of the bumper. Not fancy but it works perfectly for the purpose.


-Jesse
 
Last edited:

Metcalf

Expedition Leader
Just a bit, trying to get back in the groove...


This is the rear bumper transition flange. The gas tank skidplate will bolt to the bottom of this flange. It will use the same 10mm clip nuts that the belly skidplate is going to use to keep parts/tools common.

Some other misc things....


Upper Radiator hose. This is the upper hose from a 2007ish GM Trailblazer with a 5.3/6.0 LS engine. I only had to remove about 1" of the radiator end of the hose. This is the GATES 23194 version.


Lower Radiator hose. This is an upper hose from a 1985ish Jeep CJ7 with the 4.2 I6 engine, Dayco B71013. I did have to trim both ends of the hose a fair bit, carefully, but it ended up fitting very well.


Next project.....

These blocks are going to become the mounts for the bed corner posts.
 

Metcalf

Expedition Leader
Time to learn a new skill....


I finally pushed the AC switch on my TIG welder for the 1st time. The last time I did some aluminum AC TIG welding was probably 20 years ago for about 15 minutes....

This project is about learning new things and developing my skills as a fabricator. There are a lot of things that I am going to make out of aluminum for this truck......front fenders, roof, rear window panels, 2pc doors, bed panels, gas tank, rear fenders, etc.

Much to learn.

While the welding sample was cooling between passes I decided to cut a little sample of this new shinny metal and test a few things in my new press brake.


This will help me when folding parts. This is 1/8" 5052-H32 material. It seems to bend very clean with no signs of cracking even with a fairly tight corner radius.


Looks at all that shinny metal....many sheets to come....
 

Metcalf

Expedition Leader
More Aluminum TIG practice today...


Clean gloves. Clean rags. Acetone bottle. Clean stainless brushes dedicated to aluminum use. Clean tungsten grinding. Clean Clean Clean.

I tried a lot of different settings. I think I am getting ok results, but I still get the odd black spec floating in the weld every so often. I don't think this is a deal breaker, but dang it is annoying.

AHP AlphaTig 200x older model without AC frequency control.
3/32nd 2% lanthinated Tungsten with 1x ball end
#7 cup and maybe 1/8 stickout
20 cfh of Argon
100amp
AC balance set to to 11 o'clock or so
5052-H32 Material
3/32nd 5356 filler

I think tomorrow I am going to finish off the 1st pass on this pad plate. Then start on making a small box to try some corners....
 

Rainen

New member
Great thread, love the unique idea. I think its interest that the LR transfer case you are using has a 1.2 output. Seems like Advanced Adapters or aftermarket transfer case company X would make something similar. Maybe they do and i haven't found it.
On question for you though, where did you get the chip board from? I do a lot of mockup with cardboard myself, and it looks like the material your using is rigid enough and thin enough to fit the bill, mind telling me where you got it?
Keep up that amazing work.
So glad that I am not the only one that is designing the next rig while building the current one.
 
Good point. I keep old 12 pack cardboard or other misc cardboard packaging for that purpose because I can't stomach the price of the chip board. Art supply stores usually have it in large enough sheets, but the cost is huge.

Uline has it, but again, the cost is high. https://www.uline.com/BL_1852/Chipboard-Pads?keywords=chipboard

Some other forum suggested getting blems from picture frame stores or from fabric stores. Another source suggested befriending someone who works at a food packaging plant, but all of those options require foot work.

Edit - I just found this source. Not so bad - http://www.papermart.com/brown-gray...SKU=&utm_source=affiliate&utm_medium=cpa#4661
 
Last edited:

Forum statistics

Threads
185,828
Messages
2,878,635
Members
225,393
Latest member
jgrillz94
Top