You are using an out of date browser. It may not display this or other websites correctly.
You should upgrade or use an alternative browser.
You should upgrade or use an alternative browser.
I got here as fast as I could - '04 Suburban Z71
- Thread starter tbisaacs
- Start date
tbisaacs
Adventurer
Those look like polyurethane bushings:Wow1: there Mr Tbisaacs. Always a good thing to use when replacing stock bushings. If so I can understand the sudden change in the way the truck drives. Cheers, Chilli..
Thanks! The old body bushings were in tact but glazed and stiff. The bushings on the links were cracked and hard as a rock.

Sent from my iPhone using Tapatalk
rayra
Expedition Leader
thanks for the LED link, looks like a real decent prices for the number of pieces. Had been looking at rockauto courtesy LED bulbs from Phillips at a $5ea. I too prefer the more natural light color, really don't like that actinic blue-white. Even though the LEDs I trimmed my back hatch with are that shade.
One of my 'on deck' projects is going to be figuring out an interior latch release(s) for both the Liftgate glass and the Liftgate itself. Located centrally near where your own light bar is mounted. There's an interior panel seam right about there and the latch mechanisms / rods are around there. It should be possible to fit something like e-brake release pull handles, tied to those linkages, so one can unlatch the rear glass or hatch from inside the rear of the vehicle. I'll post a new project thread about it when I get busy on it. Hope to complete it before Summer. The aforementioned lock switch is already near to hand. I want to be able to sleep in the vehicle and open the hatch from inside.
One of my 'on deck' projects is going to be figuring out an interior latch release(s) for both the Liftgate glass and the Liftgate itself. Located centrally near where your own light bar is mounted. There's an interior panel seam right about there and the latch mechanisms / rods are around there. It should be possible to fit something like e-brake release pull handles, tied to those linkages, so one can unlatch the rear glass or hatch from inside the rear of the vehicle. I'll post a new project thread about it when I get busy on it. Hope to complete it before Summer. The aforementioned lock switch is already near to hand. I want to be able to sleep in the vehicle and open the hatch from inside.
tbisaacs
Adventurer
Which sway bar bushings and links did you get?
Moog all the way. It's a little weird because the silicone body bushings are a lot smaller that the OE rubber ones. They feel great though.
tbisaacs
Adventurer
thanks for the LED link, looks like a real decent prices for the number of pieces. Had been looking at rockauto courtesy LED bulbs from Phillips at a $5ea. I too prefer the more natural light color, really don't like that actinic blue-white. Even though the LEDs I trimmed my back hatch with are that shade.
One of my 'on deck' projects is going to be figuring out an interior latch release(s) for both the Liftgate glass and the Liftgate itself. Located centrally near where your own light bar is mounted. There's an interior panel seam right about there and the latch mechanisms / rods are around there. It should be possible to fit something like e-brake release pull handles, tied to those linkages, so one can unlatch the rear glass or hatch from inside the rear of the vehicle. I'll post a new project thread about it when I get busy on it. Hope to complete it before Summer. The aforementioned lock switch is already near to hand. I want to be able to sleep in the vehicle and open the hatch from inside.
This is on my mind too. I'm going on a solo camping trip next month and will be sleeping in the back. It's silly that there is no latch inside.
Sent from my iPhone using Tapatalk
rayra
Expedition Leader
I'll bump it up, do the exploratory surgery this week. I'm envisioning a 'MkI' that just uses some steel cable to form the pulls, wrapping the exposed ends into a taped pool or a cable eye-loop fitting.
The horizontal split seam between the panels might allow just passing these wire pulls thru without permanent modification. At least enough to test it out.
A later version I hope to use something like an emergency brake release handle(s), mounted into the plastic trim panel to make it more cosmetic and flush-fitting. I have to get in there and see which directions the pulling forces have to go and what arrangement fits both that and the structures under the skin. Something like an econo-car interior door latch and its housing could make it really slick.
rayra
Expedition Leader
ratcheting wrenches make much quicker work of that particular pain in the ***.
They look real good. I'm too cheap / broke for Bilsteins. Maybe some day. Too many other hobbies tapping my wallet.
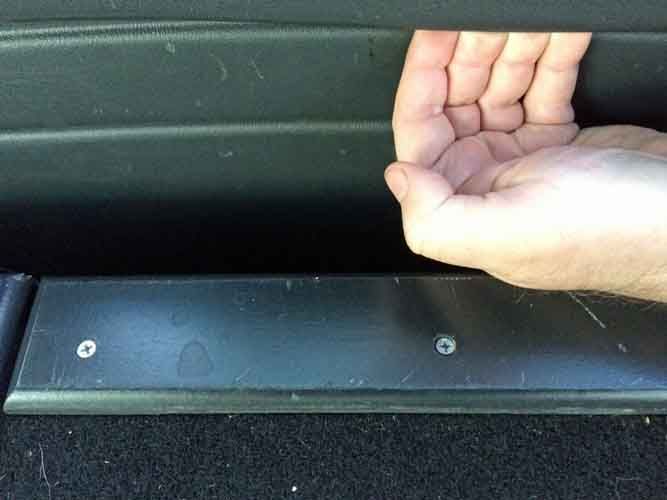
I took a quick look this evening, verifying that the overlapping seam in the Liftgate trim panels was where I thought it was and that it's ~4" above the level of the storage platform / drawers setup. Wouldn't do me much good to figure it out if can't reach the releases. With a nice inflatable twin mattress on top of my platform that ought to put the release handles about even with the top of the mattress, immediately to hand when laying in the back.
The plastic trim is two pieces. One that encircles the window and one for the lower third, where the pull handle is. The groove detail hides the overlapping joint.

tbisaacs
Adventurer
Gearing up for a solo camping trip in a few weeks as a "dry run" before dragging out my family.
Perhaps my favorite Suburban trait is the sheer amount out volume inside.
The plan is to fold down the second row of seats to use as a "platform" for my fridge, yeti 400, and dry storage. When parked I'll just leave the doors open.
The seats provide a sturdy spot to lash some straps to secure everything. Underneath there is bar that runs the full length of the seat that is bolted down.


Leaves plenty of room for my pup and I to snuggle up in the back.
Sent from my iPhone using Tapatalk
Perhaps my favorite Suburban trait is the sheer amount out volume inside.
The plan is to fold down the second row of seats to use as a "platform" for my fridge, yeti 400, and dry storage. When parked I'll just leave the doors open.
The seats provide a sturdy spot to lash some straps to secure everything. Underneath there is bar that runs the full length of the seat that is bolted down.


Leaves plenty of room for my pup and I to snuggle up in the back.
Sent from my iPhone using Tapatalk
Martinjmpr
Wiffleball Batter
Looks like you're missing the "bridge" pieces that cover the footwell for the 3rd row set - that would give you a nice flat area for sleeping.
.
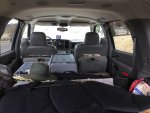
FWIW here's our interior from a recent trip, looking back to front. The area behind the front passenger seat is where our dog (40lb cattle dog) sits Fridge is in the middle with the opening towards the front and to the left of the fridge is the food box. We set it up this way so my wife can hand me a cold drink or a snack as we drive. We leave it set up like this for camp, too, just makes it easier keeping most of the food and drinks in the tow vehicle rather than the trailer - that way we don't have to empty out the trailer kitchen after each trip.
.

.
FWIW here's our interior from a recent trip, looking back to front. The area behind the front passenger seat is where our dog (40lb cattle dog) sits Fridge is in the middle with the opening towards the front and to the left of the fridge is the food box. We set it up this way so my wife can hand me a cold drink or a snack as we drive. We leave it set up like this for camp, too, just makes it easier keeping most of the food and drinks in the tow vehicle rather than the trailer - that way we don't have to empty out the trailer kitchen after each trip.
.

tbisaacs
Adventurer
Looks like you're missing the "bridge" pieces that cover the footwell for the 3rd row set - that would give you a nice flat area
I actually went so far as to buy an extra middle seat out of a Yukon so that I could swap the flaps. They are held in place with a piano hinge that it riveted to the steel in the seat. I could not get them off So now the seat is a couch in my garage.
I would have just swapped the seat as is but the Yukon seat was a slightly different color and had "tufted" leather in the seat centers.
So here we are, still no bridge pieces. For the life of me I cannot figure out how (or why) the PO removed them.
In the end it's fine. I'm only 5'6" so I fit even without them 🤣.
Sent from my iPhone using Tapatalk
tbisaacs
Adventurer
I don't know if any other suburban / Silverado owners feel the same way, but the stock headlights are just awful. I've aimed and re-aimed using a wall & tape measure and can't seem to get them dialed in.
So, I'm going to give these Depo projectors a try. They are well made for the price, but there is a perceptible bit of wiggle in them. Install takes minutes. Light cutoff is very good.


Sent from my iPhone using Tapatalk
So, I'm going to give these Depo projectors a try. They are well made for the price, but there is a perceptible bit of wiggle in them. Install takes minutes. Light cutoff is very good.


Sent from my iPhone using Tapatalk
Similar threads
- Replies
- 1
- Views
- 691
- Replies
- 46
- Views
- 10K
- Replies
- 57
- Views
- 16K


