1990 Comanche Build - The Wilderbeest

agamble

Member
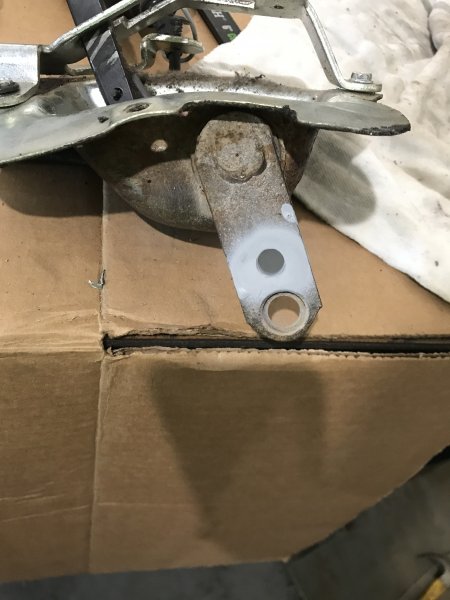
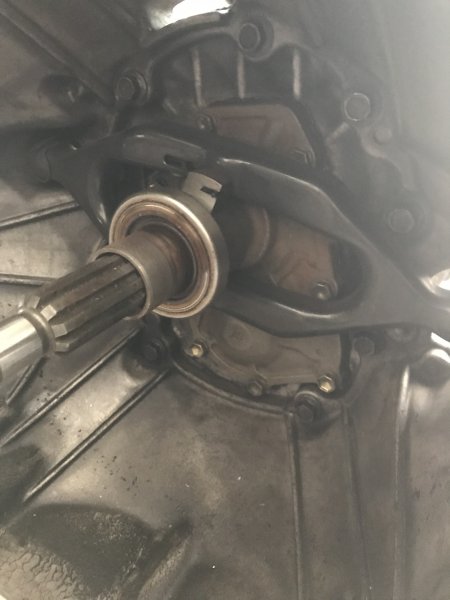
The final phase of swapping in an external slave is that the bearing retainer needs to be swapped out. The internal slave bearing retainer is shorter and reveals more spline. In the picture below you can see the final setup, the throw out bearing in the front, followed by the clutch fork, and finally the bearing retainer plate.


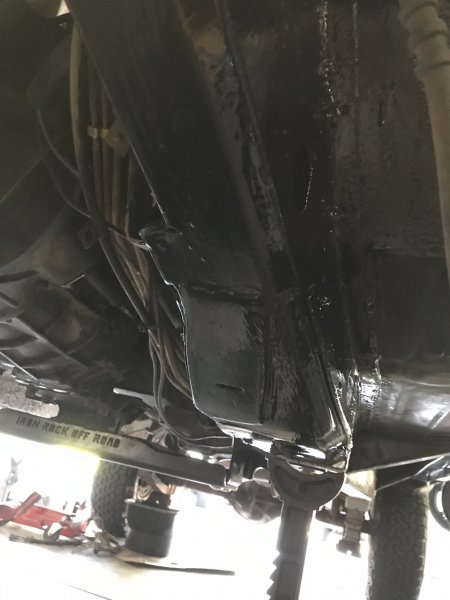
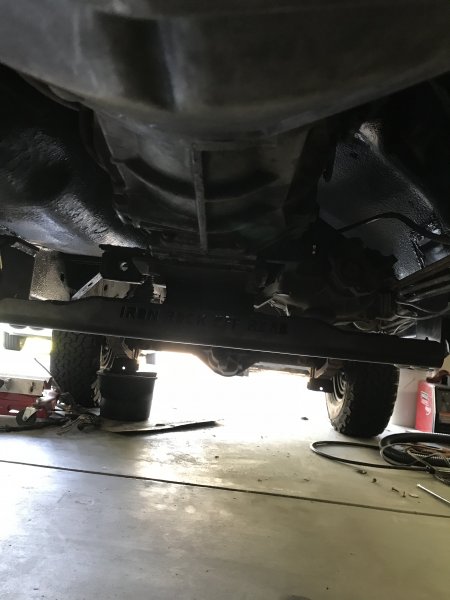
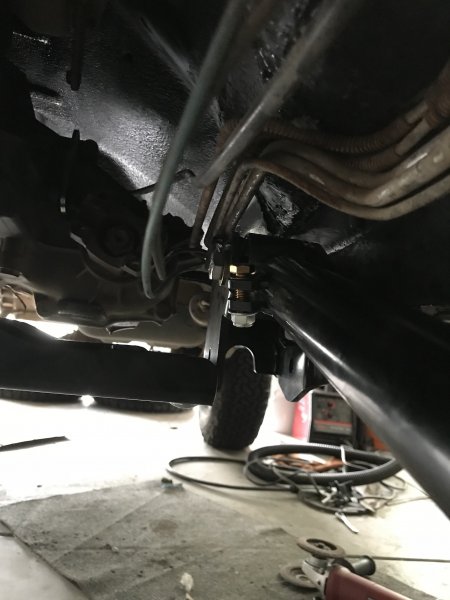
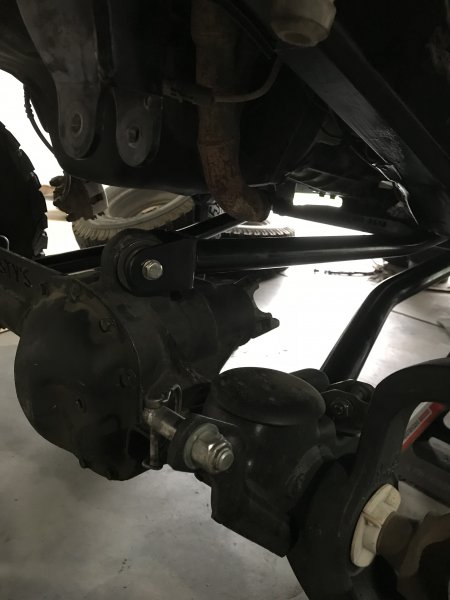
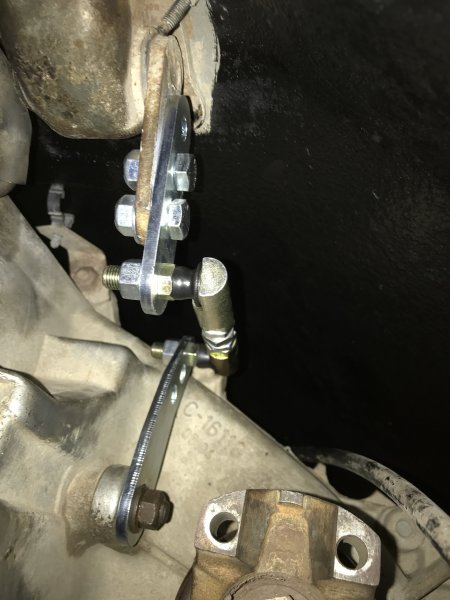
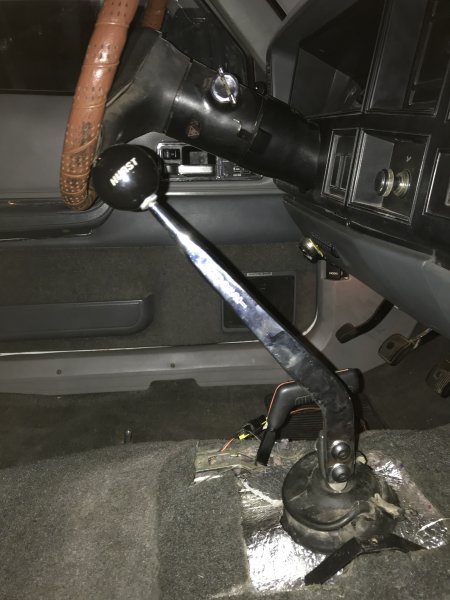
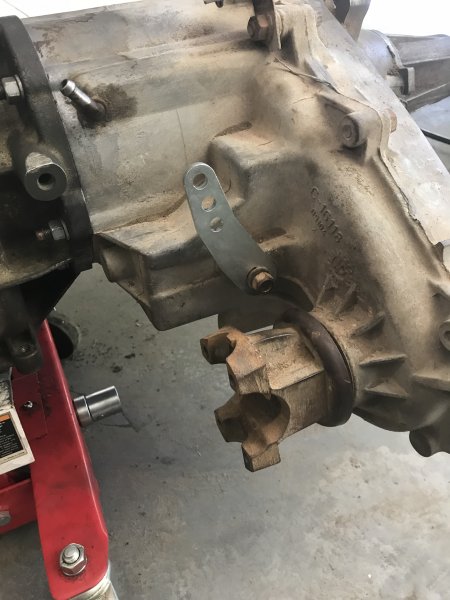
When swapping the transfer-case if you did not get an AX15/NP2321 combo you will need to get the correct input gear for the transfer case. The important thing to look for is the variations in the 231 transfer case input gear. The 231 comes in 21 spline (found behind the BA10/5, and I believe pre 91' AW4) and 23 spline (found behind the AX15 and post 91' AW4) versions. The input gear comes in three lengths, long, medium (rare) and short. To know which length input gear you have or will be pulling from the donor just take a quick measurement. The long shafts protrude 2.1" from the front mounting face of the transfer case. The short version protrudes 1.2". The rare medium shaft protrudes 1.7". You should also be careful when swapping any of these gears due to different bearing widths and gear teeth. For my specific situation I'm going from an AX15 internal slave to AX15 external slave, and both transferases had the short input gear. So it was a straight swap. While the 4WD shift linkage is the same in Jeeps equipped with the AX15 and will connect. I added in an aftermarket linkage that is simpler in setup and provides a smooth shift from Boostwerks. A google search returns several results of different manufacturers.


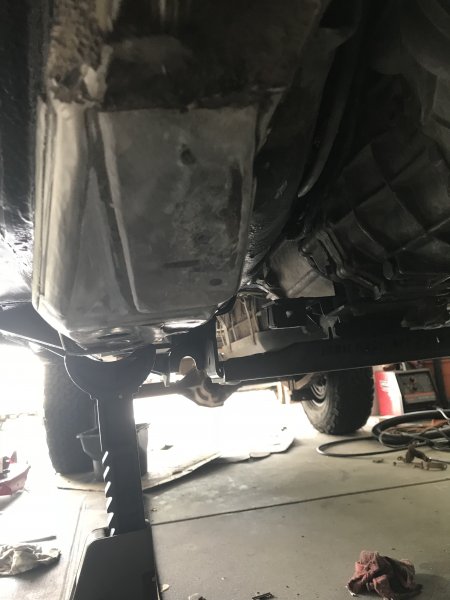
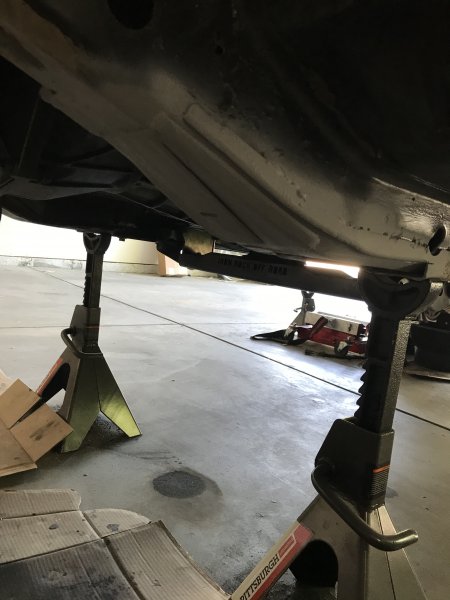
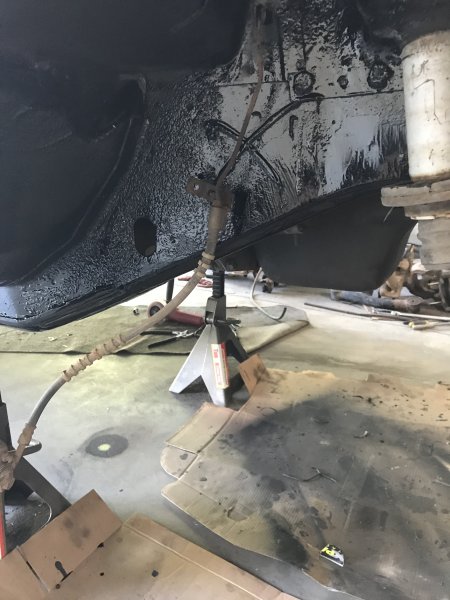
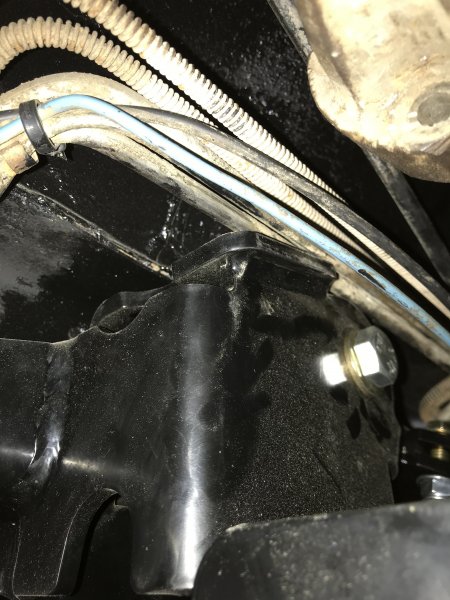
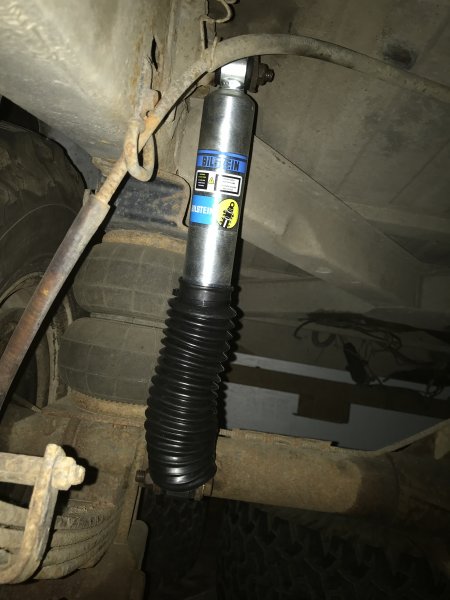
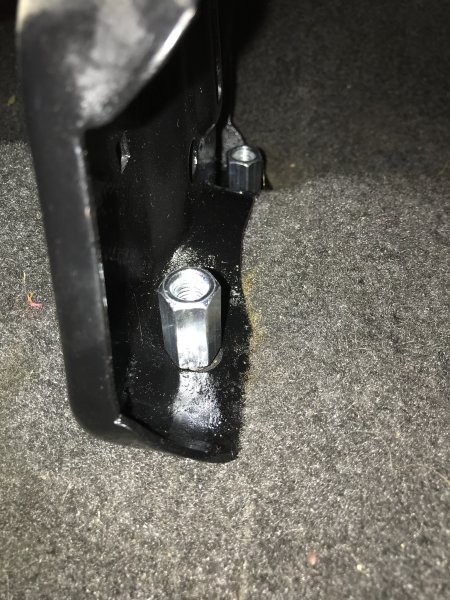
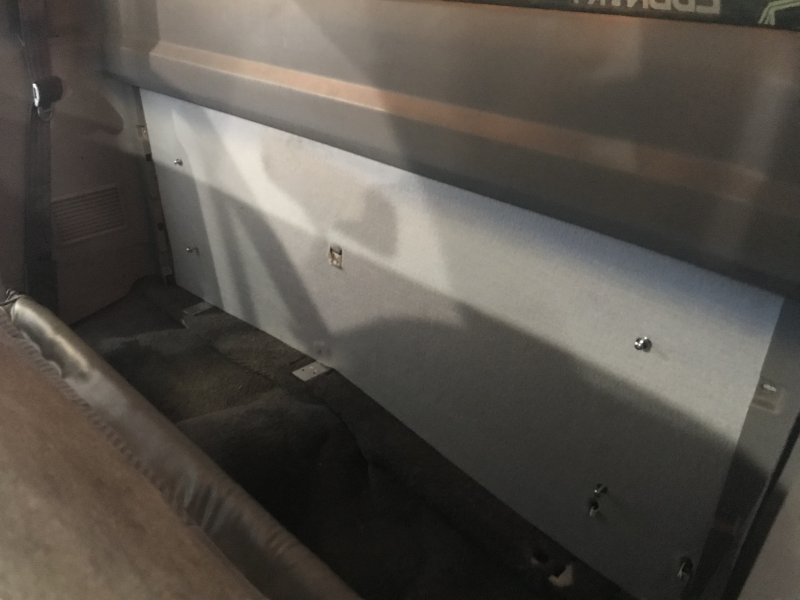
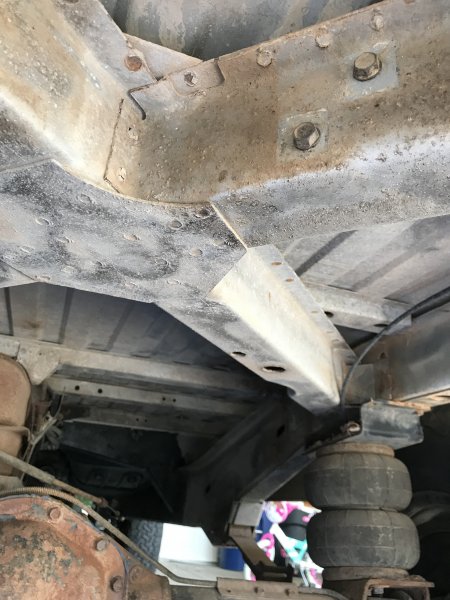
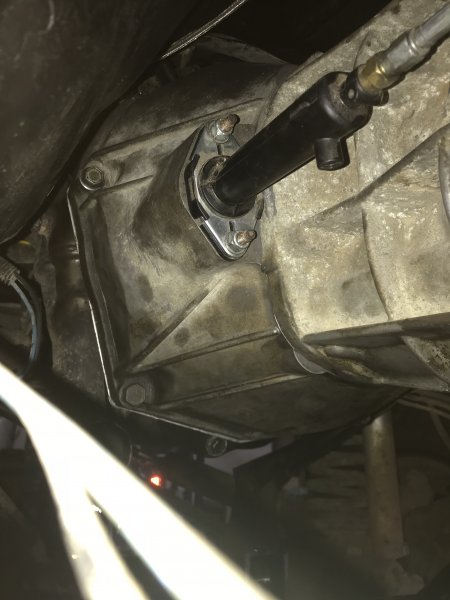
All buttoned up with the new external slave cylinder in place.


agamble

Member
can you show more of that camper shell

I can. Is there a particular thing you want to see or just more of it in general?

look up wildernest campers, they're pretty wicked, I stumbled across one on an old nissan hardbody a year or so ago, it's a shame they don't make them anymore

As O2rangeredge says they're pretty wicked. There is a strong cult following and they can still be found in fairly good condition. General information regarding them for them is hard to come by. From what I have read up on they were manufactured from around the late 80's to sometime in the mid 90's. During production they only manufactured about 300 a year and what little information on the web that I can find is that based off of the serial number this Wildernest was built sometime around 1990? I do know for sure that if there are to small "S" shaped windows on each side it is from 1994 or earlier. The last two or so production years the opera windows were merged into one bigger window on each side.


This is actually the second wilderness topper that I have put on the Comanche. The first one was about 4 inches to short, leaving a large gap between the cab of the truck and the Wildernest and I used a piece of flat iron to mount the front of the Wilderness to the bedrail. After a long search I was able to find the current Wildernest. This one is the Tent Top Model Number 91/ Tip Top Model Number T91. Its designed to go with a number of light weight pick-ups with a long bed. A link to a brochure that lists model numbers: http://www.therangerstation.com/resources/pdf_documents/Wildernest_OEM.pdf.

So as its a one size fits all approach it is not a perfect fit. Height wise it sits about 1.5" below the roof, width wise is a perfect fit, and length wise it is about 1" too long leaving a gap between the back hatch and tail gate. For it to fit on the long bed Comanche the brochure says it requires a rear door wedge, which I don't have nor have i ever seen to know what it looks. While noticeable the gap between the rear hatch and the tail gate isn't bad enough that it bothers me.


Last edited:

agamble

Member
With the transmission in it was time to begin the front suspension install. As this build is directed more towards overloading, I figured that long arms would be a benefit on all aspects of the rig. Two jeeps back I had an XJ that I equipped with IronRockOffroad Critical Path Long Arms. To date it was one of the best modifications that I have ever done. When purchased it was purely from an offroading perspective but, the benefits didn't stop there. With an improved control arm geometry it absorbed bumps well and rode so smooth.....for a jeep. On-road handling there was a marked difference compared to short arms. As well ease of creating clearance for making front end maintenance much easier. Now I have only had good experience with IRO and while I liked the Critical Path Long Arms, I wasn't a fan of the caster adjustment that came with the driver side arm. While searching for a long arm setup, not being too picky only requirement was it needed to work with 3" of lift, I found IRO had a new rock-link system. The arms are designed for a minimum of 3" of lift, eliminated the previous caster adjustment and it was a true three link.

First priority was removal of the front axle. All '87-'95 YJs and XJs and MJs equipped with the NP231 came with a Central Axle Disconnect (CAD) system on the passenger-side axle tube. It consists of a two-piece splined shaft and a coupler that is slid back and forth via a vacuum-operated shift fork to either connect or disconnect the shaft. While it is a HP Dana 30 it is the least desirable version of the axle. The long-side tube doesn’t go through the cast CAD section and so is prone to breaking if abused. The U-joints are smaller than ’96-and-later models, and some of the earliest axles used bolt-on caliper mounts. you have no 4WD. But the biggest problem with this design is that the vacuum lines rot out, the vacuum motor can seize up, and/or the shift fork can break. Any of these problems will result in no 4WD when the T-case shifter is pulled. While scouring Craigslist I found a HP Dana 30 from a 98 XJ for sale. The PO had bought the HP30 as an upgrade for his wrangler, but before swapping it in he needed money. So for $180 I got the axle housing (he had already welded on a rusty's axle truss, lower control arm skids, and braced the lower c's) axles with the larger 760 U-joints, brand new motive 4.10 gears, and axle tube seals. All this while eliminating the CAD at the same time (y).


With the axle removed it took a lot of talking myself into it but I eventually pulled the trigger. While this was not the first time cutting off the lower control arm mounts, there still is always a feeling of dread at the thought of doing something so permanent to that scale. The brackets have to go to create the space needed for long arms to fully articulate. I didn't take any pictures of the cutting portion, just the aftermath. It took a total of six cut off discs, three per side, to get the lower mounts off. I started on the inside and worked my way to the outside. Once the major cutting was done, the fine clean up and smoothing were done with a flapper disc.


Once the edges were smooth and clean, a couple coats of automotive primer covered the bare metal.


About 48-hours later to continue the theme of removing and preventing future rust, two coats of Chassis Saver was applied.


Last edited:

agamble

Member
After waiting about a day for the Chassis Saver to dry I installed the long arms. The kit comes with two outer brackets that have the mounting points on the subframe for the arms. This setup allows for the cross memeber to be dropped without having to remove the arms as well.


The only hiccup that was encountered during the install is the arms are designed for an XJ. Meaning, if you're familiar with the XJ, the rear brake line and fuel line run flat against the inner frame. On the MJ there are two rear brake lines and fuel line that bend out towards the transmission to wrap around extra bracing that is used to mount the stock cross member. The drivers side subframe mount for the long arms is designed to have a space for the lines to run between the bracket and the inner frame. So for the Wilderbeest I had to use a work around for the time being. I ended up removing all the retaining clips from the fuel filter forward to create enough flexibility in the lines allowing them to be pushed up on top of the bracket. I checked the clearance to see if the upper control arm moving up would smash the lines, and there was plenty of room. With subframe and cross member in place the new front axle was rolled into position and bolted onto the control arms.


agamble

Member
With the new axle in place I finished putting the front suspension together. For shocks I installed new 5125 bilstein shocks. Anyone interested the shocks measure 23.35" eyelet to eyelet, with a collasped length of 15.91", an extended length of 25.93", and 5/8" eyelets. Shock tower eliminaters were installed to allow for eyelets on both ends.

When ordering the shocks I thought I would take the easy route and have the seller assist with sizing. My first attempt at ordering was through 4WheelParts. When buying from the website (first mistake) the page states that a sales rep will call to confirm size for your vehicle. Well the page for the 5125 shocks listed jeep Comanche in the drop down so I put in an order for a set of four. 5 days go by no contact about the shocks, entailing no confirmation email of the order, no shipment email, or contact by the sales rep. Eventually I phone into the customer service and to tell them I haven't had the shocks I ordered a week ago sized or confirmed. They transfer me the sales rep who was assigned to my order and he doesn't answer on his direct line, nor does he return my call over two days additional days I wait. So I call the main number again, tell them I can't get the sales rep to contact me or return my call so i'm transferred to another rep who immediately answers, He looks at my order number, and after a minute searching their database promptly tells me, "Bilstein doesn't make 5125 shocks for the jeep Comanche. Lets see if they have 5100s". And starts searching the database. I quickly interject telling him hold up I don't want 5100s. If I did I would have initially ordered them, I want 5125s. Again he replies, "They don't make them for the Comanche". I ask is that what a webpage is telling you? He responds yes. At this point I say they do make 5125s for the Comanche, as shocks are pretty much a universal application, simply measured from eyelet to eyelet to ensure a proper fit. He then responds, "Well if you can find the correct manufacturer P/N for me I can order the shocks then." Now I respond, "You want me to go to the manufacture webpage or catalogue, find the correct P/N, call you back, give you said P/N, and wait for you to order it? Sounds like I am doing all your work. Can I get an additional 15% discount on top the already applied discount then? He says, "No". My response to this is, "Well if I don't get a discount for doing all the work and essentially your job, and you still get commission off of my sale why would I order from you? Cancel the order". A quick search online found the Bilstein sales brochure and 4 minutes later I was on Amazon placing an order for 5125s. I know long winded, but morale of the story is don't go with a large retailer website.


Accompanying shock tower for the upper eyelet.


The coil springs were an old pair I had laying around, they're for a 4 - 4.5" lift. In the picture above you can see the hard line was straightened out to accommodate the lift as the stock length brake lines were kept. To address this short coming I went with a cheap but very effective upgrade. On rockauto you can purchase extended brake lines (24.5" in length) for a YJ with a lift for about $11 a piece. While they're not braided lines at $22 bucks for the pair I'm not going to complain.


Once the shocks and coil springs were in, moved to connecting the steering. The steering was upgraded with the now defunct Serious Offroad 1-ton steering. It is identical to the JCR Offroad setup with the main difference being in place of the reaming out the knuckles and pitman arm for the new TREs you drill the knuckles and pit man arm to 7/8" allowing a 3/4" tapered insert to be used. To drill the knuckles I started with a 5/8" bit then stepped up to a 7/8" bit, taking care to keep it centered and not let the bit wander. The knuckles were soft as butter and drilled out in 10 minutes. The pitman arm I knew was going to be harder so I removed it and mounted it into a bench vice. Well after 30 minutes of drilling burning through my bit and making no progress I opted to take it to a machine shop. After going to 4 different shops I finally located one that was willing to drill out the pitman arm. Accompanying the 1-ton steering is a double sheer track bar from IronRockOffroad. The sway bar was beefed up from the stock 24mm to a 28mm from a V8 ZJ and some quick disconnects.


As it stands the caster and toe have not been fine tuned. After some test driving it will be adjusted accordingly.

Not suspension related but its worth a mention. I have read on various forums of using a pool noodle to protect the door hinges from water and mud. With pool noodles being so cheap and plentiful I figured that I would give it a try to protect the door hinges.
 

02rangeredge

Adventurer
With the transmission in it was time to begin the front suspension install. As this build is directed more towards overloading, I figured that long arms would be a benefit on all aspects of the rig. Two jeeps back I had an XJ that I equipped with IronRockOffroad Critical Path Long Arms. To date it was one of the best modifications that I have ever done. When purchased it was purely from an offroading perspective but, the benefits didn't stop there. With an improved control arm geometry it absorbed bumps well and rode so smooth.....for a jeep. On-road handling there was a marked difference compared to short arms. As well ease of creating clearance for making front end maintenance much easier. Now I have only had good experience with IRO and while I liked the Critical Path Long Arms, I wasn't a fan of the caster adjustment that came with the driver side arm. While searching for a long arm setup, not being too picky only requirement was it needed to work with 3" of lift, I found IRO had a new rock-link system. The arms are designed for a minimum of 3" of lift, eliminated the previous caster adjustment and it was a true three link.

First priority was removal of the front axle. All '87-'95 YJs and XJs and MJs equipped with the NP231 came with a Central Axle Disconnect (CAD) system on the passenger-side axle tube. It consists of a two-piece splined shaft and a coupler that is slid back and forth via a vacuum-operated shift fork to either connect or disconnect the shaft. While it is a HP Dana 30 it is the least desirable version of the axle. The long-side tube doesn’t go through the cast CAD section and so is prone to breaking if abused. The U-joints are smaller than ’96-and-later models, and some of the earliest axles used bolt-on caliper mounts. you have no 4WD. But the biggest problem with this design is that the vacuum lines rot out, the vacuum motor can seize up, and/or the shift fork can break. Any of these problems will result in no 4WD when the T-case shifter is pulled. While scouring Craigslist I found a HP Dana 30 from a 98 XJ for sale. The PO had bought the HP30 as an upgrade for his wrangler, but before swapping it in he needed money. So for $180 I got the axle housing (he had already welded on a rusty's axle truss, lower control arm skids, and braced the lower c's) axles with the larger 760 U-joints, brand new motive 4.10 gears, and axle tube seals. All this while eliminating the CAD at the same time (y).


With the axle removed it took a lot of talking myself into it but I eventually pulled the trigger. While this was not the first time cutting off the lower control arm mounts, there still is always a feeling of dread at the thought of doing something so permanent to that scale. The brackets have to go to create the space needed for long arms to fully articulate. I didn't take any pictures of the cutting portion, just the aftermath. It took a total of six cut off discs, three per side, to get the lower mounts off. I started on the inside and worked my way to the outside. Once the major cutting was done, the fine clean up and smoothing were done with a flapper disc.


Once the edges were smooth and clean, a couple coats of automotive primer covered the bare metal.


About 48-hours later to continue the theme of removing and preventing future rust, two coats of Chassis Saver was applied.


so it does the cap still flip completely? the names for the models don't mean much to me, but I remember seeing a fippac a while back that only tilted up 45 degrees
 

agamble

Member
Damn shame that Wildernest cap has so many bullet holes in it!

I was told they give it character, hahaha. The shell had a number of those decal stickers that I was not a fan of and I have since removed them. The razor blade came into play but the adhesive was not as easy to get off. It took a number of methods to get them off. The first attempt was the razor blade with lots of scraping, yet the adhesive would not come off entirely. Olive oil was used to help with the sticky and that work, but left an out line of where the decal had been.


After thinking off ways to remove the outline of the decal I figured I would give a a Mister Clean Magic Eraser a try. These things work wonders. It removed everything, the residual adhesive where the decals were stuck, the outline that would not be removed, and the years worth of built up grime on the shell.
 

agamble

Member
To upgrade the complicated stock Z-linkage for the transferase shifter on previous jeep I owned I used Novak SK2XC Cable Shift Assembly. While it provided the smooth shifting that it is purported to do, I found it overly complicated. This go around I wanted something that while still eliminating the complicated stock Z-linkage and provides a smooth shift, was simpler. Enter the Boost Engineering 231HD Linkage. It cannot get any simpler. A custom made shift tab moving the throw to the topside of the transfer case, two FK rod ends, two jam nuts, and random nuts to connect everything. The installation instructions provided seemed clear and easy to follow. First step is to remove the shifter inside of the cab from the transmission tunnel. There are 5 bolts that hold it into place and then it lifts right out. On this occasion I forgot to take pictures of the process but, I did snap a picture of the pictures provided in the instructions......I know cheesy. With the shift assembly out of the vehicle the plastic grommet in the end of the tab is cut and removed. With it removed bolt the provided tab onto the shift assembly as a guide to drill out a second 3/8" hole on the tab.


As an added step to prevent rust the freshly drilled hole was covered with some paint before reinstalling the shift assembly.


With the shift assembly back in place The new shift linkage is bolted on.


The test shifts were amazingly smooth, the first few times I almost couldn't tell if it was shifting or not. However, a test drive revealed that I was unable to get the transferase past 4HI. I had to play around with the linkage for awhile. Eventually I found that if I positioned shifter and transferase tab in 4LO position and then connected the linkage I was able to get the correct throw angle to engage 4LO.

While I was under the truck I installed the rear Bilstein shocks.


All the mounting hardware was super rusted, so the week prior I began soaking them with PB Blaster. Even with a weeks worth of soaking the top mounting bolts were seized. It took longer than it should have as I went slow to not to break the upper shock mount bolts and really put myself in a difficult position. But with some heating of the bolts and a longer breaker bar the upper bolts were successfully removed. Once the new shocks were on as I have done on all of the bolts that I have since put back on the truck, a healthy coating of anti-seize was applied to the threads.


With the front suspension and rear shocks in I installed the Hurst Short Shifter. After driving a sedan with a manual and getting back into the Jeep it can almost feel like rowing a whaleboat. If you have a manual transmission there is nothing you interact with more. The short shifter is suppose to reduce the throw of the lever by 39% which when driving a truck, with a longer span from the transmission to hand makes for a significant reduction in movement. Another thought, and this one is just my opinion, is it makes even more sense when out on the trail, in a less than ideal spot a quick shift is the difference between maintaining momentum or stopping.
 

agamble

Member
With the shifter in place it was time to complete the interior. Before the bench seat was put back in the truck it was refreshed a bit. The seat mounting brackets were showing signs of the rust that had eaten away the floor boards. An inspection of the brackets showed there was plenty of metal remaining and they were still integrally sound. A wire brush was used to remove the rust flakes, then couple layers of Rust-O-leum rust inhibitor followed by Rust-O-leum Epoxy paint were applied to seal it. (Drivers side had much more rust)
)

After cleaning the brackets the upholstery was cleaned. For being almost 30 years old the upholstery has held up well. There aren't any tears or frays in the fabric or vinyl. However, the seats were covered in stains from who knows what.
(Before)


To clean the upholstery I applied shout and used a stiff bristle brush to rub it in, then let it sit for about 5 minutes. Then I scrubbed with hot water and dawn dish soap. After scrubbing the excess soap and water was removed with the shop vac. The process was repeated until the significant staining was removed.

(After. The dark spots are shadows created by me when snapping the picture)


The seats were feeling a bit saggy. I’ve seen various remedies and experienced some. A previous vehicle felt as if I was riding on a board, an investigation revealed that to be the case. The P.O. has placed a board between the padding and the springs. Since I was not a fan of the board approach and I’ve had ample success with towels in the past, an extra bath towel or two was stuffed between the padding and spring to bring the firmness back in the seat.


To protect the threads and reduce the potential for rusting threads again, and make it easier to get a socket or wrench on I replaced all the nuts with couplers.


When the truck came into my possession it did not have the rear panel located behind the seat. What was back there was black plastic shelving attached to cab with sheet metal screws. I liked the shelving for the added storage and organization to carry extra parts and other knick knacks, but was not a fan of the attachment method. And without the rear panel the interior felt incomplete. I have an extra rear panel that could be installed, but with the shelving needing to be mounted to it and the potential weight when loaded up with spare parts, the material is questionable at best. A more robust option was in order. First on the agenda was a stop at the Home Depot to purchase a 4' x 8' x 3/16" hard board.


Using the extra rear panel as a template I traced out the dimensions onto the hardboard. Once traced a circular saw was used to make quick work of getting the shape out. Having the general shape cut out multiple test fits were done followed by smaller finer cuts made with a combination of reinforced cutting wheel and rotary bit on a Dremel to get a good fit. With the rear panel done it was temporarily installed to position the shelving to mark and drill the mounting holes. To mount the shelving I used #10-32 x 5/16 Tee Nuts from the back side.


The covering used was grey felt that I bought at Joann's fabric store. The color is off but most of it is going to be covered by the shelving and what little would be visible is out of view behind the seat.


With the fabric glued on the needed holes were cut with an exact knife. To mount the shelving I used four #10-32 x 1/2 inch stainless Allen heads, #10 washers and #10 neoprene washers (to dampen vibrations).


agamble

Member
Did some more rust prevention on the rear undercarriage of the Jeep. Chassis Saver was used to cover up the superficial rust found in several different locations on the rear frame and hitch.
Before and Afters


I tried to remove the hitch to make covering the frame easier. However, at some point nut strips running in the inner frame were added and over time they have rusted solid. I began soaking all the bolts with PB blaster about a week prior. Even after applying heat and using an impact wrench for way more time than I should I was unable to get them to break loose. The only thing I have to show for my efforts is I am out two sockets, one cracked and the other became hollowed out. Those bolts would not budge. So there it stays for now.


agamble

Member
In attempting to remove the hitch I had to remove the rear bumper. While it was off I noticed a large area of paint bubbling on the lower corner of the bed. After removing a large amount of scale I had one screw driver size hole break through.I took this as an opportunity to get more practice on body work. I ended up removing about a 2” x 2” area before I found usable metal. It was rather thin in a couple places and I had some burn through. After some clean up, some body filler was used over the patch. The entire area of lower corner was covered with a hefty coat of Chassis Saver to seal up the rust, both inside and out.


Forum statistics

Threads
186,048
Messages
2,881,376
Members
225,825
Latest member
JCCB1998
Top