2021 Ford F250 Tremor Adventure Rig

Tex68w

Beach Bum
There’s definitely a homeostasis found after you’ve built “x” amount of rigs and just like anything else, what fits your needs and lifestyle now might not be what you want or need five years from now. I’ve personally found myself gravitating towards a slide-in FWC again as my free time to overland travel has become more limited and I no longer desire a full-time dedicated rig. There are no wrong answers here.
 

BretEdge

Adventurer
There’s definitely a homeostasis found after you’ve built “x” amount of rigs and just like anything else, what fits your needs and lifestyle now might not be what you want or need five years from now. I’ve personally found myself gravitating towards a slide-in FWC again as my free time to overland travel has become more limited and I no longer desire a full-time dedicated rig. There are no wrong answers here.
That last sentence, "There are no wrong answers here." sums it up perfectly. It's comical (and annoying) to watch people argue online about what's the best platform. It's kind of like the old saying about cameras, the best one is the one you have with you. Same thing for rigs...the best one is the one that works for you. People are silly. :rolleyes::D
 

Power Wagon Family

I Hate Off Camber
You've got a pretty bada** rig yourself! Every platform has pro's and con's. Those Project M's are great because they're so lightweight and highly customizable. One of the cool things about living in Moab is that we get to see every iteration of rig coming through town, from the low budget dirtbag builds all the way up to million dollar plus mobile condominiums, and everything in between. I'm a nerd so I love seeing them all and when the opportunity presents itself, talking to the owners. Lots of really cool rigs and people out there!
I'm the same way! Thank you for the complements on the rig. Like all of them it's been a labor of love. Next time I'm in Moab I will hit you up, it would be great to see your truck firsthand and BS.
 

BretEdge

Adventurer
I hope you all enjoyed some quality time with friends and family yesterday during Thanksgiving. We did, and I had just enough time to install our new Four Wheel Campers thermal liner. We've had their OG thermal liner since we bought the camper a couple years ago. Our previous FWC didn't have one, and I'm here to tell you that even the older thermal liner did help keep the interior warmer and it most certainly cut down on condensation. But...I always felt like it looked cheap and certainly wasn't attractive, and I couldn't help but wonder if something thicker might be more efficient.

Not long ago FWC launched their new and improved thermal liner, which is two layers of fabric with insulation between, sewn into a quilted pattern. Equally important, the new thermal liner includes insulation panels for all of the glass windows. Our son sleeps on the dinette bed at the back of the camper, surrounded by three glass windows, and he often complains about getting cold. Since those windows are single pane glass, I'm sure they do little to keep out the cold. I'm hoping the combination of the new thermal liner, and the window coverings, will help keep us all warmer when camping in cold weather. We've got a two week trip to Arizona over Christmas, and that will likely be our first test of the new liner.

How hard is it to install the new thermal liner?

It was a piece of cake. Both liners attach to the camper via velcro strips at the top and bottom. Pro tip: when removing the old liner, don't just grip it and rip it away from the bottom velcro. The velcro strip is only attached to the camper by adhesive and if you yank on the liner it'll tear the velcro strip away from the camper wall. Slowly pull it away, using the other hand to apply pressure on the velcro attached to the camper. Once the old liner was off, I installed the new liner on the passenger side first. Again, super easy. Line up the rear window of the liner with the rear window on the camper soft wall, attach the top and then work your way all the way to the front and back, ensuring the liner is up tight against the roof. Repeat on the driver's side. The glass window coverings attach even easier using small plastic tabs at each corner that slide under the window frame. All told, it took me 1/2 hour to remove the old liner and install the new one.

Initial observations

- It looks much more high-end than the old one. Far more aesthetically pleasing.
- Seems to be well-made, with nice materials, and overall higher quality than the original liner.
- It lets in less light, so the interior is definitely darker.
- It is considerably thicker than the old one, but the roof still collapses and locks in place for travel. I had to loosen the front two clamps 1 - 1.5 turns each for a good fit, but the sides and back needed no adjustment.

Does it actually keep the interior warmer than the OG liner?

No idea yet. I'm going to try to get out for a quick overnight before our two week Arizona trip, primarily to test it out. Regardless, I'll have a full report sometime in early to mid-January after our time in Arizona. Stay tuned.

What does it cost?

The new liner is around $1,500. The old liner sells for $825.

Questions? Fire away.

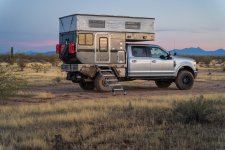
A few photos of the new thermal liner installed in the camper
 

Attachments

  • fwc thermal liner.jpg
    fwc thermal liner.jpg
    513.4 KB · Views: 50
  • fwc thermal liner-2.jpg
    fwc thermal liner-2.jpg
    538.4 KB · Views: 37
  • fwc thermal liner-3.jpg
    fwc thermal liner-3.jpg
    457.3 KB · Views: 50
  • fwc thermal liner-5.jpg
    fwc thermal liner-5.jpg
    508.7 KB · Views: 51

BretEdge

Adventurer
We've had our lithium power system since June and now that we've had it long enough for me to develop an informed opinion, I wrote a blog post about our experience and the system's performance. The post is also intended to help others decide if they actually need to upgrade to lithium from an AGM system. It is NOT an in-depth look at how a lithium system works. That's waaaay out of my knowledge. It's basically how it's working for us, some things to consider when debating whether lithium is for you, and the main components of our system.

If you're interested in reading the post, click below:

Should You Upgrade Your Overland Camper or Van to a Lithium Power System?

Photos for...why not? Everybody likes rig photos, right?

Note: There are affiliate links in the post as it is available for public consumption. If that offends you, don't click on the links. The information contained in the post is still 100% valid.
 

Attachments

  • Sunset at Overlanding Campsite near Moab.jpg
    Sunset at Overlanding Campsite near Moab.jpg
    483.4 KB · Views: 54
  • Sandstone Rock Framing Overlanding Camper and Monitor Butte Near Moab.jpg
    Sandstone Rock Framing Overlanding Camper and Monitor Butte Near Moab.jpg
    550.8 KB · Views: 53

BretEdge

Adventurer
Over the holidays we took a two week trip to Arizona, and instead of spending the entire time around Phoenix (which is what we usually do) we decided to explore the Tucson area a bit. We usually bring our mountain bikes on these trips but my wife had shoulder surgery a couple weeks before we left, so the bikes stayed home...unfortunately. Nonetheless, we still managed to have a great time.

In case y'all didn't know, Tucson is a foodie town. Big time. We were there for about a week and literally every meal we had was well above average. Mexican, Indian, American, Asian...all very, very good.

Hiked into Romero Pools in the Catalina Mountains, and that was a highlight of the trip. It's not an easy hike, especially carrying 25 lbs. of photography and hiking gear, but the reward is a spectacular granite canyon with a small creek, several waterfalls and innumerable large pools. Also, hippies smoking weed. :ROFLMAO:

We're all geared up and chomping at the bit to start the camping season but the weather here in Moab has been less than optimal. It usually starts to warm up in February, with more sunny days, but it just snowed (again) last night so it might be a minute. We're taking another 10 day trip over spring break. Where? We have no idea. We're tired of the same ol' places so we might mix it up. Or not. Who knows?

Until next time...
 

Attachments

  • Autumn Willows and Small Waterfall in Romero Canyon.jpg
    Autumn Willows and Small Waterfall in Romero Canyon.jpg
    1.2 MB · Views: 26
  • Hikers Descending Romero Canyon Trail at Sunset-2-2.jpg
    Hikers Descending Romero Canyon Trail at Sunset-2-2.jpg
    877 KB · Views: 26
  • Abstract of Yucca Plant With In-Camera Movement.jpg
    Abstract of Yucca Plant With In-Camera Movement.jpg
    224.8 KB · Views: 27
  • Autumn Willows and Creek in Romero Canyon.jpg
    Autumn Willows and Creek in Romero Canyon.jpg
    917.3 KB · Views: 27
  • Sunrise on Dragoon Mountains at Overlanding Campsite.jpg
    Sunrise on Dragoon Mountains at Overlanding Campsite.jpg
    734.2 KB · Views: 35
  • Sunset on Overlanding Campsite in Ironwood Forest National Monument.jpg
    Sunset on Overlanding Campsite in Ironwood Forest National Monument.jpg
    504.2 KB · Views: 36
  • Cholla Forest at Overland Campsite in Tortilla Mountains.jpg
    Cholla Forest at Overland Campsite in Tortilla Mountains.jpg
    502.4 KB · Views: 35
  • Sunburst Through Cholla Cactus at Overlanding Campsite near Eloy.jpg
    Sunburst Through Cholla Cactus at Overlanding Campsite near Eloy.jpg
    447.1 KB · Views: 28
  • Overland Campsite Surrounded by Cactus near Tucson.jpg
    Overland Campsite Surrounded by Cactus near Tucson.jpg
    869.8 KB · Views: 28

BretEdge

Adventurer
In early April we hustled down to Arizona for a few days. Started out at White Pocket, then headed south to Phoenix via Jerome. Did some hiking, had some great campsites, weather was...interesting.

Not a whole lot more to report. Next mod for the rig is a set of Timbren bump stops. Nothing major or exotic, but should help on rougher trails when the suspension cycles all the way up on bigger impacts. Still a few things I want to do to the rig...some day. We do have a new camp table that we'll be using soon. The Radius Outfitters Camp Cocktail Table. Seriously a beautiful piece of kit.

We're leaving mid-June to spend the summer in northern California and wherever we end up in Oregon. Hoping to make it up to Oakridge to shuttle some of their prime downhill MTB trails. Counting on some incredible campsites, and a lot of great mountain biking and hiking. Might even take a few photos along the way. ;-)
 

Attachments

  • Spotlighting on Pinyon Pine and Weaver's Needle in Superstition Mountains.jpg
    Spotlighting on Pinyon Pine and Weaver's Needle in Superstition Mountains.jpg
    658.3 KB · Views: 24
  • Man Walking Past Overland Camper at Campsite near Sedona.jpg
    Man Walking Past Overland Camper at Campsite near Sedona.jpg
    529.7 KB · Views: 26
  • Afternoon Storm Light at White Pocket.jpg
    Afternoon Storm Light at White Pocket.jpg
    752.5 KB · Views: 25
  • Stormy Sunset at Overlanding Campsite in Superstition Mountains.jpg
    Stormy Sunset at Overlanding Campsite in Superstition Mountains.jpg
    378.9 KB · Views: 22
  • Soft Morning Light on Overlanding Campsite near Sedona II.jpg
    Soft Morning Light on Overlanding Campsite near Sedona II.jpg
    462.9 KB · Views: 26
  • Looming Storm in Sky Above Overlanding Campsite in Superstition Mountains.jpg
    Looming Storm in Sky Above Overlanding Campsite in Superstition Mountains.jpg
    391.7 KB · Views: 28
  • Hiker Ascending Steep Rock Chute on Cave Trail II.jpg
    Hiker Ascending Steep Rock Chute on Cave Trail II.jpg
    571.6 KB · Views: 28
  • Sunrise at Overlanding Campsite in Superstition Mountains.jpg
    Sunrise at Overlanding Campsite in Superstition Mountains.jpg
    754.5 KB · Views: 25
  • Stormy Sunset at White Pocket-Edit.jpg
    Stormy Sunset at White Pocket-Edit.jpg
    545.1 KB · Views: 23

TexasSixSeven

Observer
In early April we hustled down to Arizona for a few days. Started out at White Pocket, then headed south to Phoenix via Jerome. Did some hiking, had some great campsites, weather was...interesting.

Not a whole lot more to report. Next mod for the rig is a set of Timbren bump stops. Nothing major or exotic, but should help on rougher trails when the suspension cycles all the way up on bigger impacts. Still a few things I want to do to the rig...some day. We do have a new camp table that we'll be using soon. The Radius Outfitters Camp Cocktail Table. Seriously a beautiful piece of kit.

We're leaving mid-June to spend the summer in northern California and wherever we end up in Oregon. Hoping to make it up to Oakridge to shuttle some of their prime downhill MTB trails. Counting on some incredible campsites, and a lot of great mountain biking and hiking. Might even take a few photos along the way. ;-)
That cocktail table just gave me a good idea. It looks very useful, but im not quite ready to let go of $400 for it. However I can fab a DIY version for about $60-80. I’ve got a couple tripods I use for precision shooting with arca ball heads on them, and one lives in my truck at all times anyways. A nice butcher block type cutting board with an arca rail bolted to the bottom would provide an instant little similar style cocktail table, and take up almost no extra room from what I’m already carrying.
 

BretEdge

Adventurer
That cocktail table just gave me a good idea. It looks very useful, but im not quite ready to let go of $400 for it. However I can fab a DIY version for about $60-80. I’ve got a couple tripods I use for precision shooting with arca ball heads on them, and one lives in my truck at all times anyways. A nice butcher block type cutting board with an arca rail bolted to the bottom would provide an instant little similar style cocktail table, and take up almost no extra room from what I’m already carrying.
That's a great idea! And, since it's on a tripod & ballhead, it would be easy to level it on uneven terrain. My only concern would be corner stability. Depending on how big you make the tabletop, it could become unstable with the only support point being a very small Arca Swiss plate in the middle.
 

TexasSixSeven

Observer
That's a great idea! And, since it's on a tripod & ballhead, it would be easy to level it on uneven terrain. My only concern would be corner stability. Depending on how big you make the tabletop, it could become unstable with the only support point being a very small Arca Swiss plate in the middle.
One a smaller tripod you’re correct. The tripods I run hold a 20 lb rifle with the majority of the mass being leveraged to one side without issue, and are rated for considerably greater than that. Legs can be adjusted out for greater stability as well. It’s in theory the same design as your camera gear, just a lot heavier built. Actuality most of the manufacturers started as camera gear manufacturers, and started producing rifle gear after seeing the demand.
 

BretEdge

Adventurer
One a smaller tripod you’re correct. The tripods I run hold a 20 lb rifle with the majority of the mass being leveraged to one side without issue, and are rated for considerably greater than that. Legs can be adjusted out for greater stability as well. It’s in theory the same design as your camera gear, just a lot heavier built. Actuality most of the manufacturers started as camera gear manufacturers, and started producing rifle gear after seeing the demand.
Ah, that makes sense. Sounds like a pretty cool optional use for the tripods! Never used one for shooting; only bean bags or rifle mounted bipods.
 

Bigc3031

Active member
Awesome build and write up.

I would have done a flatbed if I didn’t need the bed/cap for daily work.

I’m going to check out those skids. I hit the skids on my F150 many times and wasn’t much lower than my superduty tremor.

I’ll likely pick up a thermal liner for my Atlas, I think they are a must have.
 

Forum statistics

Threads
186,328
Messages
2,884,503
Members
226,200
Latest member
eclipse179

Members online

Top