Expedition TrailBlazer Project

JamesDowning

Explorer
Had some fun this weekend and got to test out a couple new components.

First of all, I had to upgrade the battery, due to the new winch. I decided to go with a Diehard Platinum after reading many reviews here. It seems they are made by the same company as odyssey. I'm considering using the old battery as a secondary, and place it in the rear. Any concerns with putting a lead acid battery inside the passenger compartment?

Second, I got to try out one of the first BajaRack jerrican holders. Below is a quick picture from when I was getting everything laid out:

jerricans.jpg


The system seems great overall, but there were a few minor tweaks that I'll be recommending to Sergio. When the cans are removed, the base is only about 2" tall and stays out of the way. Great design. If I didn't get it free, I'd certainly buy one!

Lastly, the winch finally came in! It's a superwinch LP8500. It's on the budget side of things, but once I install a quick connect for the electric lines and some synthetic winch rope, it will be perfect for me.

11.jpg


Just for your enjoyment... here are a few more pictures from the weekend:

14.jpg


5.jpg


tecore2_022.jpg


Cheers!
 

bobDog

Expedition Leader
Lastly, the winch finally came in! It's a superwinch LP8500. It's on the budget side of things, but once I install a quick connect for the electric lines and some synthetic winch rope, it will be perfect for me.
14.jpg
So what always bothered me about removable winches was the approach angle changes a lot altho you get to put it on the back too. If you past being young and strong they are a real **********. And if your in a strange angle will you be able to get the thing in the receiver? :Wow1:
So as you get experience using this system would you let us know the pros and cons please:sombrero:

O check out http://www.12voltguy.com for some very cool interior winch control panels that run both front and rear positions.:coffeedrink:
Very cool photo!
 

ryguy

Adventurer
I never thought a trailblazer could live up to its name but yours def. does, nice work. I really like the baja rack jerry can holder, makes me hate my ARB
 

JamesDowning

Explorer
So what always bothered me about removable winches was the approach angle changes a lot altho you get to put it on the back too. If you past being young and strong they are a real **********. And if your in a strange angle will you be able to get the thing in the receiver? :Wow1:
So as you get experience using this system would you let us know the pros and cons please:sombrero:

While the front winch does take away a bit of approach angle, keep in mind it's only in the center of the vehicle. I haven't encountered a situation where it would stop me. It probably has a lot to do with the areas you wheel.

The winch is also way heavier than I expected. I think it must be every bit of 100 lbs. So when carrying it from my second floor apartment down to the parking lot, I had to come up with a better method. I now take a ratchet strap around my back and over one shoulder and attach the hooks to the connecting bars that run across the drum. It allows you to lift with your body instead of your arms, and yet still guide the receiver in without any problem.

I'll probably tend to keep the winch in place when I'm planning to hit a trail or if bad weather is expected, and otherwise just leave it at home. In a pinch, I'll always have the hi-lift to winch with.

I never thought a trailblazer could live up to its name but yours def. does, nice work. I really like the baja rack jerry can holder, makes me hate my ARB

I'm really loving the BajaRack in it's entirety. I seem to just keep adding stuff to it... reverse lights, backup camera, shovel quick-fists, bike carrier, bridging ladders, jerrican holders... and it takes it all in stride while remaining a superior value.
 

emohn

Observer
Hi James,

First off, fantastic job on your build. It's one of my favorite on here because you get to see a natural progression and evolution of the build over time as needs dictate - rather than a whole hog, infinite-budget build fest that ends up overkill for what 90% of us will do with our vehicles. Nice work!

Second, do you have a link or contact info for a supplier of those BTI cases? They look like a really nice option, but I can only seem to find them in Germany and Austria.

Thanks, and keep up the great build and informative posts!

-Erik Mohn
 

JamesDowning

Explorer
Hi James,

First off, fantastic job on your build. It's one of my favorite on here because you get to see a natural progression and evolution of the build over time as needs dictate - rather than a whole hog, infinite-budget build fest that ends up overkill for what 90% of us will do with our vehicles. Nice work!

Second, do you have a link or contact info for a supplier of those BTI cases? They look like a really nice option, but I can only seem to find them in Germany and Austria.

Thanks, and keep up the great build and informative posts!

-Erik Mohn

Thanks for the compliments. I think the outside is done for now... now its just a matter of focusing on making the camping experience even better for the wife. Us men can go days without showering, but women don't seem to like that so much.

As for the BTI cases, I beleive BTI is only sold in Europe, however, the same system is used by Festool. Their system is called Systainers: http://www.festoolusa.com/products/systainers/model-comparison.html

I beleive you can buy empty cases or foam-filled cases. I had to knock off a couple pieces of pointy plastic, but otherwise they seem to work well.

Looks like they have a lot of size options:

photo_all_systainers.jpg


Looks like you can purchase them in the US through some dealers... but Festool is notoriously expensive, so be sure to compare prices before purchasing.
 

Jean-Seb

Adventurer
Nice work James, I've seen your build on ortb, just thought it was time to let you know I love it !

Great job making an unconventional platform expedition worthy !

Keep it up. :victory:
 

JamesDowning

Explorer
Back when I made my switch panel, I put a switch on there to control an auxiliary battery. It's taken me a while to get this project designed, ordered, assembled, and installed.

So lets start with the switch. The switch obtains 12V power only when the key is in the on position.

1.jpg


The signal wire from the front switch then heads back under the rear seats... where the brains of the operation are.

I'll try to give you a quick synopsis of what goes on back there. First of all, the charging current is pulled off of the rear main 12V pole. The charging wire, 8 AWG (rated for 15' of wire 100 Amps non-steady max), runs from the 12V pole, and first hits a 100 Amp, resettable breaker. From there, the charging power travels to a 100 Amp constant-duty solenoid. From there, the 12V hot wire travels onto the auxiliary battery.

The signal wire, from the front switch, runs to the solenoid signal pole. Also getting 12V from this signal wire is my delay. This home-made digital delay waits 5 minutes before then connecting the ground side of the solenoid to ground through a FET rated for 1 amp continuous.

It's still a little messy, wire-wise... I'll clean it up with some wire-wraps eventually. But despite the messyness,... it works!

2.jpg


Close up of the digital delay (I used an old Dell power supply as the housing):

7.jpg


The power from the solenoid and a ground runs through a plug and into my rear cargo drawer enclosure, where I installed the aux battery. The rear battery has its own fuse box for the 750 Watt inverter and 12V lighter-plug (for future 12V cooler or fridge).

Picture when I finished it, not installed in the vehicle:

6.jpg


Picture installed in the vehicle, shows plug connection and location of emergency jump starter:

3.jpg


Close up of rear fuse box. Two 40 A fuses (the max I could find for a blade fuse) supply the inverter. The green wire sticking up is one I may use in the future... it's a potential signal wire running from the vehicle into the aux battery enclosure.

4.jpg


Close up of the battery and it's holding system I made:

5.jpg


So, overall, I keep the switch in the on-position. After the engine is started, the alternator charges the primary battery back from starting. 5 minutes after starting, the rear battery begins charging. So far, the system seems to work great!

:elkgrin:

Here's a rough overall wiring diagram of the dual system.

schematic.jpg


:safari-rig:
 
Last edited:

JamesDowning

Explorer
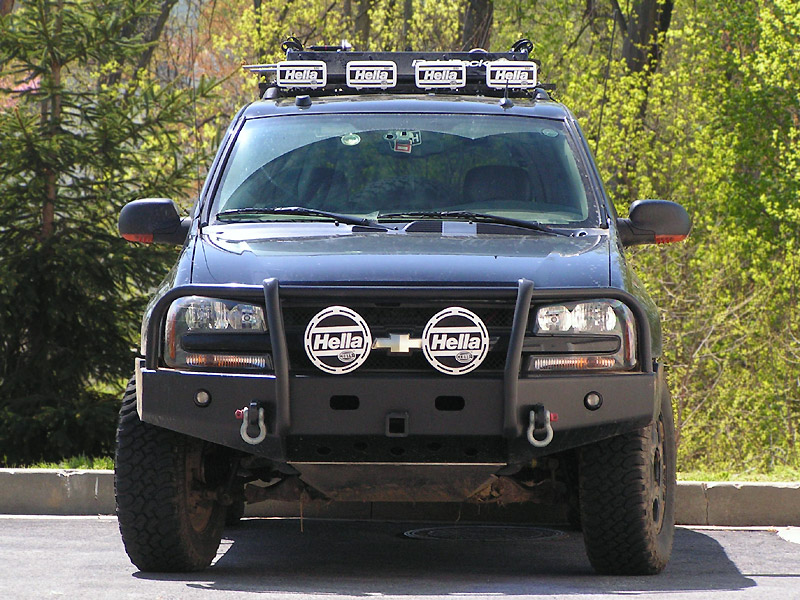
I finally got around to installing some Hella 550s in the roof rack. Driving lights in the center, fog lights on the ends.

hella-upgrade1.jpg


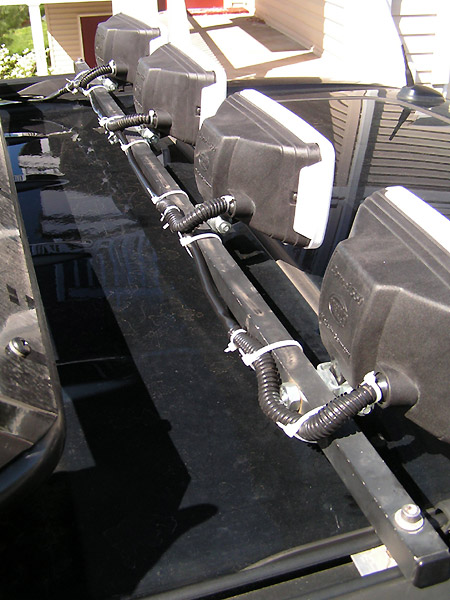
Redid the wiring too:

hella-upgrade2.jpg


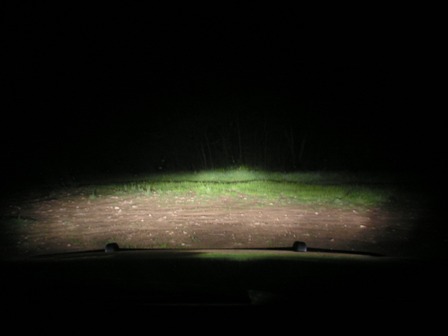
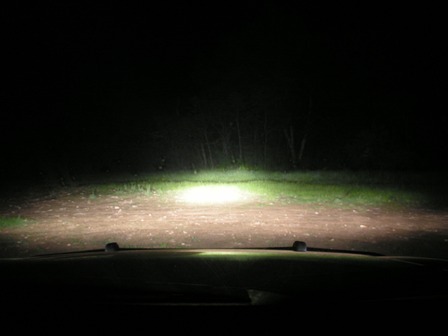
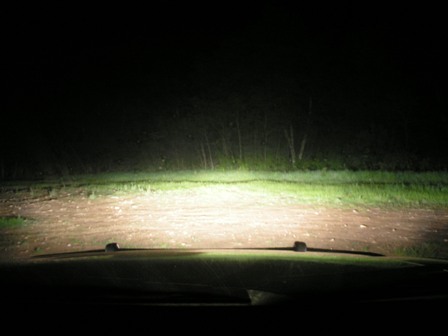
Beam Comparison: Stock first, second is stock with roof lights only:
stock.JPG
stock-roof.JPG

(Note the bright spot in the center, and the two wide beams closer to the vehicle.)

In contrast, below is the stock first, then the stock + Hella 4000s second:
stock.JPG
stock-hella.JPG


My conclusion is that I still need to redirect the roof lights a bit more upward.
 
Last edited:

KLAKEBRONCO

Adventurer
Good looking truck!

An ARB in the back of that thing would be really nice IMO.

I'm going to put a Aussie, or Lock Rite in the Bronco and can't wait. I would sure rather be able to select locked/unlocked though since it will be driven in the winter as well.
 

JamesDowning

Explorer
My build has stalled a bit lately, but there is progress on the way soon.

So instead of letting this thread remain stale, here are some images from my latest overland trip, this past extended-weekend. Pics are all from the GWNF area West of Harrisonburg, VA.

Campsite at night:
3.JPG


One of the best vehicle-accessible overlooks in the area:
5.JPG


Flora and Fauna :elkgrin::
11.JPG


12.JPG


15.JPG


26.JPG


This is a picture of "freedom" :smiley_drive::
14.JPG


Campsite:
pano2.jpg


One of a few pictures of my truck loaded up:
20.JPG


Breakfast :chef::
22.JPG


Another of our campsites:
19.JPG


Trail with a view:
25.JPG
 

eXpeditionXterra

Adventurer
I love this thread man. Way to go! Build a rig that is rare, its just what we do right? It's nice knowing my rig is the ONLY one in my area. Now with the 60 under the front, it truly is one of a kind.
 

JamesDowning

Explorer
Thanks for the kind comment.

I've been working on a little secret project for a while now. It's still in somewhat of a planning phase, but it's also in the beginning build phase.

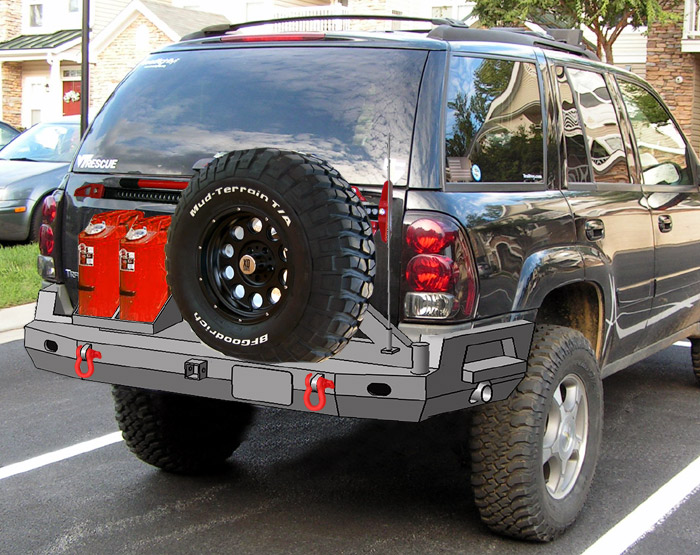
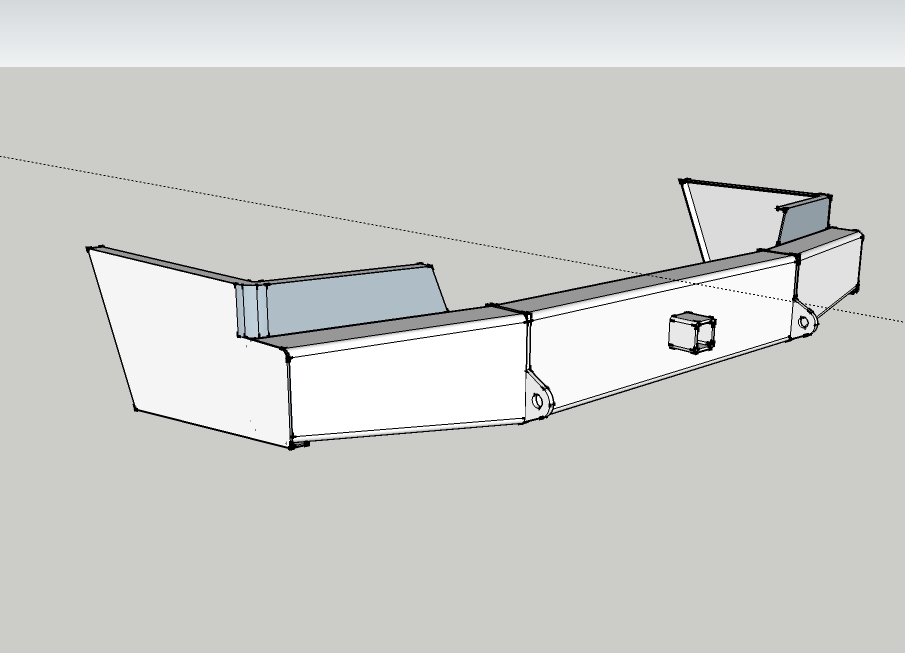
This was the original concept for a rear bumper.

rear-bumper-design-on.jpg


After much deliberation, I decided to make an 8"x4" tube the main structure component instead of building it out of sheet steel. One of my goals was to make it a simple but extremely strong and robust bumper.

pre1.jpg


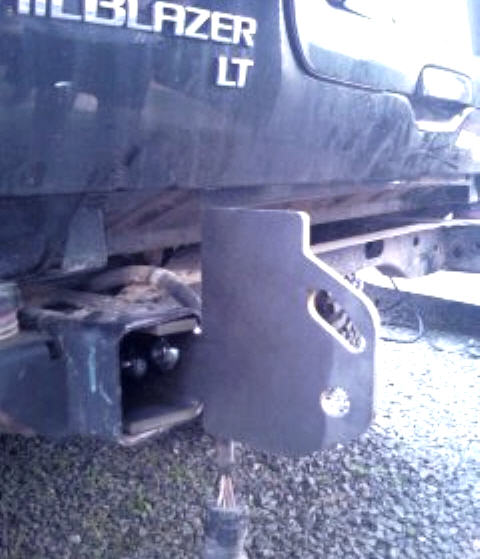
Here's a cell phone pic when I got the first bumper bracket on. 3/8" It's not going anywhere.

pre4.jpg


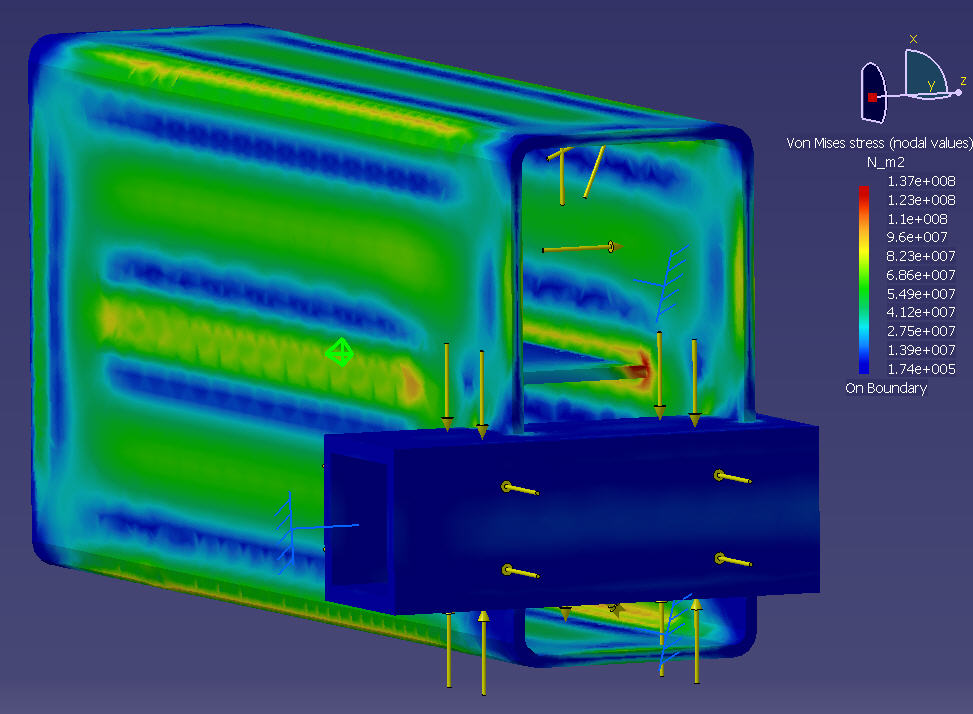
I worked on some FEA stress analysis since I knew that putting an air tank in the rear bumper could be potentially dangerous. Originally I didn't have internal ribbing, but it was added after the first round of FEA to keep the tube from expanding at the center.

tank-design.jpg


Here we are working on the center tube... Eric, my fabricator and friend, is cutting the hole for the 2" hitch.

1.jpg


Aligning the center section.

2.jpg


Center section tacked in place.

3.jpg


The end caps are very important here, as they will each be holding back thousands of pounds of pressure of compressed air, plus they will be supporting any trailer and winching loads.

Eric did a great job of getting 100% penetration welds all around the end caps. They will easily withstand the stresses being applied.

Hitch is sitting beside the bumper, ready to be welded in place.

After we weld in the air tank bungs, we'll do a pressure test to 150 psi. The tank should be good to about 200 psi before yeild, but my operating pressure will be 100 psi.

4.jpg


That's it for now, it may be a few weeks until we can do a test fitment with the bumper wings. Then a few more weeks after that until we can complete the swingout.

Any comments or lessons learned - please let me know!

Cheers!
 
Last edited:

Forum statistics

Threads
188,399
Messages
2,906,870
Members
230,176
Latest member
Arcadia1415
Top