7x16 toy hauler/base camp build

hooptycrawler

New member
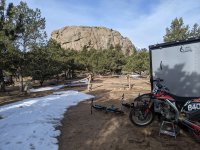
Well figured I would post this, give me a chance to ask some other questions, ideas etc. we had a little 24ft class c RV which was fun for the small size but we hated being stuck everywhere or having to pack it up Everytime. Had it's moments but layout was terrible....it was a learning experience. Starting looking at toy hauler trailers since we race dirt bikes, ride other bikes, kayak, all the outdoor things, but wow those are built worse than motorhomes. I was terrified to take one down a dirt road. So I'm going the cargo trailer route. Plan is minimal BS, fits the family of 4 and all the stuff. Needs to have a small bathroom. Been working on this for a bit now so on to the progress. Found this one that was already insulated inside, even had moto mounts inside already. Someone had built a Murphy bed up front that we took down, saved as much of it as possible to repurpose since the wood was in good shape. Night we got itPXL_20231128_023236685.MP.jpg

Tearing it down
PXL_20231202_223016851.MP.jpg

PXL_20231202_222946457.MP.jpg

The plan here is bunks up front that can fit adults if needed. Went down the RV toilet rabbit hole and decided on an ogo compost toilet, mostly it's smaller and easy to empty.
PXL_20231223_233656831.MP.jpg
Box in the right side will hold the inverter, batteries charge converter and some other electrical stuff. It will have a renogy 400 watt kit and two 100ah agm batteries.
PXL_20240107_231030463.jpg
Charge converter will let me plug in if I want to, we do a combination of off grid and RV park stuff,l (the kids have fun there). Decided to make a bench that converts to the lower bunk.
PXL_20240107_231102775.jpg
 

hooptycrawler

New member
More pics... This will double a bench seat
PXL_20240120_175927601.jpg
PXL_20240121_165853826.jpg
I had a better pic of the bed folded but it won't load. Took out the plan vent and installed a max fan, also had to install all the lighting.
PXL_20240121_165826519.jpg

PXL_20240120_190923638.jpgPXL_20240202_002629414.MP.jpg

Welded some tabs and a little extra support to the frame. Added a toolbox to the front to hold a diesel heater and more storage! Can't have too much of that.
PXL_20240204_205140435.jpgPXL_20240203_193136857.MP.jpg
Which is about where I'm at, had to update a few things for the heater for ventilation. Yes I put in a little tv, sometimes it's nice to keep kids occupied. Been working on a rack to mount solar panels since I don't want them directly to the roof. Still got lots to do but the goal is to have this useable by mid March...
 
Last edited:

hooptycrawler

New member
Got a little done this week. Changed the ducting on the heater and added an intake for the heater. Now it will run without throwing an overheat code. It was actually the duct I had run inside, it was too constricting I guess. Sat out in the trailer while it was snowing and stayed pretty nice inside. I added a little turndown to keep the fan from sucking in water or snow, I just swap it for a cap when it's not running. The small tube is the combustion air inlet.
PXL_20240210_204521693.jpg
PXL_20240210_204450187.jpg
PXL_20240210_204440779.jpg

Got the mounts for the roof rack made. These will mount to the trailer frame work and then I have 1.5 square aluminum extrusion that will span across to mount the solar panels to. Painted them with Eastwood rust encapsulator paint and then some black spray paint. Hopefully holds up better than just spray paint.
PXL_20240208_050906430.jpg
Bathroom cabinet built. It's nothing crazy but it won't be holding anything heavy.
PXL_20240209_042103526.jpg

And now I'm on to staining everything with polyurethane, which I gotta say is the worst part. But I should be able to start assembling some of the kitchen area after that.
 

hooptycrawler

New member
Solar panels installed and up and running. Took forever to get the feet installed to the roof but the extrusion made the rest super easy.PXL_20240218_224426318.jpg
PXL_20240218_224420504.jpg
Bathroom cabinet installed
PXL_20240303_224706454.jpg
And last I've been working on the kitchen area which has been consuming so much time, trying to get everything fit tight and be secure. But finally getting somewhere. Need to get a countertop made and then I will probably start working on some storage. First smaller opening with be water tanks for the sink, middle will be a slide out pantry. I made a shelf for the fridge to sit on that will mount on slides and I think I can fit some additional drawers above that.
PXL_20240303_225214598.jpg
PXL_20240303_224743115.jpg
 

hooptycrawler

New member
Made counter from redwood planks, got the sink installed but nothing plumbed in yet.PXL_20240324_192033640.jpg
Redid the vent for the heater from some 3in exhaust tubing and made a bracket to the floor. Much more durable now and won't get destroyed from stuff being around it.
PXL_20240327_024311412.jpg

And then took it to the mountains! Everything worked great so far. Fit all our stuff, stayed nice and toasty and night. So much more room in here. Now need to finish up the kitchen plumbing and storage. That was the biggest downfall so far.

PXL_20240330_143602162.jpg
 

Attachments

  • PXL_20240330_143827803.jpg
    PXL_20240330_143827803.jpg
    4.5 MB · Views: 5

hooptycrawler

New member
Water system is all done. I was initially following a write up for the plumbing but it used so many fittings and was way over priced for what it was. Combined with the faucet I was going to use it was just out of control. So returned almost everything, got a different faucet and then realized that you can buy faucet connectors with 1/2 fip on both ends that will hook up to the faucet, pump and tank with basically no parts. And they are easy to find if needed. Made a suction tube from pex. It's long enough that it can all be removed from the tank without disconnecting it. It's not a perfect seal but if I don't fill it all the way it didn't seem to be an issue on the last outing.
PXL_20240412_012221102.jpg
Well I guess I didn't get a pic of the suction tube so if someone really wants one let me know.
For the drain I used a camco drain but had to modify it. Honestly I don't how they work, it's not threaded down to the bottom so it would never actually compress the gasket, it just barely touched. I slathered it up with sikaflex and seems to be fine. The tube just hangs into the gray tank so the cap can still spin off.
Before:
PXL_20240407_164733315.jpg
After
PXL_20240407_171622954.jpg
Modified the drain tube mount to keep the tube in the tank and cap
Before
PXL_20240407_171958595.jpg
After. The black tube fits through the red cap almost perfectly so I just left it. The white mount is not attached to cap, it just sits in the tank to keep the hose from coming out.
PXL_20240407_172236319.MP.jpg
Added some cargo trailer shelves that are great, black one keeps some cleaning stuff and the unfinished keeps lots of little kitchen things handy and organized.
PXL_20240420_004807861.jpg
Took it out again for a race we had. It rained and was cold but stayed warm in the trailer. Diesel heater has been working great so far.
PXL_20240420_205516833.MP.jpg
 

Forum statistics

Threads
186,085
Messages
2,881,800
Members
225,874
Latest member
Mitch Bears
Top