Barn Door for JK factory hardtops

jgaz

Adventurer
Nice work!
I continue to be impressed how quickly (and accurately) you can create the Molle Grid for your projects. If I remember correctly you print it out on paper and use that to mark your holes, correct? I don’t recall ever seeing the file you print out shared here on Expo but thought I’d ask if it was shared anywhere else. If not I completely understand.
What gauge metal did you use for this enclosure?
 

jscherb

Expedition Leader
Nice work!
I continue to be impressed how quickly (and accurately) you can create the Molle Grid for your projects. If I remember correctly you print it out on paper and use that to mark your holes, correct? I don’t recall ever seeing the file you print out shared here on Expo but thought I’d ask if it was shared anywhere else. If not I completely understand.
What gauge metal did you use for this enclosure?
Thank you.

I made this enclosure from 16-gauge cold-rolled steel.

Below is a photo from an earlier Molle project... I do a full-size drawing on my computer and print it out. Since I've only got a standard size printer, for a project like this the printout is six or so pages that I have to tape together - if you look closely at the photo you can see it's taped together. I then tape the pattern to the metal and centerpunch all the holes through the paper, using the center marks on the drawing. Then I drill 1/8" pilot holes at each punch mark. A hole saw makes the circles at the end of each slot, and then I use a jigsaw to remove the center of the slot. Sometimes I use a large punch at a friend's fab shop to make the holes, but a hole saw works great too.

SidePanelTemplate_zpsx2kepsla.jpg
 

FlightMedicJP

Active member
A company sent me an A-Pillar switch console to test and review, in the left photo I'm holding it next to the factory a-piller trim. It's got cutout locations for 4 switches, but maybe I'll put a pressure gauge in it to monitor my AirLift air bags. Right now the gauge is in the back inside by the tailgate, but maybe I'll move it up front so I can see it from the driver's seat.

APillarConsole_zpsz0zhdnhj.jpg


I installed it yesterday to verify that it fits properly:

APillarConsole2_zpsflqsjcaa.jpg


Since the company asked me to test and review it, when I get around to installing something in it I'll post a review and company info.


Tested and approved. Have it in my Jeep. (y)(y)(y)


jscherb

Expedition Leader
I installed the Trail Kitchen this morning using the pre-production no-drill installation kit the company sent me to test. Also installed the prototype enclosure I made yesterday.

Enclosure6_zps89fpxm75.jpg


Enclosure7_zpsnow5iqmi.jpg


Enclosure8_zpsxxz5hhkr.jpg


Enclosure9_zpsc1wn0wmt.jpg


Now that the enclosure is done and installed, I'll move on to building a prototype of the companion drawer unit. I'll paint the enclosure at the same time as I paint the drawer unit; they'll both have the same finish.

DrawerUnitConcept1_zpsqwzoqqqz.jpg
 

jscherb

Expedition Leader
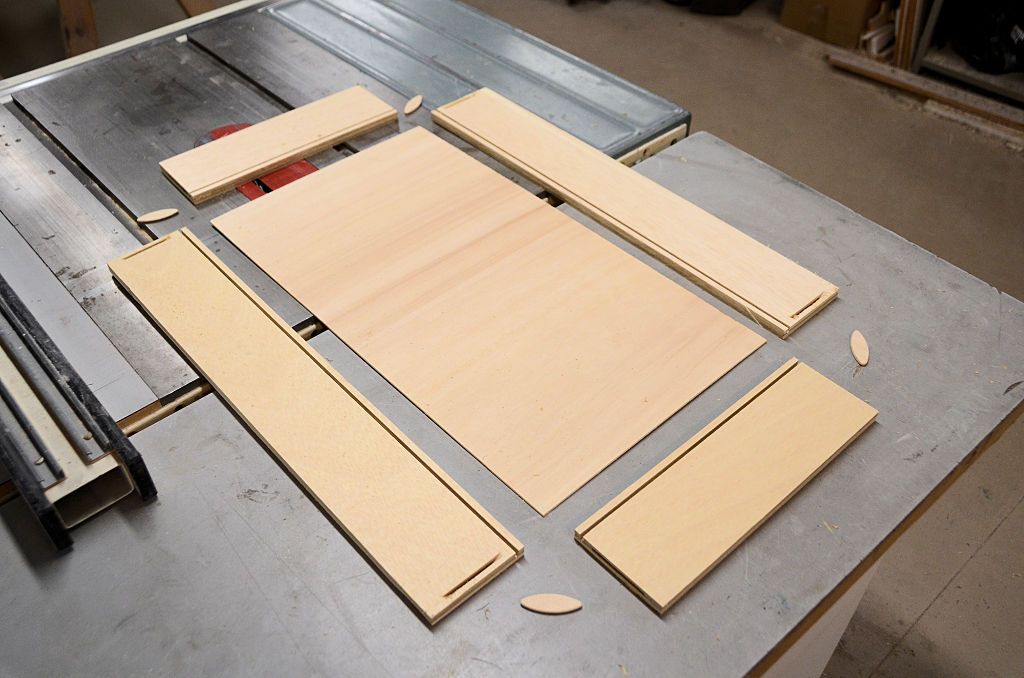
I'm building the side drawer unit today. I'll post some construction photos along the way, hopefully they'll help anyone thinking of building their own.

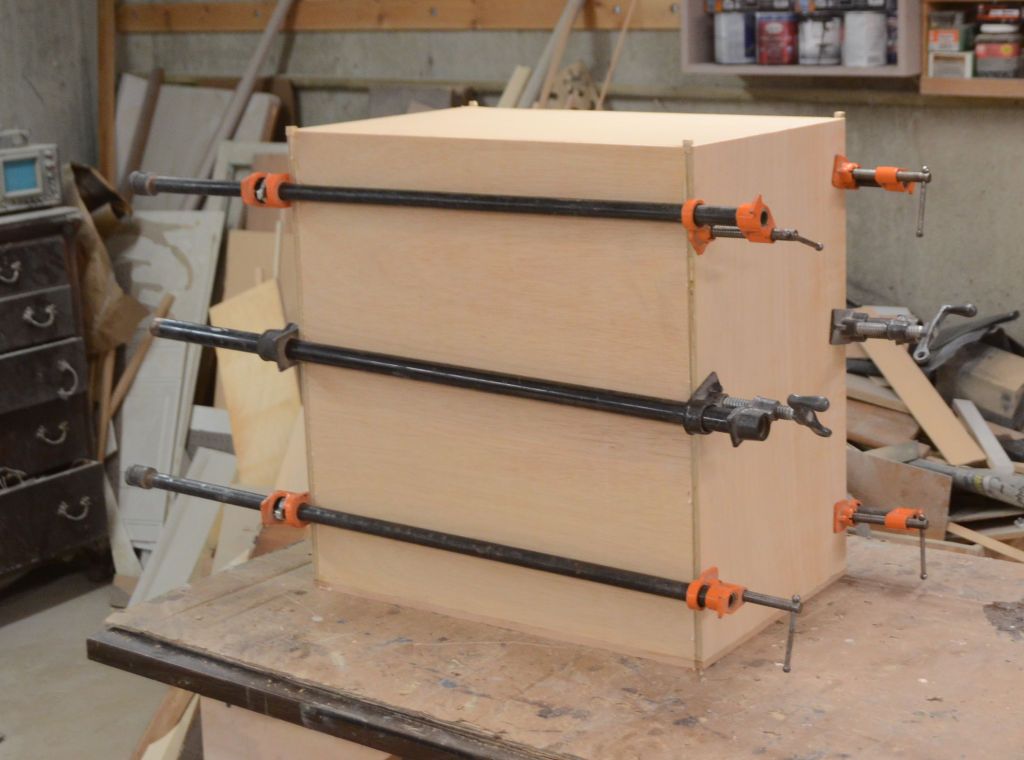
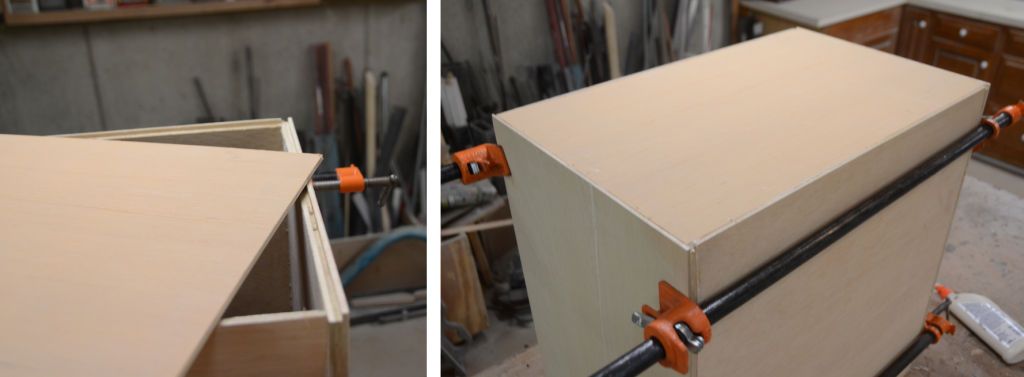
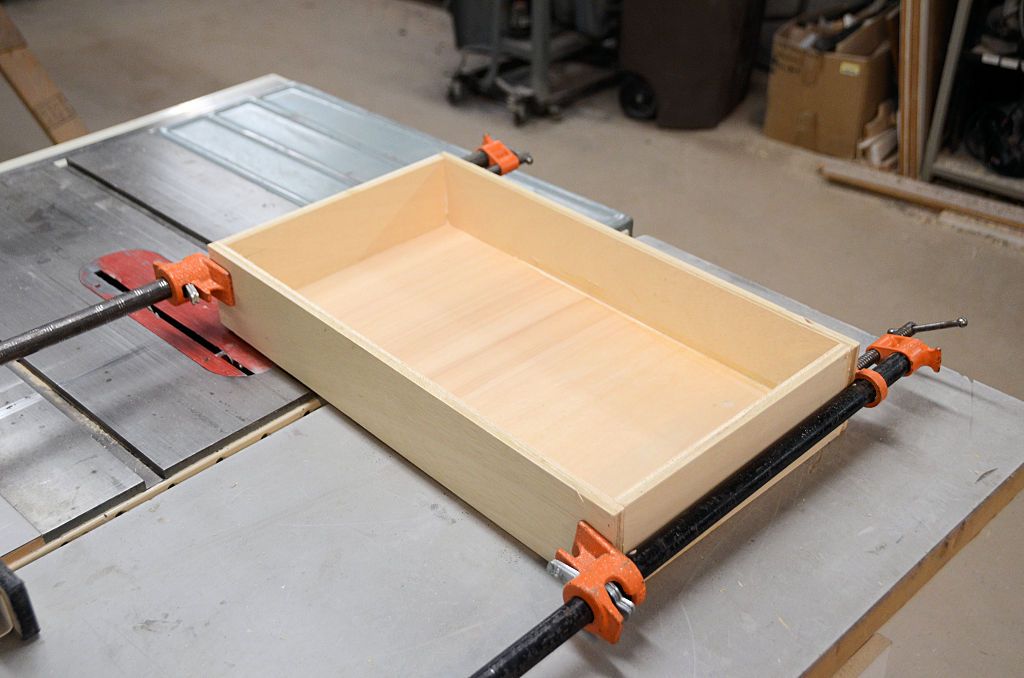
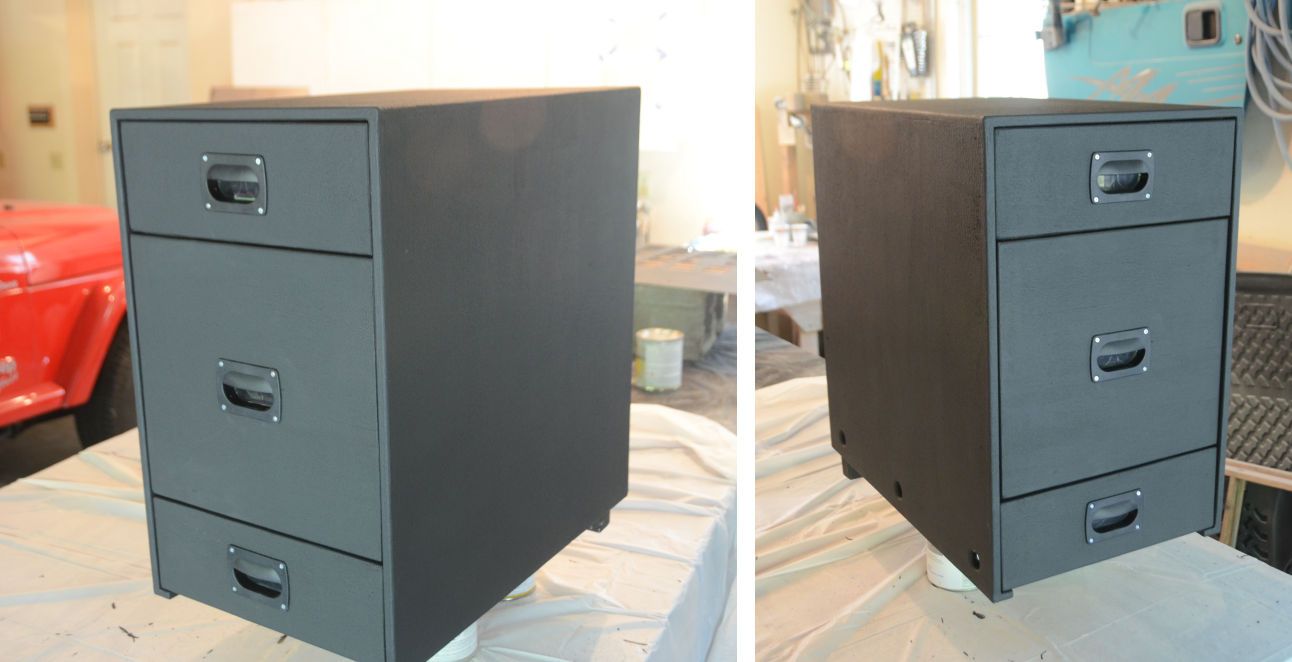
Here's the case assembled, clamped and waiting for the glue to dry, it's sitting face-down on the workbench. The sides, top and bottom are made from inexpensive 1/2" Sande plywood from Home Depot. The back is 1/4" plywood, I used flooring underlay plywood because I had a piece on hand and it's inexpensive. The case is the same height and depth as the enclosure I made yesterday and just wide enough to take up the rest of the available width in the back of the Jeep.

CaseAssembly1_zpsee7xhlmc.jpg


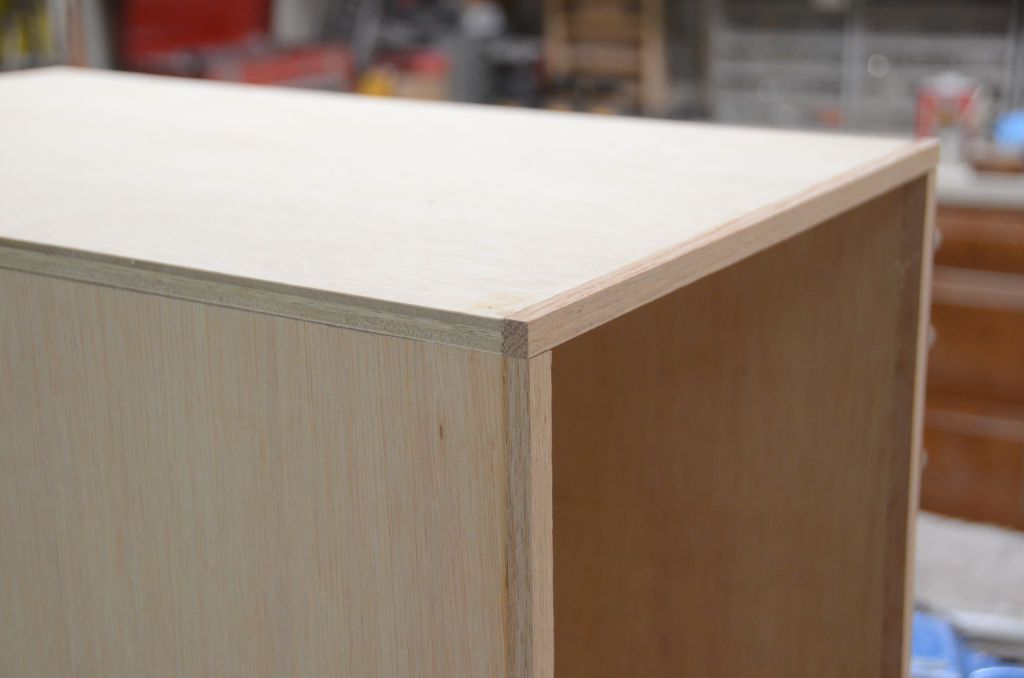
For a stronger front edge, I glued oak to the end grain of the plywood.

CaseAssembly3_zpsjlp1ezvy.jpg


The cabinet is assembled with biscuit joints. Biscuits allow glue joints with no other fastners other than the biscuits, they're very strong and align the parts perfectly.

CaseAssembly4_zpssrfblq8l.jpg


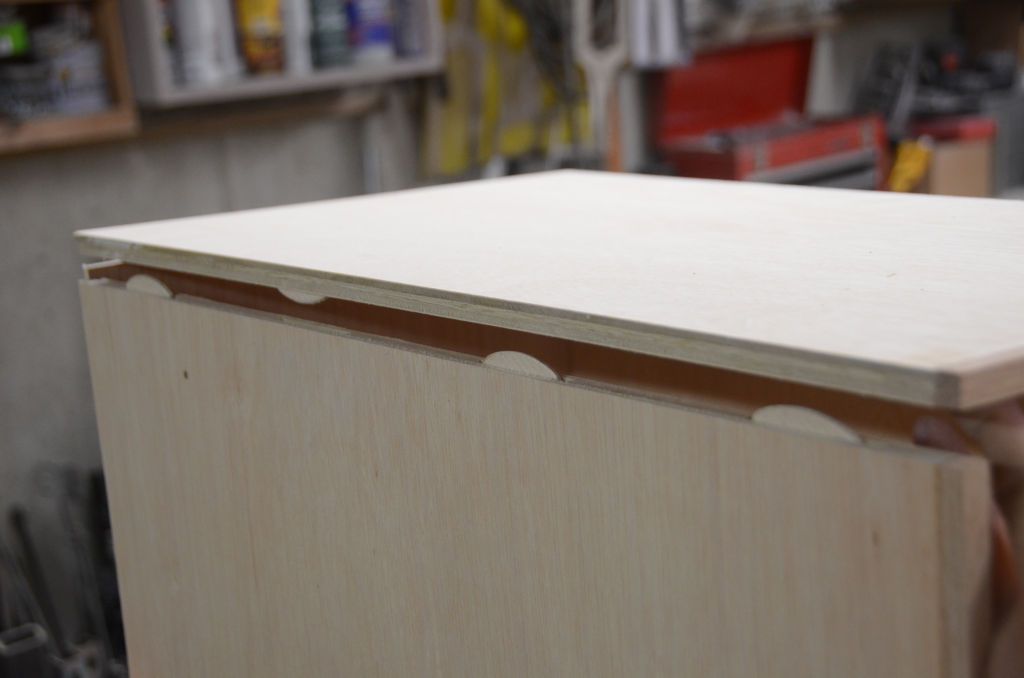
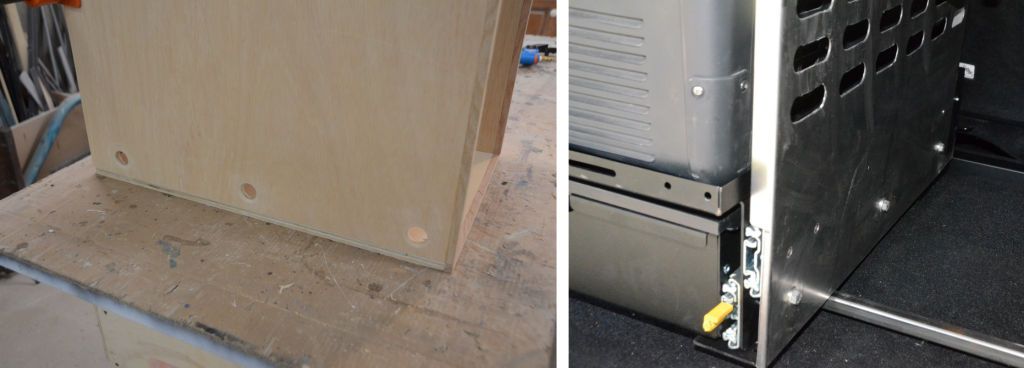
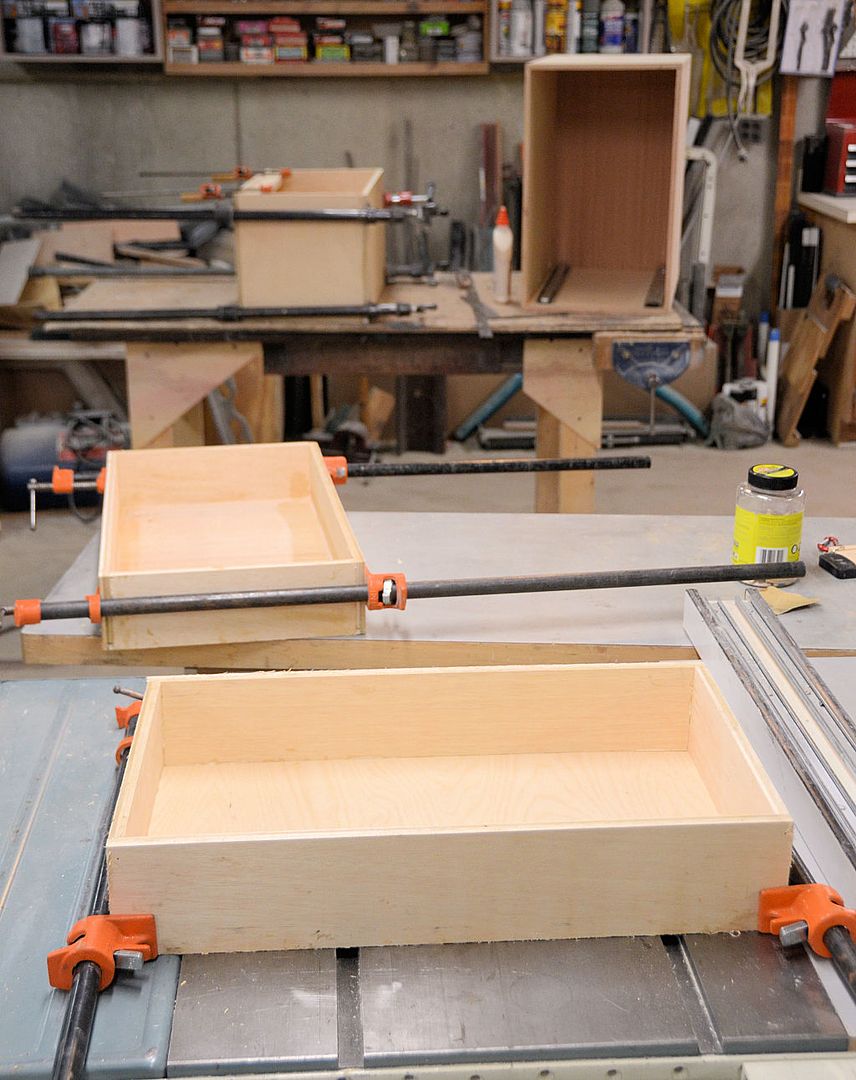
The rear panel sets in a rabbet on the back edge of the panels. It's glued in place and secured with a few brad nails. I made the rabbets on the table saw, which means they run off the ends of the panel, leaving a small void at each corner. To fill the voids I glued a small block of wood in each void, they'll be trimmed flush after the glue dries. The voids at the corner are visible in the photo below; the blocks glued in place are visible in the first photo in this post. The other way to cut the rabbets is with a rabbetting bit in the router, avoiding the corners, but I didn't have an appropriate side rabbeting bit on hand so I used the table saw.

CaseAssembly5_zpsltfxjz6o.jpg


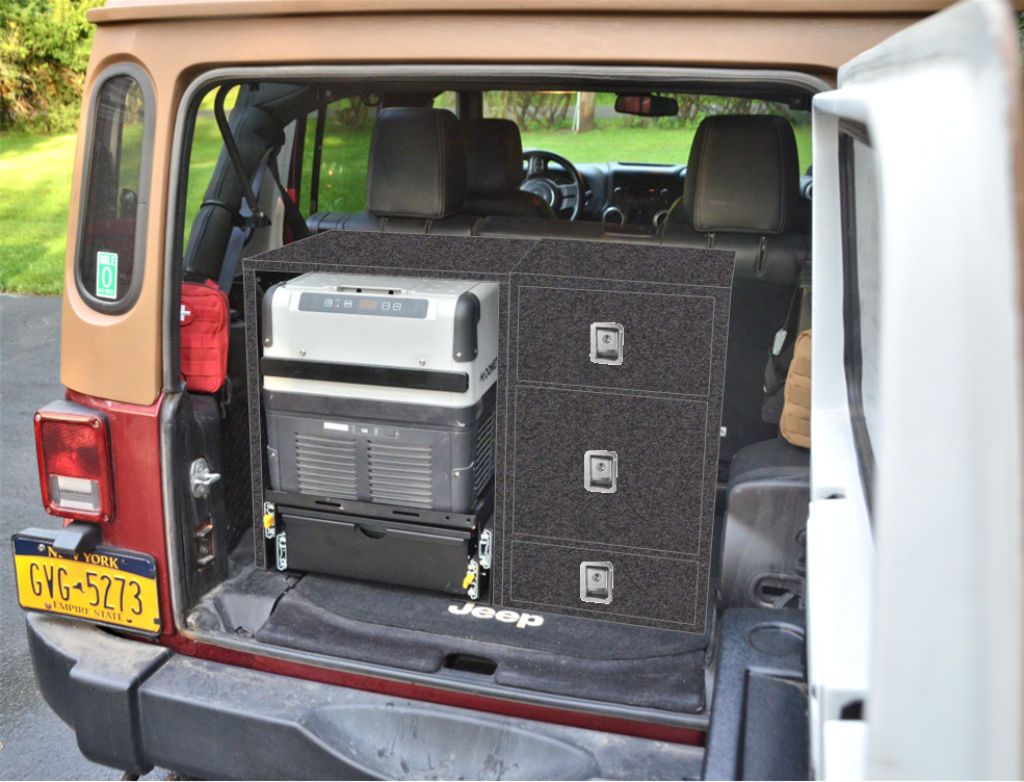
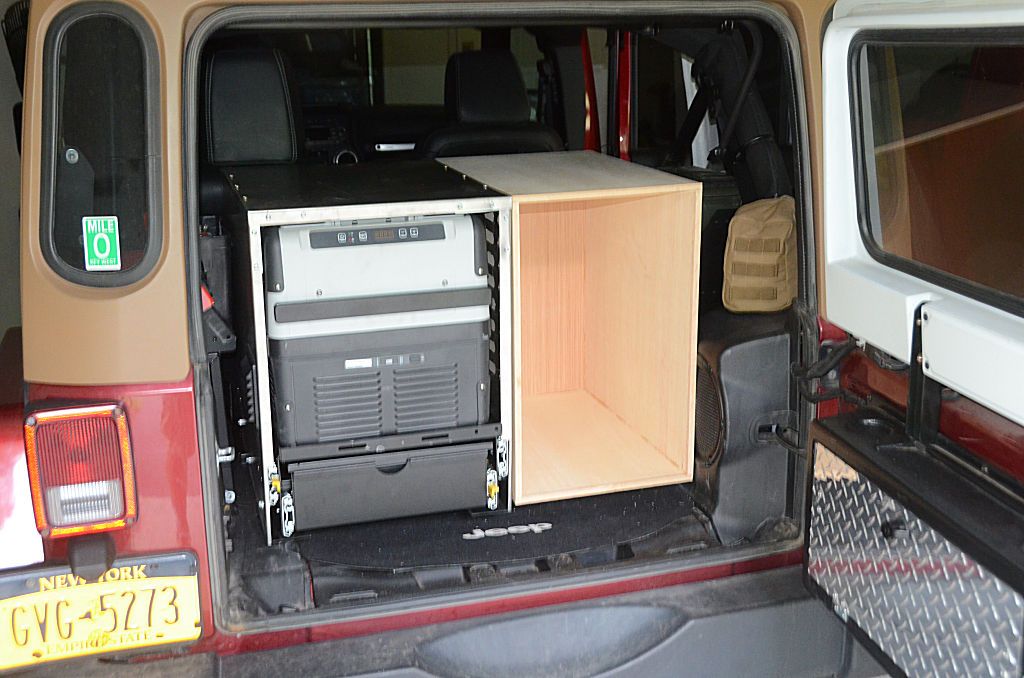
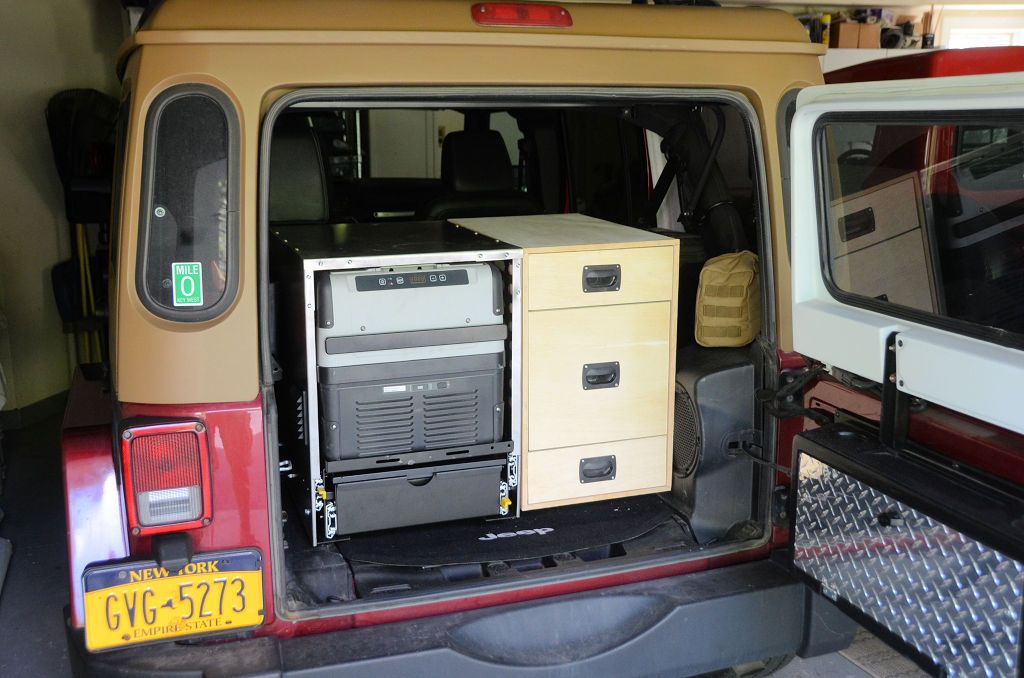
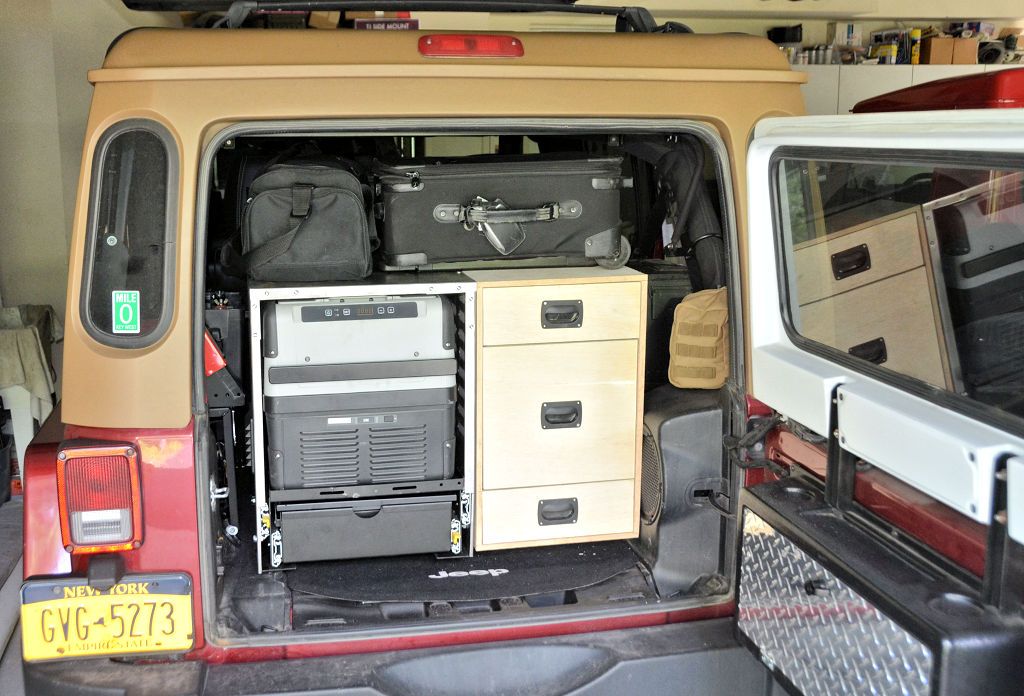
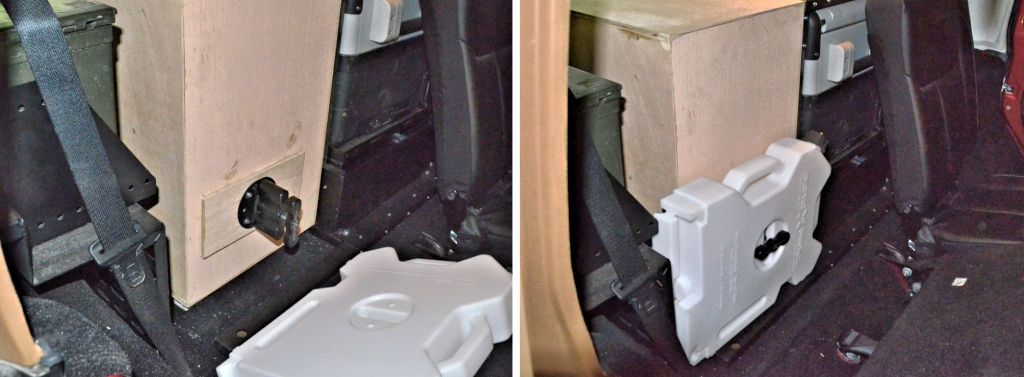
I plan for the cabinet to sit flush against the kitchen enclosure I built the other day. Because there are bolts holding the enclosure to the kitchen base, I put clearance holes for the bolt heads in the side of the cabinet.

CaseAssembly2_zpsm4vbzwac.jpg


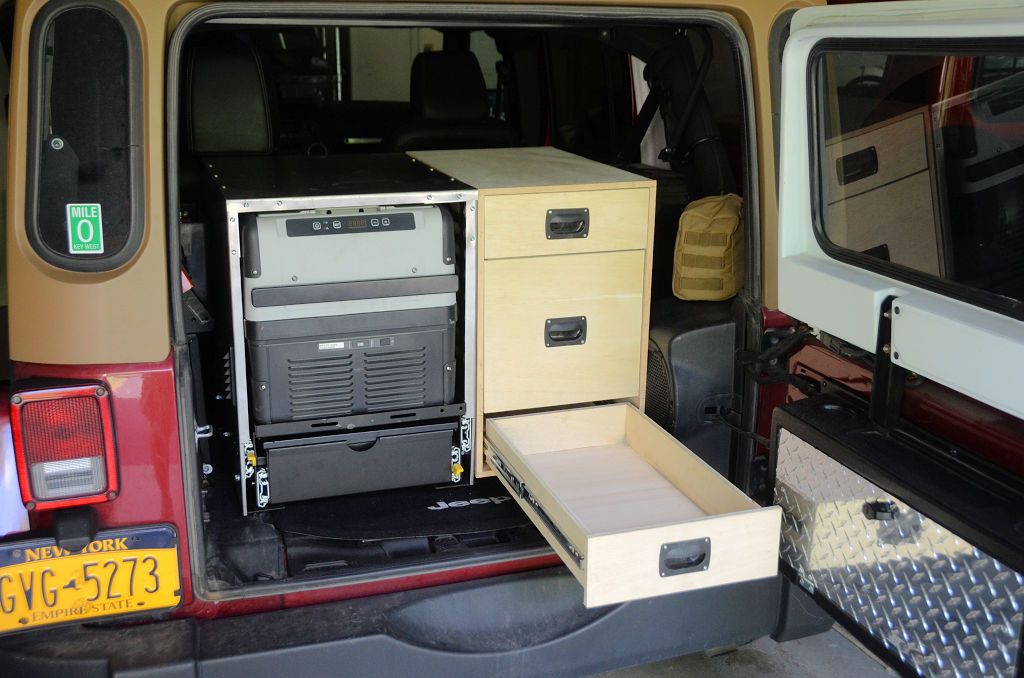
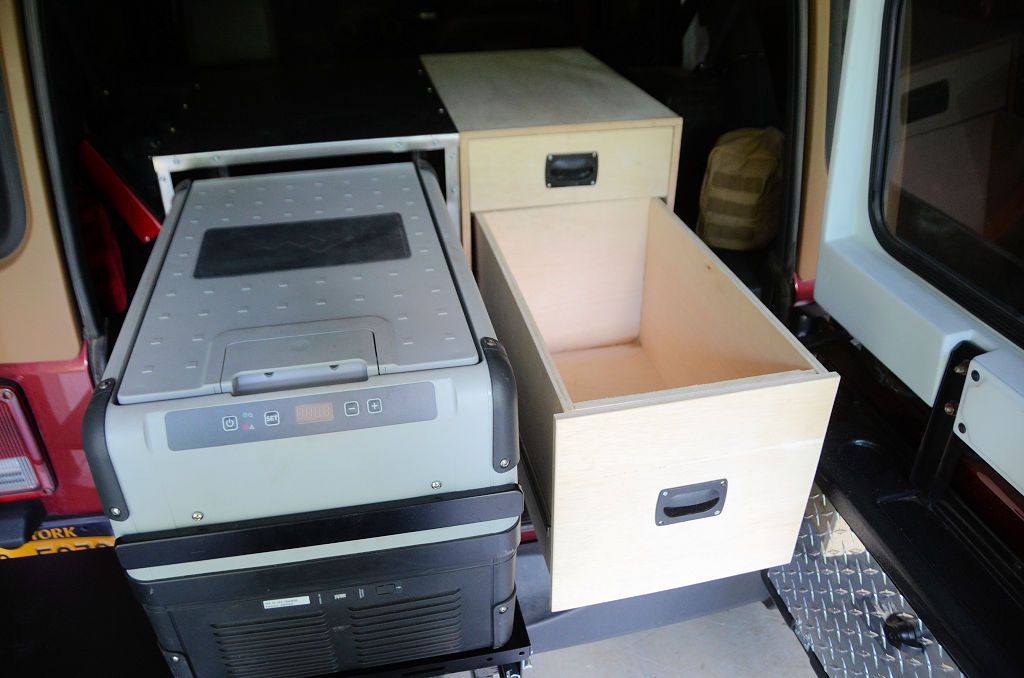
When the glue dries I'll test fit it in the Jeep and then I'll begin construction of the drawers.
 

jscherb

Expedition Leader
Drawers are simple boxes. The corners are joined with biscuits and the bottom slips into a dado in the inside of the sides. The drawer sides are made from the same 1/2" plywood that the cabinet is made from and the drawer bottoms are 1/8" plywood.

DrawerAssembly1_zpsg0p6fii9.jpg


Assembled:

DrawerAssembly2_zpspawoumch.jpg


All three drawers assembled and waiting for the glue to dry. The tall drawer in the background goes in the middle, the smaller drawers go in the top and the bottom of the cabinet. The corners of the large drawer get 3 biscuits each.

DrawerAssembly3_zps1jtjboyx.jpg


Once the glue dries the drawers and slides can be installed in the cabinet. Once installed, the drawers get faces added to them.
 

jscherb

Expedition Leader
Finished most of the construction on the Trail Kitchen companion drawer unit, only a few details left to do.

DrawersDone1_zpskzttvtua.jpg


DrawersDone2_zpsjgh60eq7.jpg


The top of the bottom drawer is at a height that would permit a hinged tabletop to go on top of the drawer and that tabletop would be at the same height as the Trail Kitchen tabletops. haven't decided yet if I will install a tabletop there, but the drawer is ready for it.

DrawersDone3_zpsvsadwfty.jpg


The middle drawer is almost 12" deep.

DrawersDone4_zpsz8hh8bu3.jpg


Gear and luggage can now be stored on top of the kitchen and the drawers; I probably will add a rail around the top or at least some tie-down points so cargo on top can be secured.

DrawersDone5_zpsgtdkz7ej.jpg


Next week I'll put a textured black finish on both the kitchen enclosure and the drawer unit.
 

jgaz

Adventurer
You don’t waste anytime do you? Lol!
As always, very nice work.

Do you have a link to where you sourced the drawer pulls? How deep a recess did you have to cut in the drawer face?
Thanks.
 

jscherb

Expedition Leader
You don’t waste anytime do you? Lol!
As always, very nice work.
Thank you.

No need to waste any time, it's a pretty simple project, make 4 boxes, make 4 drawer fronts (simple rectangular parts with a cutout for the pull), assemble three of the boxes into the fourth one using drawer slides :)

Do you have a link to where you sourced the drawer pulls? How deep a recess did you have to cut in the drawer face?
Thanks.
They're from the marine market - Sea Dog part # 227320. They require a little less than 3/4" recess.
 

OregonJKU

Active member
I installed the Trail Kitchen this morning using the pre-production no-drill installation kit the company sent me to test. Also installed the prototype enclosure I made yesterday.
Hi Jeff, how was the installation using the no-drill kit? Did it meet your expectations? Do you know when the production version will be available?
BTW your drawer unit looks great!
 

jscherb

Expedition Leader
Hi Jeff, how was the installation using the no-drill kit? Did it meet your expectations? Do you know when the production version will be available?
BTW your drawer unit looks great!
I like what they've done with the no-drill installation kit. There are two details I want to discuss with them when I meet with them on Friday, but they're not big changes. When I meet with them I'll ask about the release date - should be soon, even if they incorporate my comments into the production version.

Also on the agenda are the release plans for the other accessories I've already turned over to them, such as the sink option, and new accessories I want them to do like the enclosure I just prototyped and a few other ideas I've got.
 

jscherb

Expedition Leader
The prototype enclosure includes a Molle grid/Rotopax mount on the passenger side, it's a good place to mount the water source for the sink option:

Enclosure9_zpsc1wn0wmt.jpg


With the drawer cabinet in place, the Rotopax can't be mounted there, but I left enough room between the cabinet and the slope of the back seat to mount the Rotopax there:

FrontRotopax_zpst1xh2bie.jpg


Or, it could be mounted on the swing-down overhead rack if there's another use for that space behind the seat...

MeetingConfig_zpse7hq16jc.jpg


There's one more detail to add before I put the finish on - if I remove a section of the bottom of the cabinet (hashed area in the photo below), then with the bottom drawer removed the carpet can be pulled up a bit to provide access to the storage under the floor:

CubbyAccess_zpsuo5v0emn.jpg


I'll be putting a textured dark gray finish on both the enclosure and the drawer cabinet tomorrow.
 

jscherb

Expedition Leader
I put a textured slate gray finish on the kitchen enclosure and the drawer unit. Tomorrow I'll reinstall everything after letting the finish harden overnight.

FinishDone1_zpslxz2ivd7.jpg


FinishDone2_zpselas9yog.jpg
 

OregonJKU

Active member
Hi Jeff, your drawer unit looks beautiful! BTW in your pictures above I noticed the overhead swing-down Molle panel. What's the status on availability of the production units?
 

Forum statistics

Threads
185,989
Messages
2,880,549
Members
225,705
Latest member
Smudge12
Top