You are using an out of date browser. It may not display this or other websites correctly.
You should upgrade or use an alternative browser.
You should upgrade or use an alternative browser.
Boomer the Quadravan 4x4 Camper
- Thread starter spencyg
- Start date
I think we're all glad for a few updates around here! It has been too long for sure.
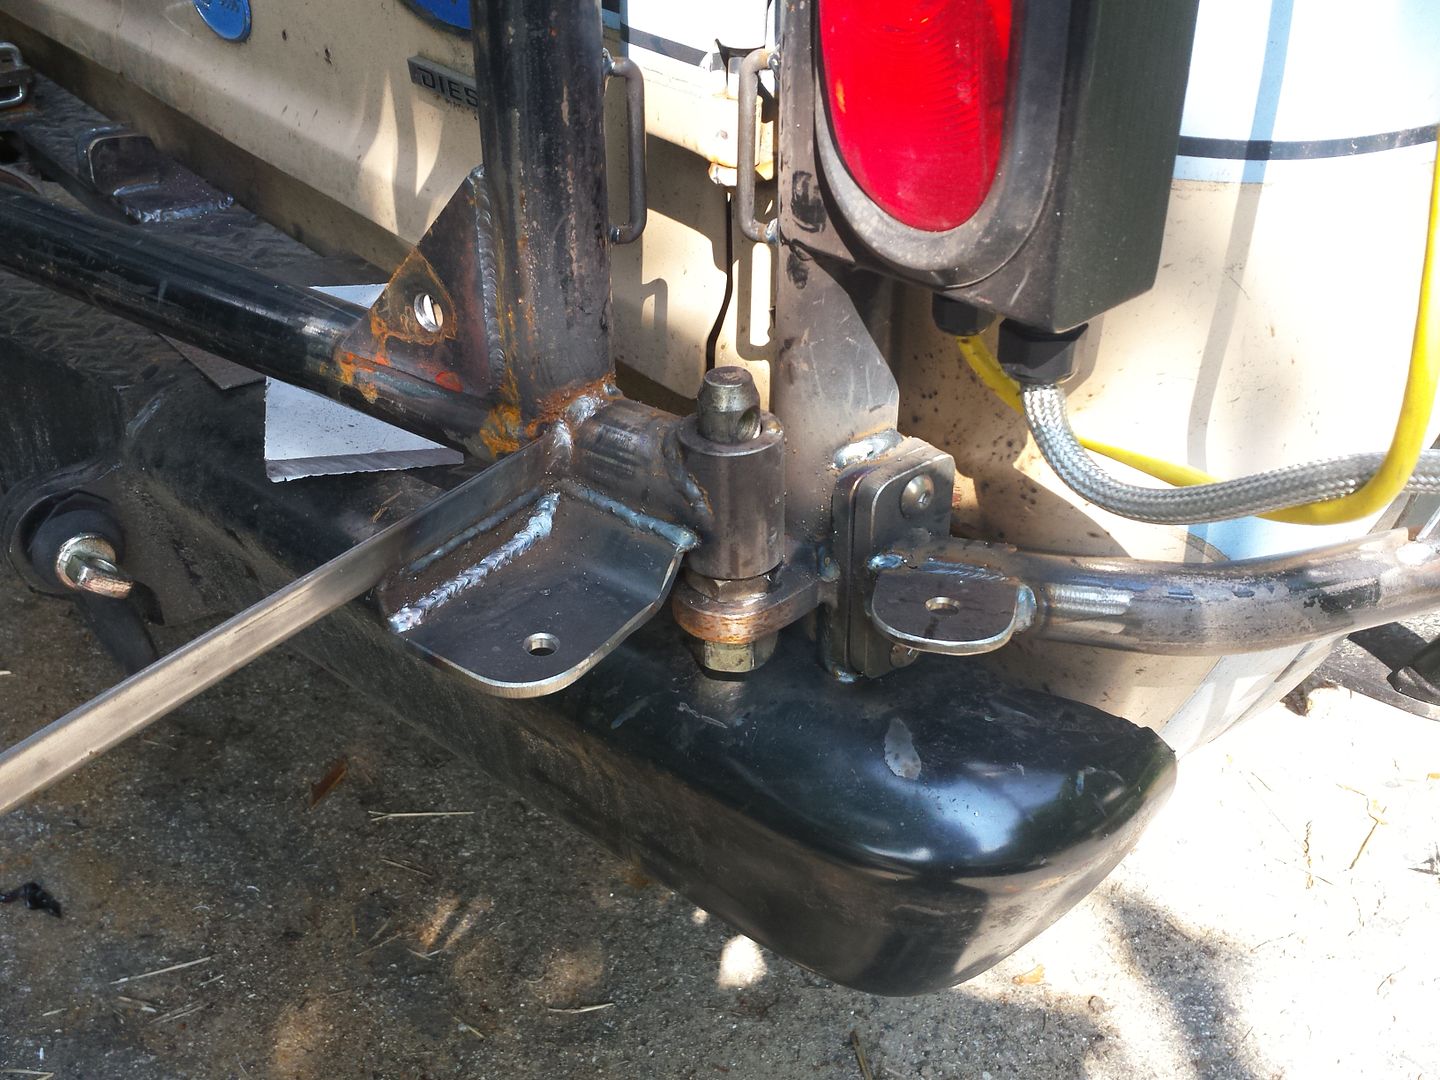
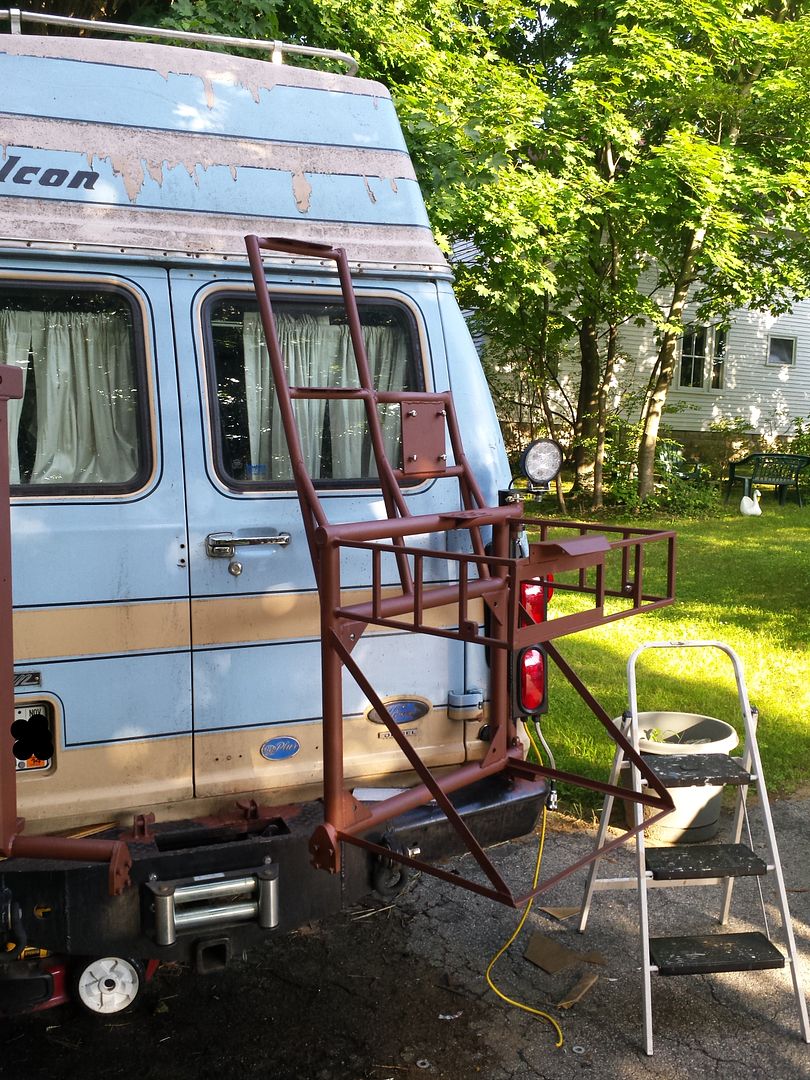
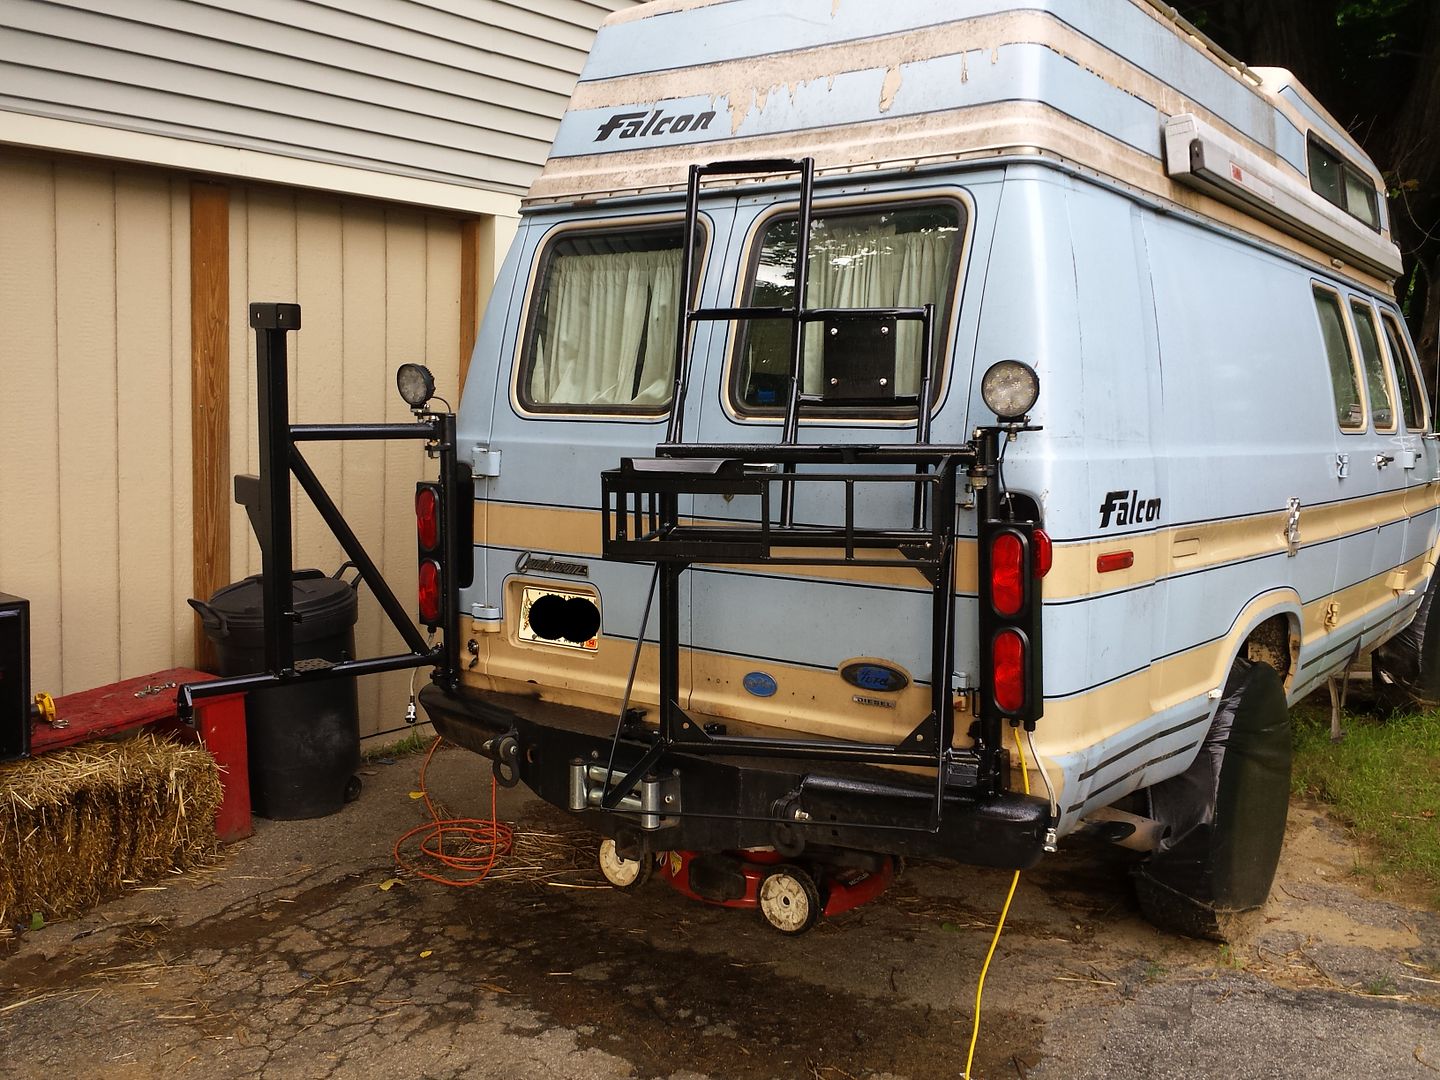
Pushed hard again today and finished up fabrication on the rear swing outs. I was actually intending to be at it only until mid-morning but once I got the latch for the box frame fabricated and mounted I still wasn't happy with the amount of flex I was getting in the overall assembly. Mind you, this flex required me to basically put my entire body weight on the frame and even then it was moving maybe 1/4-3/8", but I still felt it was too much.
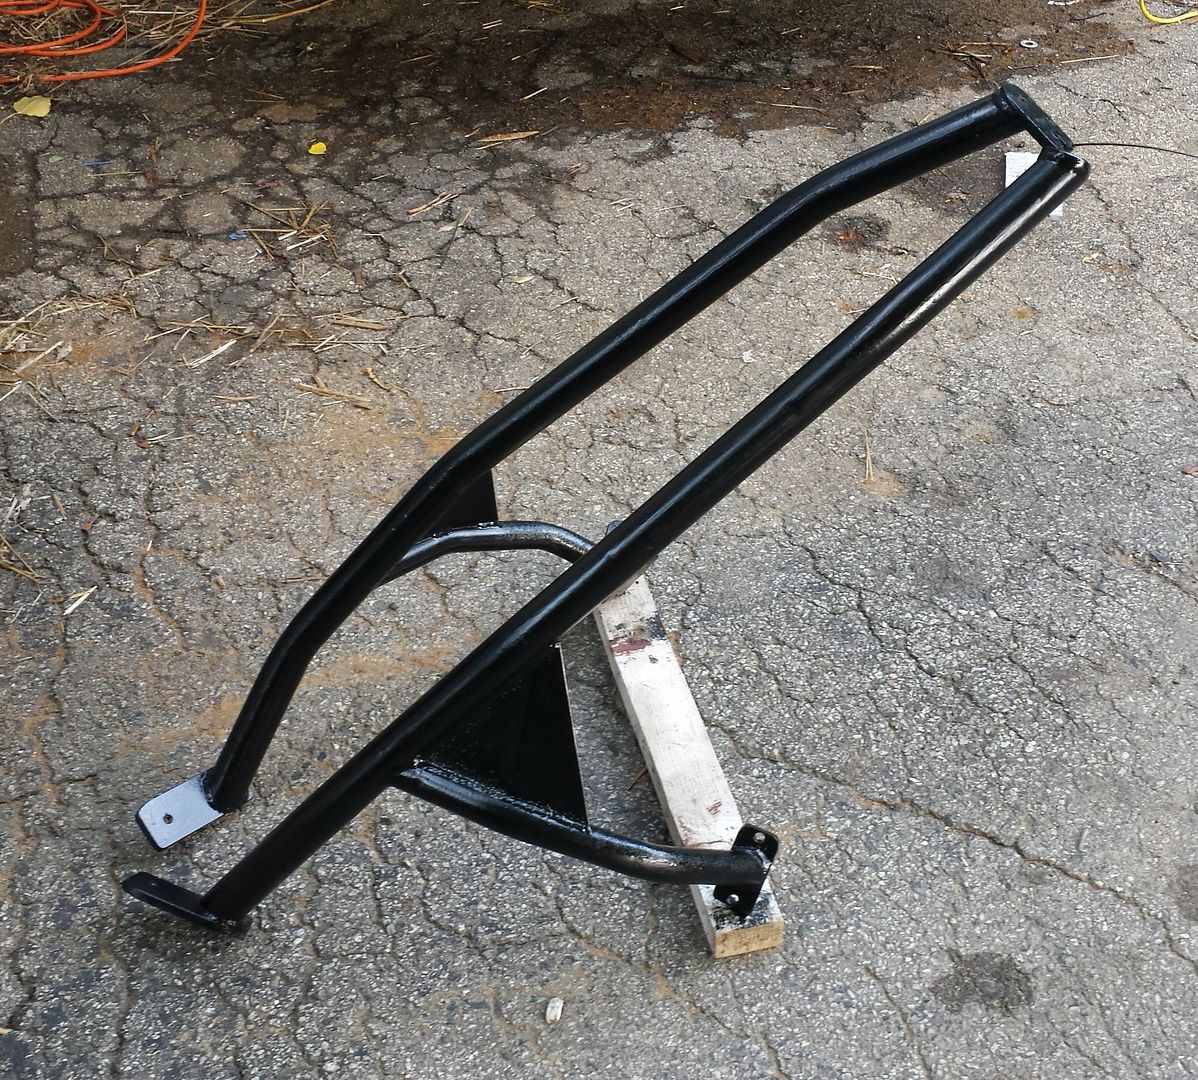
So a bit of re-design, heading down a road I had considered when I first was thinking about the implementation of the diagonal braces. It seemed the diagonals should have an additional support member in the center of the tube going back to the lower portion of the swing-out stanchions. Clearly this was what I needed to do after looking at how everything was moving when under a load.
So I did.
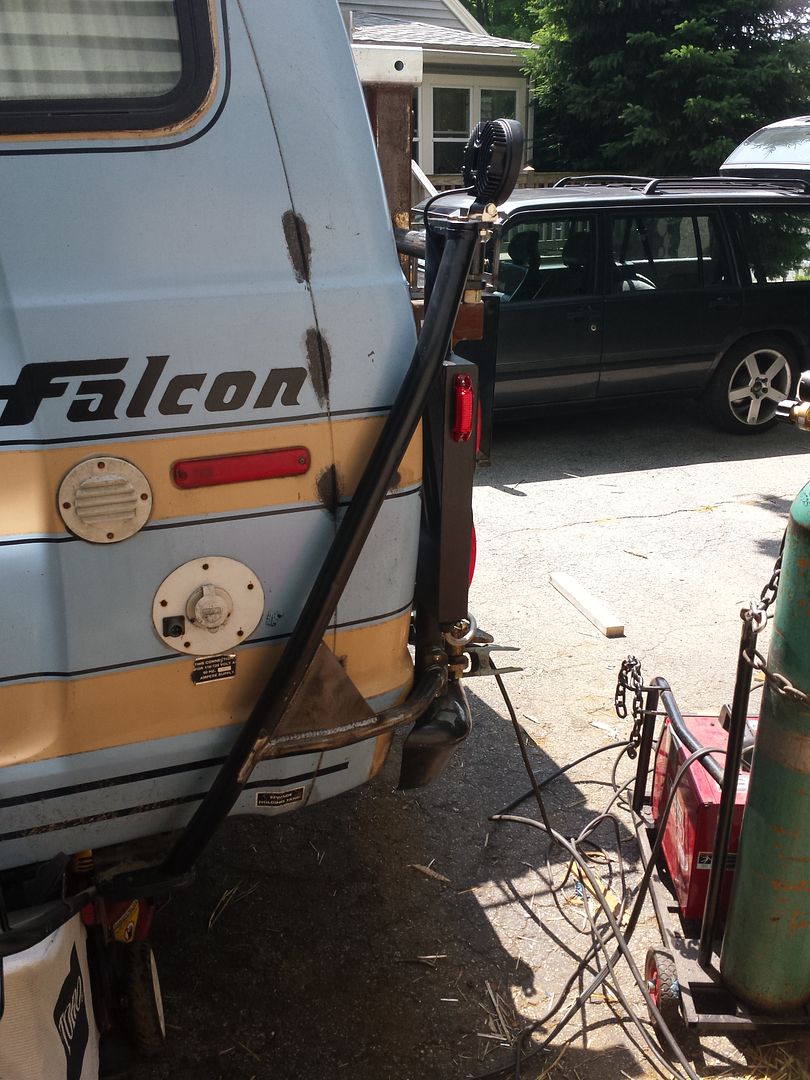
The mid-tube (as we're calling it) is welded permanently to the diagonal tube, but unbolts from the stanchion. The addition of the triangular plates probably wasn't necessary but I was on a roll. The end result was a significant increase in stiffness of the assembly. What was 3/8" is now maybe 1/8". I'm happy with it now.
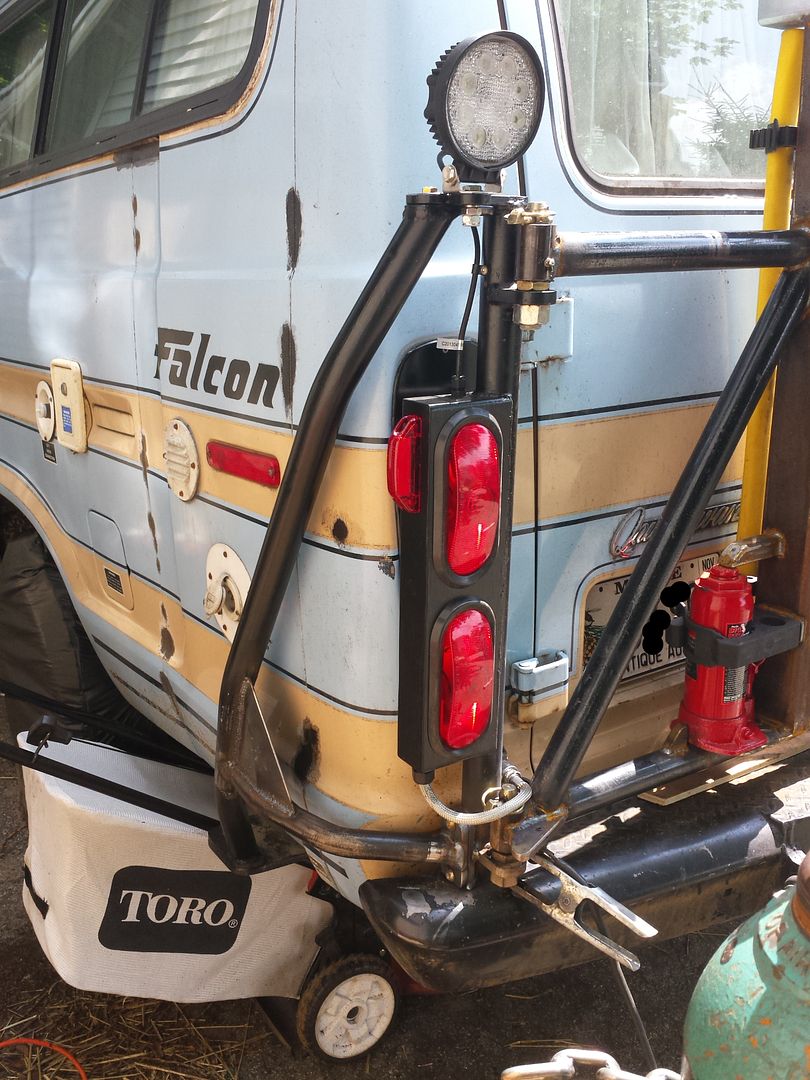
I finished up fabrication with some little steel hoops in a couple spots for tying down wiring and propane flex hose. The intent is to just zip tie the wire or hose directly to the hoops. The one near the license plate will be static, but the two on the lower swing portion will support loops of wire and hose to allow free motion without pinching or stretching.


I also made a travel restraint for the box frame and a feature on the mid-tube to allow me to pin the box open since we may use this part of the swing-out for outdoor cooking and it would be good to have the box toward the awning side of the van.
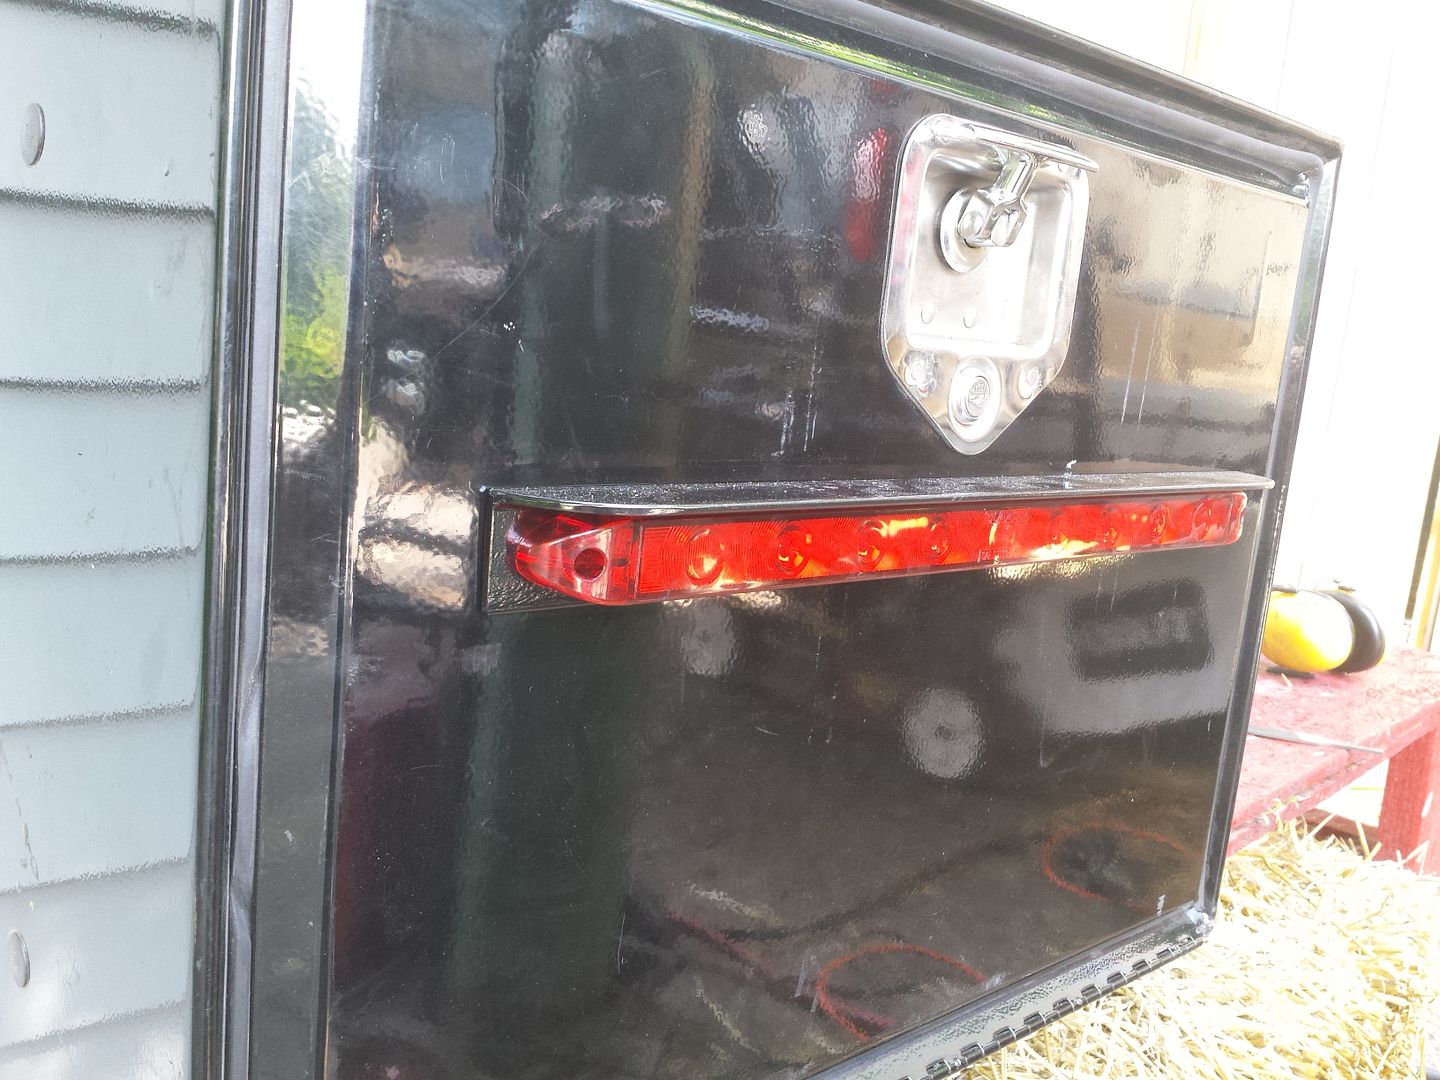
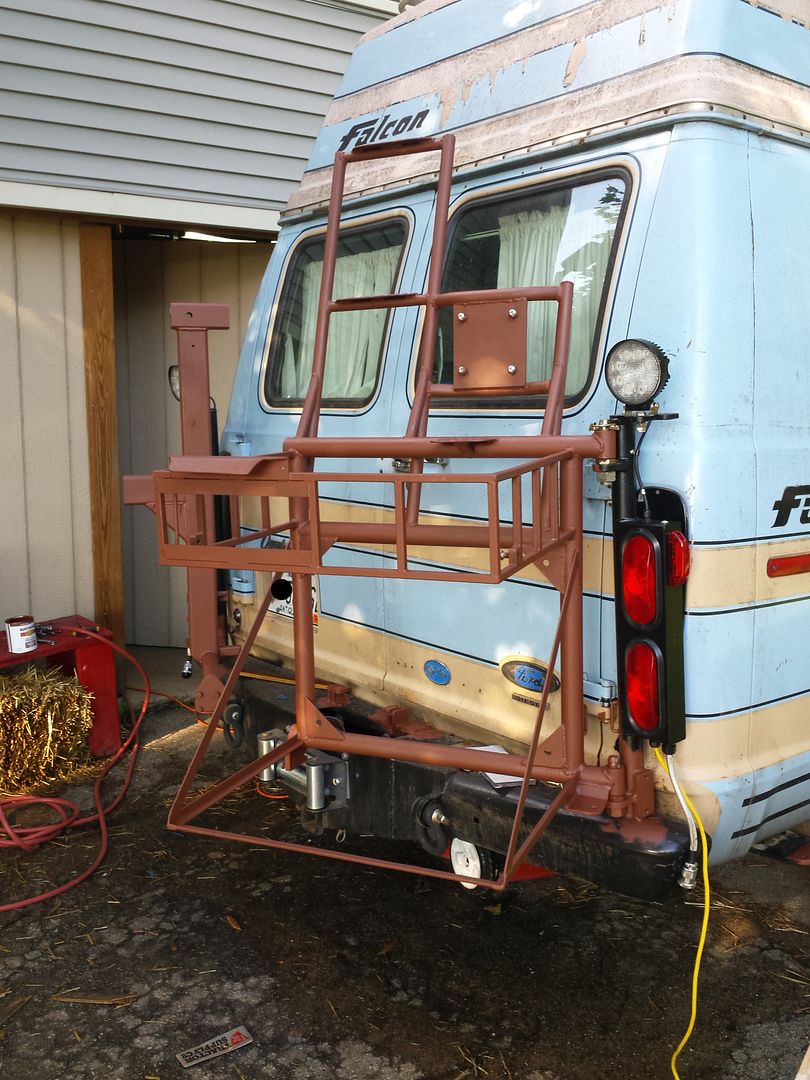
I mounted the 3rd brake light to the box prior to removing everything for paint.
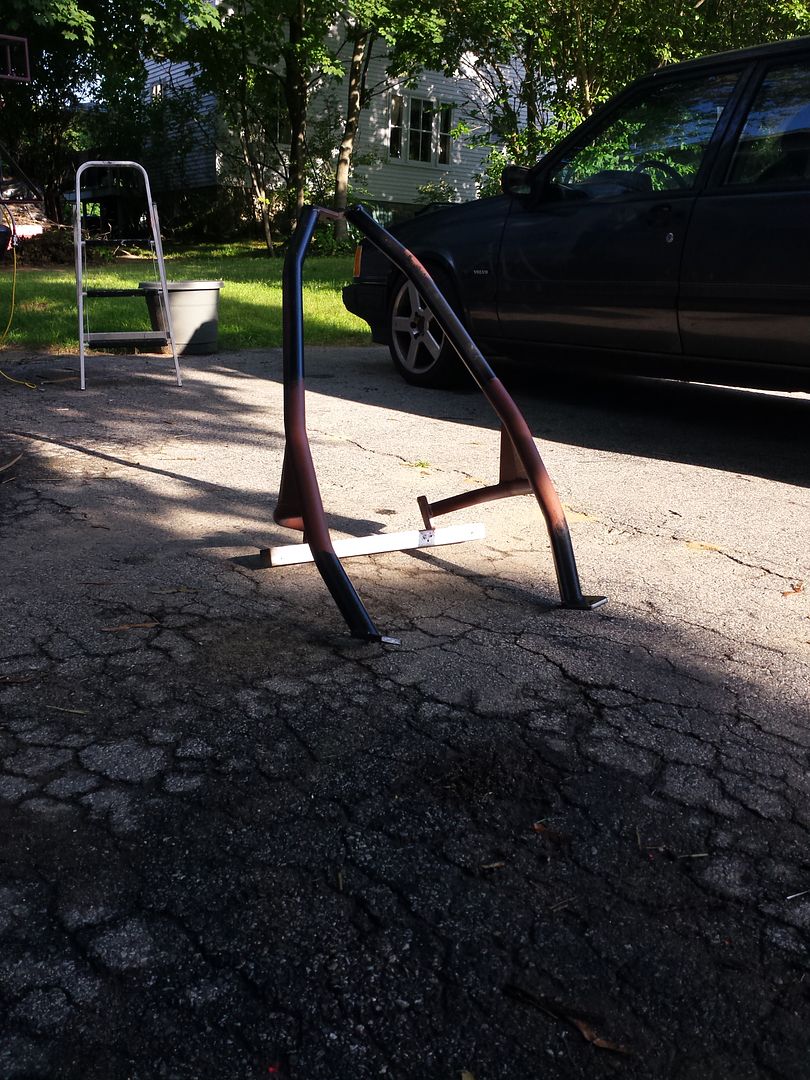
Then everything got stripped, washed and primed. This whole thing is going to be a rust-oleum brush-on job.

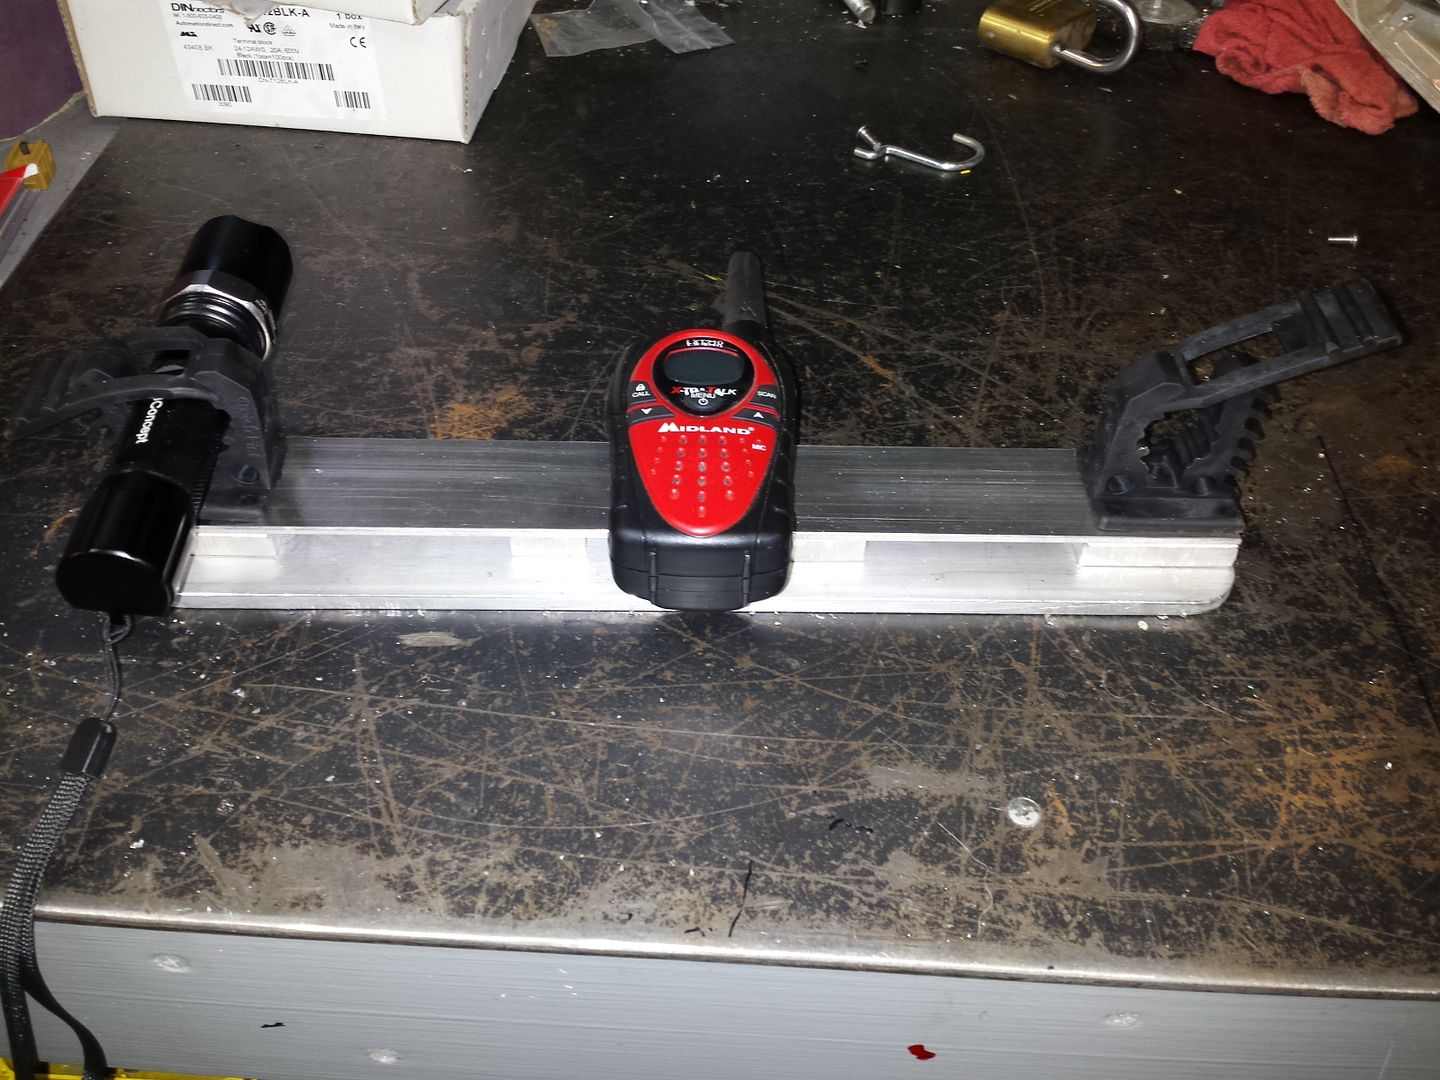
In the shop last night I started in on the new front console organizer. A flashlight on each end and then 2-way radio holsters for 3 units. Still to be completed.
And lastly, this arrived.

Suspension re-do starts next week....I'm exhausted so the thought of it kind of makes me want to cry....I'm sure it will be awesome.
Mostly.
SG
Pushed hard again today and finished up fabrication on the rear swing outs. I was actually intending to be at it only until mid-morning but once I got the latch for the box frame fabricated and mounted I still wasn't happy with the amount of flex I was getting in the overall assembly. Mind you, this flex required me to basically put my entire body weight on the frame and even then it was moving maybe 1/4-3/8", but I still felt it was too much.
So a bit of re-design, heading down a road I had considered when I first was thinking about the implementation of the diagonal braces. It seemed the diagonals should have an additional support member in the center of the tube going back to the lower portion of the swing-out stanchions. Clearly this was what I needed to do after looking at how everything was moving when under a load.
So I did.


The mid-tube (as we're calling it) is welded permanently to the diagonal tube, but unbolts from the stanchion. The addition of the triangular plates probably wasn't necessary but I was on a roll. The end result was a significant increase in stiffness of the assembly. What was 3/8" is now maybe 1/8". I'm happy with it now.
I finished up fabrication with some little steel hoops in a couple spots for tying down wiring and propane flex hose. The intent is to just zip tie the wire or hose directly to the hoops. The one near the license plate will be static, but the two on the lower swing portion will support loops of wire and hose to allow free motion without pinching or stretching.


I also made a travel restraint for the box frame and a feature on the mid-tube to allow me to pin the box open since we may use this part of the swing-out for outdoor cooking and it would be good to have the box toward the awning side of the van.

I mounted the 3rd brake light to the box prior to removing everything for paint.

Then everything got stripped, washed and primed. This whole thing is going to be a rust-oleum brush-on job.


In the shop last night I started in on the new front console organizer. A flashlight on each end and then 2-way radio holsters for 3 units. Still to be completed.

And lastly, this arrived.

Suspension re-do starts next week....I'm exhausted so the thought of it kind of makes me want to cry....I'm sure it will be awesome.
Mostly.
SG
flightcancled
Explorer
With a rig this size a single swing out would require an insanely huge hinge and support mechanism. You've seen what I've had to do for rigidity with less than half of the moment arm of a single sided unit.
The glass top is maybe a bit more than 1/8" thick but seems to be old-school hand layup (as opposed to the current chopper gun crap) so its pretty strong. I don't walk up there but if I had to I'm sure it would support my weight. When it comes time to do the roof rack (maybe next year) the anchor points will just be bonded to the sidewalls of the topper.
SG
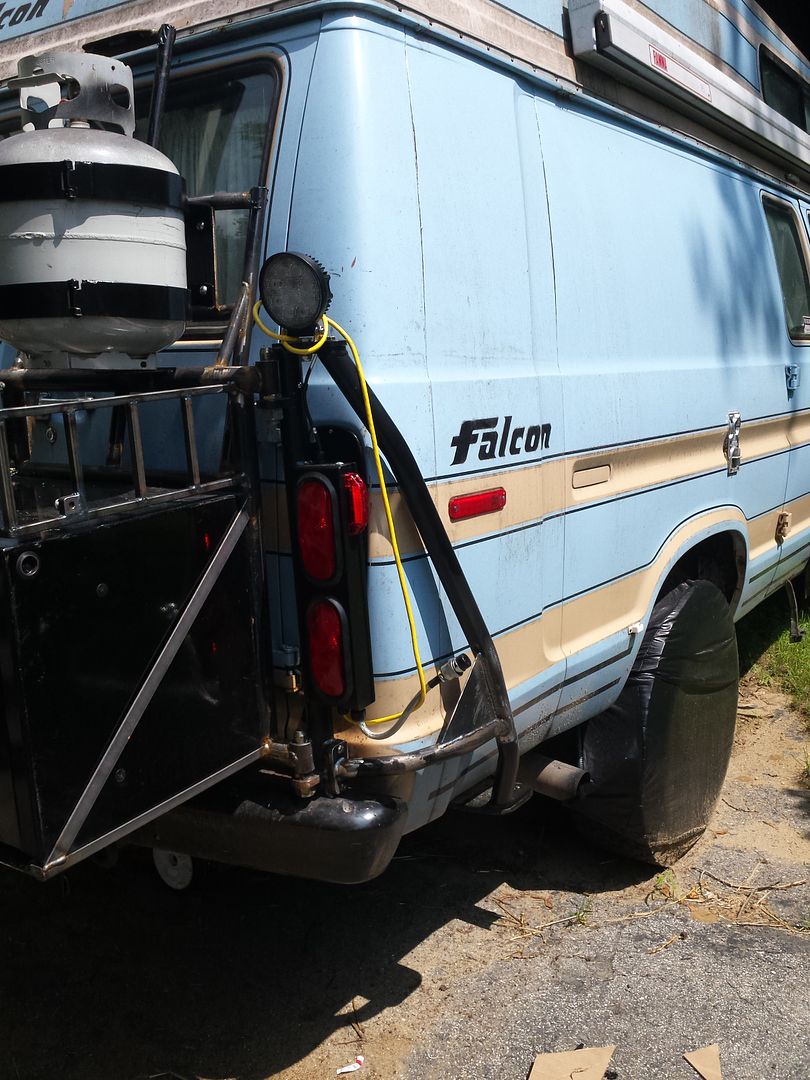
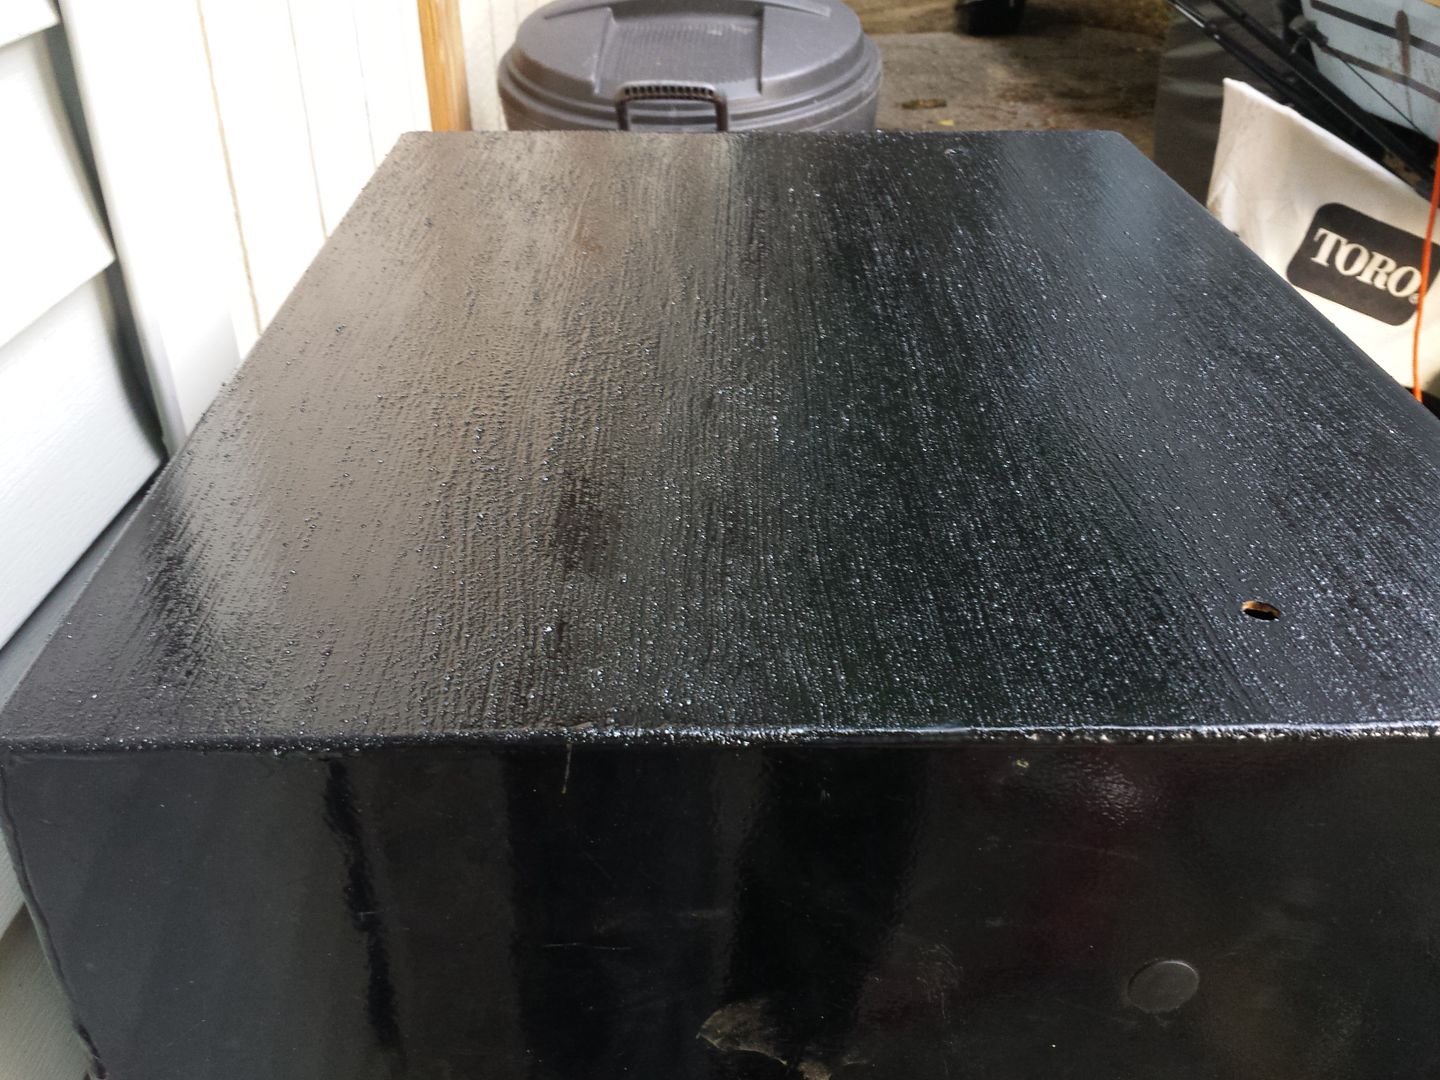
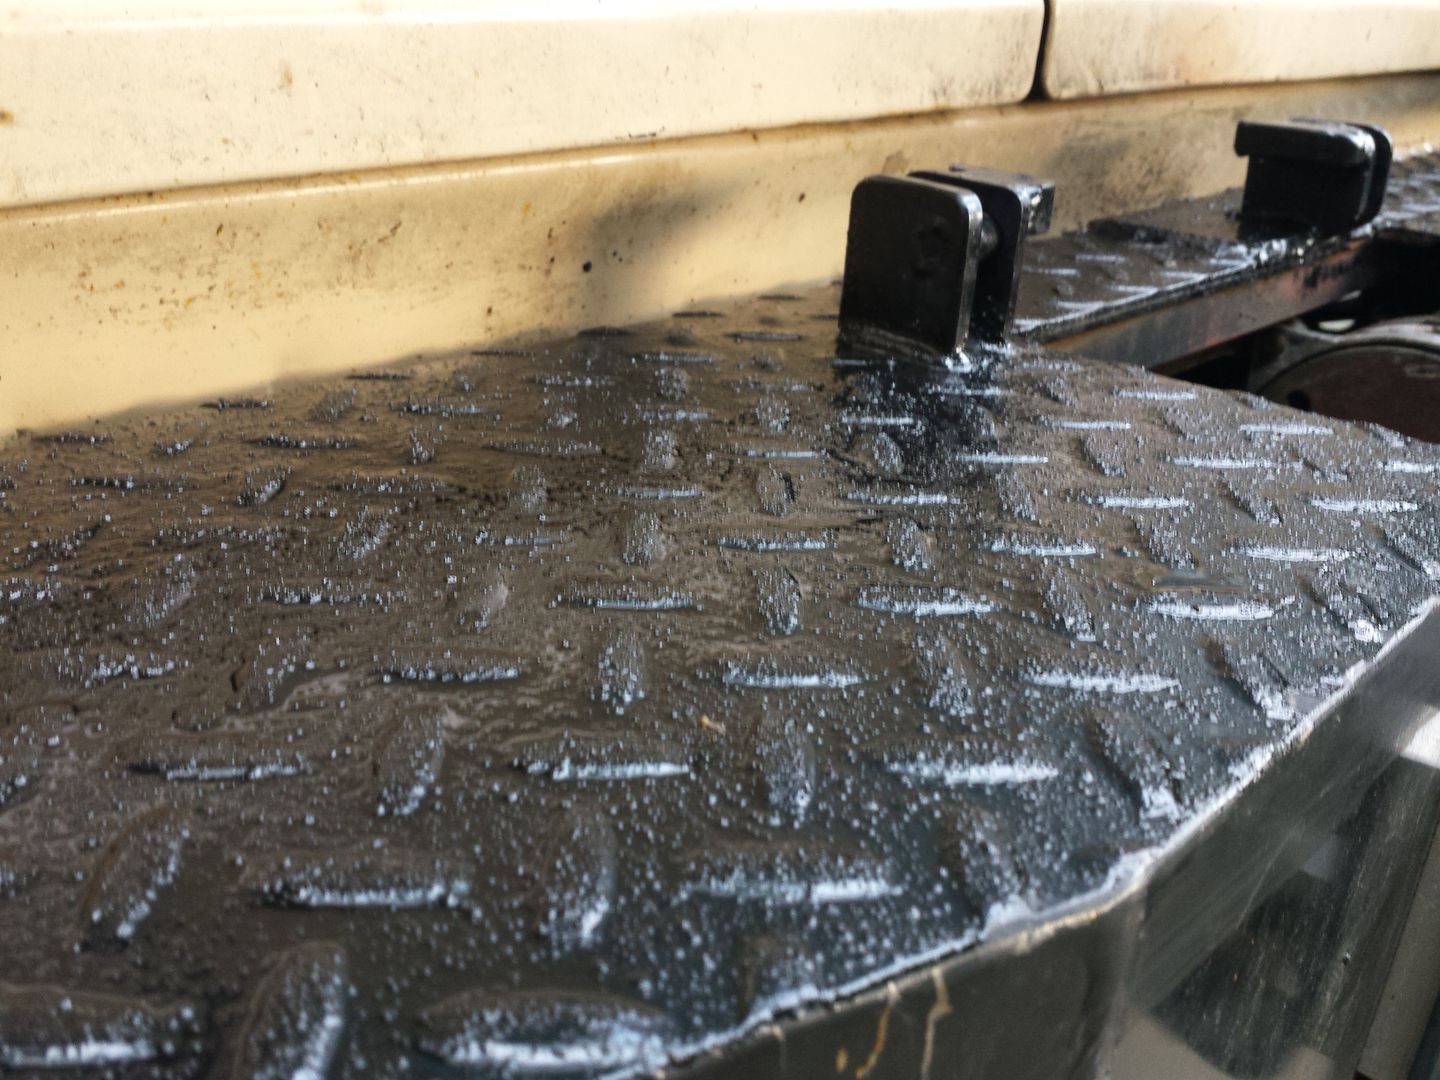
A break in the weather allowed me to get everything painted. I thinned out some professional grade Rustoleum Semi-Gloss Black and went to town with a brush.
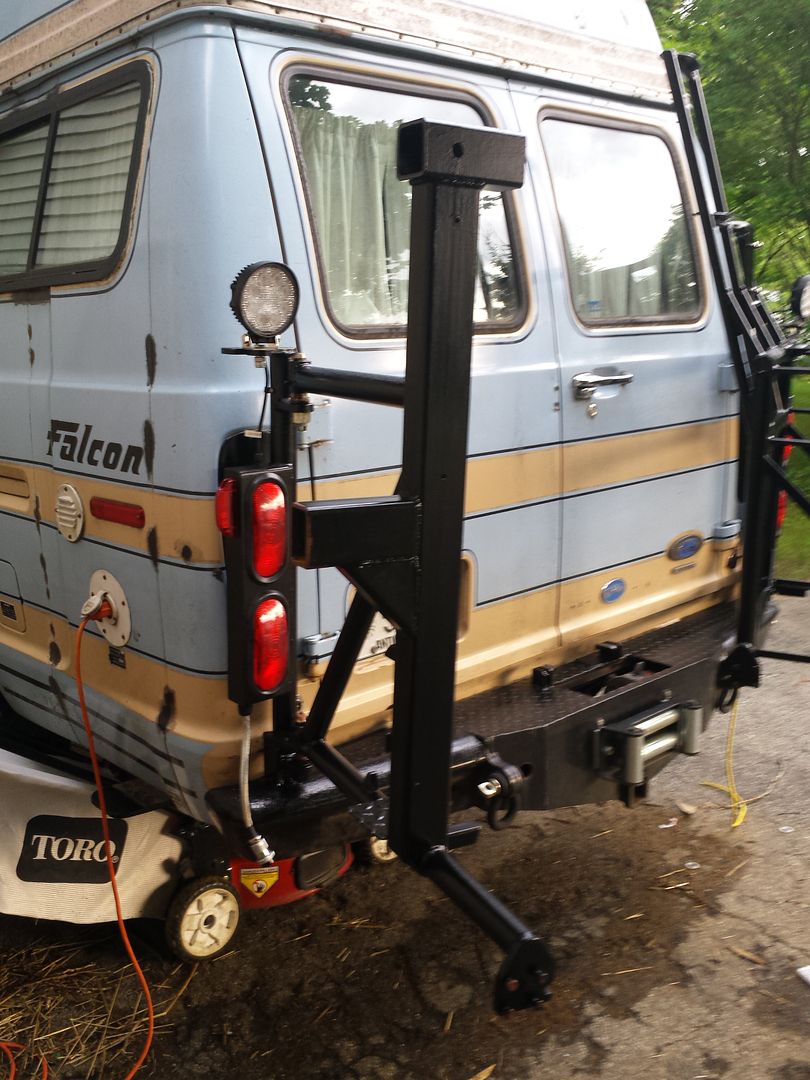
When I had finished everything, I raided the kids' sandbox and put some grit into the last of the paint I had mixed up. This stuff went on all the horizontal surfaces I thought I might be stepping on at some point. That steel diamondplate is extremely slippery when wet and I really hate falling for a few different reasons....
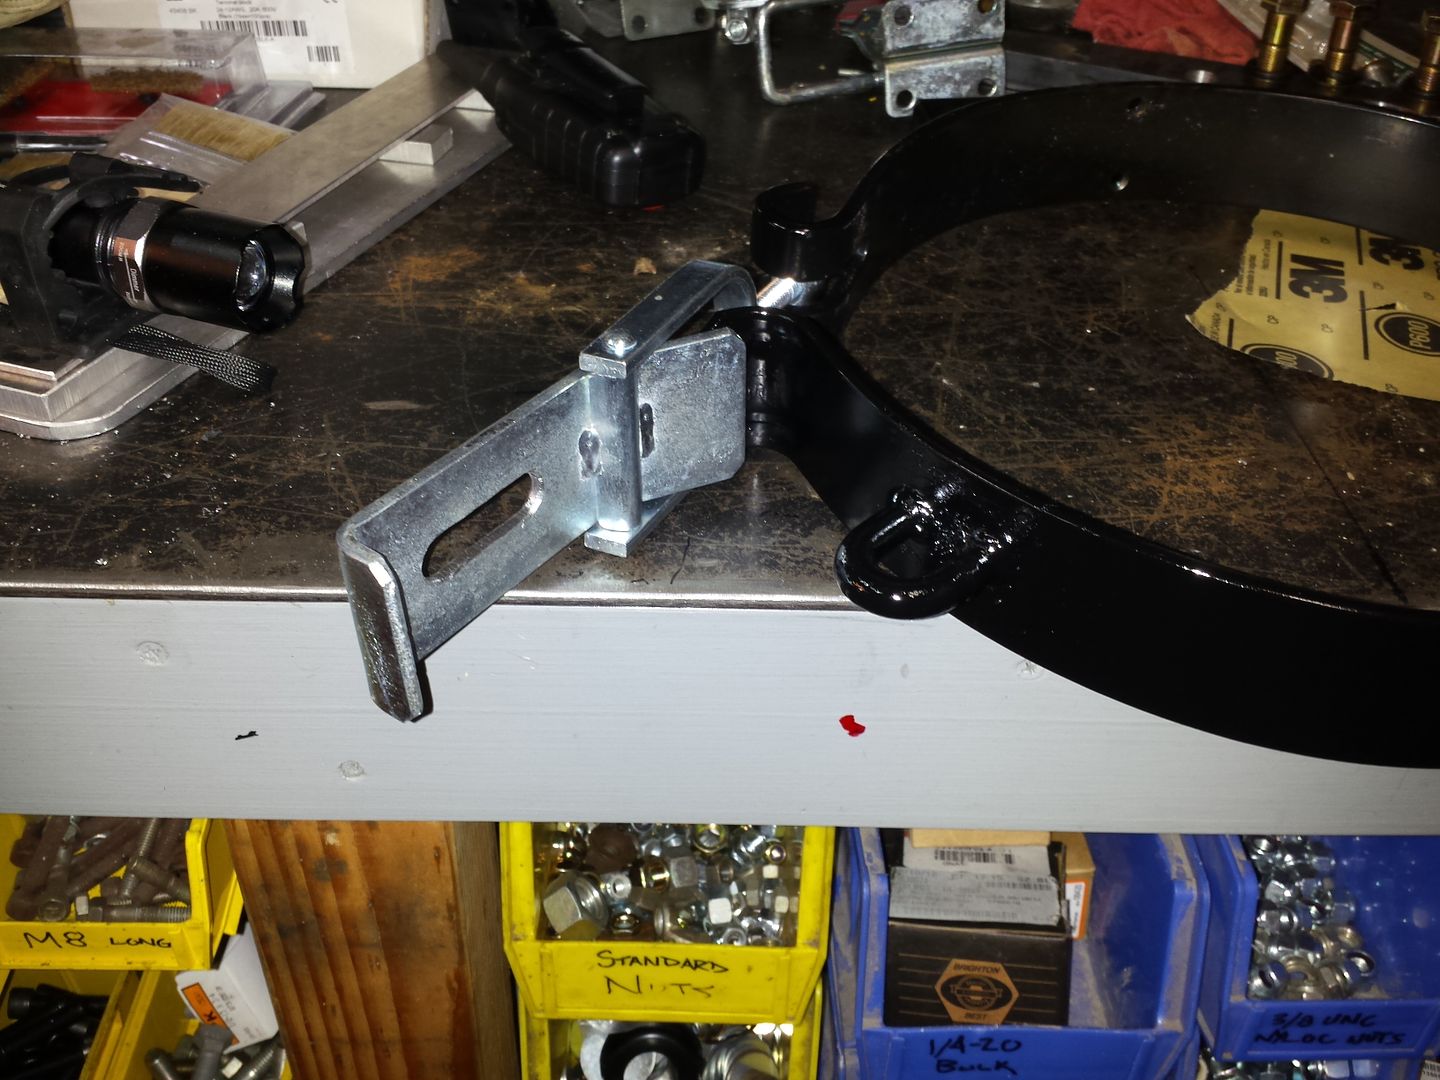
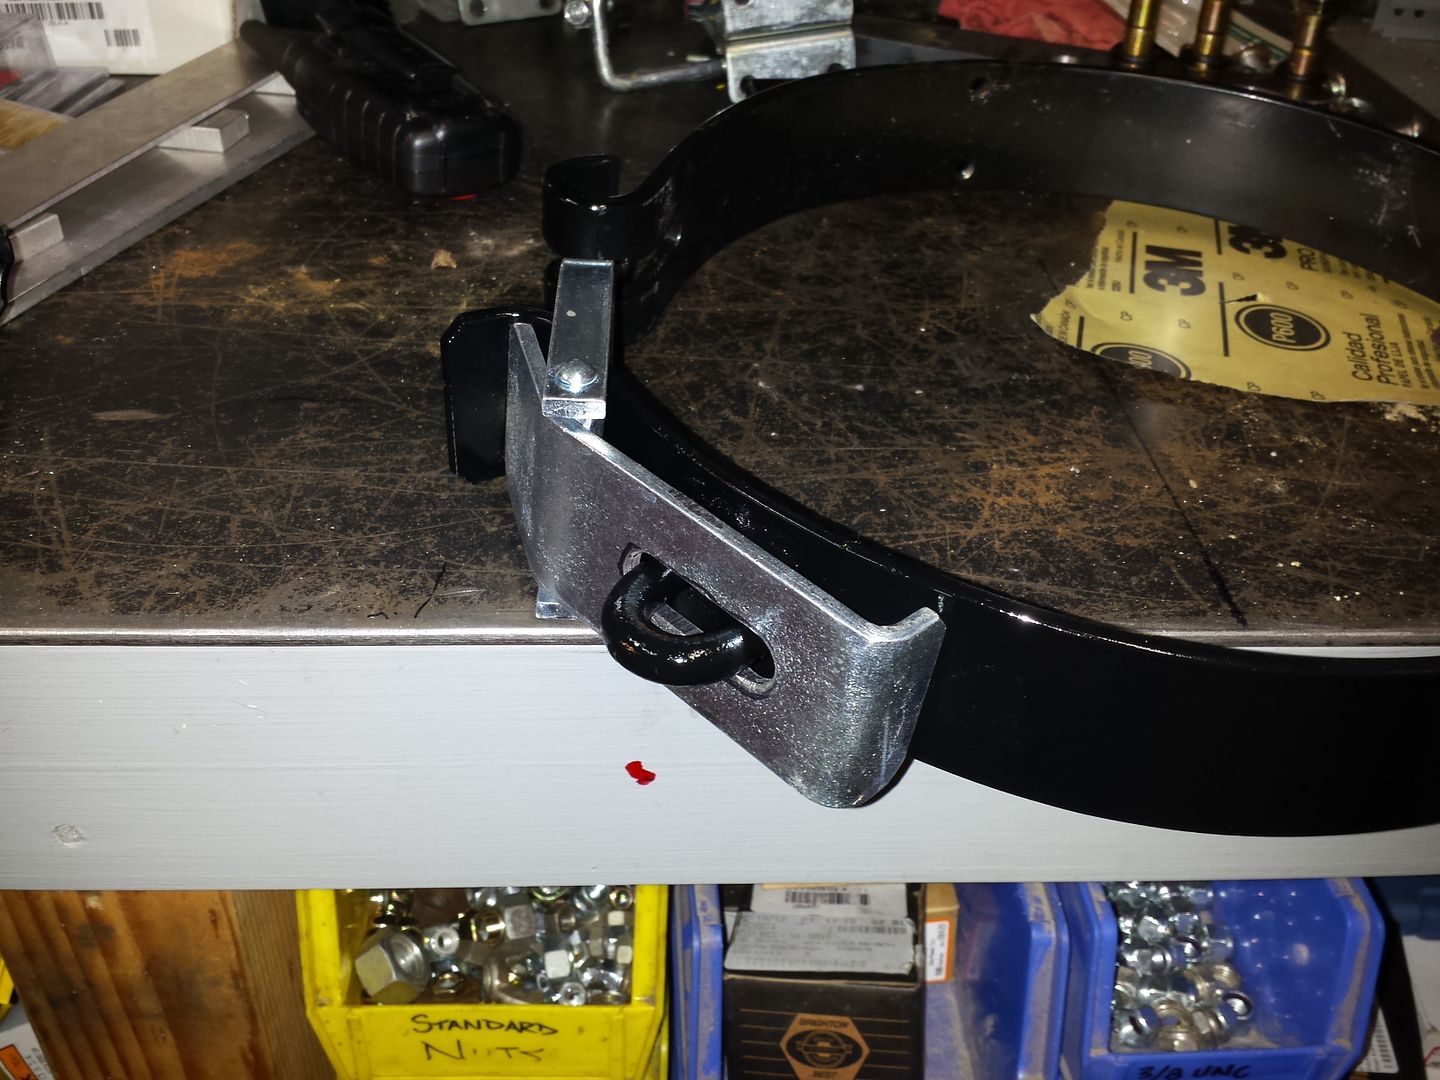
After I finished with the paint I pulled a few bits of the old propane feed line out from under the van and put a shopping list together for a few misc. fittings to get that system online. To close out the evening I modified one of the propane tank clamps to accept a lock. I really liked the idea of locking the base plate but when I started to really dig into it the locking process was going to be kludgey....
So this will work fine.
It is raining again so we'll see what this evening brings. I need to do some rust repair on a couple doors and then start digging into the front suspension. The parts from Ballistic Fab are supposedly here on Thursday (tomorrow) and I want to make relatively quick work of this suspension modification.
SG


When I had finished everything, I raided the kids' sandbox and put some grit into the last of the paint I had mixed up. This stuff went on all the horizontal surfaces I thought I might be stepping on at some point. That steel diamondplate is extremely slippery when wet and I really hate falling for a few different reasons....


After I finished with the paint I pulled a few bits of the old propane feed line out from under the van and put a shopping list together for a few misc. fittings to get that system online. To close out the evening I modified one of the propane tank clamps to accept a lock. I really liked the idea of locking the base plate but when I started to really dig into it the locking process was going to be kludgey....
So this will work fine.


It is raining again so we'll see what this evening brings. I need to do some rust repair on a couple doors and then start digging into the front suspension. The parts from Ballistic Fab are supposedly here on Thursday (tomorrow) and I want to make relatively quick work of this suspension modification.
SG
Mwilliamshs
Explorer
Looks slick! (no pun intended, given your friction paint)
Last edited:
TheBoondocker
New member
Hi what are your plans for the frt suspension mods that you are planning to do ?
Hi what are your plans for the frt suspension mods that you are planning to do ?
I have a coil sprung front "2 link" suspension similar to what you'd find on an early bronco. The similarity actually is only in the 2 trailing arms, as Pathfinder Industries decided to ignore all previous successful industry-standard axle locating strategies in favor of....
This

In application....

What you're looking at are two rods with rubber bushings at each end. The ends fastened to the cross member secure the axle to the frame, preventing it from moving side to side (and, in practice, up and down as well). The ends on the axle have thicker rubber bushings which "squish" to allow axle movement. It also adds a huge amount of slop to the steering effort and makes the ride very harsh.
This all gets cut out tonight.
The new linkage will be a far more traditional cross-over steering setup with a standard panhard bar linking the axle to the frame with a single pivot point (passenger side on the axle, driver side on the frame). The steering will utilize a "high steer" upper arm on the passenger side knuckle to link up to the steering box, and the stock lower arms will be utilized for the crossover link.
Hopefully this works.
My Ballistic Fab order arrived last night and along with my steering components came the spare tire mounting plate. For all the grief I gave ballistic for their poor shipping time and general lack of customer service, the order arrived correct and the stuff is very nice.
So I welded that plate on, painted it up, and Voila....

Then I mounted the tire temporarily (actually, for those looking closely, the color of the new hub suggests I've warped the actual timeline of events)


The tire fits great and I've got room for one a little bigger if need be down the road. I was concerned about the driver side runniing / brake light being blocked by the tire but I think I'm good. Needless to say, the rest of the stuff got re-assembled after the paint dried and this wraps up the fabrication portion of the swing-outs. I still need to put together the propane manifold and do a little last wiring for the 3rd brake light and plate light, but those are really just small details.
Suspension work tonight. Fun (?)
SG
Normally this isn't the case, but during a few weeks in the summer the rest of the family is off visiting family while I stay back to "bring home the bacon". In off-bacon hours I'm able to accomplish far more than when I'm attending to husband and daddy duties. I don't sleep much when they're gone....
Another thing to note on the spare tire hub is the "nose" protruding from the center of the plate. I have a mating tube which will be used in the next couple weeks to fashion a spare tire lock. The intent will be that the tire is mounted and secured with lugs. The previously mentioned plate will then slide over the "nose" and secured with a lock which is passed through a common hole between the tube and the protruding rod. It will all make more sense once assembled.
SG
Mwilliamshs
Explorer
I think that spare locking idea is ingenious! Did you come up with that yourself? I see how the round plate with an attached tube slid over the "snout" would stop a thief from loosening/stealing even your lug nuts, much less the tire and wheel.
Last edited: