Converting a factory JK/JKU hardtop to modular

jscherb

Expedition Leader
The objective is to create a non-obstructed 360° view around the vehicle.

I never realized that was the objective. I always thought it was trail, camping and overland functionality :).

Maybe I should post instructions for adding windows to the rear corners of a factory hardtop, they really increase the visibility out the back...

RearView1_zpsu7logizk.jpg
 

Jurfie

Adventurer
The objective is to create a non-obstructed 360° view around the vehicle. Thus overtime our rear seat headrest and spare tire would need to be relocated.

That's why I like Jeff's modular top conversion; the ability to run with a hardtop but no side and rear panels would be epic!
 

jscherb

Expedition Leader
Yesterday I suggested that installing rear corner windows in a factory hardtop could increase visibility out the back. Here are some concept images showing what such a mod could possibly look like...

On the early model "narrow hatch" hardtop:

OperaWindowsEarlyModel_zpsasezfs0x.jpg


On the late model "wide hatch" hardtop, the windows need to be narrower because the hatch is wider:

OperaWindowsLateModel_zpsehzh5qtk.jpg


OperaWindowsLateModel2_zpsbu3rndtj.jpg
 

jscherb

Expedition Leader
That's why I like Jeff's modular top conversion; the ability to run with a hardtop but no side and rear panels would be epic!

I can confirm that, it is epic :). Photo taken after coming down out of Tincup Pass, the trail passes Mirror Lake and crosses this stream (approx elev 11,000) just before arriving at the town of Tincup.

MirrorLake.jpg
 

JDaPP

Adventurer
How badly damaged is too badly damage to work this project? I found a hardtop on craigslist that was in an accident, mostly scratches but has a couple of cracks right around the seam between the top and the rear glass (the one you cut in your design to separate top from rear. I have never worked with fiberglass so that probably makes a difference as well.
 

jscherb

Expedition Leader
How badly damaged is too badly damage to work this project? I found a hardtop on craigslist that was in an accident, mostly scratches but has a couple of cracks right around the seam between the top and the rear glass (the one you cut in your design to separate top from rear. I have never worked with fiberglass so that probably makes a difference as well.

Almost all damaged fiberglass hardtop parts can be repaired. Here's one example, it's a fragment of a 2-door hardtop I bought a year or so ago - it's an early model 2dr so I bought it for the window/window opening in the event I ever wanted to make a slider window retrofit kit for that model. As you can see from the before and after photos below, it was missing a significant part of the panel at the top, and it had a large crack and and area missing at the bottom.

2drPanelRepair4_zpsqw3jxw8x.jpg


2drPanelRepair3_zps46h2uncp.jpg


Bolted in place as part of the modular hardtop:

AssembledEarlyModelWindowSides_zpsfhz0tnl7.jpg


Here are before and after photos of another repair I did recently, I documented the steps in this thread a few weeks ago:

RepairBeforeAndAfter_zpsv3efvlki.jpg


If you post photos of the damage on the hardtop you're thinking of buying, I could probably advise you on what's necessary to do the repair.
 

jscherb

Expedition Leader
Appreciate the feedback, here is the link to the craigslist listing

https://inlandempire.craigslist.org/pts/6203022964.html

This is the one that concerns me the most:
View attachment 408167

The two areas I've circled require very similar but slighty different repair techniques.

The area circled in red is single-walled, so you'll make the structural repair on the inside (which will be visible) and a cosmetic repair on the outside. To help hide the repair on the inside I would do a first layer in fiberglass mat soaked in SMC-compatible resin, which will probably be blue or red depending on which cream hardener you end up with, and then two more layers of mat soaked in ordinary polyester resin tinted with white tint agent. All of the work I've done on the modular conversion was done with white-tinted resin and as you can see from the photos it matches the inside of the hardtop very well - check the bolt flanges in the second photo below, they're visible because you can see the bolt heads but you can't really tell they weren't part of the hardtop from the factory.

The area circled in yellow is a little more difficult to repair only because that area is double-walled and without cutting the inside wall you won't be able to get at the inside to make the repair. You have two choices:

- Make the entire repair on the outside. You'll need to taper the edges of the cracked area gradually enough to give the material you'll add for the repair enough area to bond to. Again the first layer needs to be done with SMC-compatible resin, then layers can be built up with ordinary polyester resin and mat until you're at or just below the outside surface, then you'll finish with body filler. You won't need to tint the resin because it'll be painted black anyway.

- A stronger way to make this repair is to cut away the inside shell (area circled in red in the second photo below), and do the structural part of the repair from the inside. If the crack goes all the way to the hatch opening this is the way I'd do it because just doing the repair on the outside you may not build up enough strength. If you cut the inside shell carefully it can be replaced and patched with white-tinted resin and it won't be very noticeable.

Neither of these repairs worry me, but might seem intimidating if you have no fiberglass or bodywork experience. Ready through the repair steps I posted a few weeks ago to see if those seem like something you'd be willing to undertake, those techniques will be pretty much what you'll need to do on this hardtop.

Of course you can count on me to advise and help in any way I can if you decide to go ahead with this.

JDaPPRepair_zpssey9fagf.jpg


JDaPPRepair2_zpsurjhpjh8.jpg
 

jscherb

Expedition Leader
A few weeks ago I showed how a combination of 2-door and 4-door factory hardtop parts could be mixed in a modular way to produce a hardtop that would fit an extended Jeep like the Africa (http://forum.expeditionportal.com/t...KU-hardtop-to-modular?p=2312630#post2312630):

AfricaLengthTop1_zpsdrcmqyzx.jpg


If you put the same extended top on a stock JKU, it hangs over the back of the tub 10":

AfricaLengthTop3_zpsfbzvpxyy.jpg


A lengthened hardtop being not that hard to do makes me think a bolt-on tub extension would be an interesting project. With a tub extension:

AfricaLengthTop3x_zpsrgd6q0pz.jpg
 
I don't even own a JK and I always come in here to look at what Mr Jscherb has updated. I like that he has also made it a sort of diy/instructional thread. Before I ran across the deal I got on my FJ80 I was looking real hard at an JK because of this thread. Keep up the great work!


I drove a JK that was converted to a news vehicle. Visibility out the back was poor due to the rack and mast system for the sat dish on top. All you have to do is adjust you mirrors properly and you could do just fine. If you feel you need a bit more, stick some convex mirrors on there. Side window storage makes lots of sense, even if it is not for everyone.
 

JDaPP

Adventurer
The two areas I've circled require very similar but slighty different repair techniques.

The area circled in red is single-walled, so you'll make the structural repair on the inside (which will be visible) and a cosmetic repair on the outside. To help hide the repair on the inside I would do a first layer in fiberglass mat soaked in SMC-compatible resin, which will probably be blue or red depending on which cream hardener you end up with, and then two more layers of mat soaked in ordinary polyester resin tinted with white tint agent. All of the work I've done on the modular conversion was done with white-tinted resin and as you can see from the photos it matches the inside of the hardtop very well - check the bolt flanges in the second photo below, they're visible because you can see the bolt heads but you can't really tell they weren't part of the hardtop from the factory.

The area circled in yellow is a little more difficult to repair only because that area is double-walled and without cutting the inside wall you won't be able to get at the inside to make the repair. You have two choices:

- Make the entire repair on the outside. You'll need to taper the edges of the cracked area gradually enough to give the material you'll add for the repair enough area to bond to. Again the first layer needs to be done with SMC-compatible resin, then layers can be built up with ordinary polyester resin and mat until you're at or just below the outside surface, then you'll finish with body filler. You won't need to tint the resin because it'll be painted black anyway.

- A stronger way to make this repair is to cut away the inside shell (area circled in red in the second photo below), and do the structural part of the repair from the inside. If the crack goes all the way to the hatch opening this is the way I'd do it because just doing the repair on the outside you may not build up enough strength. If you cut the inside shell carefully it can be replaced and patched with white-tinted resin and it won't be very noticeable.

Neither of these repairs worry me, but might seem intimidating if you have no fiberglass or bodywork experience. Ready through the repair steps I posted a few weeks ago to see if those seem like something you'd be willing to undertake, those techniques will be pretty much what you'll need to do on this hardtop.

Of course you can count on me to advise and help in any way I can if you decide to go ahead with this.
Thank you very much for the follow up! I will let you know if I get it.
 

jscherb

Expedition Leader
Two weeks ago I posted some concept images showing what windows added to the rear corners of a factory hardtop might look like. Here's one more concept image.

OperaWindowsLateModel3_zpsujpxx671.jpg


I've got one more factory hardtop rear panel waiting to have bolt flanges added to convert it to modular; I'm thinking of adding windows like this to that one.
 

jscherb

Expedition Leader
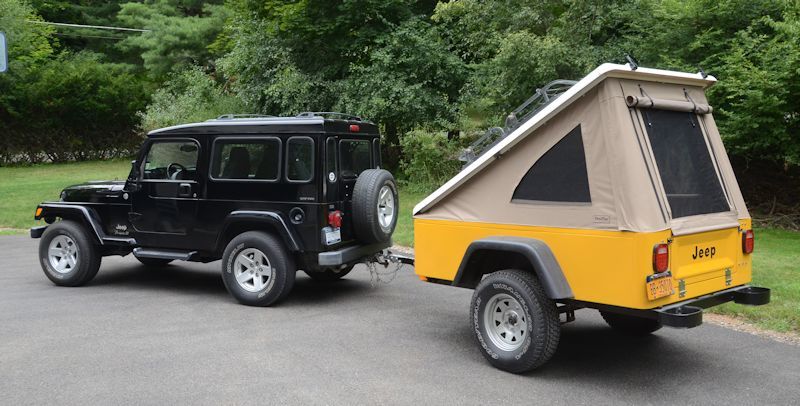
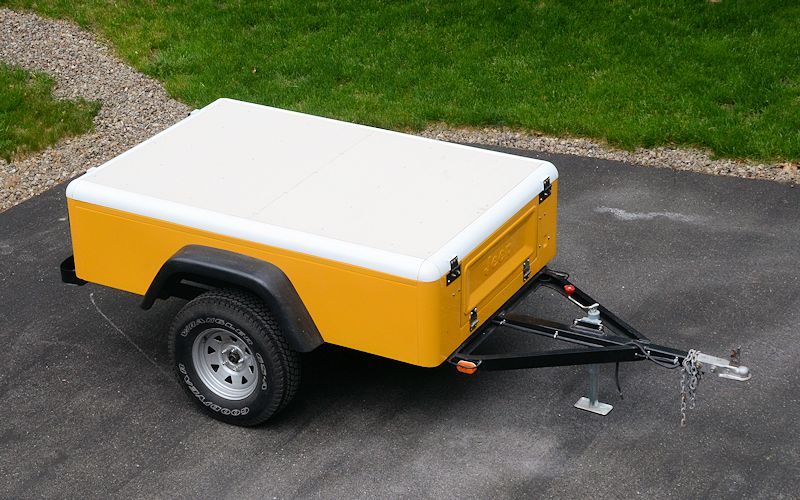
A few years ago I made a pop-top camper lid for my Jeep-tub trailer.

CanvasFinal5_zpse51313a6.jpg


In total I think I spent about $300 on the lid, hardware and canvas.

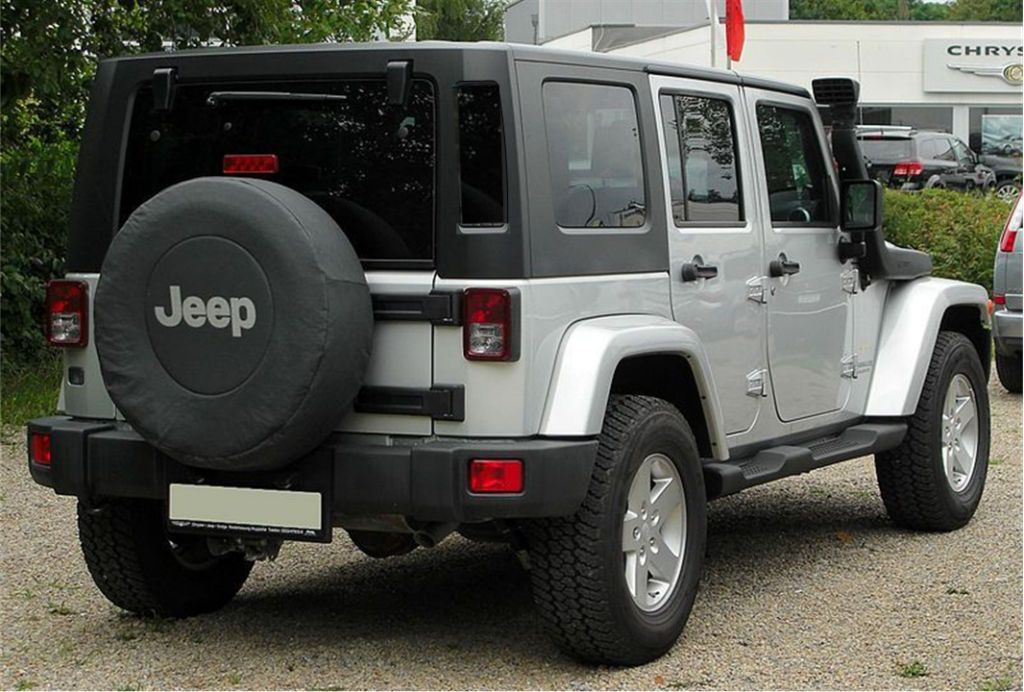
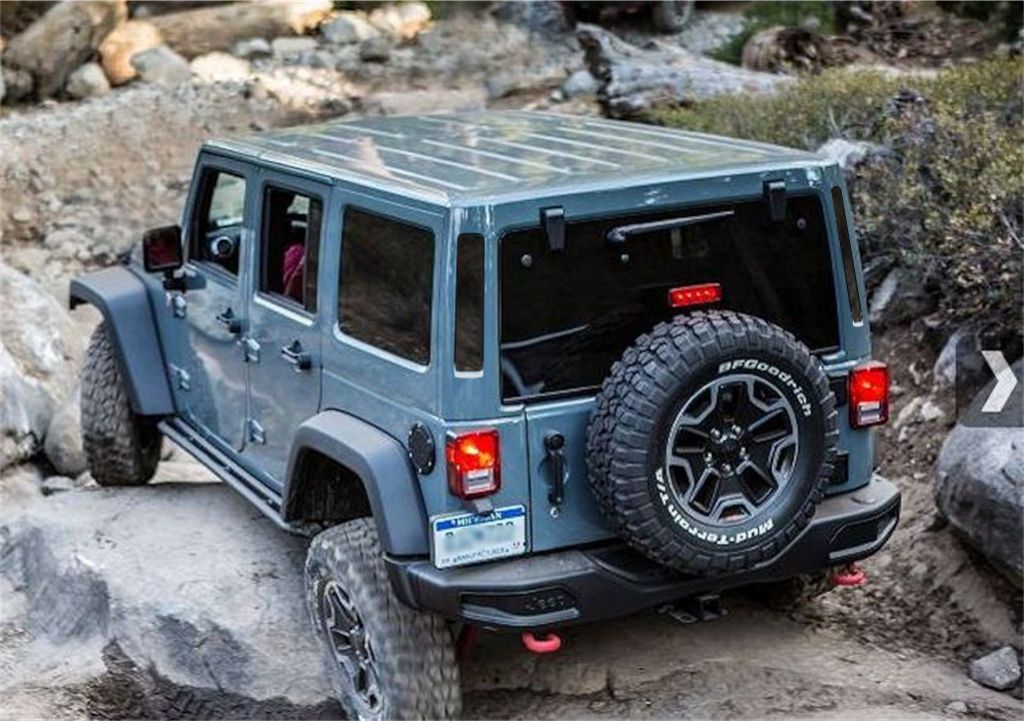
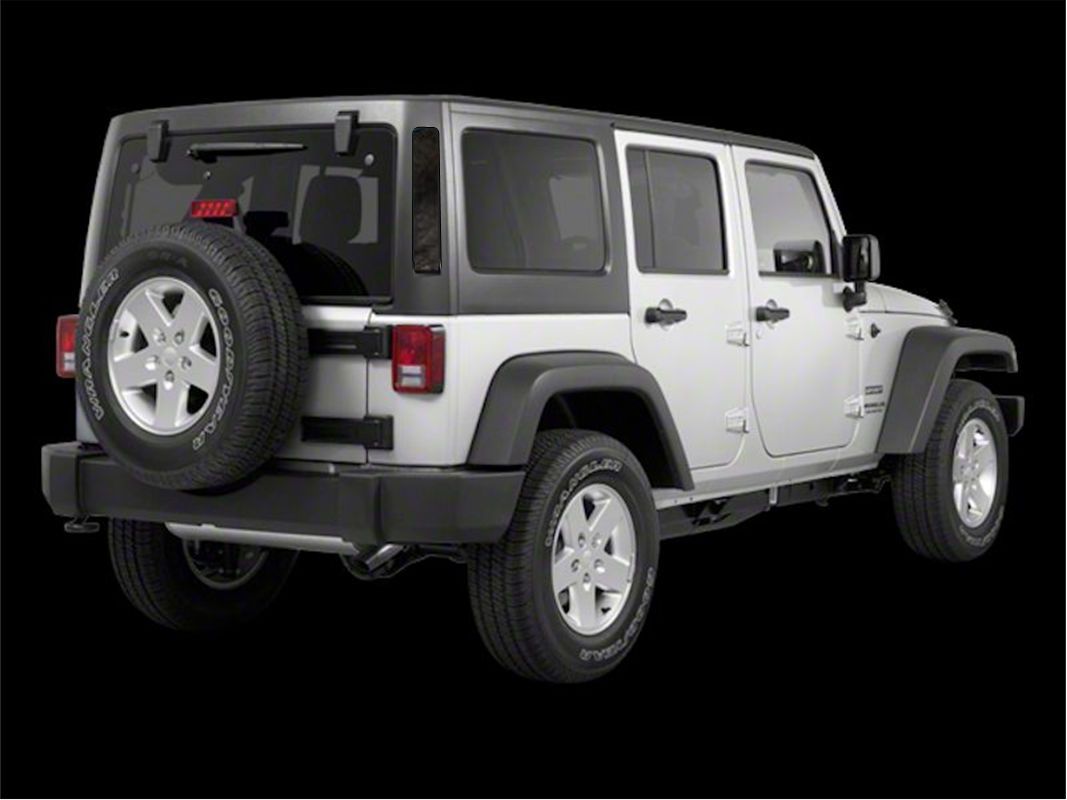
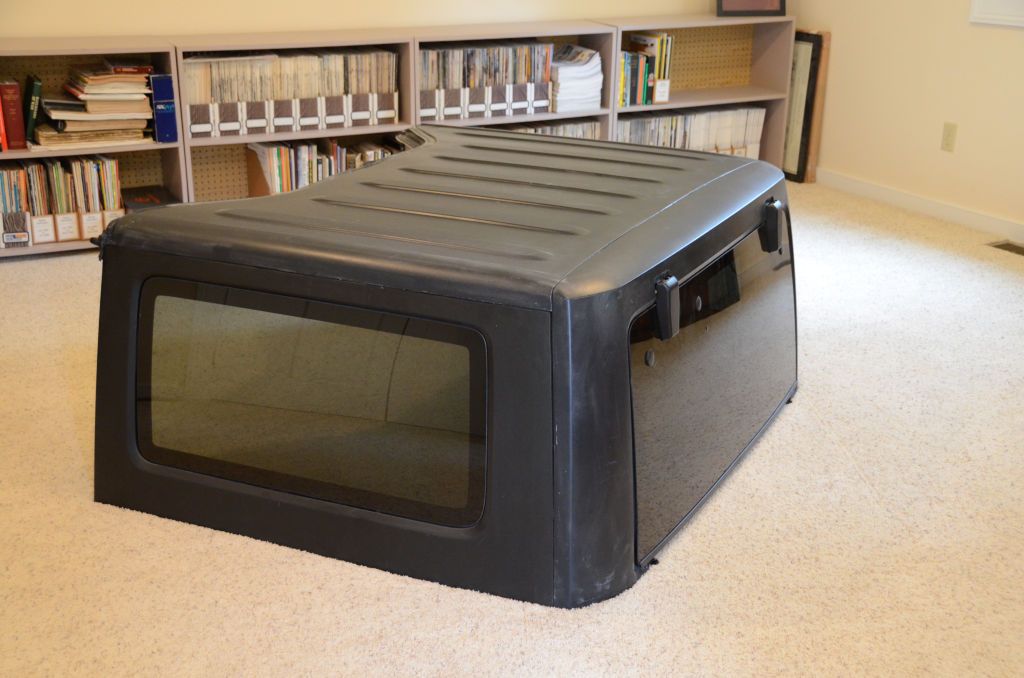
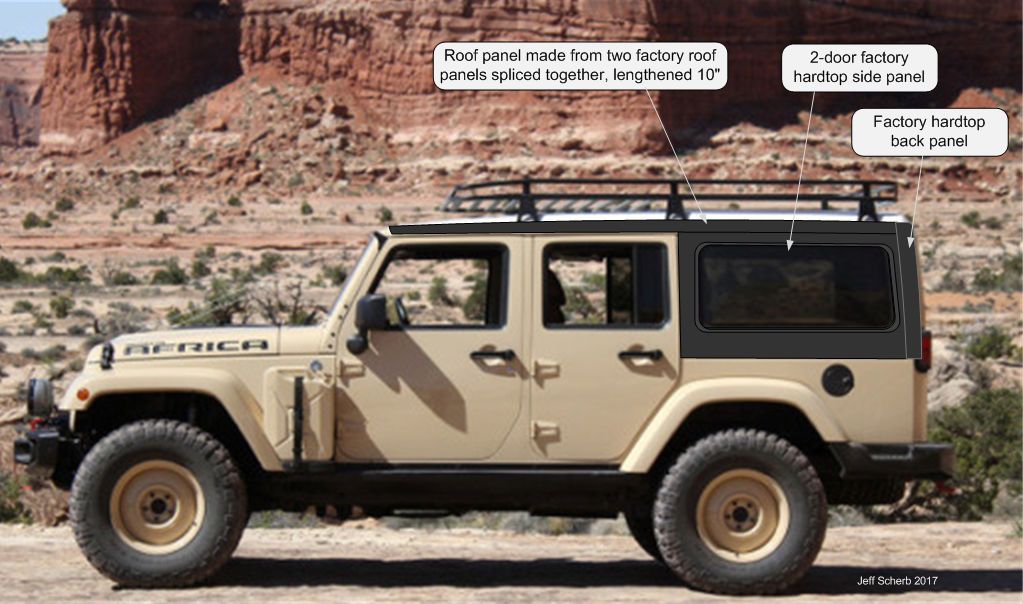
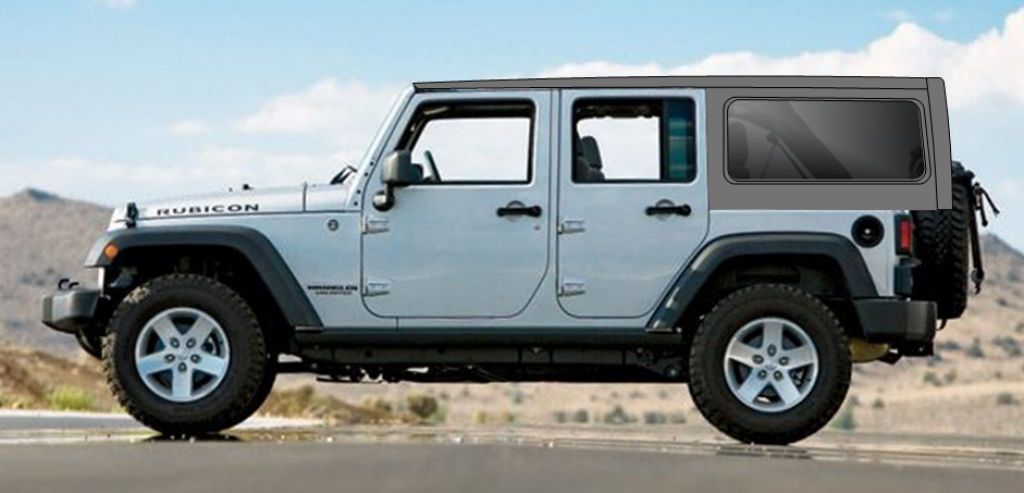
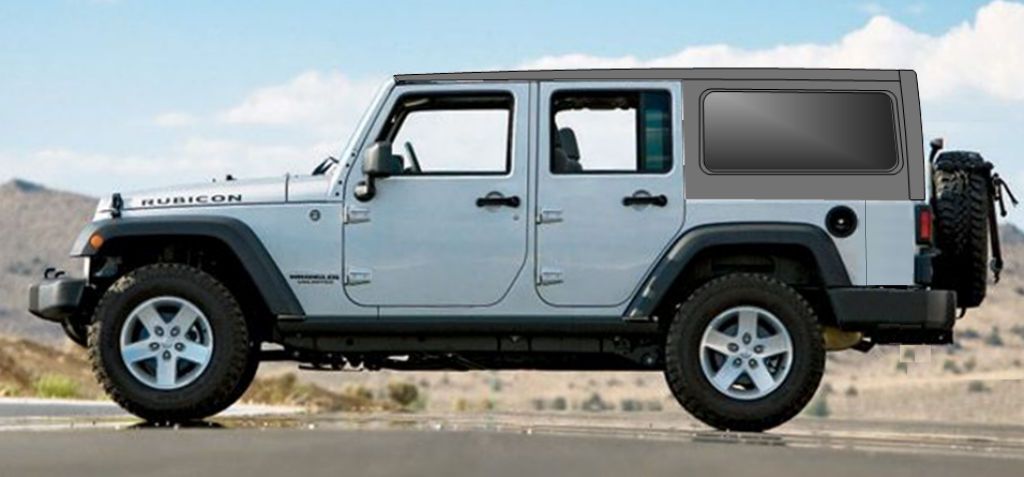
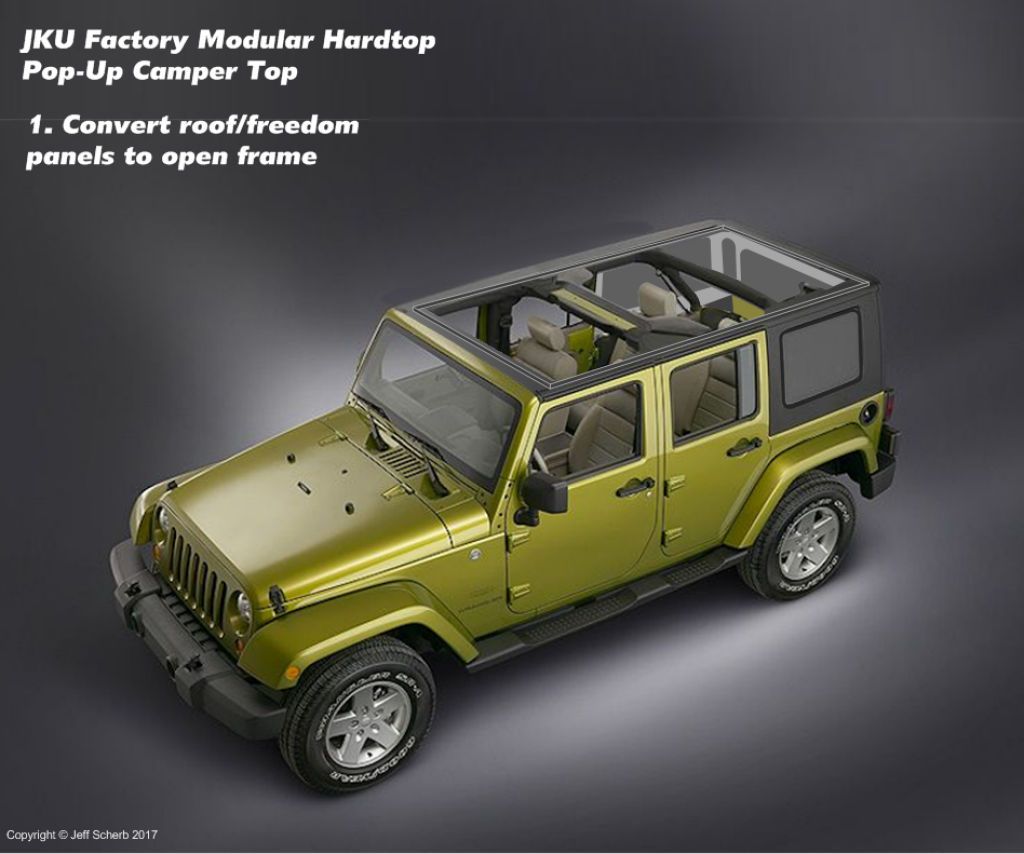
The pop-top is roughly the size of a JKU roof, and the same basic design can be used to convert a JKU hardtop to a pop-top camper.

A good plan would be to convert a hardtop to modular and then build the pop-top lid to fit on it, perhaps using the roof from a second hardtop so the camper top could be swapped for an ordinary roof when the Jeep wasn't in use as a camper. Everything I'm about to describe would work fine on a stock hardtop (not converted to modular), but a modular top would be much easier to handle once the pop-top was installed because it can be installed/removed in pieces instead of a single huge, heavy full hardtop.

I've omitted many details of construction in this post, I'll just cover the main modifications.

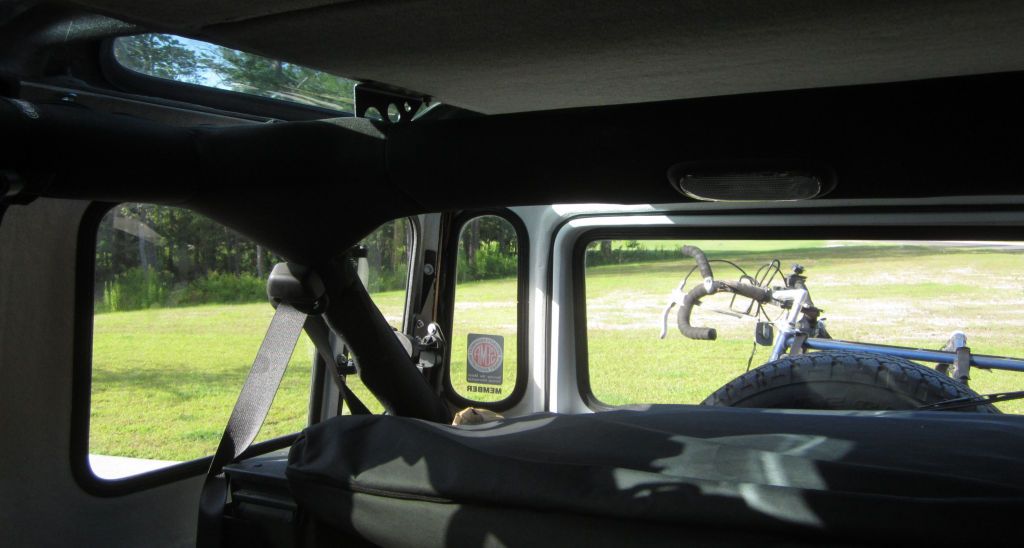
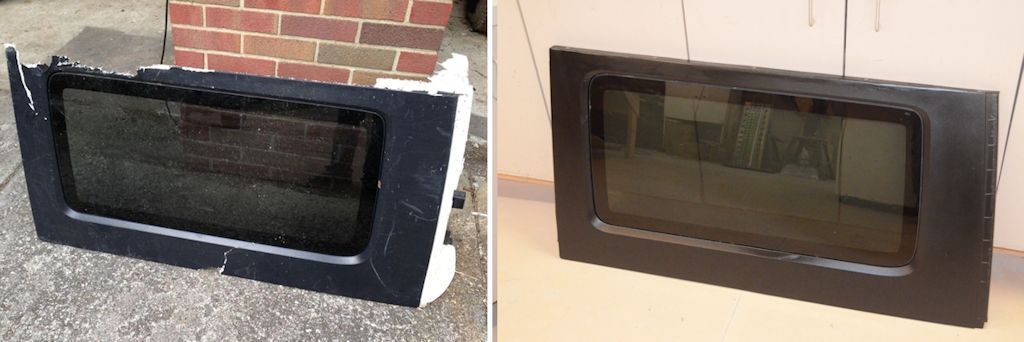
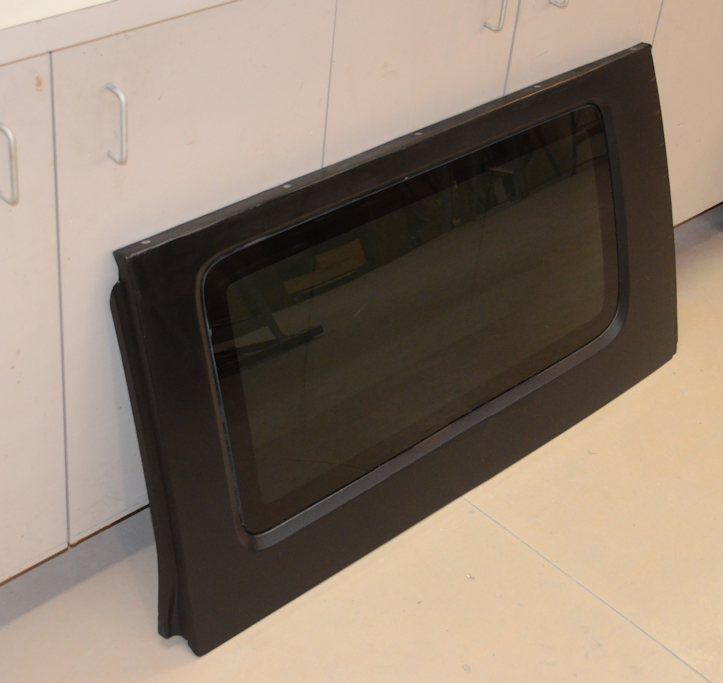
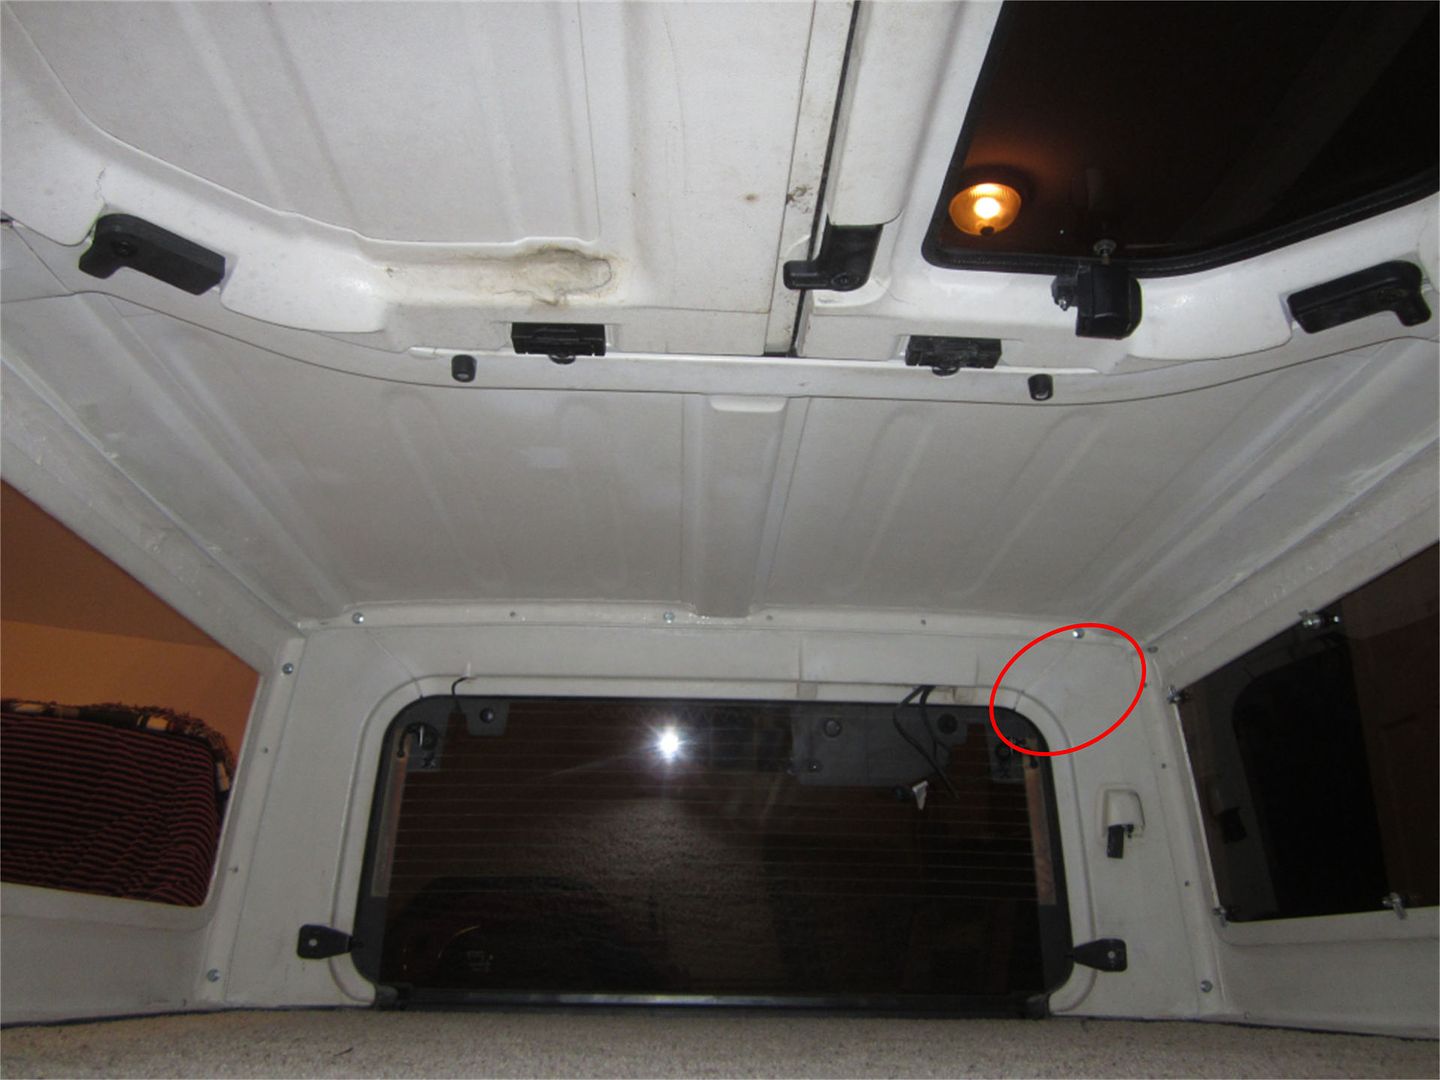
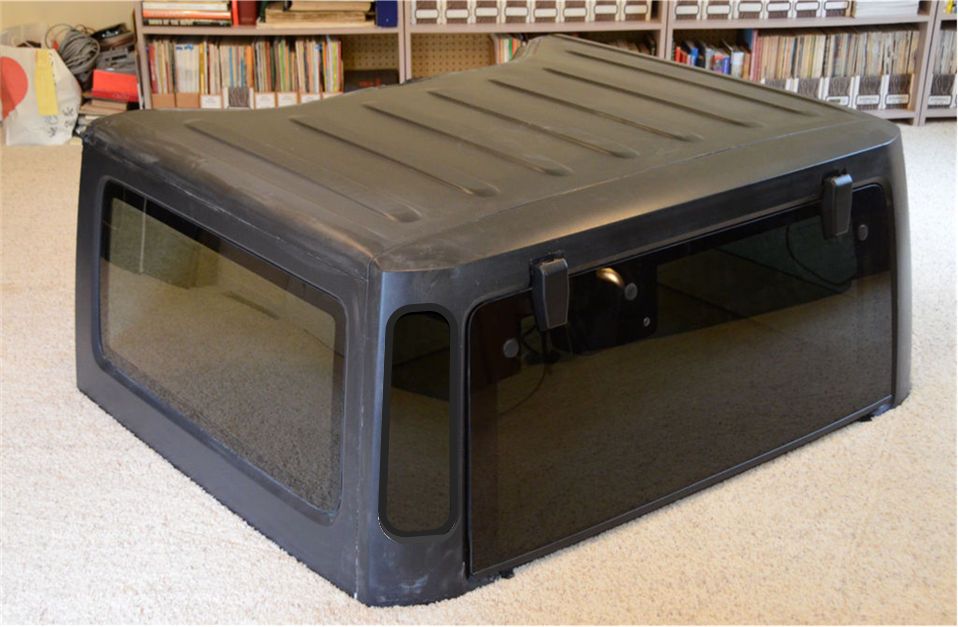
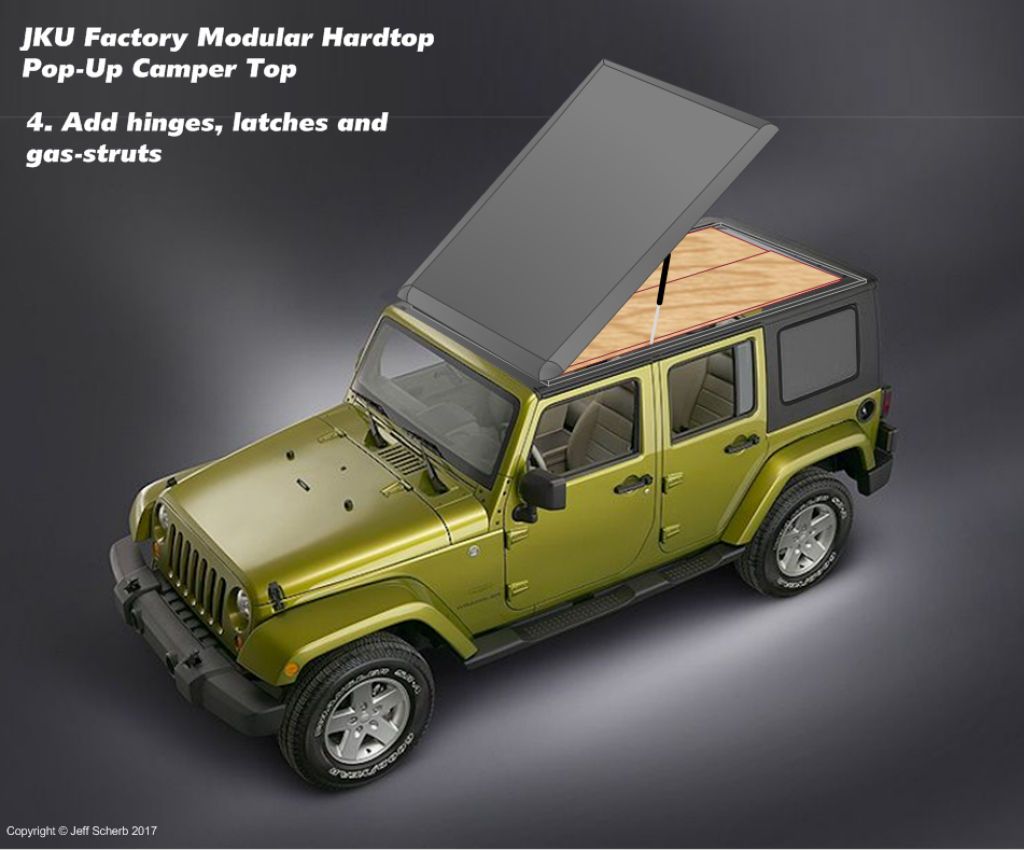
The first step is to turn the roof and freedom panels into a "ring" around the 4 sides. Removing the center of the roof reduces the overall height of the camper because the sleeping platform can rest on top of the roll bars. It would be possible to do this so that the roof/freedom panels remain intact, but the resulting camper would be higher when closed. I'd probably bond all the parts together into a solid ring rather than leaving the remains of the freedom panels as separate parts, but either way could work. Ideally there would be some framing around the opening, which would work best if everything were bonded together and not separate parts.

PopTop1_zpsrwn8v8th.jpg


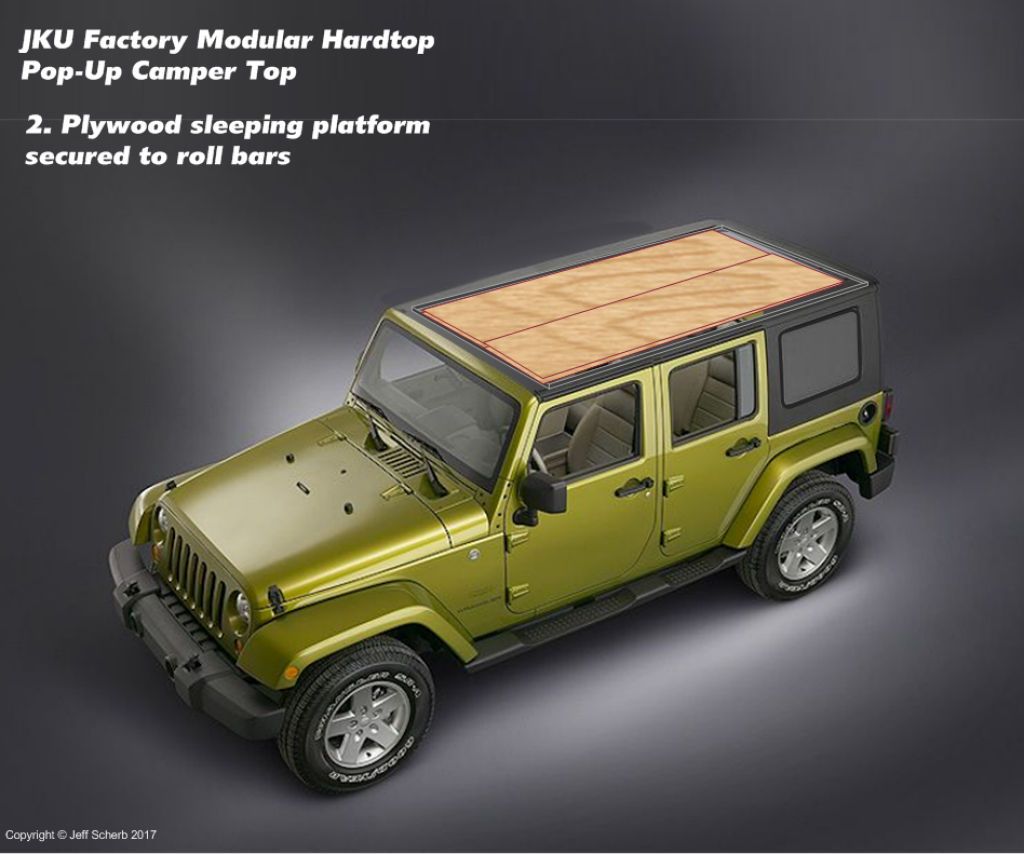
A sleeping platform made from plywood is secured to the roll bars. Wooden cross-ribs would support the plywood where it's not supported well enough by the roll bars.

PopTop2_zpscewbrrev.jpg


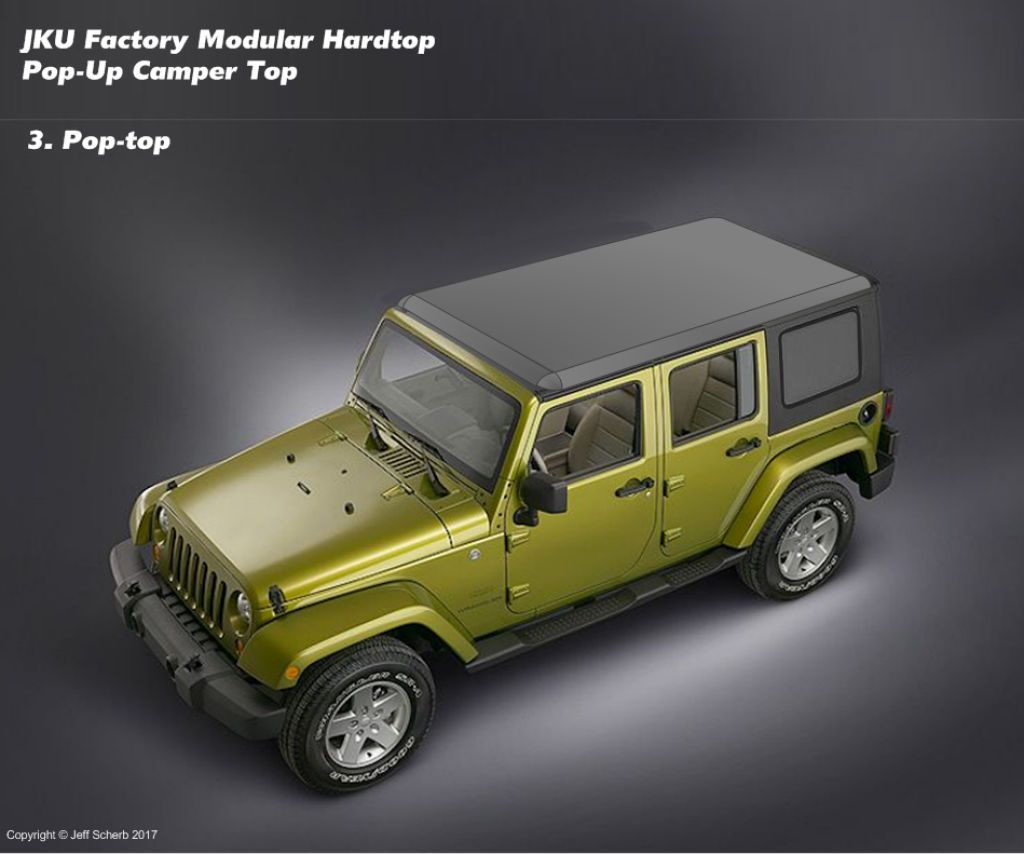
Next a lid is constructed. The lid should be high enough to enclose all of the bedding and whatever else you would want to keep up there. Perhaps it would be 4" high off the roof.

PopTop3_zpsyrkbq67x.jpg


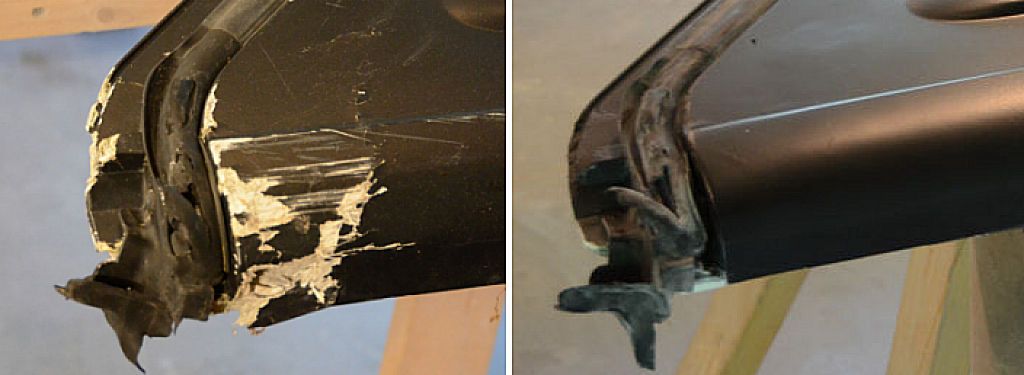
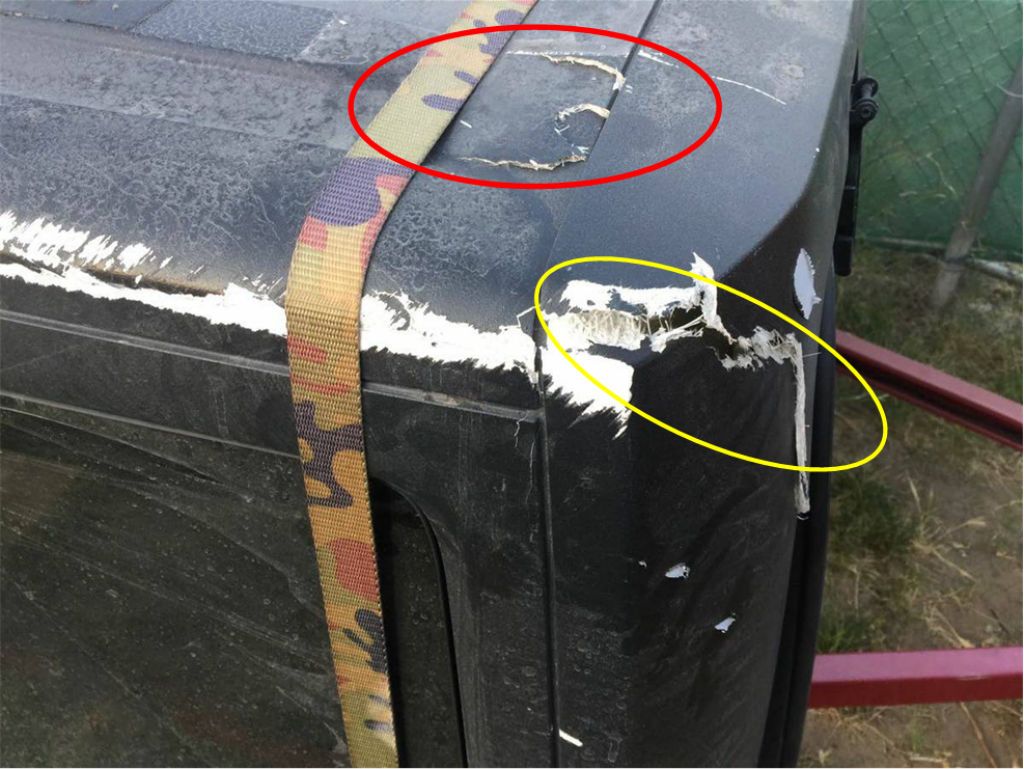
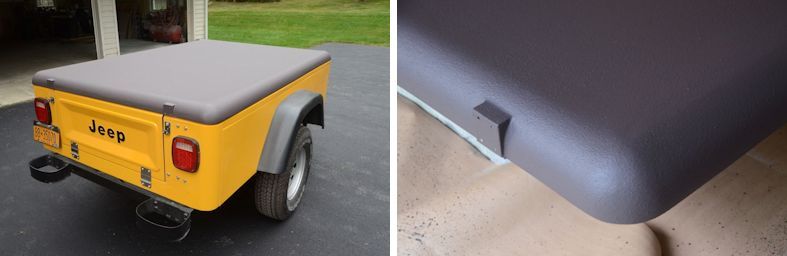
When I made the pop-top lid for the trailer, I used a combination of TrailTop fiberglass framing components (the whiter parts in the photo below) and 1/4" plywood (I used pre-primed plywood that was an off-white color), with a few other wood parts for strength. The TrailTop parts provided nice rounded corners and curved sides, but not having TrailTop parts, you could build the entire shell from wood.

CoveryAssyDone3_zps114e1d53.jpg


I finished the cover in Olympic "Rescue It", which is an acrylic coating for home decks. Applied with a roller, it provides a nice textured finish that's very durable, hides the wood grain and the joints between the TrailTop fiberglass parts and the wood, and is reasonably priced. The same could be done with the hardtop camper lid. Many colors are available.

RescueItCover_zpse981bc36.jpg


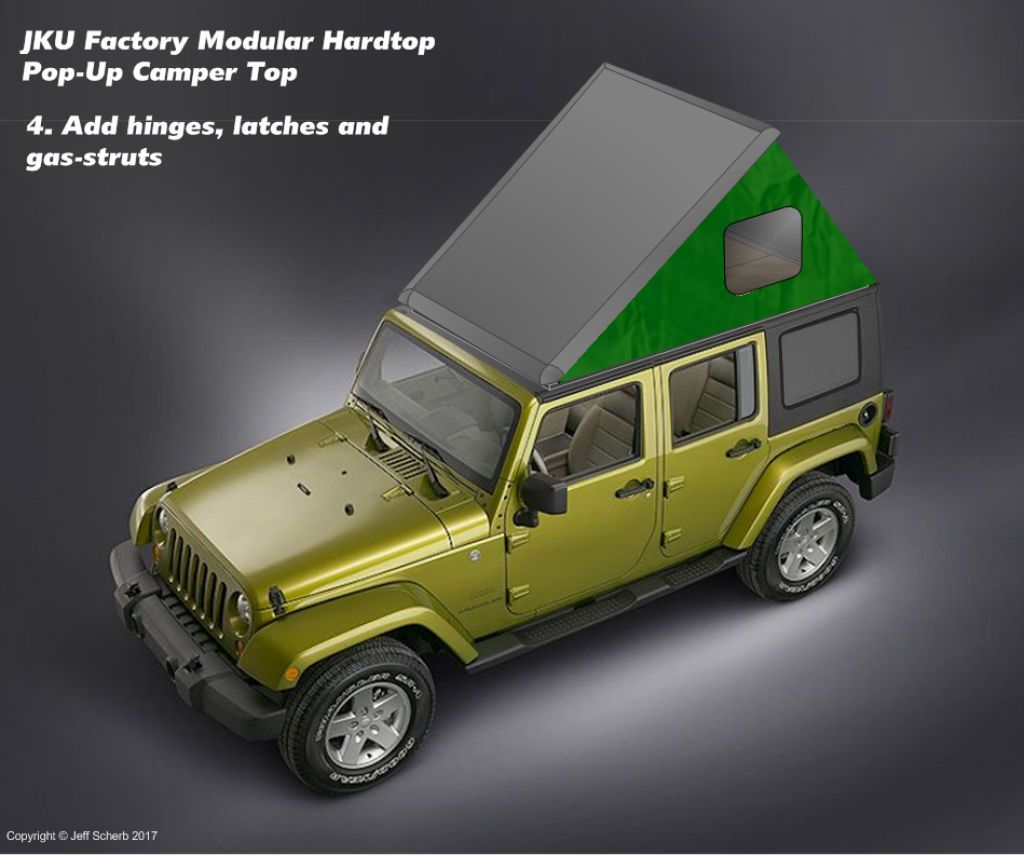
The lid gets hinges, latches and gas struts. And weatherstripping, but I've omitted that detail from this post.

PopTop4_zpszikkukhs.jpg


Once the mechanical assembly is done, side panels are sewn from an appropriate waterproof fabric. Windows/screens are added to your preference, and probably a rear door as on the trailer. A ladder would be used to enter from the back, or you could put a hatch inside in the sleeping platform for entry from the inside. I can show more photos of the trailer pop-up if anyone's interested in the details of the side panels, windows, zippers, etc.

PopTop5_zpsk5xtpdso.jpg


As I said, I've omitted a bunch of details, but the above should give you an idea of what's required. This shows a very basic pop-top, lots of things could be done to enhance it - scissor-type hinges to raise the front, for example, or a more elaborate canvas design, solar panels, etc...

Given that I only spent about $300 on my trailer pop-top, I believe you could build a complete basic pop-top hardtop camper for a JKU for less than $750. That cost includes the cost of the materials for the modular conversion of the hardtop, the cost of building the lid and the hardware for it, all the material for sewing the sides, but not the cost of the hardtop itself.
 

JDaPP

Adventurer
You have in one post described what I have been trying to work out in my head for years. I love my j30 top but I miss the modularity of a normal hardtop
 

Forum statistics

Threads
185,888
Messages
2,879,482
Members
225,497
Latest member
WonaWarrior
Top