HSKR4X4
Adventurer
Currie Enterprises Jeep JK Antirock Write-Up
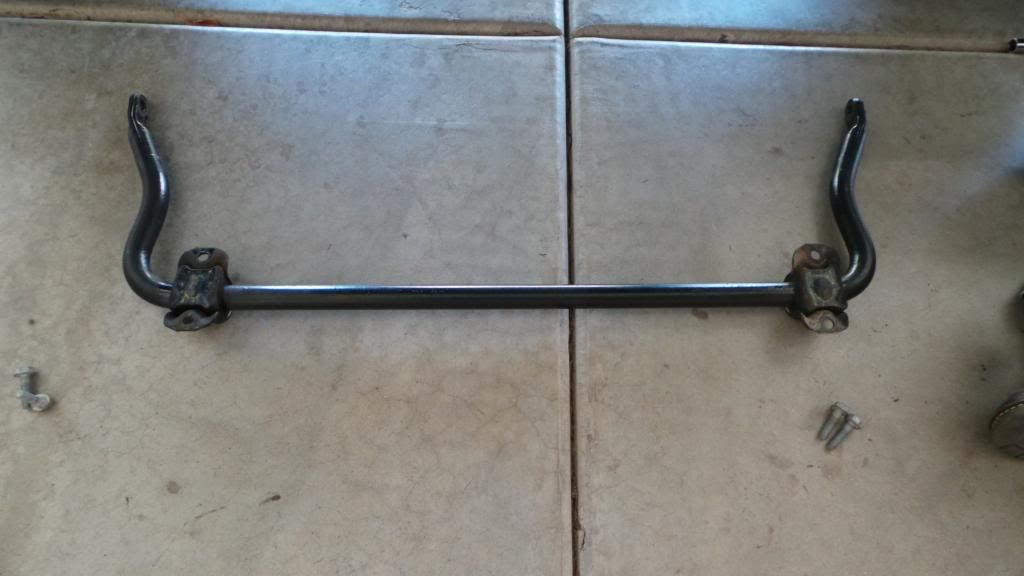
JK ANTIROCK FRONT SWAY BAR KIT W/ ALUMINUM FRAME BRACKETS & ARMS
Part # CE-9900JKFAA
$519.95
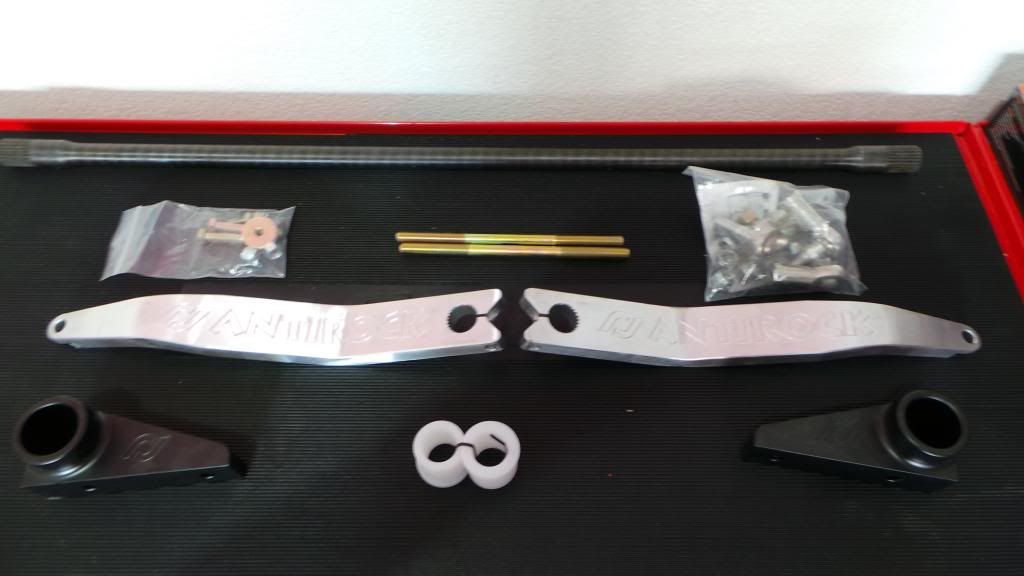
Description:
For all models of the '07 and up Jeep JK Wranglers - 2 or 4 door. The Currie Antirock sway bar kit provides balanced performance of front and rear suspension for rugged off-road conditions. It gives the driver increased traction by balancing and distributing the weight and traction over all four tires. The Antirock off road sway bar is designed to directly replace the stock Jeep sway bar. This bar is made of SAE 4130 heat treated steel for ultimate strength, which is the same quality used in professional off-road competition sway bars. This kit includes all components for installation including, the sway bar, bolt-on billet aluminum frame brackets which feature the RJ logo milled into the sides of them and semi-gloss black powder coat finish, delron bushings, billet aluminum arms that are bent to spec., adjustable length heim jointed sway bar links, necessary hardware, and step-by-step instructions. Unit bolts into existing holes in the bottom of the frame rail and attaches to the stock mounts on the vehicle's axle housing. The Currie Antirock sway bar does not need to be disconnected for off-road use.
CAUTION: Jeeps will have more body roll than stock. This sway bar may be used on the street, however, it will not provide the same handling characteristics as the stock setup
NOTE: Due to all the manufactures currently making front bumpers for the Jeep JK, you may have to modify your front bumper to make this system fit properly.
My thoughts
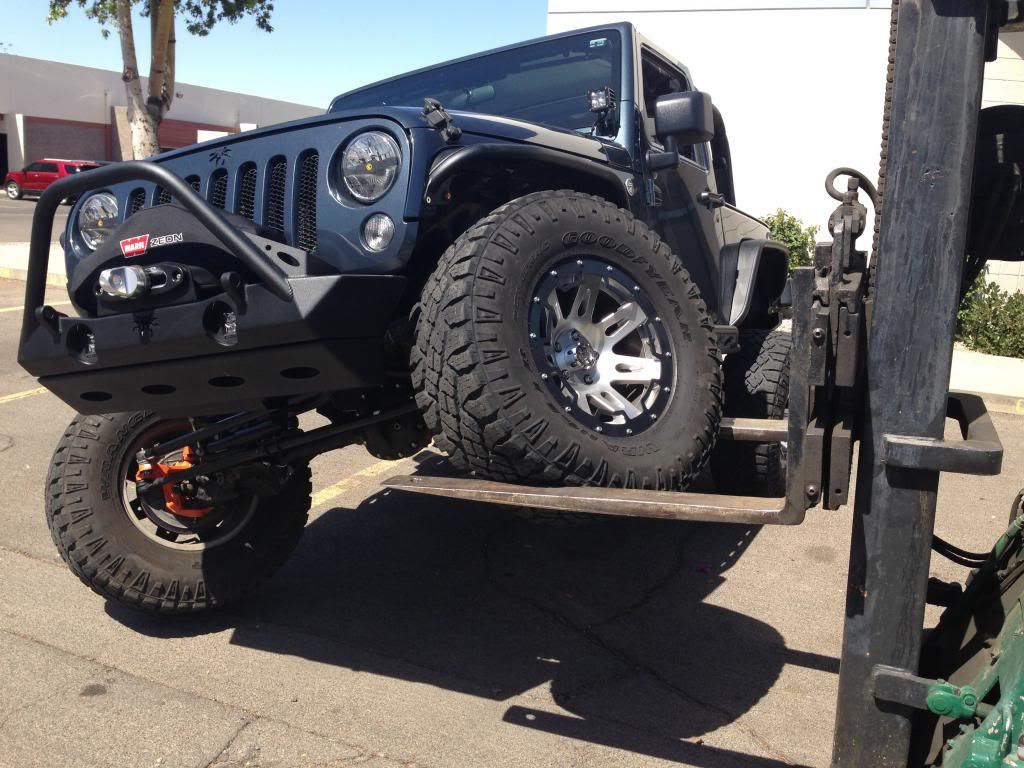
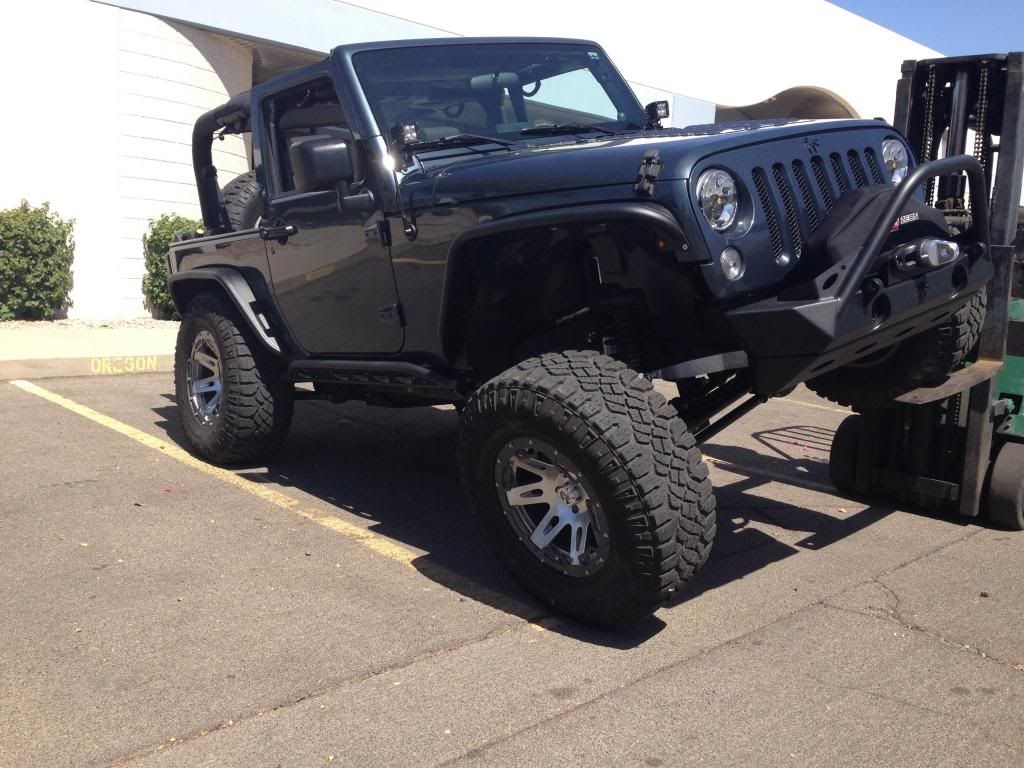
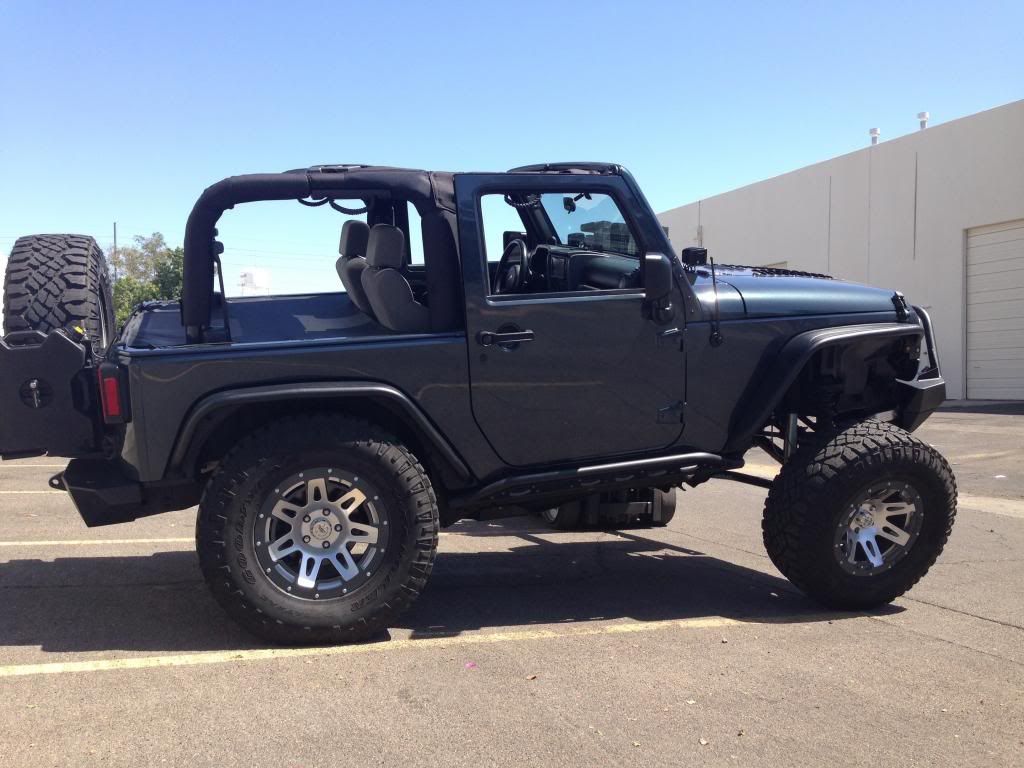
I have been running the TeraFlex Suspension quick disconnect kit now for about 2 years and always dreaded getting underneath Jeep to disconnect or find level ground. Their kit has worked perfect this entire time but I decided to finally put a stop to getting in and out of Jeep to disconnect or connect. That’s when I decided to look in to the Currie Enterprises JK Antirock kit. After reading multiple reviews online and talking to local Jeepers with the kit, I finally decided to bite the bullet. I chose the aluminum frame brackets and arms not only because of the weight difference, but because the aluminum will match some of the accent pieces on my Jeep. The install was pretty easy minus a few little bumps in the road due to a very limited install guide. When I first mounted up the frame brackets I actually put in backwards, and slid through the sway bar before I even noticed that I had them in wrong. The other little bump in road was trying to figure out the angle I wanted to set the arms at. Now that I have installed the kit which took about an hour and a half (including taking photos), I believe that I could install another in about thirty minutes or so. After the install, I drove down multiple city streets and highway at speeds ranging from 5-80 mph, and at no time did I feel unsafe. The Jeep handled great on turns and low and high speeds. Since my Jeep is not a Rubicon, when I disconnected I was fully disconnected so my body roll was drastically worse than the Currie Antirock setup, so any light body roll that I have now isn’t really noticed or bothersome. I would HIGHLY recommend the Currie Antirocks to any Jeep owners that deal with manually disconnecting at trailheads, or Jeep owners that have Rubicon’s were their sway bar motors have failed. Currie Enterprises has made one heck of a setup and the quality of everything is top notch!
Kit Includes
1) CE-99001B- 36” Antirock Bar
1) CE-9900JK-MSK- Mounting Brackets (Steel) or CE-9900JK-MAK- Mounting Brackets (Aluminum)
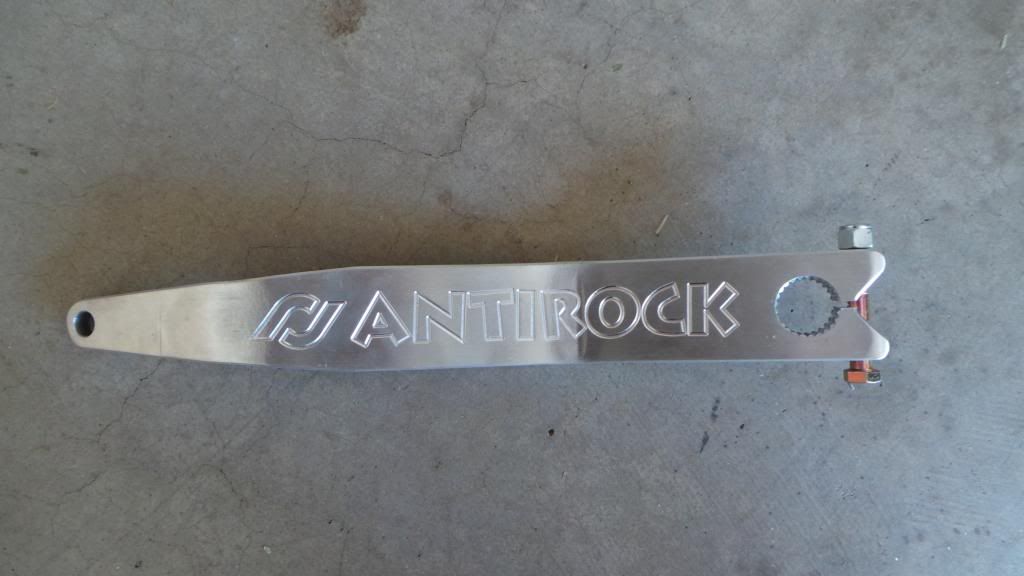
2) CE-99003-JK- Antirock Steel Arms or CE-99003-JKA- Antirock Aluminum Arms
2) CE-9901D- Antirock Bushings
2) EE-3212CH8- 5/16”-24 x ¾” Bolts
2) EE-3120WFZY- 5/16” Washer
2) EE-62WS- 5/16” Lock Washer
2) EE-3840CH8- 3/8”-24 X 2 ½” Bolt
2) EE-38NS- 3/8”-24 Nylock Nut
2) EE-991050- Sway Bar End Link Rod
2) CE-99006- Sway Bar End Link Rod End (RH)
2) CE-99006L- Sway Bar End Link Rod End (LH)
4) EE-51NS- ½”-20 Nyock Nut
2) EE-51NF- ½”-20 Jam Nuts (RH Thread)
2) EE-51NFLHP- ½”-20 Jam Nuts (LH Thread)
Tools Needed
Dead blow or rubber mallet
Ratchet
Ratchet extension
18mm socket
18mm wrench
19mm wrench
19mm socket
16mm socket
14mm wrench
14mm socket
13mm wrench
5/8 wrench
Install Guide
Step 1
Park Jeep on level ground
Step 2
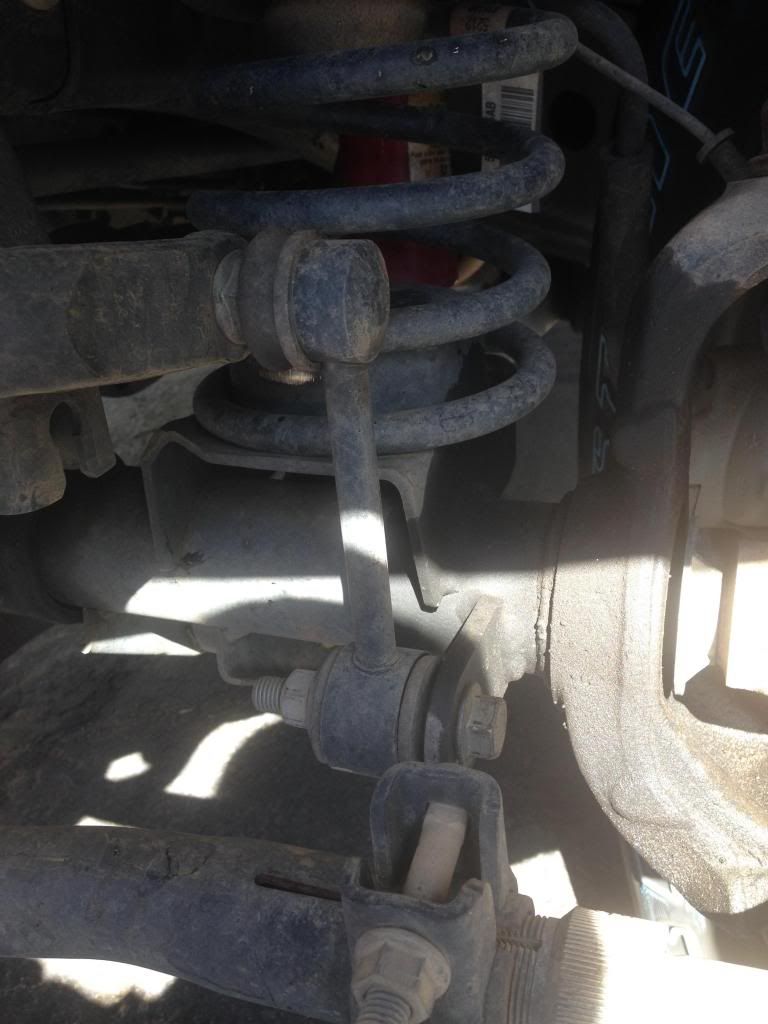
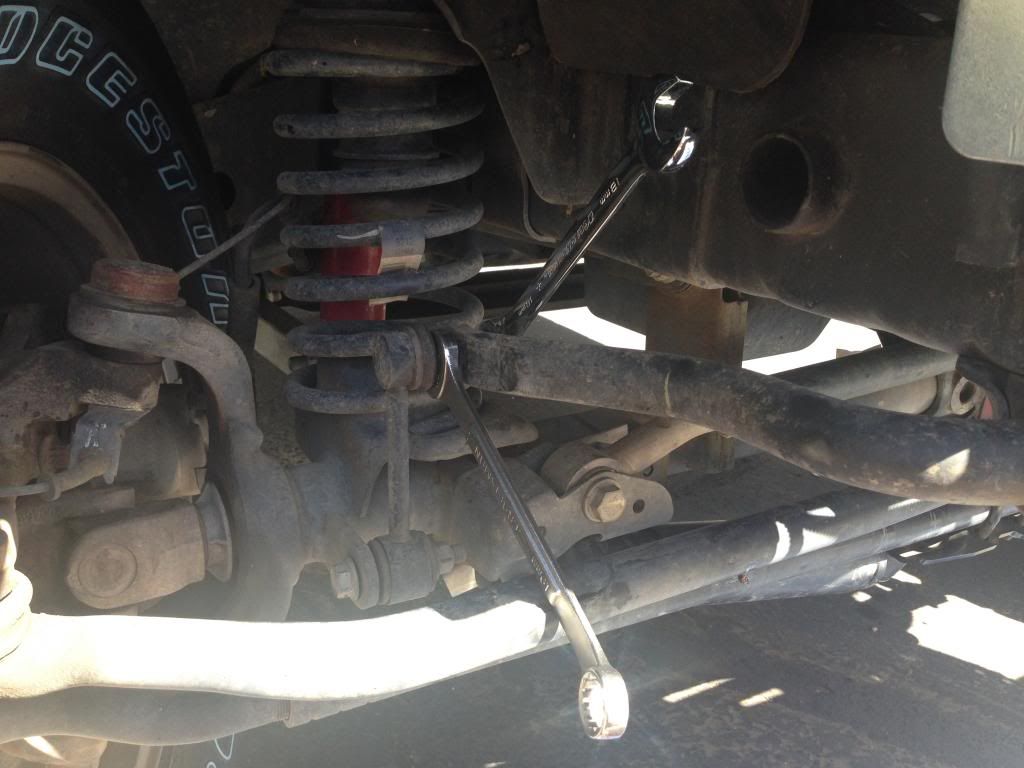
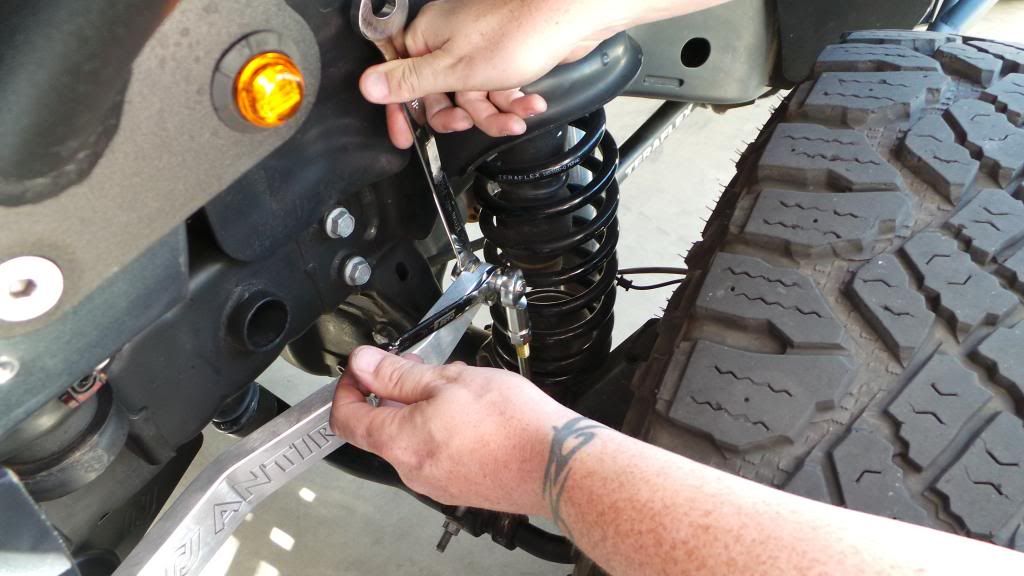
Remove the nuts and bolts from lower part of link on driver/passenger side.
• You will need to use both 18mm and 19mm wrenches/sockets at same time to remove nuts and bolts from links.
• The upper part of links can stay on the anti-sway arm since you won’t be reusing. In the pics below, I pulled links entirely though

Step 3
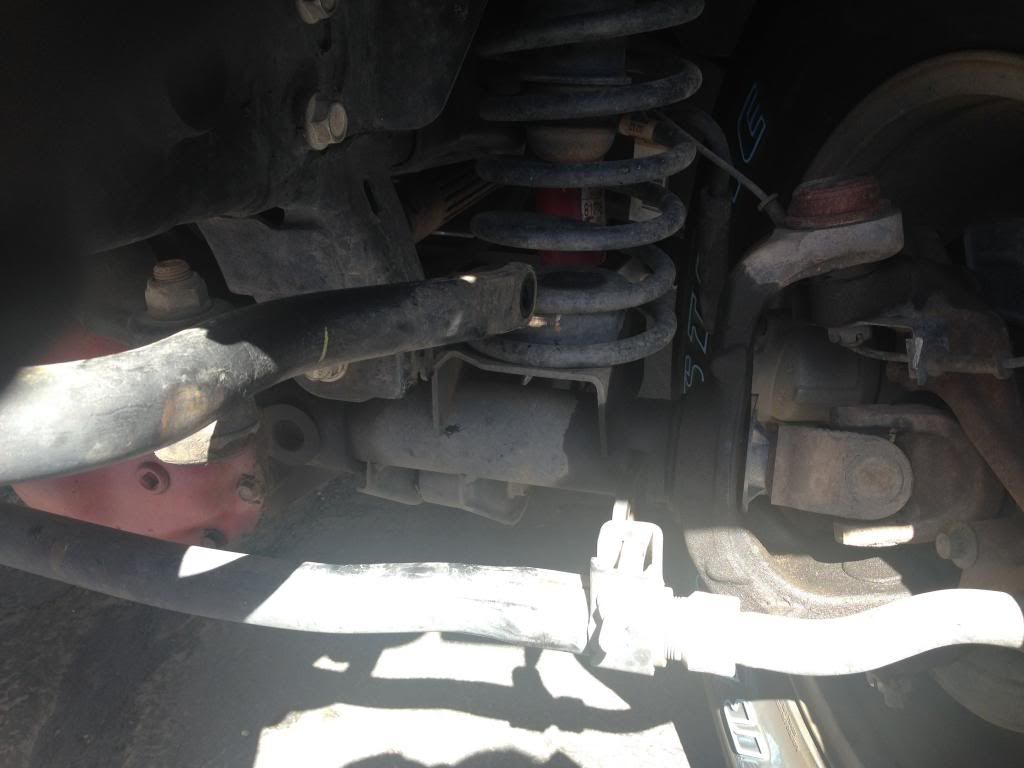
Remove the 4 bolts from frame mounts holding on the factory anti-sway bar and arms, then put to the side.
• You will need a 16mm socket
• Keep the 4 bolts you just removed handy because you will reuse with the mounting brackets that were supplied by Currie Enterprises
Step 4
Install the Antirock (white) bushings into your mounting brackets
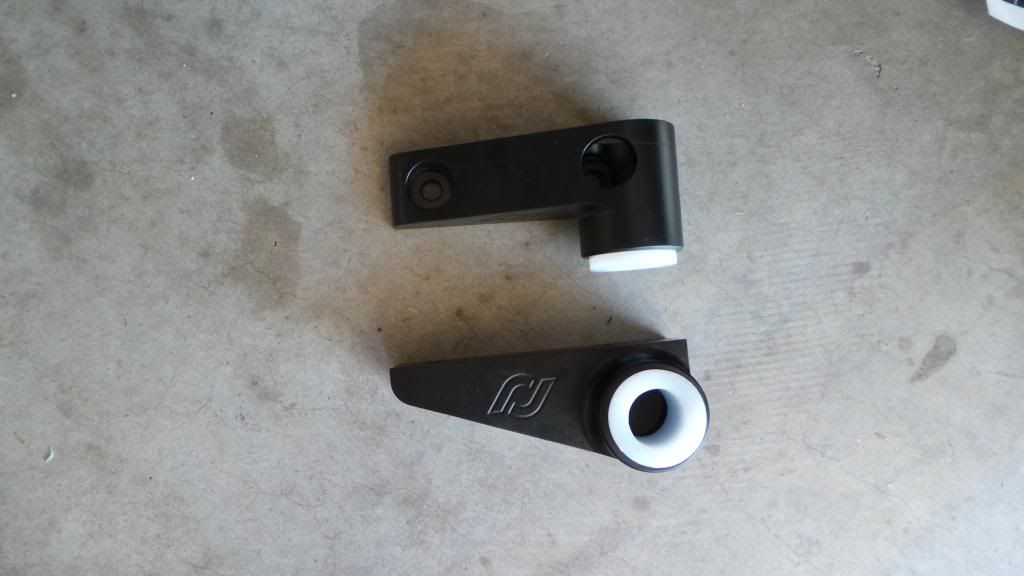
Step 5
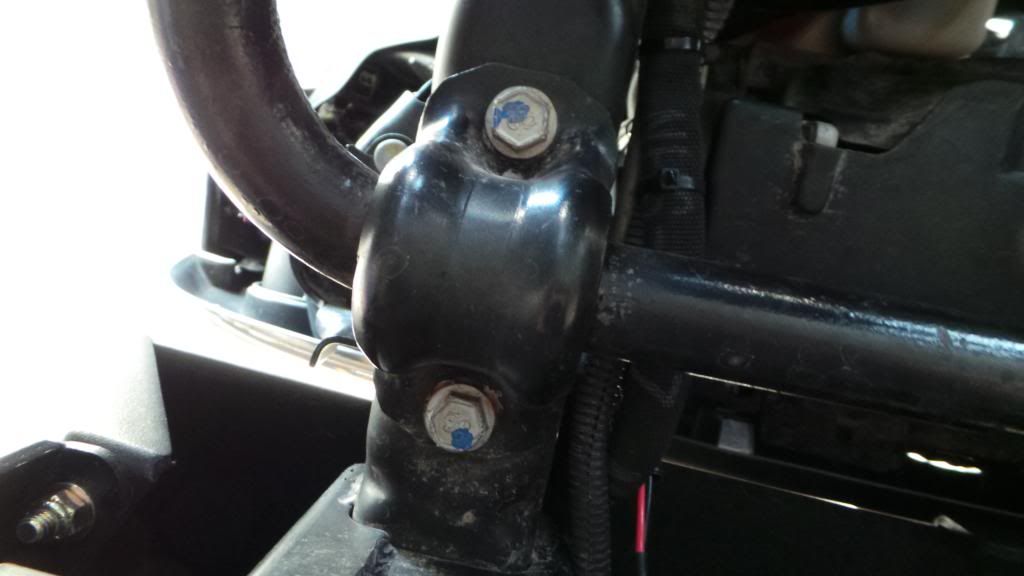
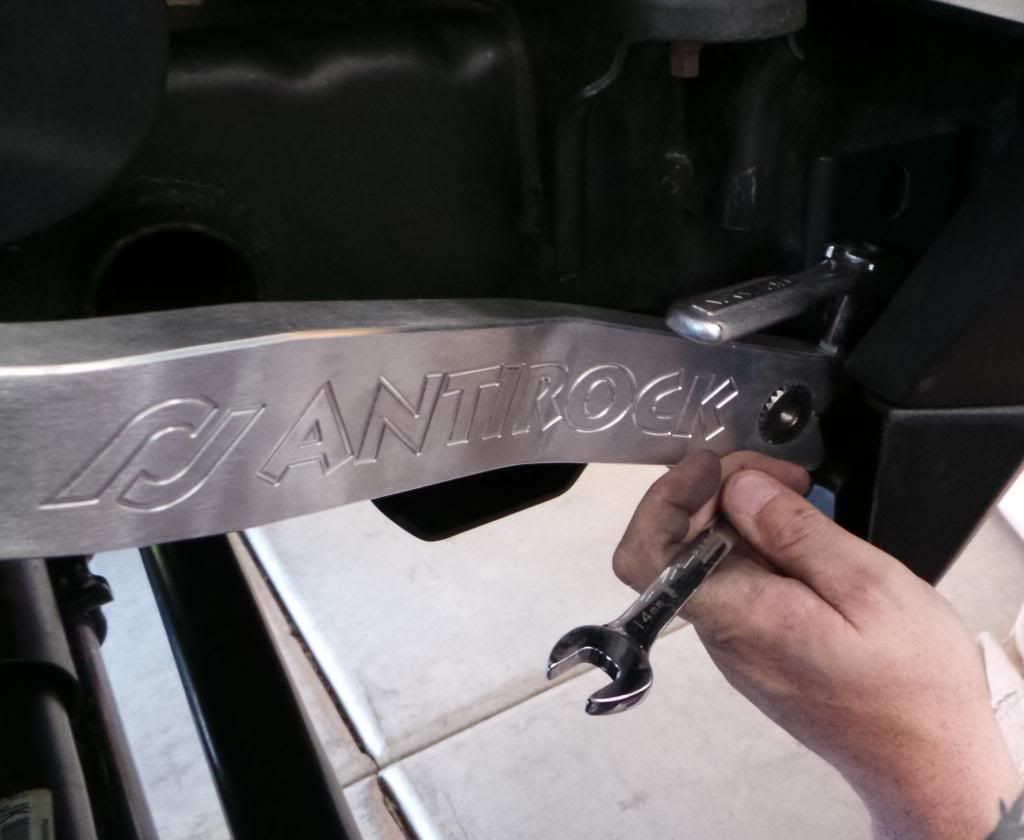
Install the new mounting brackets using the 4 bolts you put aside from factory anti-sway bar. (Step 3)
• You will need a 16mm socket with extension
• Make sure the thicker part/bushings of mount are towards the front of Jeep
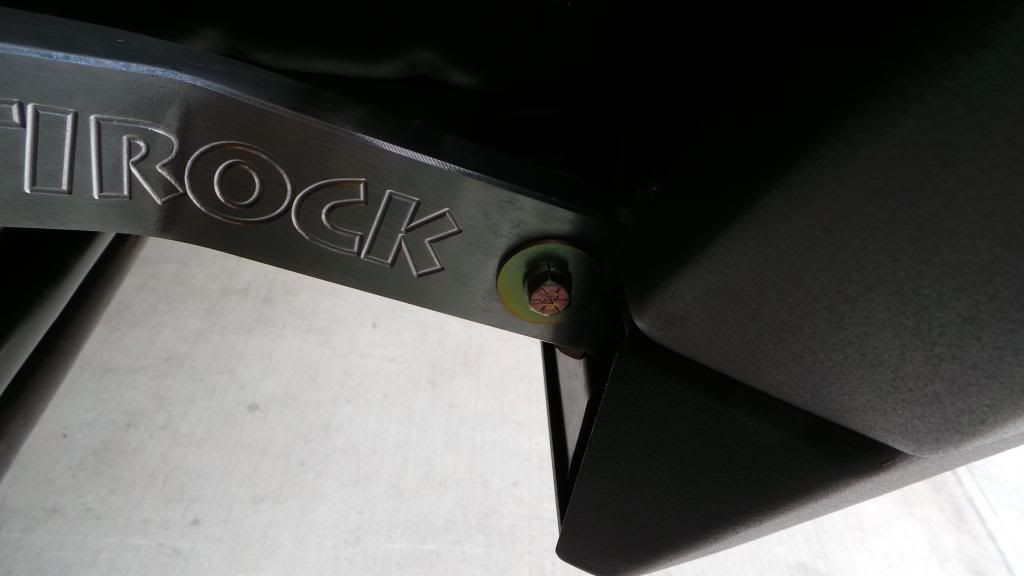
• Make sure all 4 mounting bracket bolts are fully tightened down
Step 6
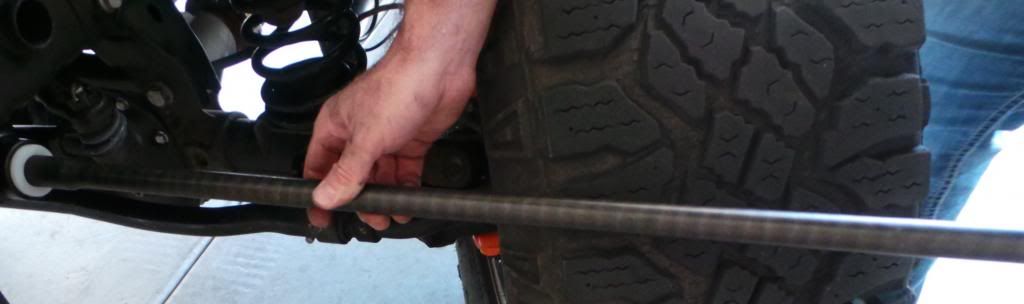
Slide the Antirock bar through the white bushing of driver side mount that you just installed. Make sure the bar you slid through driver side partially comes out of passenger side bushing.
• You will need a dead blow or rubber mallet to help with this process.
Step 7
Measure both driver/passenger side where the Antirock bar slides through bushings. You need to make sure the Antirock bar is protruding out of both bushings at the same length
• Dead blow or rubber mallet will help slide Antirock bar back and forth to get same length on both sides.

Step 8
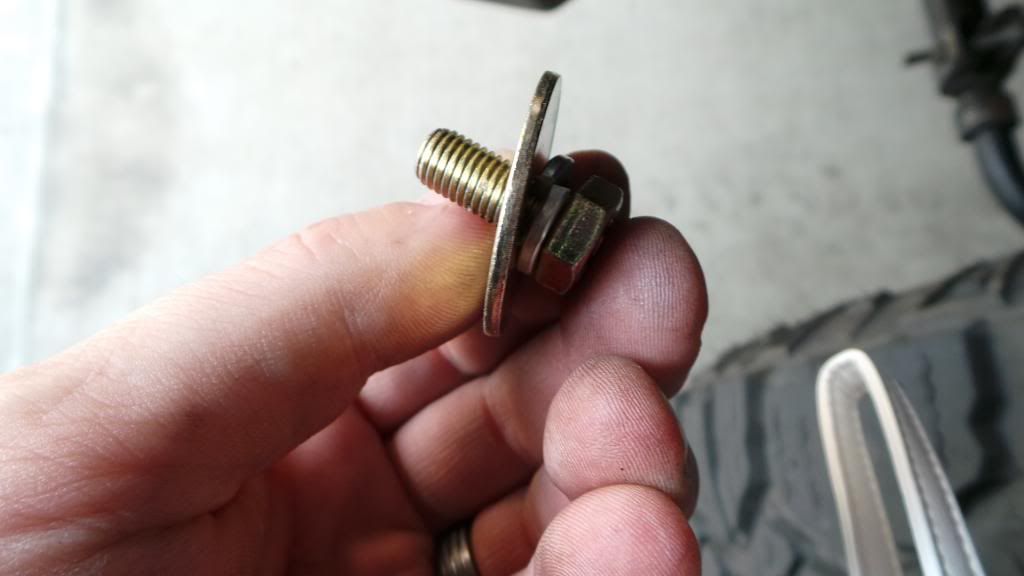
Install the supplied hardware onto the Antirock arms (Don’t tighten)
• Use the 3/8”-24 x 2 ½ “ Bolts & 3/8” 24 nylock nuts
• The nylock nut needs to be at top and bolt head at bottom
• Installing in that order will hopefully give you the clearance needed for your front bumper so you don’t have to notch out anything.
Step 9
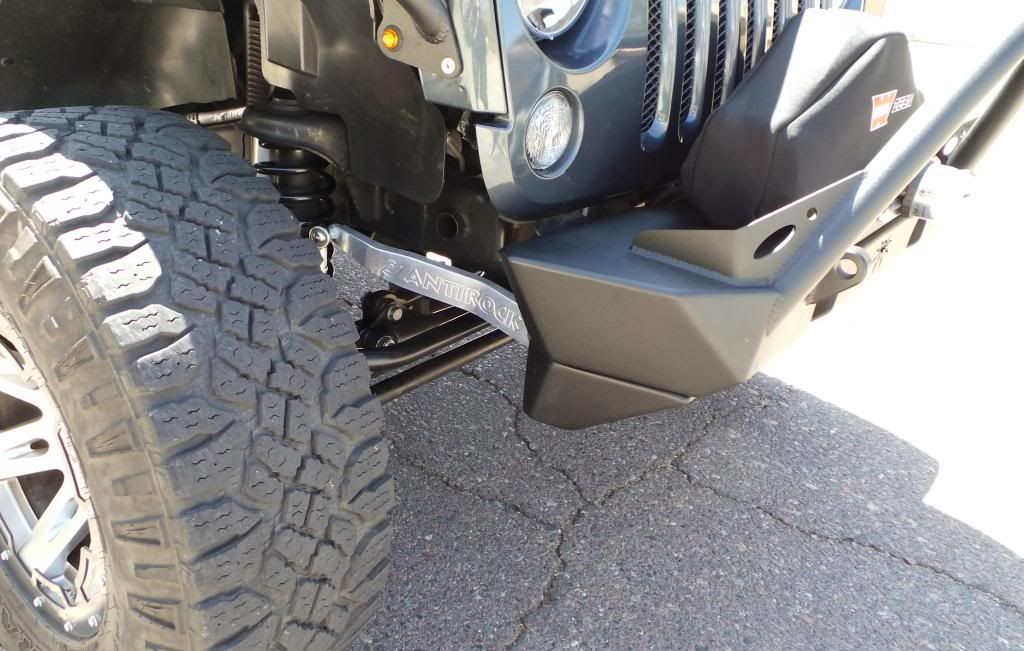
Install the supplied Antirock arms
• Make sure the Antirock bar is showing through the arms at same length once again
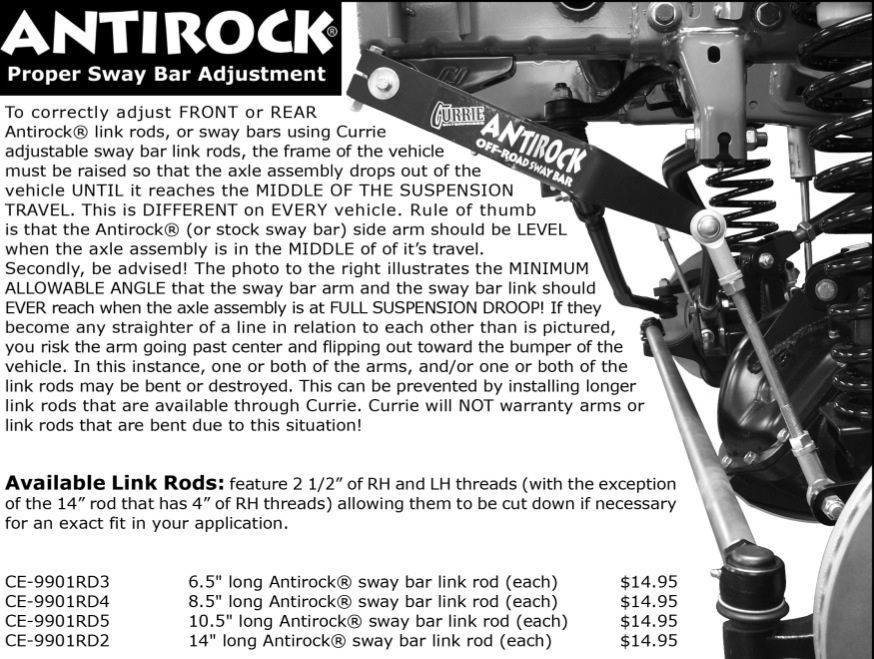
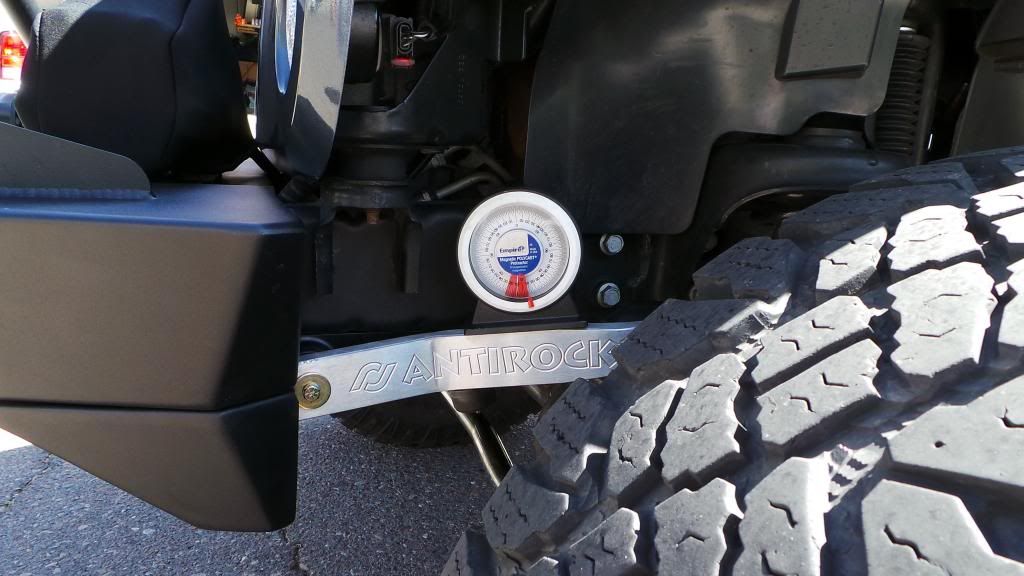
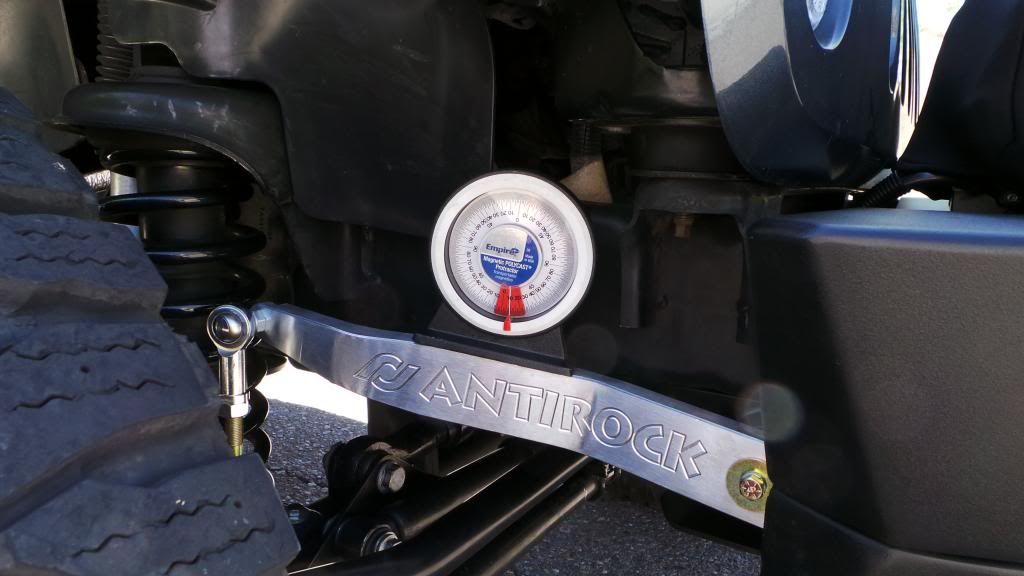
• When installing, the arms have they to be “clocked” the same. That means both arms need to be at the exact same angle and placed in the same “teeth” of Antirock bar
• I found that an angle finder helps a lot when “clocking in the arms.
Step 10
Once you have “clocked” your Antirock arms to the same position you may now tighten down the bolts you installed on step 8
• You will use a 14mm wrench and 14mm socket
Step 11
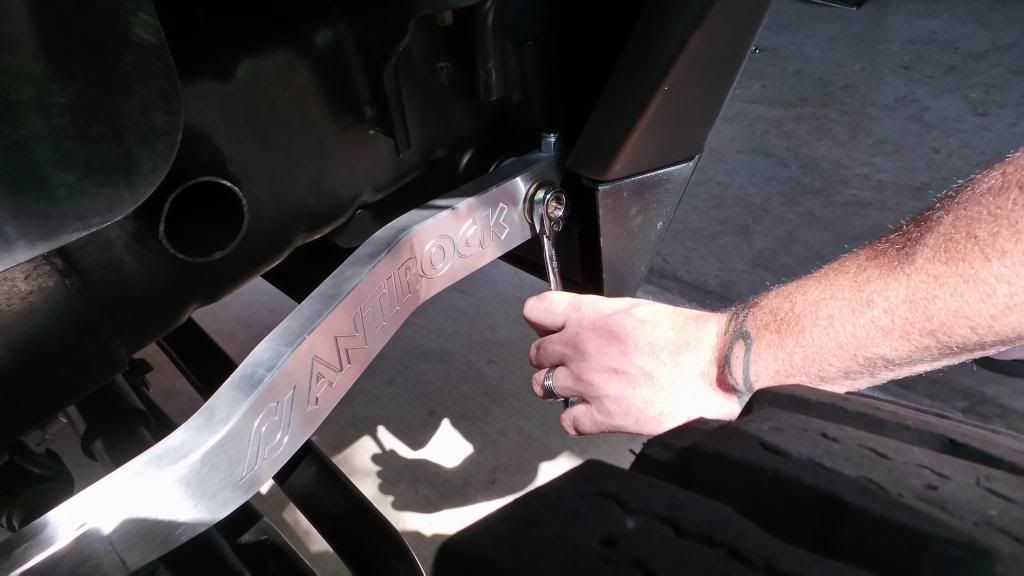
Install the Antirock bar/arm fasteners then tighten down
• 5/16”-24 x ¾” bolts, 5/16” washers, and 5/16” lock washers
• Slide on the lock washers first then the washers onto bolts
• Use 13mm wrench to tighten
Step 12
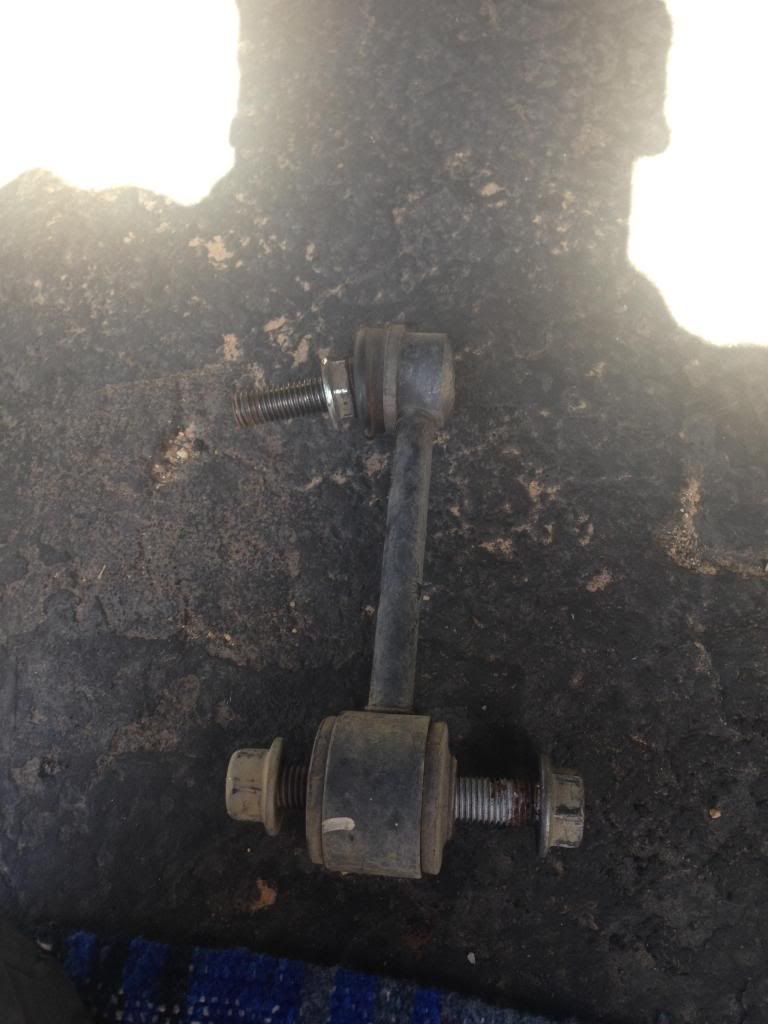
Assemble your links
• Screw on the correct threaded jam nut to each side first
• Screw on the sway bar end link rods last
• Don’t tighten anything down yet


Step 13
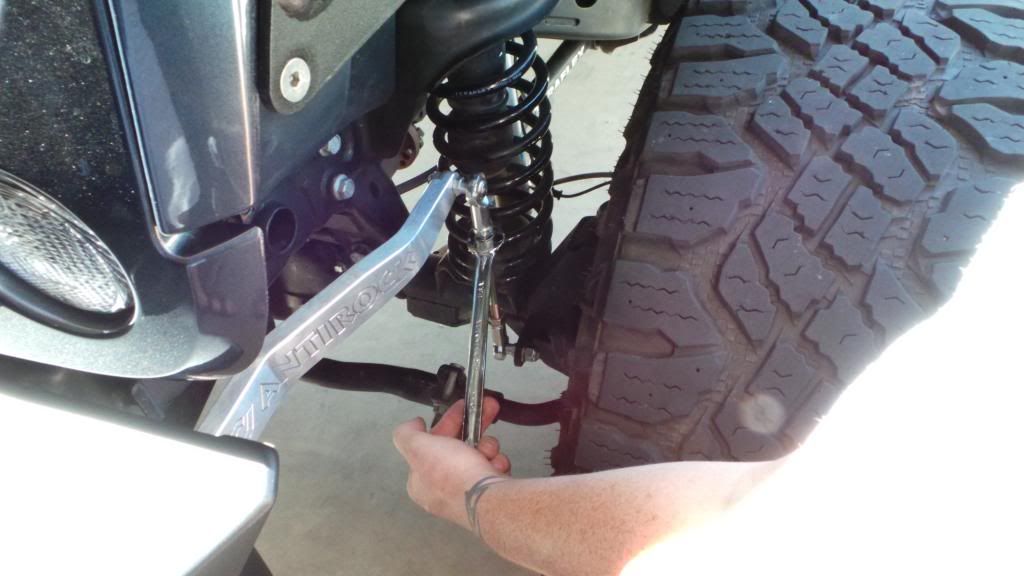
Install Links
• I used 19mm wrench for the nylock nuts & 5/8 wrench for the sway bar end link rod side
• Try to make the threads the same length on both sides of sway bar end link rods
• Once you have the links set to desired length, tighten the jam nuts with a 19mm wrench
Congratulations you are now done with the install portion!!
JK ANTIROCK FRONT SWAY BAR KIT W/ ALUMINUM FRAME BRACKETS & ARMS
Part # CE-9900JKFAA
$519.95
Description:
For all models of the '07 and up Jeep JK Wranglers - 2 or 4 door. The Currie Antirock sway bar kit provides balanced performance of front and rear suspension for rugged off-road conditions. It gives the driver increased traction by balancing and distributing the weight and traction over all four tires. The Antirock off road sway bar is designed to directly replace the stock Jeep sway bar. This bar is made of SAE 4130 heat treated steel for ultimate strength, which is the same quality used in professional off-road competition sway bars. This kit includes all components for installation including, the sway bar, bolt-on billet aluminum frame brackets which feature the RJ logo milled into the sides of them and semi-gloss black powder coat finish, delron bushings, billet aluminum arms that are bent to spec., adjustable length heim jointed sway bar links, necessary hardware, and step-by-step instructions. Unit bolts into existing holes in the bottom of the frame rail and attaches to the stock mounts on the vehicle's axle housing. The Currie Antirock sway bar does not need to be disconnected for off-road use.
CAUTION: Jeeps will have more body roll than stock. This sway bar may be used on the street, however, it will not provide the same handling characteristics as the stock setup
NOTE: Due to all the manufactures currently making front bumpers for the Jeep JK, you may have to modify your front bumper to make this system fit properly.
My thoughts
I have been running the TeraFlex Suspension quick disconnect kit now for about 2 years and always dreaded getting underneath Jeep to disconnect or find level ground. Their kit has worked perfect this entire time but I decided to finally put a stop to getting in and out of Jeep to disconnect or connect. That’s when I decided to look in to the Currie Enterprises JK Antirock kit. After reading multiple reviews online and talking to local Jeepers with the kit, I finally decided to bite the bullet. I chose the aluminum frame brackets and arms not only because of the weight difference, but because the aluminum will match some of the accent pieces on my Jeep. The install was pretty easy minus a few little bumps in the road due to a very limited install guide. When I first mounted up the frame brackets I actually put in backwards, and slid through the sway bar before I even noticed that I had them in wrong. The other little bump in road was trying to figure out the angle I wanted to set the arms at. Now that I have installed the kit which took about an hour and a half (including taking photos), I believe that I could install another in about thirty minutes or so. After the install, I drove down multiple city streets and highway at speeds ranging from 5-80 mph, and at no time did I feel unsafe. The Jeep handled great on turns and low and high speeds. Since my Jeep is not a Rubicon, when I disconnected I was fully disconnected so my body roll was drastically worse than the Currie Antirock setup, so any light body roll that I have now isn’t really noticed or bothersome. I would HIGHLY recommend the Currie Antirocks to any Jeep owners that deal with manually disconnecting at trailheads, or Jeep owners that have Rubicon’s were their sway bar motors have failed. Currie Enterprises has made one heck of a setup and the quality of everything is top notch!
Kit Includes
1) CE-99001B- 36” Antirock Bar
1) CE-9900JK-MSK- Mounting Brackets (Steel) or CE-9900JK-MAK- Mounting Brackets (Aluminum)
2) CE-99003-JK- Antirock Steel Arms or CE-99003-JKA- Antirock Aluminum Arms
2) CE-9901D- Antirock Bushings
2) EE-3212CH8- 5/16”-24 x ¾” Bolts
2) EE-3120WFZY- 5/16” Washer
2) EE-62WS- 5/16” Lock Washer
2) EE-3840CH8- 3/8”-24 X 2 ½” Bolt
2) EE-38NS- 3/8”-24 Nylock Nut
2) EE-991050- Sway Bar End Link Rod
2) CE-99006- Sway Bar End Link Rod End (RH)
2) CE-99006L- Sway Bar End Link Rod End (LH)
4) EE-51NS- ½”-20 Nyock Nut
2) EE-51NF- ½”-20 Jam Nuts (RH Thread)
2) EE-51NFLHP- ½”-20 Jam Nuts (LH Thread)
Tools Needed
Dead blow or rubber mallet
Ratchet
Ratchet extension
18mm socket
18mm wrench
19mm wrench
19mm socket
16mm socket
14mm wrench
14mm socket
13mm wrench
5/8 wrench
Install Guide
Step 1
Park Jeep on level ground
Step 2
Remove the nuts and bolts from lower part of link on driver/passenger side.
• You will need to use both 18mm and 19mm wrenches/sockets at same time to remove nuts and bolts from links.
• The upper part of links can stay on the anti-sway arm since you won’t be reusing. In the pics below, I pulled links entirely though
Step 3
Remove the 4 bolts from frame mounts holding on the factory anti-sway bar and arms, then put to the side.
• You will need a 16mm socket
• Keep the 4 bolts you just removed handy because you will reuse with the mounting brackets that were supplied by Currie Enterprises
Step 4
Install the Antirock (white) bushings into your mounting brackets
Step 5
Install the new mounting brackets using the 4 bolts you put aside from factory anti-sway bar. (Step 3)
• You will need a 16mm socket with extension
• Make sure the thicker part/bushings of mount are towards the front of Jeep
• Make sure all 4 mounting bracket bolts are fully tightened down
Step 6
Slide the Antirock bar through the white bushing of driver side mount that you just installed. Make sure the bar you slid through driver side partially comes out of passenger side bushing.
• You will need a dead blow or rubber mallet to help with this process.
Step 7
Measure both driver/passenger side where the Antirock bar slides through bushings. You need to make sure the Antirock bar is protruding out of both bushings at the same length
• Dead blow or rubber mallet will help slide Antirock bar back and forth to get same length on both sides.
Step 8
Install the supplied hardware onto the Antirock arms (Don’t tighten)
• Use the 3/8”-24 x 2 ½ “ Bolts & 3/8” 24 nylock nuts
• The nylock nut needs to be at top and bolt head at bottom
• Installing in that order will hopefully give you the clearance needed for your front bumper so you don’t have to notch out anything.
Step 9
Install the supplied Antirock arms
• Make sure the Antirock bar is showing through the arms at same length once again
• When installing, the arms have they to be “clocked” the same. That means both arms need to be at the exact same angle and placed in the same “teeth” of Antirock bar
• I found that an angle finder helps a lot when “clocking in the arms.
Step 10
Once you have “clocked” your Antirock arms to the same position you may now tighten down the bolts you installed on step 8
• You will use a 14mm wrench and 14mm socket
Step 11
Install the Antirock bar/arm fasteners then tighten down
• 5/16”-24 x ¾” bolts, 5/16” washers, and 5/16” lock washers
• Slide on the lock washers first then the washers onto bolts
• Use 13mm wrench to tighten
Step 12
Assemble your links
• Screw on the correct threaded jam nut to each side first
• Screw on the sway bar end link rods last
• Don’t tighten anything down yet
Step 13
Install Links
• I used 19mm wrench for the nylock nuts & 5/8 wrench for the sway bar end link rod side
• Try to make the threads the same length on both sides of sway bar end link rods
• Once you have the links set to desired length, tighten the jam nuts with a 19mm wrench
Congratulations you are now done with the install portion!!