You are using an out of date browser. It may not display this or other websites correctly.
You should upgrade or use an alternative browser.
You should upgrade or use an alternative browser.
EarthRoamer XV-JP "Northwest Edition"
- Thread starter WhereTheHellIsJames?
- Start date
Rofocowboy
New member

Who makes this bar? Never seen it before...
jrueppel
Adventurer
Who makes this bar? Never seen it before...
Looks like it was made by Vector Offroad:
http://www.vectoroffroad.com/jke-dock-p-28.html
Put one into my 2007 JK and love it.
Psyched to see it going into the "PJ".
mhiscox
Expedition Leader
That's right. Interestingly, I'd had the smaller Rugged Ridge bar that has a couple of dash trays that were very handy, and I was very pleased to learn that the trays fit on the JKE-Dock. Best of all possible results.Looks like it was made by Vector Offroad:
http://www.vectoroffroad.com/jke-dock-p-28.html
PaulJensen
Custom Builder
Jeep 51
Jeep 51...
It was a rough week...The flu bug bit last Sunday, slowed me significantly Mon. & Tues. then forced me flat on Wed...Fever broke Thurs...On top of that, the entire week was a deluge...Is it spring yet...???...
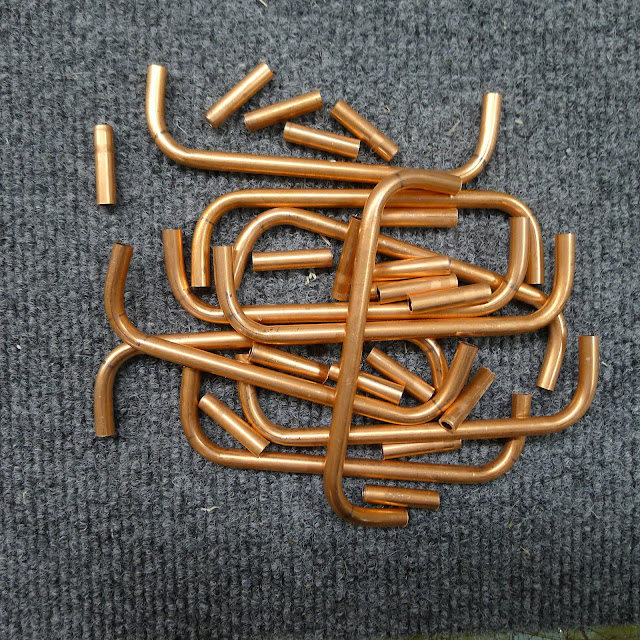
(above) I had a neighbor make these drawer pulls...He used 1/4" thick wall tubing and stretched the coil with a come-along to harden the copper (???) then bent them as you see...I cut them to depth with a jig on the tablesaw...8/32 screws had their heads cut off, then epoxied into the tubing...Each pull was carefully laid out on the drawer, drilled precisely, and carefully fitted...I need to post a picture of them installed...They look nice...
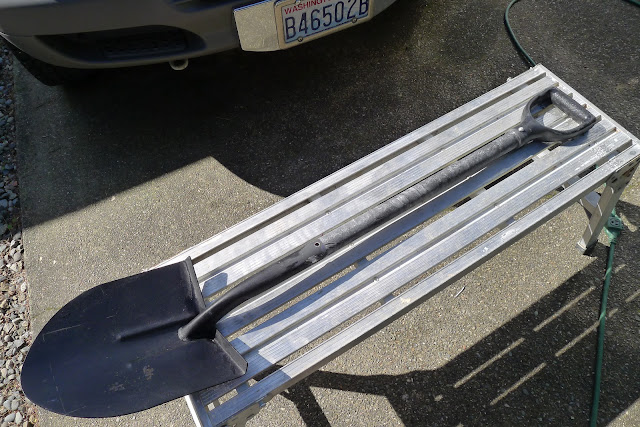
(above) Mike sent me better mounts for the shovel and ax...So I decided to strengthen the shovel handle and cover over the holes I drilled when I mounted the tools to the box off the back..I took the strengthening to a ridiculous level.....Over the fiberglass shaft I laminated three wraps of 4oz. carbon fiber cloth with epoxy...The ax handle got a couple of wraps too..To get the wraps to wrap tight, I covered the wet CF / Epoxy with a light wrap of 4mil. Visqueen...Next over that went stretch plastic wrap...I put on three layers of stretch wrap, with each layer being compressed tighter...
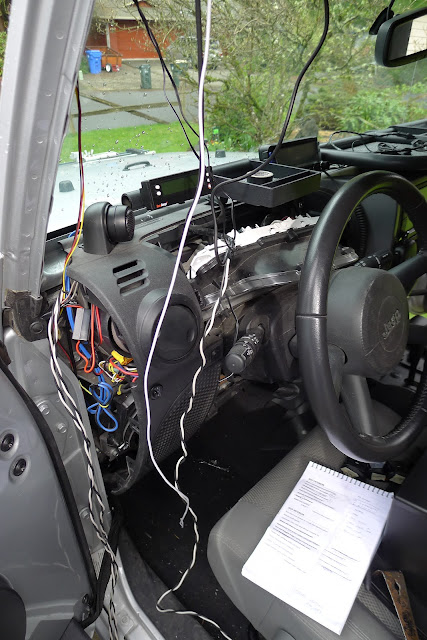
(above) I spent a lot of time on wiring this week...Here is the center of my playground...The components on the front bar were installed, but not yet wired, so I had a lot of wire to pull and connect...I added a new distribution panel behind the driver seat, wired everything in and was very disappointed on how loose the connections into the panel were, so I ended up cutting everything loose and using a different kind of panel...Mike provided me with a couple to choose from...The new one is better...Easier to connect to, is tied to the ignition switch on most of the circuits, and has internal, sealed breakers that re-set themselves...Nice...unfortunate for me, I had to do all of this wiring seated on the floor right behind the front seats facing the rear door...6'3" x 200# crumpled into a ball...With the flu...I think I invented some new yoga positions or torture models...
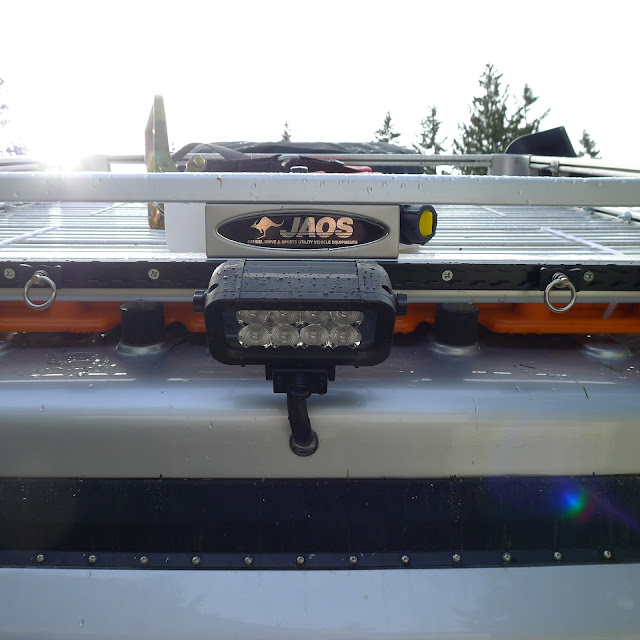
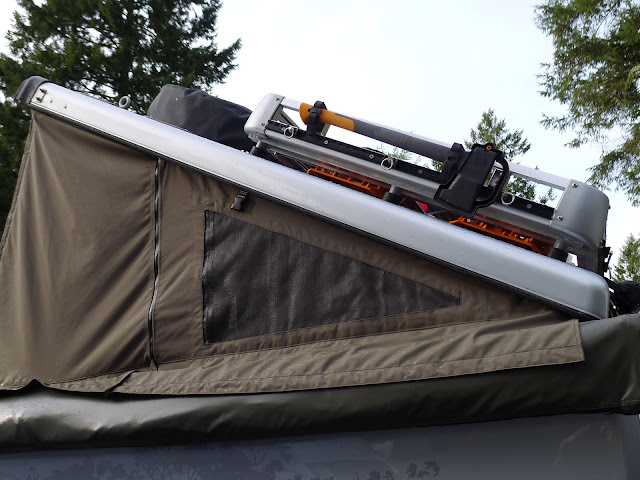
(above) The uber high intensity rear light is mounted to the roof rack...Nearly invisible underneath it is the rear facing camera I mounted to the light...I went with the rack mounting to have the light not be in the way when the wrap-around awning is deployed...Also, I wanted to keep the holes through the roof to a minimum...In the picture you also get a better look at the rack tie-down hardware...
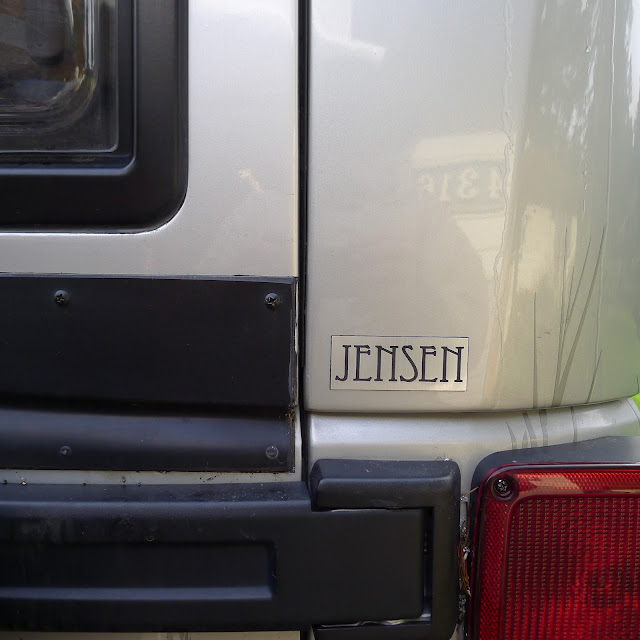
(above) I cut one of my silver surfboard logos and mounted it here...Subtle enough, eh...???...
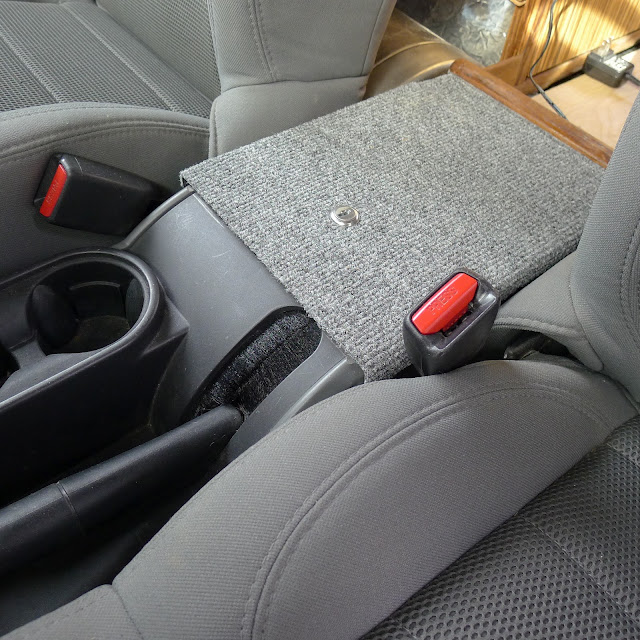
(above) The steel lockbox was painted black and had big bolts coming through the top before I changed those out with rivets and put carpet over the box...There is one seam in there if you look close...In front of the lock...The carpet covers over the hinge and folds nicely so I didn't need to do a cut there...Looks better that way too...
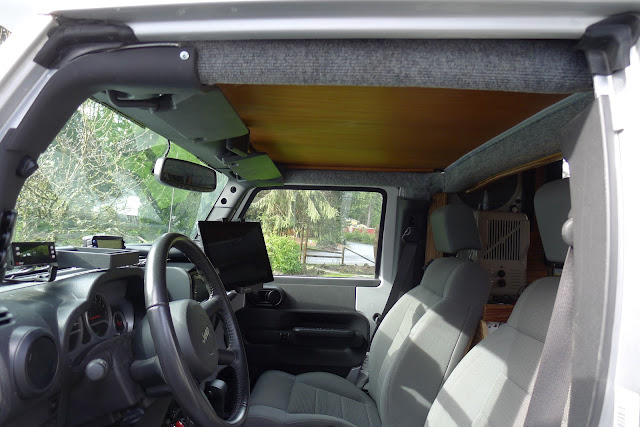
(above) The side rollbars were covered with 1/2" foam pipe insulation, then carpet was installed over that...I use heavy duty peel and stick pressure sensitive adhesive on all that stuff...The bar behind the seats got a similar treatment...
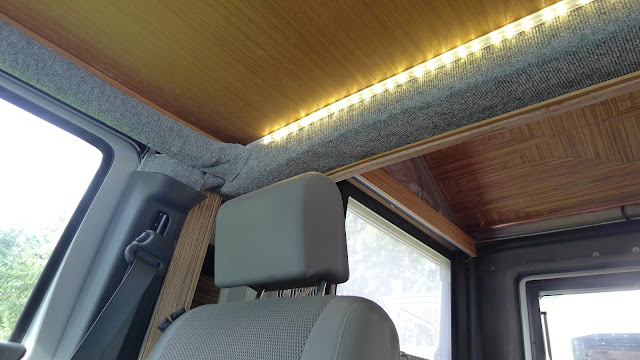
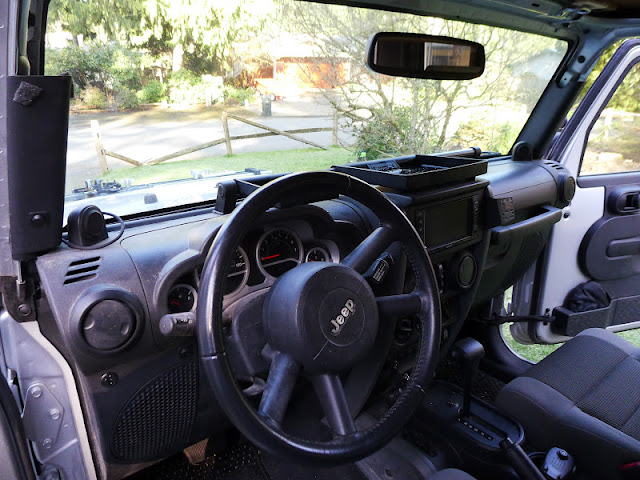
(above) For lighting up the front cabin, I used a couple types of LED lighting...The primary lighting is this rope light...
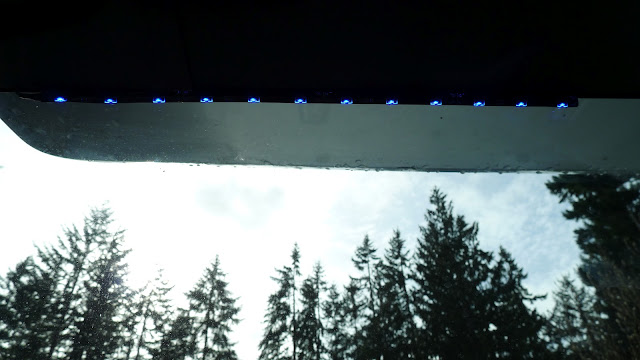
(above) Stuck to the top edge of the windshield are a pair of low intensity blue LED light strips...
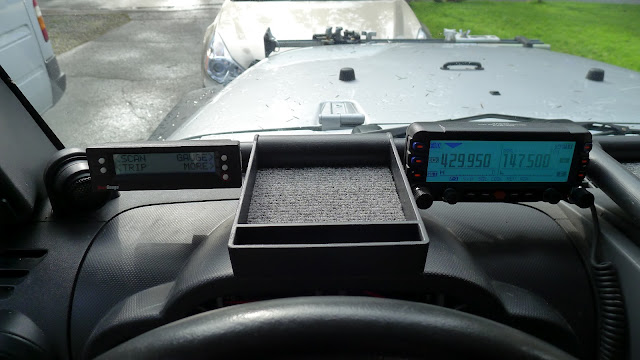
(above) The electrical connections for the Scanguage and Ham radio were solid...
The Scanguage plug-in is down near the brake pedal and intrudes kind of far into the foot space, so I mounted it up behind the speaker panel down there... Completely out of the way now...
The Ham radio control unit is under the driver seat and the hand unit was not mounted, but resting aside the seat...I brought it forward...
New radio speakers were installed...1" tweeters up high and 6" mid-range down low...Not easy to mount those low ones without removing 99% of the up-front plastic...I found a way, but it wasn't easy for a guy with big mitts...Such is my life...
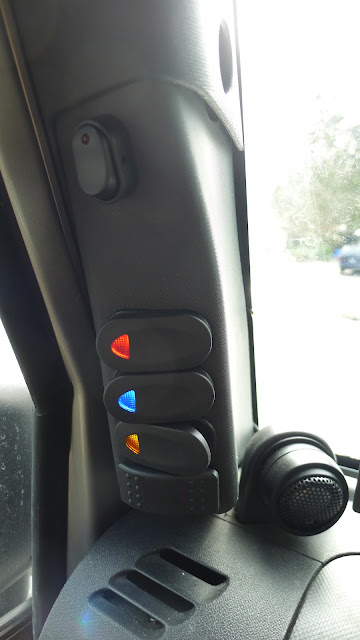
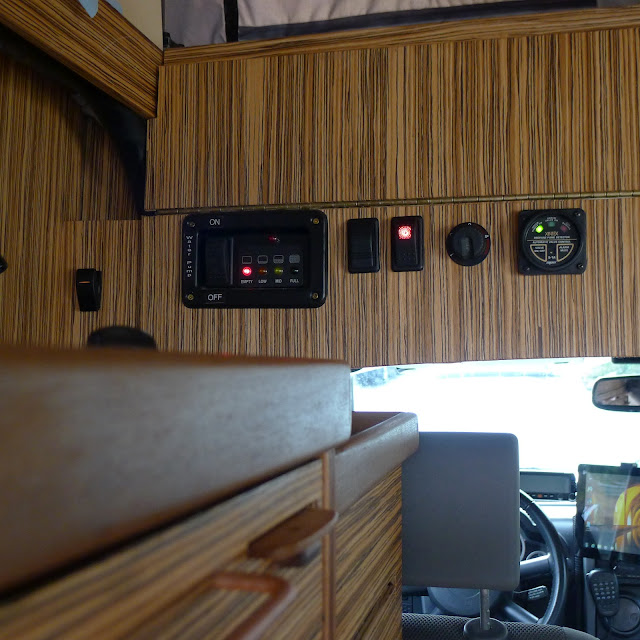
(above) Top down, controls for:
Switch for rear light power source...Not tied to ignition switch...Can be a constant on or switched off...
Red...High intensity cool white LED rope light...
Blue...Low intensity blue LED lights...
Orange...Tablet computer power switch...
Three way switch for rear light mounted on rack...The other switch is just above the fire extinguisher in back...
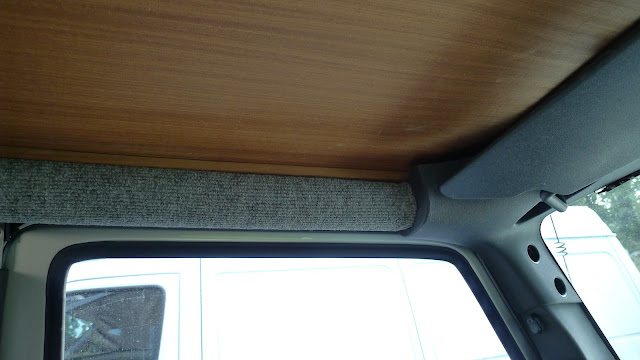
(above) Over the rollbar carpet I fitted in a wood strip to fill the gap...
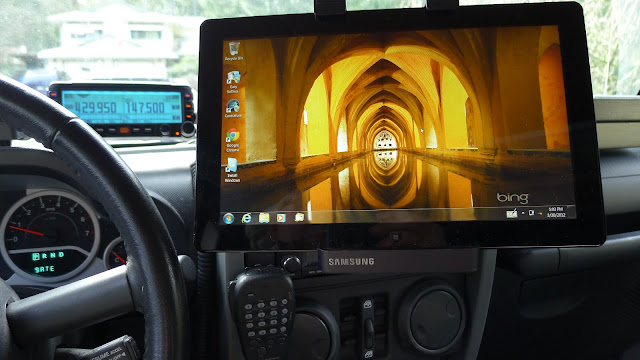
(above) The power for the tablet works...I love it when a plan succeeds...Note new location of Ham radio handset...
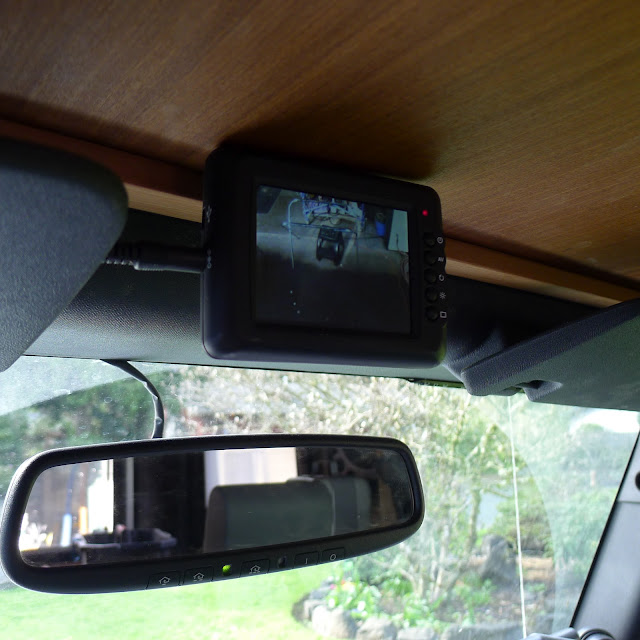
(above) Rear view cam and garage door controlling mirror...
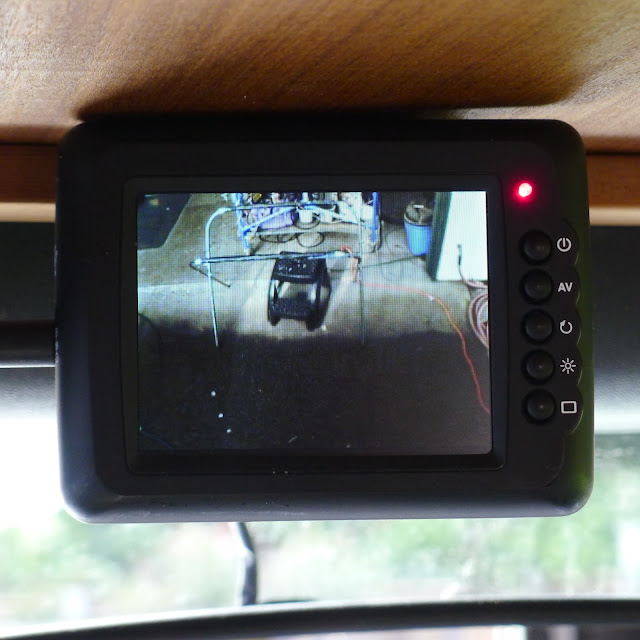
(above) Rear view cam with the roof up...
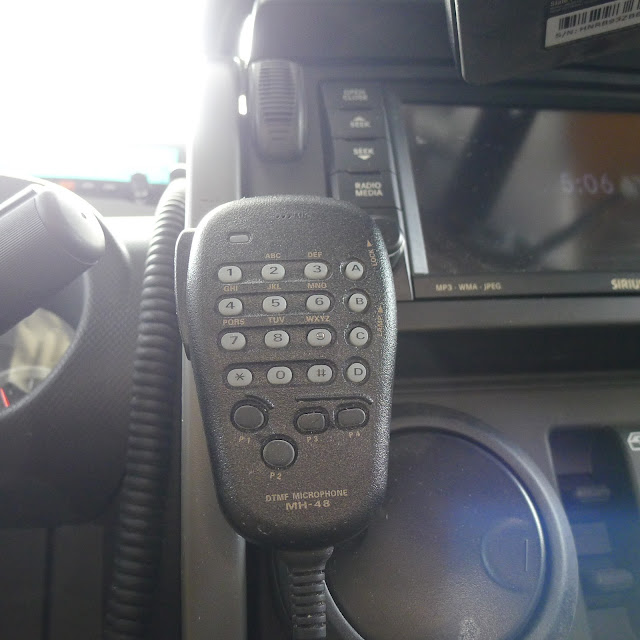
(above) MDTMF Microphone...Just above that is the new microphone for the cell phone built into the Sirius radio...

(above) The Ham radio antenna was mounted to the hinged engine compartment hood and the lifting of the hood stretched and severed the cable...So I got a new cable, did some soldering to make it work and re-mounted the antenna to a non-hinged area...
(above) In back, powered up...I will label what's what...You get a distorted view of one of the drawer pulls here too...
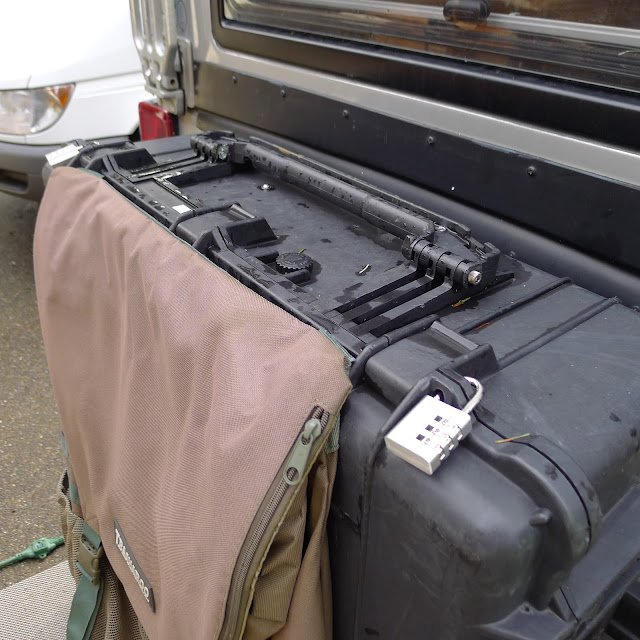
(above) The generator / recovery gear boxes now lock...Just enough to keep the curious from becoming felonius...
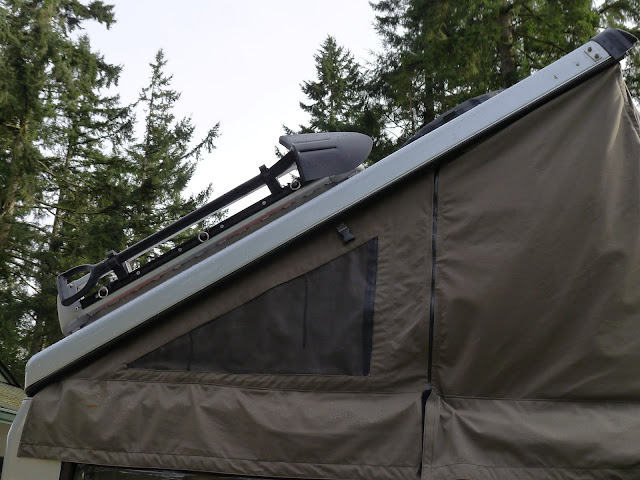
(above) New shovel mount...The rubber strap thing is a huge improvement over the old metal/wingnut mount...
(above) The ax is over here...I had to fabricate a mounting bar for the rear rubber strap thing, just another thing to do to get it right...
The list of things to finish is pretty short now...Mostly cosmetic and filling if fluids and fuels...There are a couple of electrical things to sort out...Nothing major...
Mike mentioned me doing a shakedown cruise...I'll likely head out sometime mid next week...Our weather forecast is calling for a huge rainfall event starting Monday...I'll wait for that, at least, to pass...I'm thinking of doing a loop up Hood Canal then driving west along The Strait of Juan de Fuca to the Pacific, the drive south along the coast before heading east back home...Three or four days...No worries, no hurries...
I'll probably do one more post here before Mike starts a New Post based on the Grand Adventures of (Insert Vehicle Title Here)...I throw my trip report in there...
More later...
Jeep 51...
It was a rough week...The flu bug bit last Sunday, slowed me significantly Mon. & Tues. then forced me flat on Wed...Fever broke Thurs...On top of that, the entire week was a deluge...Is it spring yet...???...
(above) I had a neighbor make these drawer pulls...He used 1/4" thick wall tubing and stretched the coil with a come-along to harden the copper (???) then bent them as you see...I cut them to depth with a jig on the tablesaw...8/32 screws had their heads cut off, then epoxied into the tubing...Each pull was carefully laid out on the drawer, drilled precisely, and carefully fitted...I need to post a picture of them installed...They look nice...
(above) Mike sent me better mounts for the shovel and ax...So I decided to strengthen the shovel handle and cover over the holes I drilled when I mounted the tools to the box off the back..I took the strengthening to a ridiculous level.....Over the fiberglass shaft I laminated three wraps of 4oz. carbon fiber cloth with epoxy...The ax handle got a couple of wraps too..To get the wraps to wrap tight, I covered the wet CF / Epoxy with a light wrap of 4mil. Visqueen...Next over that went stretch plastic wrap...I put on three layers of stretch wrap, with each layer being compressed tighter...
(above) I spent a lot of time on wiring this week...Here is the center of my playground...The components on the front bar were installed, but not yet wired, so I had a lot of wire to pull and connect...I added a new distribution panel behind the driver seat, wired everything in and was very disappointed on how loose the connections into the panel were, so I ended up cutting everything loose and using a different kind of panel...Mike provided me with a couple to choose from...The new one is better...Easier to connect to, is tied to the ignition switch on most of the circuits, and has internal, sealed breakers that re-set themselves...Nice...unfortunate for me, I had to do all of this wiring seated on the floor right behind the front seats facing the rear door...6'3" x 200# crumpled into a ball...With the flu...I think I invented some new yoga positions or torture models...
(above) The uber high intensity rear light is mounted to the roof rack...Nearly invisible underneath it is the rear facing camera I mounted to the light...I went with the rack mounting to have the light not be in the way when the wrap-around awning is deployed...Also, I wanted to keep the holes through the roof to a minimum...In the picture you also get a better look at the rack tie-down hardware...
(above) I cut one of my silver surfboard logos and mounted it here...Subtle enough, eh...???...
(above) The steel lockbox was painted black and had big bolts coming through the top before I changed those out with rivets and put carpet over the box...There is one seam in there if you look close...In front of the lock...The carpet covers over the hinge and folds nicely so I didn't need to do a cut there...Looks better that way too...
(above) The side rollbars were covered with 1/2" foam pipe insulation, then carpet was installed over that...I use heavy duty peel and stick pressure sensitive adhesive on all that stuff...The bar behind the seats got a similar treatment...
(above) For lighting up the front cabin, I used a couple types of LED lighting...The primary lighting is this rope light...
(above) Stuck to the top edge of the windshield are a pair of low intensity blue LED light strips...
(above) The electrical connections for the Scanguage and Ham radio were solid...
The Scanguage plug-in is down near the brake pedal and intrudes kind of far into the foot space, so I mounted it up behind the speaker panel down there... Completely out of the way now...
The Ham radio control unit is under the driver seat and the hand unit was not mounted, but resting aside the seat...I brought it forward...
New radio speakers were installed...1" tweeters up high and 6" mid-range down low...Not easy to mount those low ones without removing 99% of the up-front plastic...I found a way, but it wasn't easy for a guy with big mitts...Such is my life...
(above) Top down, controls for:
Switch for rear light power source...Not tied to ignition switch...Can be a constant on or switched off...
Red...High intensity cool white LED rope light...
Blue...Low intensity blue LED lights...
Orange...Tablet computer power switch...
Three way switch for rear light mounted on rack...The other switch is just above the fire extinguisher in back...
(above) Over the rollbar carpet I fitted in a wood strip to fill the gap...
(above) The power for the tablet works...I love it when a plan succeeds...Note new location of Ham radio handset...
(above) Rear view cam and garage door controlling mirror...
(above) Rear view cam with the roof up...
(above) MDTMF Microphone...Just above that is the new microphone for the cell phone built into the Sirius radio...
(above) The Ham radio antenna was mounted to the hinged engine compartment hood and the lifting of the hood stretched and severed the cable...So I got a new cable, did some soldering to make it work and re-mounted the antenna to a non-hinged area...
(above) In back, powered up...I will label what's what...You get a distorted view of one of the drawer pulls here too...
(above) The generator / recovery gear boxes now lock...Just enough to keep the curious from becoming felonius...
(above) New shovel mount...The rubber strap thing is a huge improvement over the old metal/wingnut mount...
(above) The ax is over here...I had to fabricate a mounting bar for the rear rubber strap thing, just another thing to do to get it right...
The list of things to finish is pretty short now...Mostly cosmetic and filling if fluids and fuels...There are a couple of electrical things to sort out...Nothing major...
Mike mentioned me doing a shakedown cruise...I'll likely head out sometime mid next week...Our weather forecast is calling for a huge rainfall event starting Monday...I'll wait for that, at least, to pass...I'm thinking of doing a loop up Hood Canal then driving west along The Strait of Juan de Fuca to the Pacific, the drive south along the coast before heading east back home...Three or four days...No worries, no hurries...
I'll probably do one more post here before Mike starts a New Post based on the Grand Adventures of (Insert Vehicle Title Here)...I throw my trip report in there...
More later...
Every Miles A Memory
Expedition Leader
The attention to detail is beyond OCD!! Love that Carbon Fiber Wrapped shovel...I think that makes it Tatical :victory:
Overland Hadley
on a journey
Info on the ''uber high intensity rear light''?
PaulJensen
Custom Builder
Info on the ''uber high intensity rear light''?
LED Light Emitter on Trunnion Wall Mount - 8, 3-Watt LEDs - 24 Watt - 1440 Lumen - 325'L X 70'W Beam
The Magnalight LEDLB-8ET LED Light Bar offers high light output and extreme durability combined a versatile trunnion mounting system that allows mounting to walls and provides 270 degrees of adjustability. This IP68 rated LED light bar is waterproof to three meters and produces 1,440 lumens while drawing only 24 watts of power @2 amps from a 12 volt electrical system. This light can run on any voltage from 9 to 42 volts and provides an extremely rugged lighting solution that is ideal for use in commercial marine environments as well as industrial applications such as machine vision system lighting, heavy equipment illumination, blasting lighting and mining operations.
The LEDLB-8ET LED light bar from Magnalight produces a 325' long by 70' wide light beam with 1440 lumens of bright light. Eight Edison Edixeon® Emitters containing CREE EZBright® three watt LEDs producing 180 lumens each are arranged in rows and paired with high purity 10 degree optics to produce a tightly focused spot beam with limited spread or light spillage. We also offer optional floodlight versions with 35 degree optics to produce a wider beam spread and more light over a larger area nearer the fixture, making flood versions ideal for use as work and area lights. These LED light bars are IP68 rated and waterproof to 3 meters, sealed against intrusion by dust and dirt and very ruggedly constructed to withstand the most demanding environments, conditions and applications.
The entire Magnalight LEDLB-E series are constructed of extruded aluminum and feature heavier housings, rubber isolated mounts and unbreakable polycarbonate lenses to provide increased durability against vibrations, impacts, waves, hard rains, sand and high winds.
http://www.magnalight.com/p-47290-l...-leds-24-watt-1440-lumen-325l-x-70w-beam.aspx
Overland Hadley
on a journey
Ford Prefect
Expedition Leader
(above) The power for the tablet works...I love it when a plan succeeds...
Sleeping Dog
Adventurer
Absolutely stupendous. The talent of James and Paul is humbling. And Mike thank you for being a Medici for the overland traveler. Those of us building or considering building a vehicle have inspiratrion.
A question regarding the roll bar. When I've looked at Earthroamer Jeeps, it appears that the roll bar was removed entirly aft of the front seats, or modified to remove the cross bar that would have been above the rear seats. Is that correct or was the bar modified in some manner that opened the space, but still provided some roll over protection in the back.
Also it is my understanding that the back section of the roll bar on the JK provided stiffness to the frame in addition to rear passenger protection. Notice any lack of stiffness?
The idea of building a more humble version of your Jeep using the Ursa Minor or Habitat tops is tempting, but that damn cross bar is in the way.
Thanks,
Jim
mhiscox
Expedition Leader
Thanks for the compliments, Jim. Much appreciated.When I've looked at Earthroamer Jeeps, it appears that the roll bar was removed entirly aft of the front seats, or modified to remove the cross bar that would have been above the rear seats. Is that correct or was the bar modified in some manner that opened the space, but still provided some roll over protection in the back.
We retain the front side tubes and the steel cross piece behind the front seats. But the bar that was right behind the JKU's rear seat is gone, and we instead have a hoop as far back as possible in the rear corners, with verticals running to close to the roof junction (a little taller than the height of the rear door) and then a cross bar tying them together. Then there are non-stock side tubes going at the same height (a little below the roof joint) from the rear sides to the junction of the cab and cabin forward to where they tie into the Jeep hoop right behind the front seats.
The net result is that we have pretty much as much tubing and bracing, and thus no stiffness problems, but the crossbar that was near the rear seats is now back by the tailgate and the section of the "cage" that's in the cabin is higher off the floor pan than stock.
Incidentally, one of the very best things that came of Paul's craftsmanship was hiding the roll cage, and especially the steel behind the front seats. When I contemplated doing something by myself, the issue of what to do with that area had me stumped. Apparently no problems for Paul . . .

Sleeping Dog
Adventurer
Thanks Mike. I suspected that a change was made rather than simply removing the bar.
If you are looking for a road trip, we northeasters would welcome you to this falls Overland Expo. Northern New England has a just reputation for natures beauty that time of year. Plus we'd all love to take a closer look.
Jim
If you are looking for a road trip, we northeasters would welcome you to this falls Overland Expo. Northern New England has a just reputation for natures beauty that time of year. Plus we'd all love to take a closer look.
Jim
mhiscox
Expedition Leader
Thanks for the invitation. It'd be great to get some pictures of the Jeep under the birch and maples, and I haven't been back that way for a while. It'd be nice if the price of gas dropped a bit first, though.If you are looking for a road trip, we northeasters would welcome you to this falls Overland Expo. Northern New England has a just reputation for natures beauty that time of year. Plus we'd all love to take a closer look.