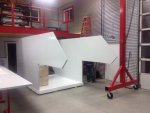
Flatbed and composite panel build on Dodge 2500

Jeep

Supporting Sponsor: Overland Explorer Expedition V
Got the extrusions coated and assembled the floor.

LOTS of 252!

Image 7.jpg

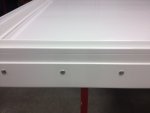
Lowers were riveted to the upper extrusions with 1/4 coated Uni Bolts, 4000 lb shear, 2400 lb pull out strength.

Image 9.jpg

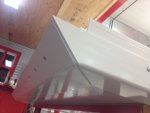
Shot of the lower rear corner, 3/16 5052 aluminum wraps 4" under the bottom, good protection, will help with moving, blocking, forklift loading, whatever.

Image 8.jpg
 

ripperj

Explorer
This is a sweet build, I like it. As soon as my Alaskan is ready to use I'm going to start a composite panel build that will be my lifetime camper(anyone ever said that and stuck to it?)
Keep up the great work and pics!

Sent from my Passport using Tapatalk 2
 

Blade76

New member
looks like an european built cabin ;) All cabins built here are made pretty alike.
Did you rivet it and used the 252 at the same time?
 

Healeyjet

Explorer
Is the inside of the panel the inside of the finished wall? It appears it is as it is a beautiful finish. That being said, where do you run the wires etc? I am sure there is a very nice solution and I may be getting ahead of the build but I am very interested to see how this system works and have never seen the inside of a European camper.
Ward
 

Jeep

Supporting Sponsor: Overland Explorer Expedition V
The riveted extrusions use the rivets for a mechanical structural connection between the extrusion components only, there is a bead of Sika laid in between but when the 2 aluminum components are riveted together in a zero clearance fashion, the Sika becomes a sealant more so than an adhesive. The extrusions are bonded to the floor with no mechanical fasteners.

The walls have the same finish inside, it's decent, I'm making some changes to a different premium finish skin as a standard material.

The walls have 2 runs installed during assembly and I have a really cool drill "bit" that lets me bore a straight hole if I need to install more runs, I an go 5' at a time, and just press pvc conduit in. The assembly sequence is key to making it all work. On my F-650 all of the wiring is surface mount, all of the wood trim is routed out on the back side, and other ideas like that to conceal it, you cannot see a wire anywhere, and you can get at every inch of plumbing and electrical with relative ease. I'm leaning towards that method too, see what it all looks like when we start putting it together.

I do like a lot of the features and designs in the Euro market, and I like a lot of the designs of the American market. There are some shortfalls to both and we will never have everything we want but I'm trying!

Cheers,
Mark.
 

Jeep

Supporting Sponsor: Overland Explorer Expedition V
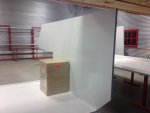
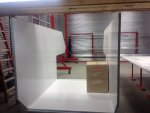
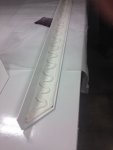
Got some walls up, the box inside is the fridge and its about 3" larger than the actual cabinet for it will be, the flat floor plan really makes for a lot of very useable space for gear and living. The layout basically gives 2 semi isolated living spaces, the master bed in the overhead will be separated nicely from the back end which will have a set of bunks for the kids in the rear, provides a little privacy in a small area.

Walls up 2.jpg

Walls up 3.jpg

Walls up.jpg
 

Forum statistics

Threads
185,977
Messages
2,880,447
Members
225,705
Latest member
Smudge12
Top