How would you outfit this custom LJ?

jscherb

Expedition Leader
I made a few small changes to the roof rack so I could mount the roof top tent longitudinally. It's much better this way - the rear barn door can be opened under the tent, providing great weather protection, and because of the height of the tent base on top of the Safari Cab, there's almost 7' of headroom under there. I also got the ladder properly installed, because of the height of the LJ Safari, an extension was required.

SafariRTTLong1.jpg


SafariRTTLong2.jpg


SafariRTTLong4.jpg
 
I made a few small changes to the roof rack so I could mount the roof top tent longitudinally. It's much better this way - the rear barn door can be opened under the tent, providing great weather protection, and because of the height of the tent base on top of the Safari Cab, there's almost 7' of headroom under there. I also got the ladder properly installed, because of the height of the LJ Safari, an extension was required.

SafariRTTLong1.jpg

I like it this way better than transversal. Not sure why, probably just personal, but the covered space you get to work in your trunk is priceless. As I said before, no trailer though :)
 

jscherb

Expedition Leader
I like it this way better than transversal. Not sure why, probably just personal, but the covered space you get to work in your trunk is priceless. As I said before, no trailer though :)
Speaking of covered space... with the roof top tent opening off the back, an option that's available for the tent that could be really nice is the changing room, here's an image from a website selling the tent:

ChangingRoom1.jpg


I edited that image into one of my photos from yesterday and came up with this:

ChangingRoom2.jpg


What's nice is that the rear barn door could be open inside the changing room, so you'd have access to the inside of the Jeep while using the changing room.
 

jscherb

Expedition Leader
Where does the ladder stow?

The ladder slides together like an extension ladder and stows on top of the folded tent, it's the bulge in the center of the folded up tent in this photo:

SafariRTTPacked1.jpg


The ladder always stays connected to the tent base, so what's nice is when you're ready to open up the tent, you extend the ladder out past the back of the Jeep, then you pull down on it like a lever to flip the tent open. Once you get the tent up to vertical, you control opening it the rest of the way with the ladder as a "handle". Makes it very easy to open the tent on top of a tall vehicle.
 

Ford Prefect

Expedition Leader
Some of the tents actually have a covered ladder area, the enclosed changing room on those is obviously larger but a fair amount. My wife and I like this idea a lot because we would be able to put the tent up, wit the room, and our boys could get in and out of the jeep and tent to see us anytime they wanted, and we could keep the door open so that we could hear one another really well also. The last cool thing is with that style one could conceivably put a space heater on the ground under the room and it would heat the entire area if you had electric or were willing to run a generator all night. Funny enough I am almost certain I will never own one of those tents. The few companies who make that style seem to think that we are all made of money.
 

jscherb

Expedition Leader
Some of the tents actually have a covered ladder area, the enclosed changing room on those is obviously larger but a fair amount. My wife and I like this idea a lot because we would be able to put the tent up, wit the room, and our boys could get in and out of the jeep and tent to see us anytime they wanted, and we could keep the door open so that we could hear one another really well also. The last cool thing is with that style one could conceivably put a space heater on the ground under the room and it would heat the entire area if you had electric or were willing to run a generator all night. Funny enough I am almost certain I will never own one of those tents. The few companies who make that style seem to think that we are all made of money.
The tent I've got sells for $829 at the place I got mine from; they've got the "vestibule" version you're talking about for $1,029. They sell the changing room for mine for $115, and the changing room for the vestibule style is $270. So the difference is $355 ($829+115 = $944 vs. $1029+270 = $1299). Those numbers don't include shipping.
 

Ford Prefect

Expedition Leader
The tent I've got sells for $829 at the place I got mine from; they've got the "vestibule" version you're talking about for $1,029. They sell the changing room for mine for $115, and the changing room for the vestibule style is $270. So the difference is $355 ($829+115 = $944 vs. $1029+270 = $1299). Those numbers don't include shipping.

Wow that is the best price I have seen yet by half or more. Most of the vestibule kind are at least 2200, then they go way up from there. I tell you what, if I am going to spend 2200 on a tent it is going to go straight up and say Maggiolina on the back of it!

Good info, I don't suppose you can tell us where you got your tent yet then eah?

Shipping is a bummer. That is one thing Camping lab really has going for them is the free shipping on the tents. Too bad they never have any tents in stock. Seems like their page has said "pre-order now" for nearly a year. sigh.
 

97tjguzzy

Explorer
Wow that is the best price I have seen yet by half or more. Most of the vestibule kind are at least 2200, then they go way up from there. I tell you what, if I am going to spend 2200 on a tent it is going to go straight up and say Maggiolina on the back of it!

Good info, I don't suppose you can tell us where you got your tent yet then eah?

Shipping is a bummer. That is one thing Camping lab really has going for them is the free shipping on the tents. Too bad they never have any tents in stock. Seems like their page has said "pre-order now" for nearly a year. sigh.

I got my overland plus from Southeast Overland, It has the vestibule and is much less than $2200.

http://southeastoverland.com/index....ts&task=view&id=20&filter_category=&Itemid=13
 

jscherb

Expedition Leader
Those of you who have been following this thread for a long time may remember the budget rack basket I made out of two inexpensive HF ATV Cargo Racks:

JerryCanHolder3.jpg


I've posted a bunch of photos with an extra spare tire in the basket, and whenever I drive like that I have to strap the tire down with a ratchet strap, which is a pain. I'm planning a week-long off-pavement trip in Colorado in July, and I'm thinking I want to carry an extra spare, so I decided to design and build a better way to secure the tire.

So here's what I've come up with, it cost about $3.00 in materials. It's basically a u-shaped bracket that can slide over any of the basket crossbars, a 1/2" bolt welded into the bracket, and a ball-detent lynch pin to hold it in place.

TireMount1.jpg


Installing it takes seconds, just slip the bracket over a crossbar and slide the lynch pin in place. What's nice about this is that the position of the bracket can be changed without unbolting it, so if the cargo space needs change and the tire needs to be shifted somewhere else in the basket, it's easy to do.

TireMount2.jpg


Once the bracket is installed, the tire sits in the basket and is secured with a lug nut. The lug nut is the same size as the nuts on the wheels, so the factory lug wrench is all that's needed to secure/remove the spare.

TireMount3.jpg


And BTW, I've started a thread with a few photos of my current project, which I'm calling the CJ Grille Conversion Kit for the TL/LJ: http://www.expeditionportal.com/forum/threads/78680-CJ-Grille-Conversion-Kit-for-the-TJ-LJ?p=1114827
 

jscherb

Expedition Leader
Here's an idea I'm working on for a tailgate cargo rack.

ExogateRack1.jpg


The rack consists of a Rack Mounting Base that goes between the spare carrier and the tailgate. The brackets that hold the rack would slip into slots in the base, which would enable the rack to be quickly installed/removed when necessary. Either lynch pins or bolts would secure the installed rack/brackets to the base, and the height of the brackets would be adjustable for different size spares by using different holes for the bolts/lynchpins. The brackets would be appropriately sized to accept a number of different sizes or configurations of baskets.

While this cargo carrier could be installed on a stock tailgate, I don't think that would be a good idea - it would best be used on a tailgate reinforced with something like the Gr8Tops Exogate.

I'm going to use the HF ATV Cargo Rack for the basket, which is on sale right now for $31.99. The HF basket is too large as is, so I'll narrow it to a little less than the width of the tailgate, and remove one rung to make it 14" front-to-back. Here's a photo of the unmodified HF rack I'm starting with, it's just perched on the spare for now:

HFCargoUncut.jpg


Over the next few days I'll get the basket narrowed and the rest of the parts fabricated.
 

jscherb

Expedition Leader
I've cut the HF rack down to about 13" x 30" (inside dimensions). I think that's about right for a decent-sized cooler.

HFCargoCut.jpg


Here it is just sitting on top of the spare... the small cooler in it is mostly to keep it balanced so it doesn't tip and fall off :).

HFCargoMockup1.jpg


The next step is to make the mounting base that attaches to the tailgate, and then the legs that go into the base and support the basket.
 

jscherb

Expedition Leader
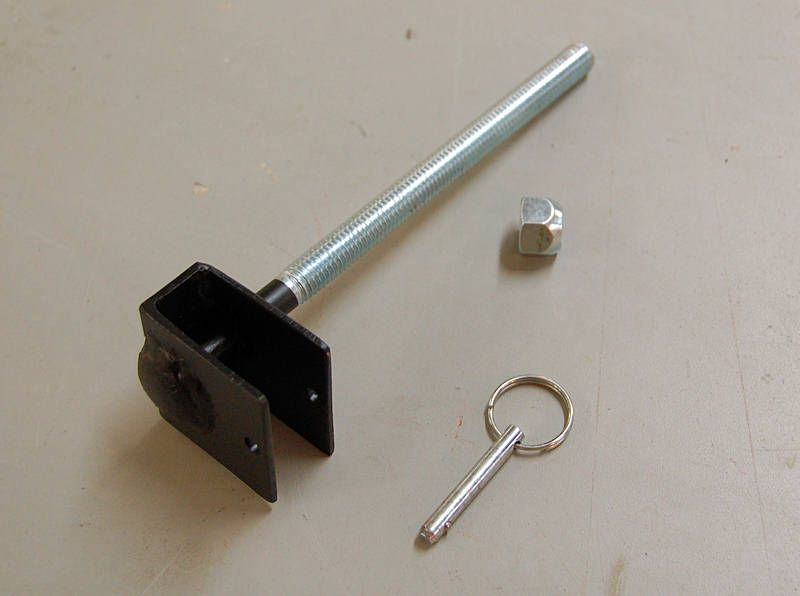
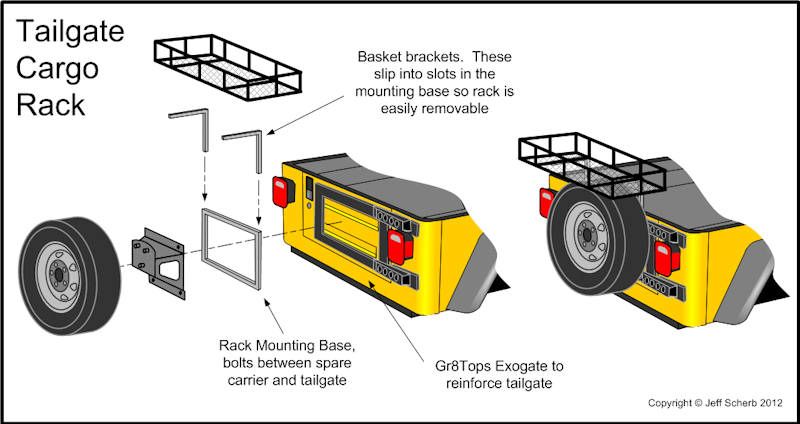
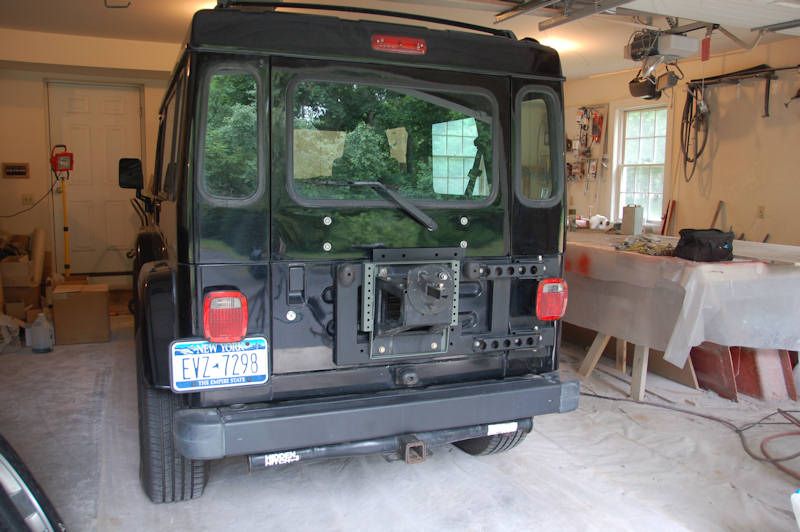
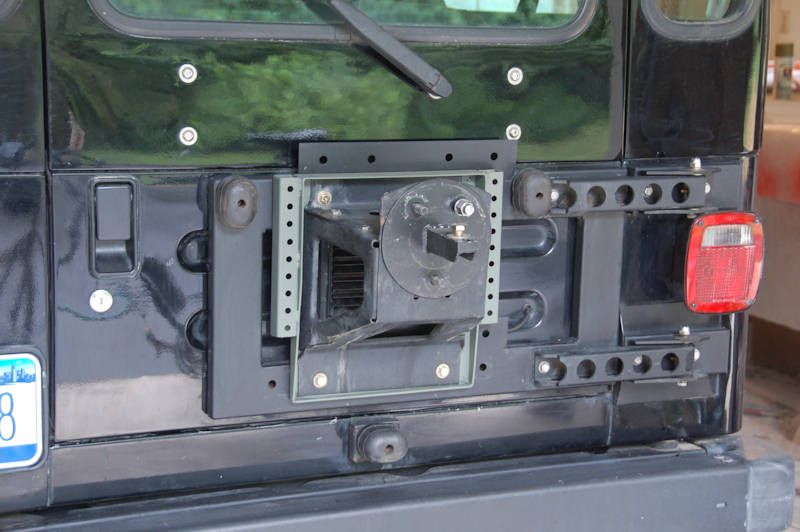
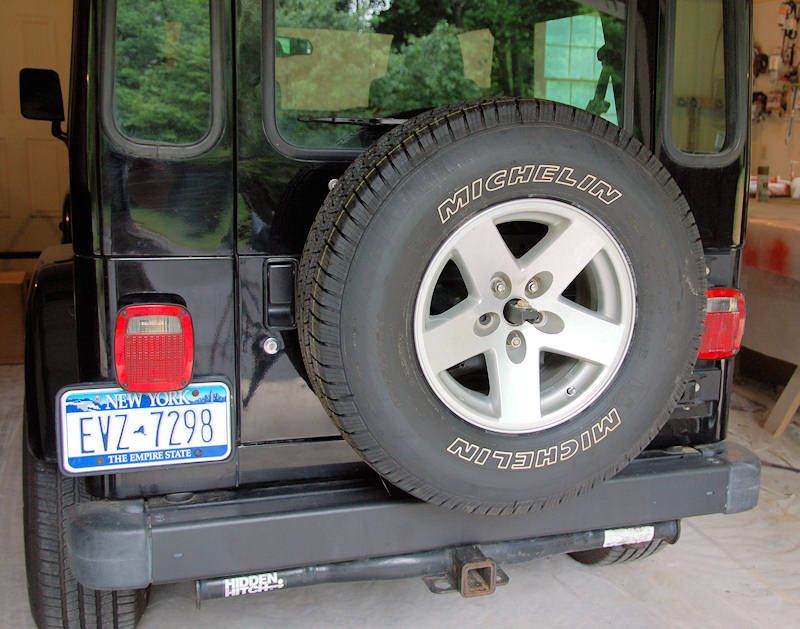
The mounting base gets sandwiched between the spare carrier and the tailgate, it'll install very easily, just unbolt the spare carrier, slip this in, and bolt everything back up.

HFRackBase1.jpg


Next is to weld some "Stake pockets" to the sides of the base, made from 1 1/4" square tubing.

Here's the rack base installed on the Jeep, the stake pockets welded on the base frame, and it's had a quick coat of primer. Took only about 2 minutes to install it - remove the four bolts holding the spare carrier to the tailgate, slip the rack base in between, and replace the bolts.

HFRackBase3.jpg


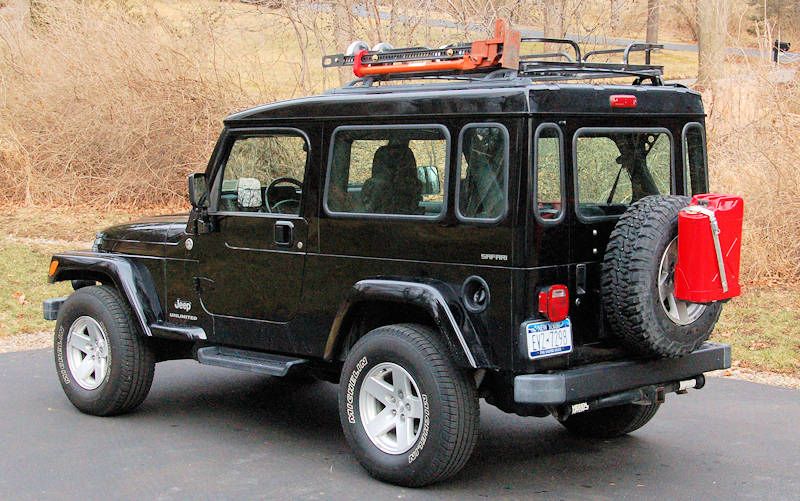
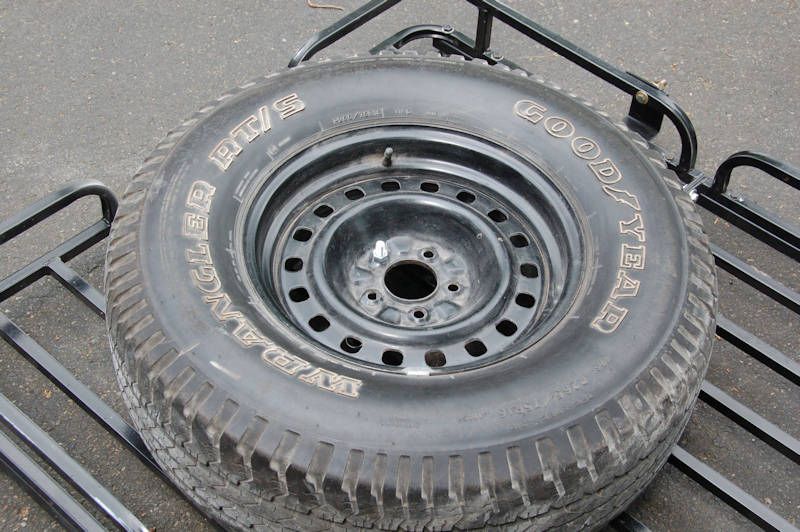
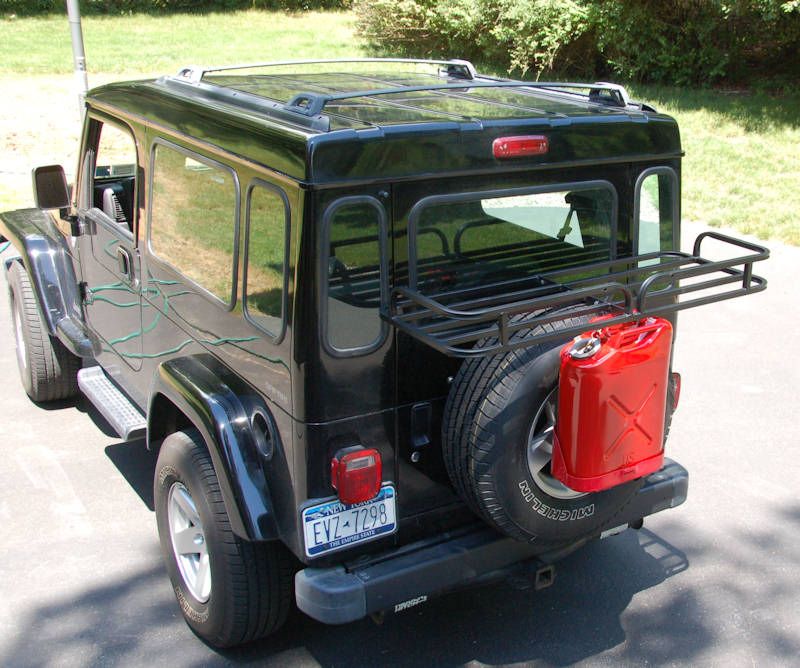
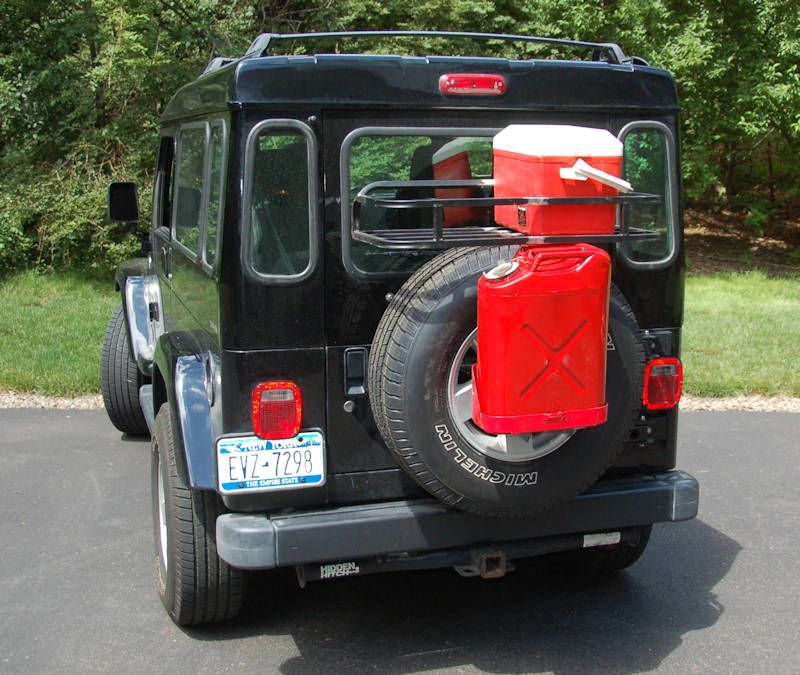
Also in this photo you can see the base for mounting my jerry can rack through the spare tire center hole, that base just slips over the three lugs on the spare carrier and is held in place with the spare.

HFRackBase4.jpg


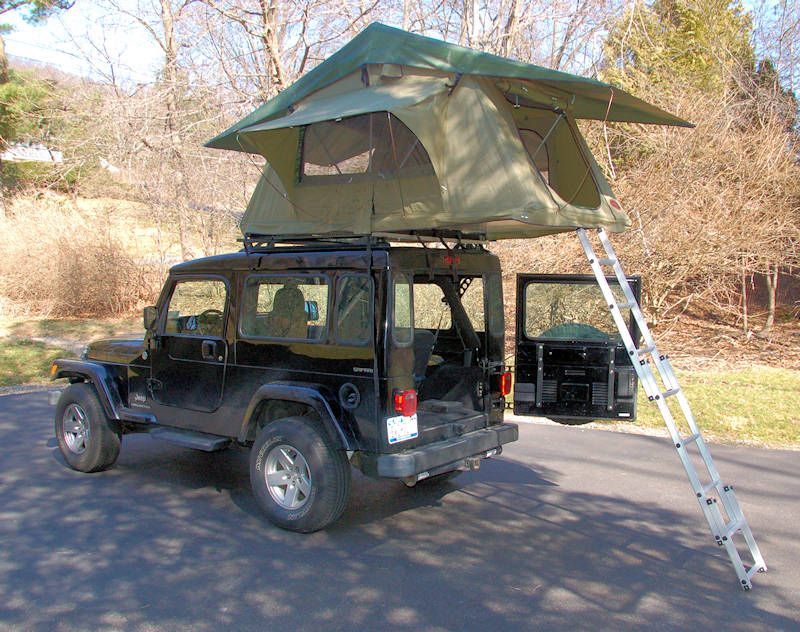
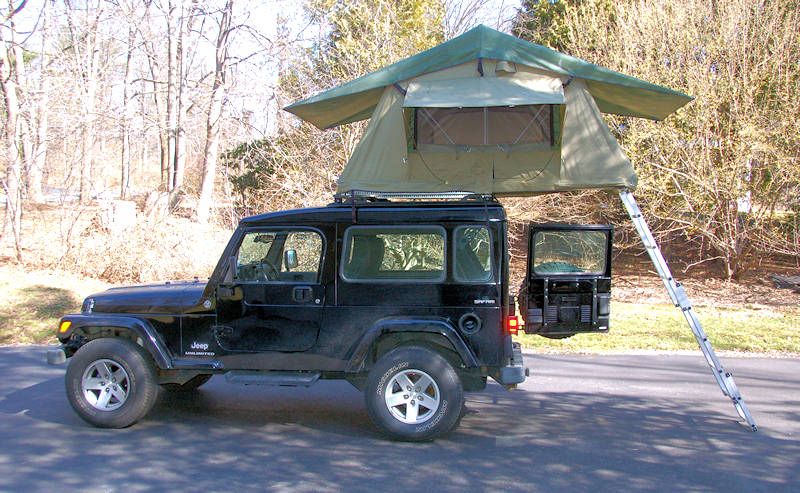
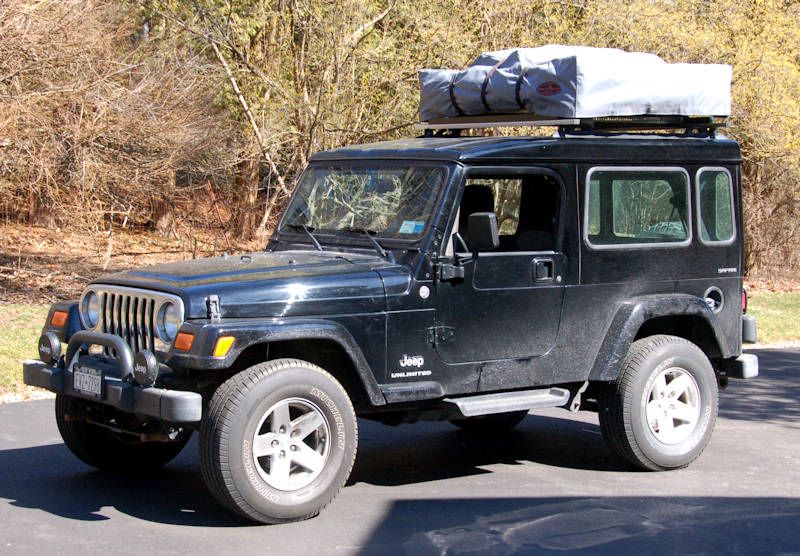
I've got a Gr8Tops Exogate tailgate reinforcement/heavy duty hinge set installed, so supporting the extra weight of the cargo rack and the jerry can rack is no problem. This rack base and the jerry can rack would install just fine on a stock tailgate without an Exogate, but I don't think it would be a good idea to put much extra weight on a stock unreinforced tailgate.

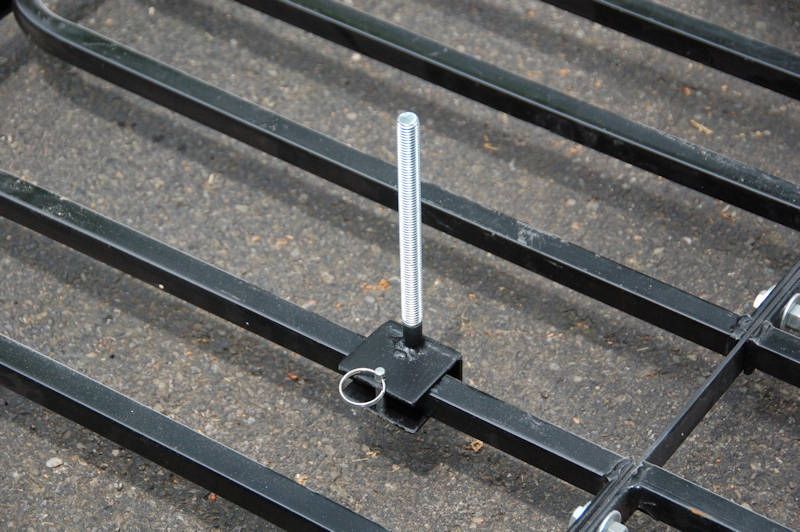
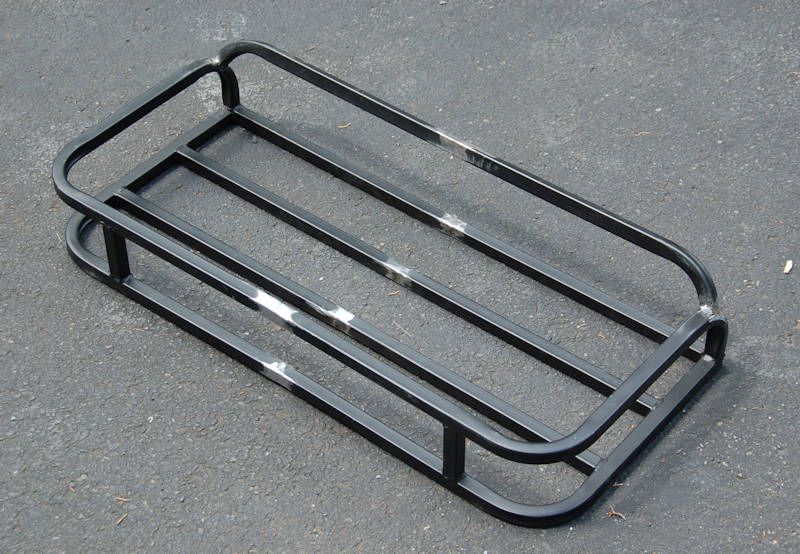
So next I've got to make the vertical brackets that will go in the stake pockets and support the rack basket. They'll be held in place by bolts through the holes in the stake pockets; I decided on bolts instead of something like lynch pins to reduce movement and rattle. The range of holes on the pockets will allow a 6" vertical adjustment of the rack height, which should be enough to put the rack above 37" tires if necessary (I've got 32's on the LJ).

Once nice thing about both of these racks is when the rack bases are installed without the racks, the only thing that's visible is the small stud sticking out from the center of the spare. The cargo basket base isn't visible at all.

HFRackBase6.jpg


On to the vertical brackets to hold the rack basket next.
 

Forum statistics

Threads
186,250
Messages
2,883,809
Members
226,050
Latest member
Breezy78
Top