rayra
Expedition Leader
Fiddled around with vehicle solar today, still waiting on mailorder parts. Been using powerwerx.com for Anderson Power Pole (APP) connectors and other electrical connection tidbits.
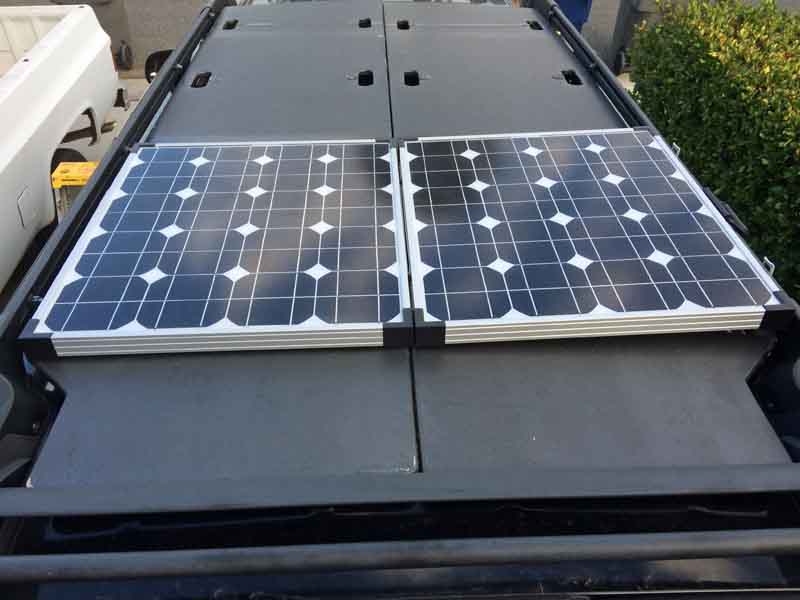
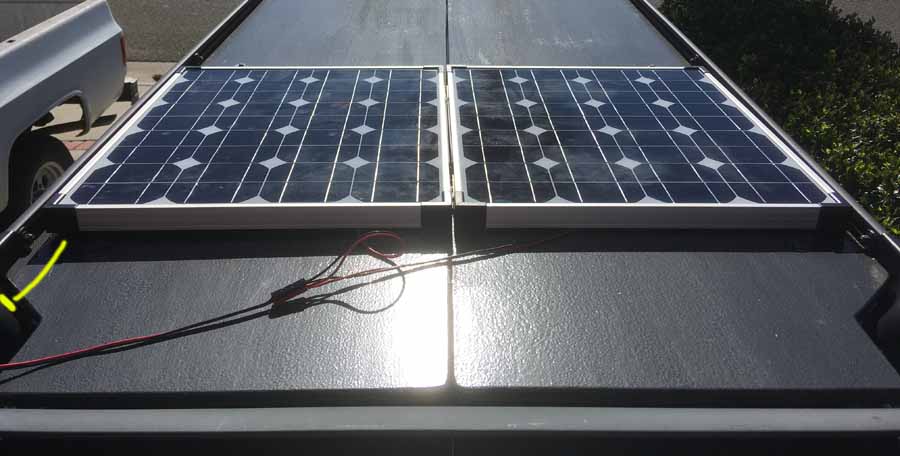
I got this bargain used folding panel kit last year and have been (very slowly) working to integrate it with my Suburban. It already works as-is. I added a long power lead for the panel (~30') so the panel could be set on the ground in the sun while parking the vehicle in the shade. But am also working up a lockable metal frame on my roof deck where the panel can be mounted and connected all the time, feeding power to my cargo area power distribution module and backfeed / charge my Aux battery.
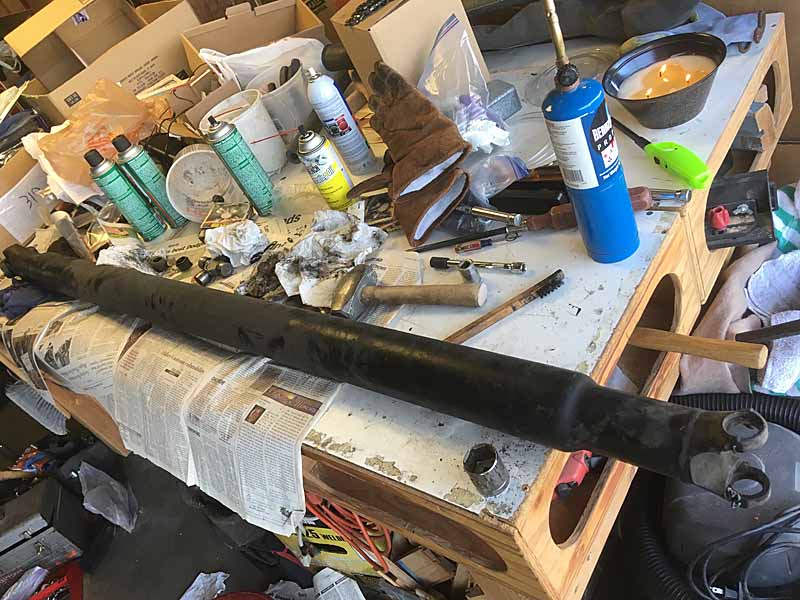
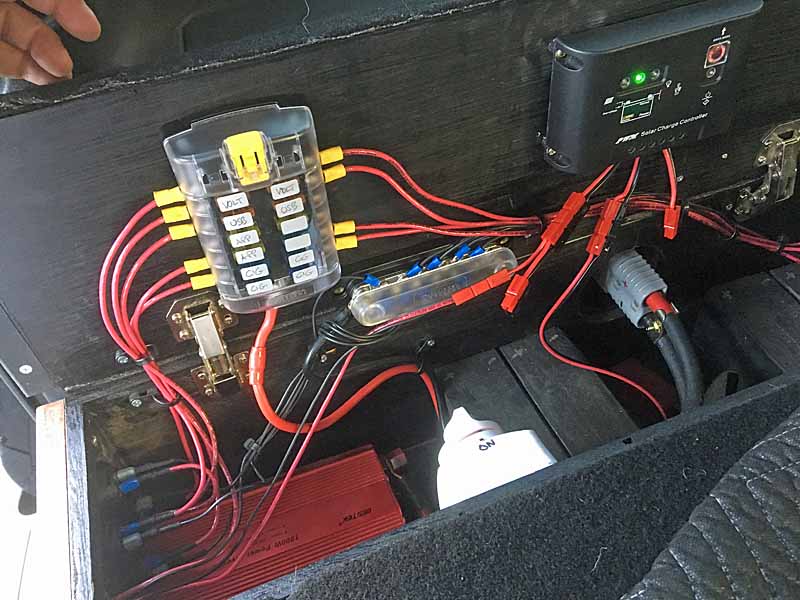
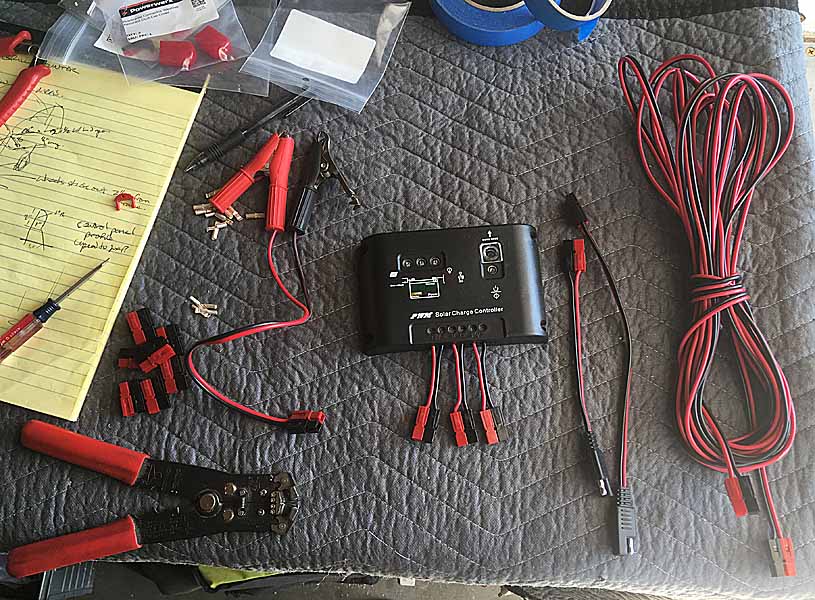
Today I disassembled the wiring setup as it came and dismounted the PWM-type charge controller (CC) from the tilting easel-bracket on the underside of the panel with the intention of mounting the charge controller inside my vehicle's power module. I added a lot of APP connections so I can swap connector cables on the wiring harness and easily change connections as configurations change. If needed I can readily dismount the CC and re-attach it to the panel kit for use somewhere else / away from the vehicle.
I intend to eventually get a better MPPT-style CC to mount in the vehicle and the PWM can be a spare or passed around with the panel kit if needed.
The back side of the panel kit, as it came to me. The bracketry is fairly crude and very sharp-edged. The .com vendor doesn't appear to be in business anymore but this sure seems like a progenitor of the Renology folding kit.

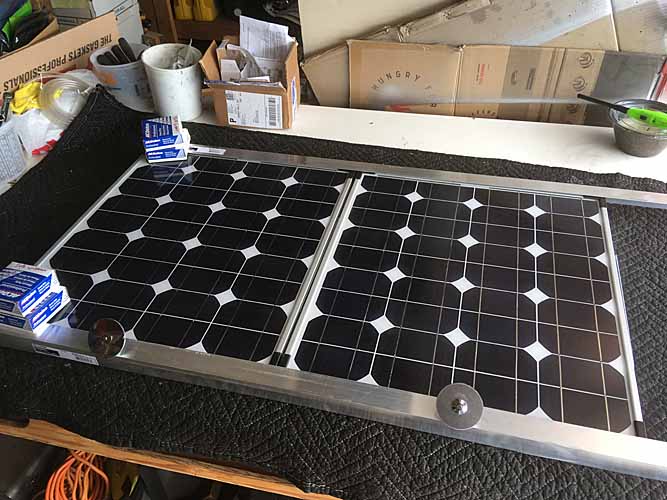
Pretty generic 100W solar panel

Not even a name-branding on the CC

Some of my wiring / connector changes. I have a mobile HAM kit bag that is set up in a similar fashion. Lots of varied power connections which can be swapped / reconfigured via use of APPs. The battery clamp set in this picture is from that other kit. And this way everything can be intermixed.
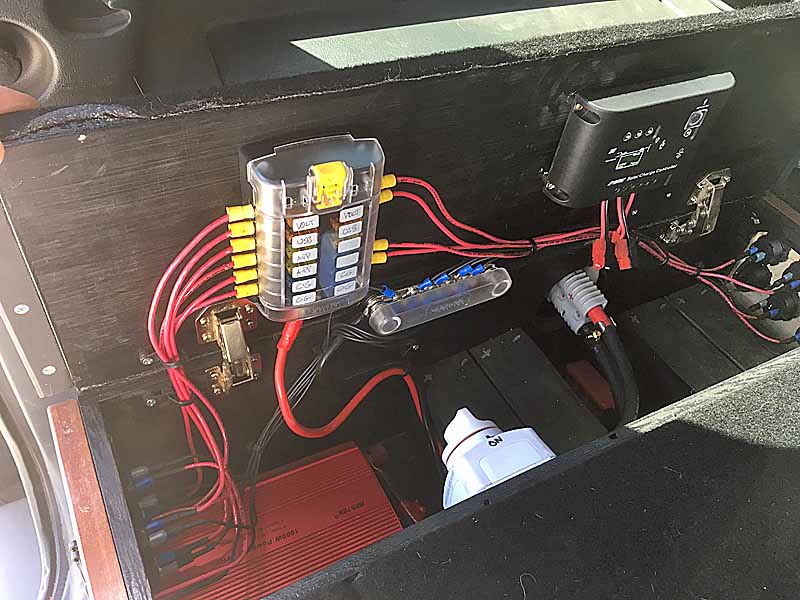
I mounted the CC inside the lid of my Suburban's power module. I still need to fabricate a battery lead with ring connectors to go from the CC to the post terminals inside the power module where the fat 1/0 cables from my Aux battery connect. For testing purposes I'm temporarily using the battery clamp cable end on the wiring leads I can readily reach inside the module (not pictured). I also cut some rubber hose down into 1/4" standoffs for the CC mounts. Thinking to provide an air gap at its back side.

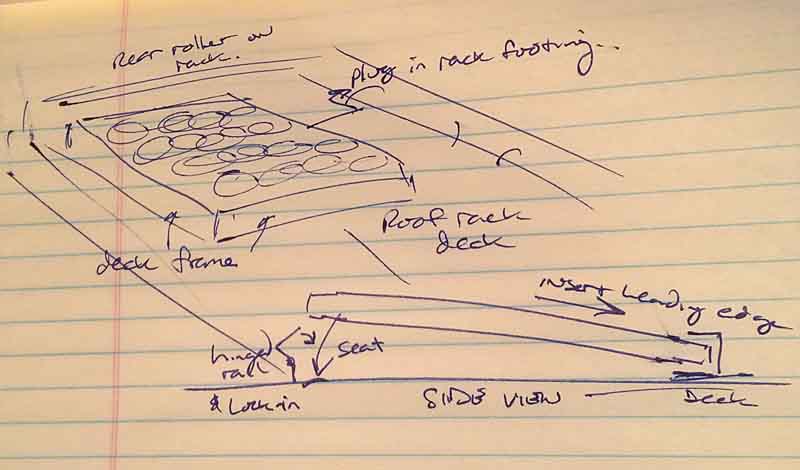
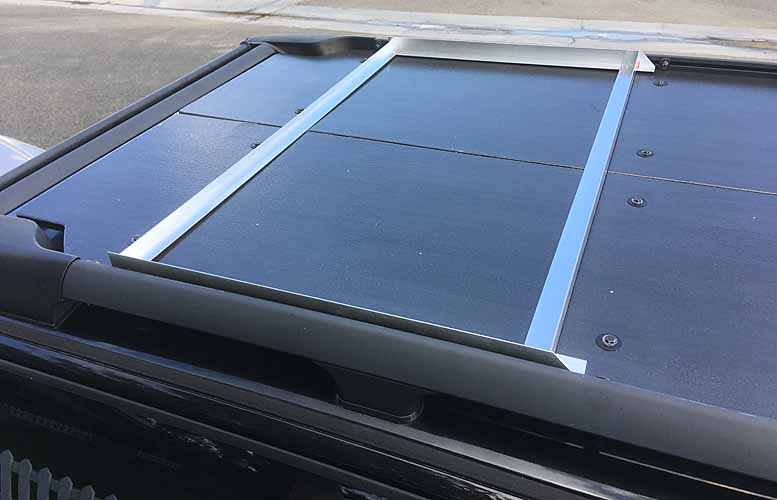
This is a rudimentary bulkhead bracket which I'll be using on the roof, set into the plastic shoe / cover at the driver rear of my Z71 roof rack, passing the wiring down thru the big plastic substructure of the roof rack mount and on thru the vehicle roof and down the 'D' pillar at the driver rear and passing thru the pass-thru into the power module. The solar panel roof bracket will have a power lead to tie this bulkhead connection to the panels when they are roof mounted.
I also have two sets of APP connectors in both the rear- and front-facing panels of my power module. I'll probably be rewiring one of the connectors on the rear-facing panel so it ties directly to the CC. Would need to change the solar panel power in connection to an APP 'Y' connector. Or manually swap which cable is connected when connecting things. But would rather have it already wired so it isn't forgotten.
I COULD 'backfeed' the whole thing just leaving those rear panel APPs wired as they are. Juice goes both ways. But I'd lose the whole 'charge controller' aspect. So I'll go ahead and re-wire and mark one of the APP sets on the rear as dedicated solar panel 'IN'.
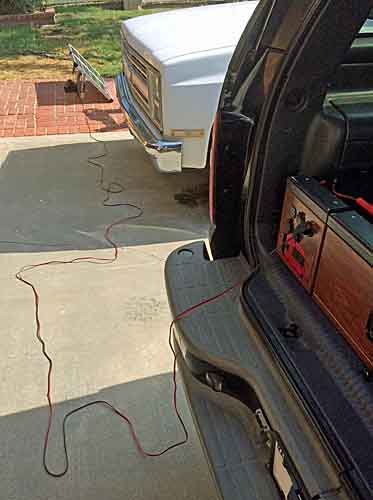
Right now, my CC seems to be happily topping off my Aux battery, with the panels sitting on the hood of my pickup, the cable running on the ground and to the CC mounted in the Sub.

Now I just have to finish the roof deck bracket / mount. I was hoping to cut down the aluminum channel frames of the panel kit, but the panels themselves have such a bulky wiring module glued to their backs that I can't drop the side height of the frames more than 1/4", so it's not worth the trouble. And as the frames are right now, they'll socket into a 2" C-channel fairly well. So 8' of that for my front and rear edges of the mount and 4' of L-angle for the sides and some other odds and ends and I can implement my lockable mount design.
And then add the vehicle wiring extensions and it will be done.
I got this bargain used folding panel kit last year and have been (very slowly) working to integrate it with my Suburban. It already works as-is. I added a long power lead for the panel (~30') so the panel could be set on the ground in the sun while parking the vehicle in the shade. But am also working up a lockable metal frame on my roof deck where the panel can be mounted and connected all the time, feeding power to my cargo area power distribution module and backfeed / charge my Aux battery.
Today I disassembled the wiring setup as it came and dismounted the PWM-type charge controller (CC) from the tilting easel-bracket on the underside of the panel with the intention of mounting the charge controller inside my vehicle's power module. I added a lot of APP connections so I can swap connector cables on the wiring harness and easily change connections as configurations change. If needed I can readily dismount the CC and re-attach it to the panel kit for use somewhere else / away from the vehicle.
I intend to eventually get a better MPPT-style CC to mount in the vehicle and the PWM can be a spare or passed around with the panel kit if needed.
The back side of the panel kit, as it came to me. The bracketry is fairly crude and very sharp-edged. The .com vendor doesn't appear to be in business anymore but this sure seems like a progenitor of the Renology folding kit.
Pretty generic 100W solar panel
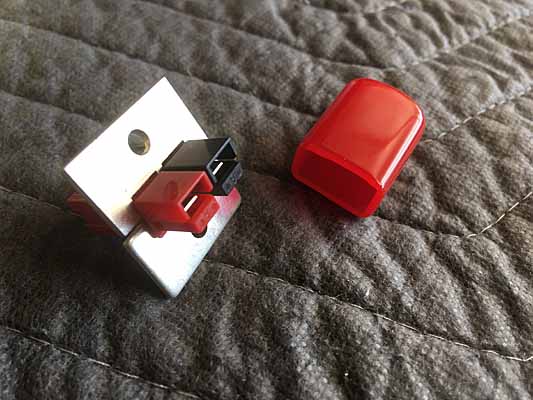
Not even a name-branding on the CC
Some of my wiring / connector changes. I have a mobile HAM kit bag that is set up in a similar fashion. Lots of varied power connections which can be swapped / reconfigured via use of APPs. The battery clamp set in this picture is from that other kit. And this way everything can be intermixed.
I mounted the CC inside the lid of my Suburban's power module. I still need to fabricate a battery lead with ring connectors to go from the CC to the post terminals inside the power module where the fat 1/0 cables from my Aux battery connect. For testing purposes I'm temporarily using the battery clamp cable end on the wiring leads I can readily reach inside the module (not pictured). I also cut some rubber hose down into 1/4" standoffs for the CC mounts. Thinking to provide an air gap at its back side.
This is a rudimentary bulkhead bracket which I'll be using on the roof, set into the plastic shoe / cover at the driver rear of my Z71 roof rack, passing the wiring down thru the big plastic substructure of the roof rack mount and on thru the vehicle roof and down the 'D' pillar at the driver rear and passing thru the pass-thru into the power module. The solar panel roof bracket will have a power lead to tie this bulkhead connection to the panels when they are roof mounted.
I also have two sets of APP connectors in both the rear- and front-facing panels of my power module. I'll probably be rewiring one of the connectors on the rear-facing panel so it ties directly to the CC. Would need to change the solar panel power in connection to an APP 'Y' connector. Or manually swap which cable is connected when connecting things. But would rather have it already wired so it isn't forgotten.
I COULD 'backfeed' the whole thing just leaving those rear panel APPs wired as they are. Juice goes both ways. But I'd lose the whole 'charge controller' aspect. So I'll go ahead and re-wire and mark one of the APP sets on the rear as dedicated solar panel 'IN'.
Right now, my CC seems to be happily topping off my Aux battery, with the panels sitting on the hood of my pickup, the cable running on the ground and to the CC mounted in the Sub.
Now I just have to finish the roof deck bracket / mount. I was hoping to cut down the aluminum channel frames of the panel kit, but the panels themselves have such a bulky wiring module glued to their backs that I can't drop the side height of the frames more than 1/4", so it's not worth the trouble. And as the frames are right now, they'll socket into a 2" C-channel fairly well. So 8' of that for my front and rear edges of the mount and 4' of L-angle for the sides and some other odds and ends and I can implement my lockable mount design.
And then add the vehicle wiring extensions and it will be done.