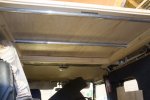
Making a ifting roof on a 110

wuntenn

Adventurer
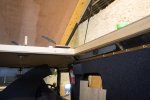
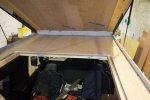
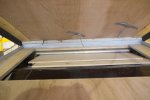
No really exciting stuff happening I'm afraid - it's the 'you-can't-see-this-but-it's-really-important' stuff that is fiddly fiddly and taking up loads of time. Basically when I whacked the hole out of the roof I cut through the strengthening rib in the middle of the van, the one that runs across the width, and also the one that runs front to back. So to tie these four cut-points into the new structure I'm plugging the holes with some wood, which is screwed into place with a couple of screws coming up from below through the rib's alloy.
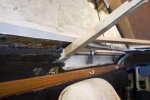
rib-1.jpg

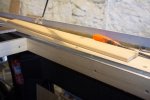
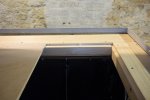
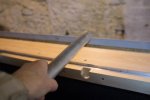
Once its hammered in and solidly fastened, the surplus is cut off.
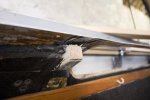
rib-2.jpg

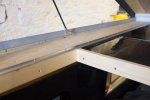
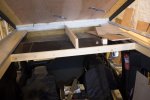
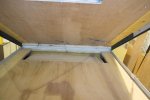
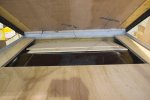
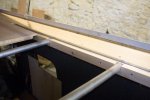
Then the square pine is installed, and screwed through in to the wood-filled rib. It forms the lowest part of what is basically a sandwich with the pine plate on top (as shown in previous post), the metal of the old roof, a packing piece, then square pine at bottom. A slim facing will cover the joint on the vertical face. And underneath this (above the white hooks) there will be a thin plywood veneer on an angle from the wood where the hooks are, up to the back of the lower edge of the square stuff. This will run from the back of the van to the point where it meets the slope above the drivers seat (where the fire extinguisher is). Behind the ply is a void into which I can run wiring or vents, piping or whatever, or recessed lights. On the outside of that void is the new void I've created between the outside of the old roof, and the back of the new alloy that forms the new roof. It's going to be pumped full of building foam.
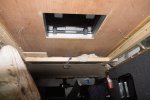
rib-3.jpg

I'm still weighing up options for the bed platform. I only need the rearmost bit, that floats over fresh air, to be reasonably thick and solid - the bit at the front can be thin ply (maybe 1/4" or 3/8") because its not weight bearing - only carrying our feet, or a small boy from time to time. The rearmost bit does need some bracing across the width but I'm leaning towards two pieces of alloy tube that can be stored out of the way and slipped in to take the weight when the bed platform is set up. Doing it that way means I don't have to fasten strengthening members to the actual board which will make its overall thickness increase which in turn will diminish the (already slim) storage space between bed and new roof.
 
Last edited:

bianchi

Observer
Hi the roof is looking good, why did you not just buy a spare roof of ebay with no alpine windows and do the whole build on the floor then just swap roofs when finished.
have you got the canvas for the sides

cheers
 

wuntenn

Adventurer
Couple of reasons: I didn't want to have to take the old roof off - if I did that I'd be into all kinds of other nonsense. Basically I wanted to slowly do the build on the drive but be able to keep using the vehicle and this seemed like a good way to do it by lifting on the frame - doing some work - lifting it off. Plus it's just more expense, and the cost of another roof is a good chunk of the cost of a new fridge! And I'm Scottish so whilst I'm happy to be extravagant in some ways, I'll happily save and recycle in other ways. The people who fitted the alpine lights made a pigs ear of it and they're squint, too high and not equally spaced so nobody would be interested in buying the old roof off me so I decided to keep it. Also - the roof has very little corrosion and buying something else at a 'cheap' price might be to take on a crumbling thing.

Fabric is happening shortly - going to get the local tarpaulin/marquee maker to run it up for me - have already run it past them and they're more than happy and able - I needed to get the gas struts fitted to get a dead size for the fit and now they're on and working I can get the exact measurements.
 
Last edited:

wuntenn

Adventurer
Today's little bit of progress is the roof hatch screwed down and mastic all over the place so hopefully watertight now, and a bit of trimming around the roof cut and fitting the alloy angle that will support the bed platform. Made a decision on the bed - it's going to be 1/2" plywood with detachable struts underneath either timber or alloy pipe, will decide when I get the board on and see how wibbly it is. The bit down at my feet will be 1/4"ply - more than sufficient.

Anyway - all trimmed up (although the underside is still to be finished).

trim-1.jpg

Alloy L angle for the bed platform to run on.

trim-2.jpg

Then looking towards the front with the remains of the old roof underneath.

trim-3.jpg

And then the whole of the front. Ignore the plank on its edge - that's me working out where the 1/4 ply will go - I'm thinking I may have it in two pieces so they store underneath and get popped in when needed. It's not as straightforward as it looks because the two sections of the bed will be different thicknesses so I've got to be 'creative'!

trim-4.jpg
 

smithco1

New member
Still enjoying this thread immensely. Good work!

I wonder if wooden slats wouldn't do the job of the plywood and yet save a bit of weight. I'm thinking like Ikea design here. I imagine you would need to strengthen the end slat (where you climb in and out from) but otherwise some evenly spaced clear pine, or what ever serves, would probably do the job. If you wanted to be able to roll the mattress back for head room, you could staple some cordage of some sort to the slats and then you could roll it back when the bed is not in use too.

If you were lucky, the rolled up slats in combination with a bit of the folded mattress would create an upper deck bench for an audience while you're doing the happy dance in the back of your truck. :jumping:
 

wuntenn

Adventurer
Cheers Smithco!

Aye that's a good suggestion - one I considered, but the rolled slats will be bulkier than I have space for. What I've got is a reasonable compromise - the 1/2" ply will sit in the alloy runners, perfectly flush. It will typically be slid to the front of the van during the day, leaving the whole of the rear area open, so when the roof is up there's walking headroom for me (at 6' tall) all the way from the back door to the front edge of the opened up roof (about 6' linear distance). This also means when the roof is closed that the board pushed forwards leaves the roof hatch uncovered so loads of light in the back.

When it needs to be a bed, the 1/2" ply is slid rearwards, and rests on two tubes that are dropped into slots on either side (simple alloy U shapes). I've made it so that the ply can initially slide all the way to the back temporarily which allows me some space to get up in front of the board to be able to reach into the void above the drivers seat and extract two pieces of 1/4" ply which form the foot area of the sleeping platform - slim, light, easy to handle and use when needed. As there is so little headroom at that point above the front seat nobody will ever be able to stand on it, and my wee boy crawling on it will not damage it such is the strength of 1/4" ply.

Now with a little bit of ingenuity I can also make that bed platform my camp table, it can slot onto a runner on the side of the van under the awning and be a suitable size for three or four people. My previous iteration of internal fitments on my 110 was based on plastic boxes - two small and two large ones that covered the floor area, with a 1/2" ply top over them in very carefully measured sizes that was immensely strong (because supported by the boxes) and formed the sleeping platform. When the boxes were removed and the ply lifted out, the two small boxes became a table base with a table-sized piece of the ply on top, and the two large boxes had a Therm-a-Rest chair kit on top to make two very comfortable chairs for each of us.

I'm intending the same system in this build - with various things having multiple functions depending on their location in the van.
 

wuntenn

Adventurer
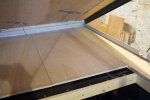
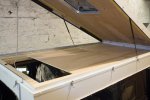
A wee bit further today. This is the sleeping platform - first pic shows it pushed to front end of van, so a nice big clear space at the rear to walk about in.

bed-1.jpg

...and then pulled out to about 7' from front leaving a reasonable space at the back to climb up onto the top through.

bed-4.jpg

And when the main platform is pulled out it reveals the two pieces for the foot end, concealed in the recess. To actual reach these the sleeping platform gets shoved right to the rear of the van so the 2' space is now at the middle of the van and I can pop up through there and reach in to get the foot bits and stick them in.

bed-2.jpg

bed-3.jpg

..this is them pulled out and popped in place to make the foot of the bed.

bed-6.jpg

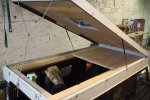
And then the complete thing all assembled, seen from above and below - still have to install the cross supports underneath - they will just pop in and out as required and be stored in the recess with the foot bits.

bed-8.jpg

bed-7.jpg

The ply is cr*p and has warped once it was cut - you can see the left bit of the foot is slightly popped up so that needs some remedy or other - maybe a piece cut from a new sheet. However what this system enables is the foot sections to be easily stored and pulled out when needed and to be used as a table top outside, clipped to the van side.
 

krl81

Adventurer
Brilliant!
About the warping. Take the warped piece, put a piece of 2*2 ( or even 2*4 standing on edge) diagonally under it so the warped end points up and then put something heavy on the corners that don't have the 2*4 under it. Leave it for a couple of days, hopefully TADA! :) Don't be alarmed if you hear a crackle, its just proof of you telling the wood what to do. :)
We do this from time to time at work with warped wardrobe doors and other small bits and pieces.
 

wuntenn

Adventurer
Thanks krl81 - aye, I've tweaked some stuff like that before - this ply is so rubbish I suspect it will do the crackle thing and then actually crack!
 

smithco1

New member
Quite ingenious using the plywood for dining. I love that. Enough said.

The splitting plywood I have dealt with too. Usually for me problem is the wood hasn't cured enough before going into the ply process in the first place. In the states we call this Chinese ply. Because generally it is. It's our own fault for setting the standard and then buying it.

In building stage sets we deal with this type of split ply in a few different ways:

1) First is to try and re-glue it which requires heat and pressure and time. Doing that requires you to up front admit that it may not last longer than a series run of Elf (yes that went to stage) while still looking good. Reason why is that you still have wood that is warping as it's drying and ageing and oh yeah, gluing. Thus the stray layer of ply will never conform unless you help nature along to shrinkage. Some how.

2) Use bleach. I used to do this a ton when I was modeling airplanes as a tot and even did this on my own house with arched doorways. Essentially soak the offending section of wood with a 50/50 bleach/hot water mix for a bit and then follow with the above recipe to squeeze and cure the wood. Problem with this is you will loose colour in the outer visible sheet and of course bleach breaks down the fibres that make up any cellulose material. So strength lost. Perhaps negligible strength loss though.

3) Replace the squeaky bolt with a non squeaky bolt. Probably the easiest to replace that piece of wood with a new (better) piece.

But I like your approach here. Keep it cheap and don't even worry about it. If it becomes a low hanger then put a piece of angled aluminium on the edge to stop it catching on your evening wear. It the whole outter layer comes loose then call it the living section of the truck. I dunno, but I'm sure you will be clever enough to figure it out.

Cheers,
S
 

wuntenn

Adventurer
Thanks Smithco - the ply stack in the builders yard was variable from diabolical to just about acceptable. We went through a load of them before I got one that was reasonable. It might do, I can tweak it a bit, but I need another sheet for the folding seating area that will be made just below, at the rear of the front seats, which might yield a cutting suitable to replace it. That next part is where my wee lad will sleep - probably a bi-fold design with the second 'leaf' forming a sleeping platform for him, which will accommodate him comfortably until he gets to about 5' tall - which is a good few years yet.

I like the 'evening wear' suggestion! But the reality is it's a LandRover with a folding shed on top, and my sleeping wear will not be a smoking jacket and slippers, and the 'four-poster bed' is a thermarest and a down sleeping bag!
 

wuntenn

Adventurer
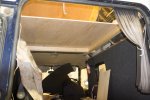
Well thats the bed more-or-less done. Board pushed to the front - normal daytime position.

pipe-1.jpg

For sleeping it gets pulled back to reveal the foot end (in two pieces) and the support pipes neatly tucked away. (will get some clips to hold the pipes and stop them clanking).

pipe-6.jpg

Pipes popped into slots.

pipe-5.jpg

pipe-4.jpg

Then board pulled over for sleeping on, with almost two feet of space left at rear to climb up through.

pipe-2.jpg

Had a very spirited bounce around on it, sufficient to get the suspension rocking back and forwards and not a creak nor groan from it so I guess its strong enough.
 

wuntenn

Adventurer
Hoping to be able to use it this summer.

I still have to get the fabric sides measured up and fabricated, that'll be the next critical job. I've ordered an Engel fridge and need to fit that on HD slides that come out sideways - its the important factor because it's dimensions and location will determine where the Exmoor Lock/Fold seat I've already got in the back for my wee lad will be - where it is currently looks to be about 1" too tight for the Engel to fit behind it so I think I may need to move it forwards. (and that impacts on a metal storage box I've built across the width behind the bulkhead so that'll need to be chopped as well. A lot of fiddly bits!)

Once all that's done and the fridge is in, it gives me an exact size/location to be able to establish where to fit a gas cooker (above the fridge) and then I can fit the small sink on the opposite side. The idea is that the cooker and sink will be located so that they are just inside at the back door area and usable when the sleeping platform is deployed - so basically the sink and cooker will be oriented to be in the 2' gap at the end of the bed so I can lean out and make some tea without any drama!
 

Forum statistics

Threads
186,288
Messages
2,884,067
Members
226,151
Latest member
Dgollman
Top