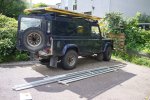
Making a ifting roof on a 110

tacr2man

Adventurer
the sika that they use for windscreen direct bonding should do the trick there is a particular version that is used when there is front airbag in vehicle . I would bond direct to the aluminium , as otherwise you are relying on the paint bond . They stick aircraft together nowadays rather than rivet etc . so the suitable adhesive must be out there .
 

wuntenn

Adventurer
Aye - I think my problem was in assuming the paint was well bonded! Whatever goes on next will be direct to alloy.
 

wuntenn

Adventurer
Well the solar panel is now welded on with some kind of permanent rubberymasticy stuff that sticks even underwater (so it claims), and it was well weighted as it dried overnight so hopefully thats it on more securely than before.
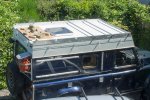
fbrc36230.jpg

This morning I wrestled an 8x4 foot sheet of thin flooring ply onto the side and made a template of the angles at rear for the fabric maker to work off - just to confirm his measured sizes. Was interesting to see the roof with 'form' and 'structure' as it really gives a sense of the shape and space inside.
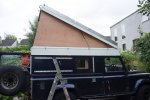
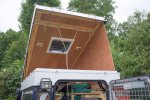
fbrc36239.jpg

fbrc36241.jpg

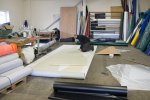
Next into town and within a short time it was cut and the lower edge pocket stitched leaving the top loose and unstitched so that I can temporarily fix the bottom edge on to the van and establish exactly the height required, allowing a little less so that the roof struts are pushing up against it to keep it under tension. It seemed more sensible (although more work) to do it this way, but probably more likely to get an exact fit. The last thing I want is bits of fabric flopping around looking shabby, and which will also crease and wear unevenly.
fbrc36244.jpg

I'll have a go at fitting it over the weekend depending on the weather. When it's on I'll draw a few lines to allow the fellow doing the sewing to have exact dimensions to work to.
 

Arjan

Fossil Overlander
This looks very good - would love to have solid sides as we do a lot of Winter Laning...

You could write a "building a lifting roof for Dummies book" with a this here !
 

wuntenn

Adventurer
I'm off to the city in a week or two to collect the alloy for the hard sides. They will store on the roof and be clipped in when needed. I can have insulation glued onto the back of them or simply carry insulated material to velcro inside over the existing fabric sides. The method of fastening the alloy panels is to use the external clips that hold the roof in the closed position. Interlocking alloy extrusions should make the edges secure. See the drawings:

lrfabric2.034.jpg

As you can see above the two sides are in two pieces that simply slide into the gap, with the upper edge an H section fixed to the slide-in panel and which forms a seal against the existing gasket on the raising part of the new roof. The vertical edge seals against the other side panel using the same H section. The rear section is split horizontally and hinged so it can be 'bent' outwards and pushed up against the top gasket, and onto the sides. The hinge also allows the panel to be folded to make it smaller for storage on the roof.

You can see the various extrusion shapes here (they are the bits in red):

lrclipsides.033.jpg

Each section is placed in starting with the thin edges of the wedge sides. When the clip is fastened it wont move and the next section can be installed. Each side is clipped in and then the rear piece is pushed in and seals the whole thing and at the same time the alloy corner extrusions seal it, make it rigid and lock it all into place.

Benefits are that in summer I can have fabric sides and in winter the addition of the hard sides makes it wind and weather proof, and installation is quick and simple. Doing it in bad weather is no problem either because the inner waterproof fabric is still intact and acts as a weather barrier and condensation stopper.

It was very very difficult to finds the alloy extrusions that are the specific shapes I need, but after a lot of research I tracked them down. The crucial one is the one that is like a U with a handle on it that goes on the back panel to seal around the edge of the side panels,a s it holds the whole thing together.

The alloy sides are Dibond material which is signmakers alloy - very thin alloy faces and a light plastic core - really strong and rigid and UV stable as its intended for outdoors use.

PS Ignore the attached jpg it was a previous image with typos but I cant seem to delete it.
 

Attachments

  • lrclipsides.034.jpg
    lrclipsides.034.jpg
    186.3 KB · Views: 52
Last edited:

frans

Adventurer
I have an odd question that occurred to me. Did you and your fabric person talk about the direction of weave on the fabric when it gets installed? Soon I will be building my lifting top and I am wondering if the direction of weave matters in terms of longevity and or wear
thank you
frans
ps: looking good!
 

wuntenn

Adventurer
Hi Frans - no. The fabric is very strong stuff and having chosen it (from a vast selection) I discussed it's properties with the supplier (not the fabricator) having explained what it was intended for, they thought it was the perfect choice and had no worries about strength as the 'load' is spread evenly along its entire length. What I did specify in the sewing is that the fabric is doubled over at the edges with sufficient overlap that the doubled fabric extends up to where the continual folding over the alloy side will be. This should help with that definite wear area.

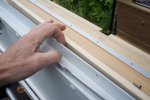
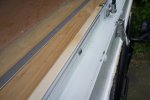
Today I drilled the alloy strips that will hold the fabric in place, and then used them as templates to drill the fixing holes in the lower portion of the new roof. You can see the method I'm using in the pictures - from the outside there's the alloy strip (with barcode) and then the upstand of the new roof, and behind it the pine batten that will take the back of the screw and provide a nice finish on the inside. The fabric (obviously) going between alloy strip and upstand.

fbrc36252.jpg

fbrc36253.jpg
 

wuntenn

Adventurer
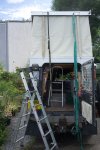
Been doing various things over the last wee while - fitting plumbing, connecting mains wiring, inverter etc. However today I tackled the fabric sides. What a bugger! Really difficult job - all the alloy stuff pales into insignificance compared to the fabric, mainly because the fabric is not rigid and can flex, wobble, bend, flop and stretch (a bit). But with the help of my neighbour it went on. I still need to fettle it a bit and finish off the internal fixings all around.

fbrc36448.jpg

To fasten it I stuffed a couple of pieces of wood up in the end, sized so they are about 1" less than the fully open height (as pushed up by the struts) and then pulled the roof down onto those pieces of wood with the ratchet straps (green and black). This gave me a firm structure to push up against as I screwed the fabric into place, but also building in some upwards movement and 'push' from the struts to help keep the fabric taut when the straps are released (in theory!).

fbrc36449.jpg

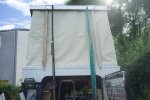
When we finally removed the tie down straps and battens it ended up not looking too bad!

fbrc36450.jpg

There's a slight problem at the back where we've perhaps fastened the fabric on a wee bit too far 'uphill' on the sloping roof which is making the fabric a wee bit prone to catching when the roof closes but I think I can resolve that issue with tighter elastic cords inside.

fbrc36451.jpg

What I've done is attach a spider's web of hooked-end cords across the width which pull the fabric in as the roof closes, but the back end needs to be able to pull quite a ways in to be able to easily clear the perimeter joint/seal. Hopefully be able to sort that tomorrow. When the roof is closed the cords are unhooked and stowed and the floppy fabric rolled up and tucked away into the gap between the lower and upper roof where it should be safe and out of the way.

But it fits, it works, and it looks ok.
 
Last edited:

4Rescue

Expedition Leader
Very cool... I love the construction and the engineering aye. Still reading through the full thread but so far looks like it's been more then "well" thought out aye. Looks beautifully constructed too.

I'm gonna have to keep my eyes peeled for this next time I'm over cause all my family over there are in the Highlands in/around Inverness or W.Daviot (We're Davidsons and some Brownells).

Cheers

Dave
 

wuntenn

Adventurer
Cheers krl81!

Hi Dave - thanks for the compliments. There's a few rough edges and things I would have done differently had I been using a proper workshop from the start. Driveway engineering is ok but it has its limitations!

Aye you might spot the Landy if you're about - we're just down the road from Daviot, we take our wee lad up to the vintage tractor rally every summer on the Daviot Estate. A grand day out!
 

wuntenn

Adventurer
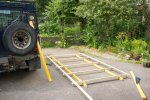
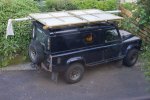
Just been looking at the dates in the metadata of the images I've been taking. It's exactly 1 year since I started this project these pix are from the 4th, 5th and 6th of July last year - this was making a timber frame to bring back the alloy from Glasgow on my roof, then the load on the roof, and the pile of alloy extrusions on the ground. And then it was downhill all the way from there!

x10011988.jpg

x10012011.jpg

x10012012.jpg
 

wuntenn

Adventurer
Hopefully not. The fabric is polyester weave, with UV and mildew treatment and was recommended by a major fabric supplier as ideal due to strength and longevity due to its superior weather resistance. It's quite 'shiny' and only slightly breathable so should shed water pretty well. As this is not a 'desert' type set up but more intended for the north (I'm at 56 degrees or so north) having it highly breathable was not a priority. There are reasonable sized fabric window flaps on both sides which can roll up (with bug nets behind) and those plus the roof vent (400mm square) should be ventilation enough.

Only thing I need to do is go over all the seams with seamsealer as the sewing process is pretty invasive and has created several potential leak points.
 

Forum statistics

Threads
186,293
Messages
2,884,125
Members
226,151
Latest member
Dgollman
Top