Matthewp's MuTTT (Multiple Terrain Tactical Teardrop).

matthewp

Combat Truck Monkey
The last couple days involved work on the control box and the dividing wall between the kitchen and sleeping area. This wall involves a 2" gap for water and electrical lines. Here is a top view:
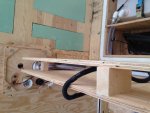
ImageUploadedByTapatalk1399334744.279881.jpg

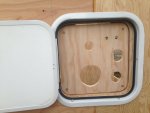
From the sleeping bay side, there will be a removable panel:
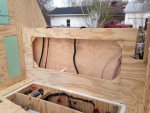
ImageUploadedByTapatalk1399334801.221790.jpg

The kitchen side is open behind the area that will be behind the drawers:
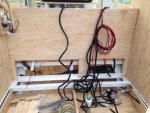
ImageUploadedByTapatalk1399334873.116266.jpg

The concept of this will to be to maximize the access area in the void.
 

matthewp

Combat Truck Monkey
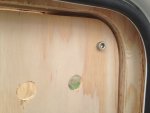
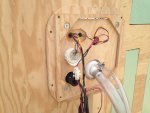
The box behind the control panel will be about 4" deep. Access will be through the control panel being removable by four bolts:

ImageUploadedByTapatalk1399335024.049924.jpg

ImageUploadedByTapatalk1399335037.625123.jpg

ImageUploadedByTapatalk1399335055.873806.jpg
 
Wow, you're moving right along! I could have swore I subscribed to your thread. Coming along nicely Matt. I'm liking all of the compartments. Mine is beginning to seem like a sardine can with every advancement I make lol.
 

Grim Reaper

Expedition Leader
I wish I had more progress! With finances on hold until after Christmas, and being hijacked to build a custom garage door for a friend, the trailer sits un-loved!
.
Good news is, Kristy, my wife, is hot in the design of the kitchen with me!

Elmo_4_VT, does this look right?


View attachment 187536

I wouldn't do it that way.
I'd do it the way it's done on your car and the switch is on the ground leg.

The frame of the trailer is going to be grounded to the battery. Run the positive to the light. Run the ground to the switch and from the switch to the frame.

This is better for several reasons. You can protect the wiring to the light better in most instances. You also only need one wire to the switch instead of a wire from the power source to the switch to the light.
If the wire at the switch gets cut or pinched then it's not a dead short to the battery that blows the fuse. It either turns the light on if shorted or if the wire is cut then no light at all. That way if you have multiple lights on the same fuse you don't loose the rest.
 

matthewp

Combat Truck Monkey
I'd do it the way it's done on your car and the switch is on the ground leg.

Funnily enough, I ended up changing and doing that by recommendation from an electrcican friend. Thanks for the explaination though! It's nice to have it explained well as to why.
 

roverpat

Observer
More pictures please!! The frame design is phenomenal. Water tanks and battery situated nice and low to help with center of gravity is brilliant. I dont plan to build a teardrop however the frame is exactly what I was thinking of doing. Great build!!
 

matthewp

Combat Truck Monkey
More pictures please!! The frame design is phenomenal. Water tanks and battery situated nice and low to help with center of gravity is brilliant. I dont plan to build a teardrop however the frame is exactly what I was thinking of doing. Great build!!

Please forgive me for that! It has been a busy week. I hope to have last weekend's pictures up tonight.... And, of course, hope to have more updates by the end of the weekend.
 

matthewp

Combat Truck Monkey
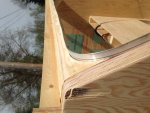
I decided to seal my rear hatch using a similar design to my Jeep. It therefore involved finding the right seal and figuring out how to work more metal magic.

Here's the aluminum (more reasonably malleable than steel, but still plenty strong for the use).

ImageUploadedByTapatalk1400285018.063452.jpg

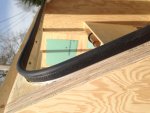
The seal trim is screwed every 6". I worked the metal around the opening one screw at a time, using a rubber mallet to push it into the corners.

ImageUploadedByTapatalk1400285038.094349.jpg

All finished with the rubber seal (found on grainger.com) in place.

ImageUploadedByTapatalk1400285057.097919.jpg

When I go to finish the bodywork, I will remove the trim, then seal it to the wood with 3M 5200 before reinstalling the screws.
 
Last edited:

matthewp

Combat Truck Monkey
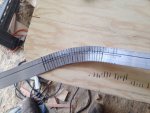
To get around the vertical angles (30*), I cut a series of gaps in the trim, about 3/4 of the way through, with my Dremel and a grinding disk.

ImageUploadedByTapatalk1400285510.426089.jpg

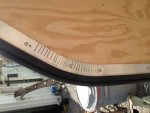
After carefully bending with a hammer, then installing, the finished product looks pretty good.

ImageUploadedByTapatalk1400285530.270997.jpg

The open gaps remaining in the metal around the curve will be sealed with JB Weld and sanded down before installing and sealing.
 
Last edited:

matthewp

Combat Truck Monkey
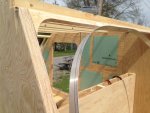
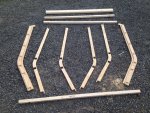
Here's the rear hatch frame pieces cut out. It's a 2 X 4 up top with 1/2" plywood for the ribs

ImageUploadedByTapatalk1400286072.096856.jpg

All screwed and glued together.

ve5uhube.jpg
 
The open areas in the metal around the curve will be sealed with JB Weld and sanded down before installing and sealing.

What about a nice looking paneling to cover the trim and sides? Would keep you from having to JB weld and it would look clean too.


Sent from my XT1030 using Tapatalk
 

matthewp

Combat Truck Monkey
What about a nice looking paneling to cover the trim and sides? Would keep you from having to JB weld and it would look clean too.


Sent from my XT1030 using Tapatalk

Thee outside panels of the hatch visually cover the seal. I will be able to show you after this weekend.
 

Forum statistics

Threads
186,384
Messages
2,885,286
Members
226,303
Latest member
guapstyle
Top