My 86' T4R-V8 Swap & SAS Build

I also started cutting off all of the ifs brackets and started cleaning up the frame. This is a chore if all you have is a grinder, a plasma, or oxy/ace torch would make it alot easier!

I do all my cutoff with a sawzall and a 6" diameter .045" thick cutoff wheel. It does take time, but there is a lot less mess to clean up after. I get really close to the frame with the cutoff wheel.

Looks good so far.
 

rustED

Adventurer
I do all my cutoff with a sawzall and a 6" diameter .045" thick cutoff wheel. It does take time, but there is a lot less mess to clean up after. I get really close to the frame with the cutoff wheel.

Looks good so far.

Thanks! I just finished reading through your build, very nice fabrication work. I wish I had access to some better tools/equipment, just been making do with what I have, which isn't much, lol.

Yeah the grinder and cutoff wheel work well for me, just went through alot of skinny wheels! There were a few times where it was kind of sketchy because of the angle I was cutting at, I just took my time as to not bind of the cut off wheel, I'd hate to have one explode that close to me! It definitely helped already having the engine pulled out to get to all the ifs brackets and cleanup the frame rails.
 
Last edited:
Thanks.

You have to let the cutting wheel do the cutting. Forcing the wheel only wears them out fast. I can do a cutoff with one wheel!

But the safety concerns...I have scars to prove what you said is true. I had one grab once, it rode up my face and then knocked me out. I woke up in a pool of blood. Nobody else was around so I called my neighbor and told her I may need medical assistance. She showed up with a beer in each hand and gave them both to me. The look on her face when she saw me proved that I needed both beers.

I have some cool neighbors.
 

rustED

Adventurer
^Dang, that sounds pretty bad! Good thing your neighbor came to the rescue, sounds like you need needed at least a couple beers! I haven't got caught that badly yet, i 2as building a flat bed for my dads truck years ago, and got the backside of my finger still not sure how I did it, but it went to the bone. My wife (she was my girlfriend back then) went to doctor it up and almost passed out from seeing the blood, lol. I just wrapped it in some tape and went back to work, lol.

This is off the subject, but the last pic I posted in post #42 above, does it look all scrambled to anyone else, or is it just my tablet?
 

rustED

Adventurer
What are you doing for bumpers and sliders? You going to make them or buy them?

I will probably build my own rear bumper and spare tire carrier. I'm thinking of using 2x3" for the main bumper, and add some D rings, then 2" or maybe 1-1/2" for some side protection. I'll go back and edit this post and add some pics of a similar bumper later. I'm not sure on the front, I'd like to build a plate front bumper off of a TG winch mount. I might just buy some sliders.
 
The box tubing in the rear is a good idea. It's strong so when you drop off a ledge and land on it it won't tweak. I use the box tubing laid flat and partially tuck it under the tailgate for a tidy look.


rustED

Adventurer
^That's a cool bumper design! Do you hwve anymore pics?...I wish I had a tube bender...


I haven't done much on my 4runner lately. I worked on it a little today trying to figure out how I was going to mount my hoodpins. It was a beautiful sunny day, but still too cold for me to stay motivated.


The Synergy hoodpins I'm using are a little different than the regular style. I have to use a hole saw to cut a 1 "hole through my hood so that the polyurethane grommet will fit through the hood. I made these brackets to avoid having to drill through the support structure on the underside of the hood. I will paint the brackets when I'm finished.


Last edited:

rustED

Adventurer
Hood Pins

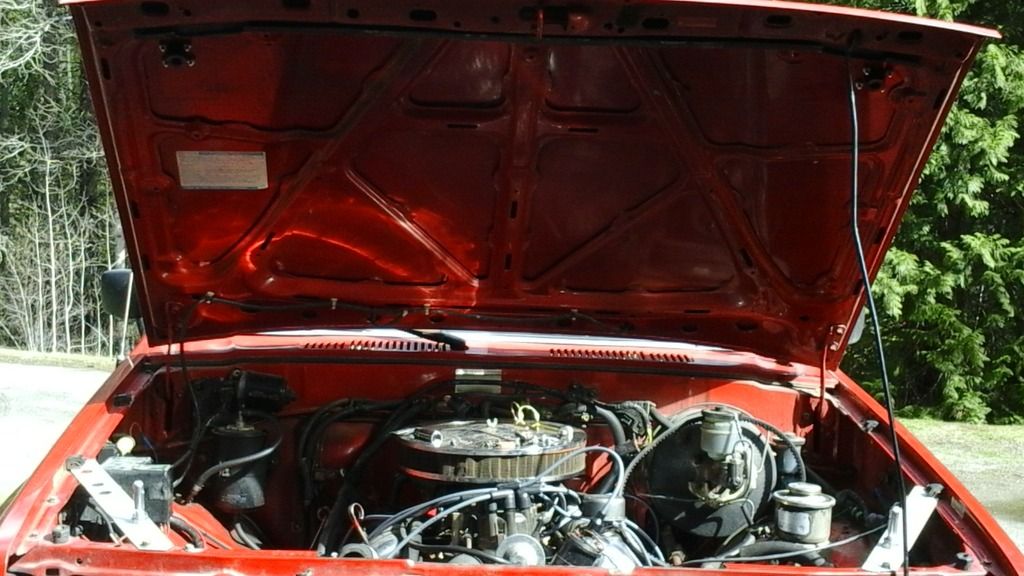
Well, I did a little more work on the 4runner. I (mostly) finished installing the hood pins. I still need to go back and paint the angle iron supports that the pins bolt to, probably going to paint them paint them red.


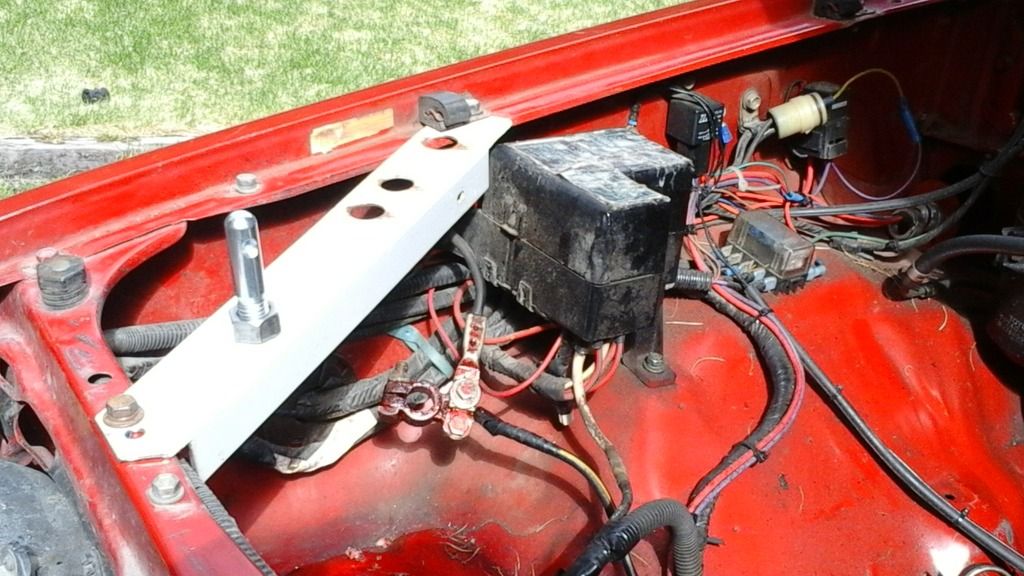
^I got the other support made, i just used some scrap I had laying around, those 3 large holes were already there. I may go back and make new supports later, i really wanted to make them triangle shaped out of some 14 gauge and cut holes and flare them with a dimple die, I have an image in my head of how I want it to look, I just dont have enough 14 gauge scrap, nor the tools to accomplish it at the moment, lol.
I will have to relocate the windshield washer fluid reservoir. I had to take out the 1" spacer that came with my Optima battery, so the battery will sit low enough and allow clearance for the support, so I'll have to modify my battery hold down strap now.


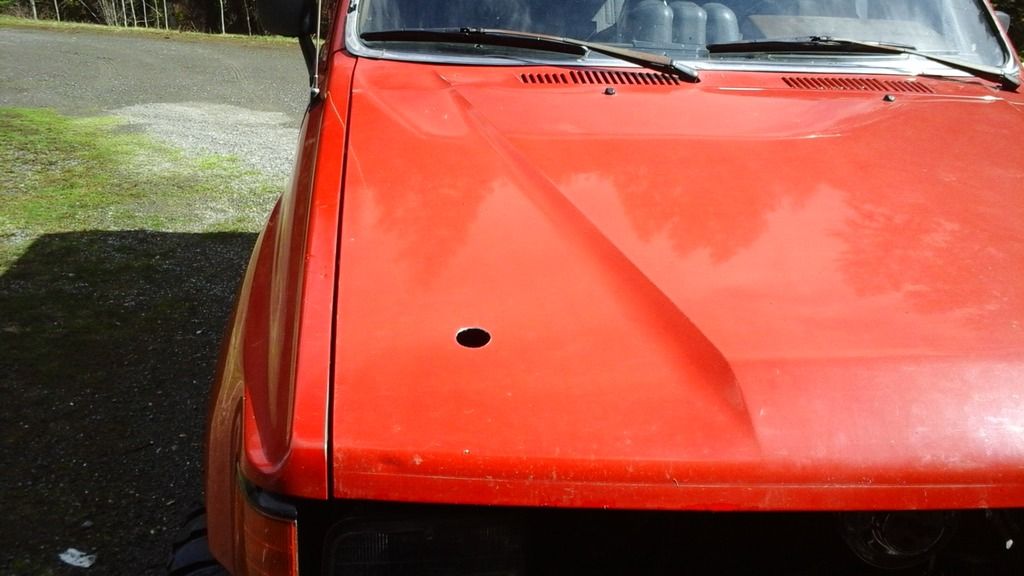
^no turning back now!!!


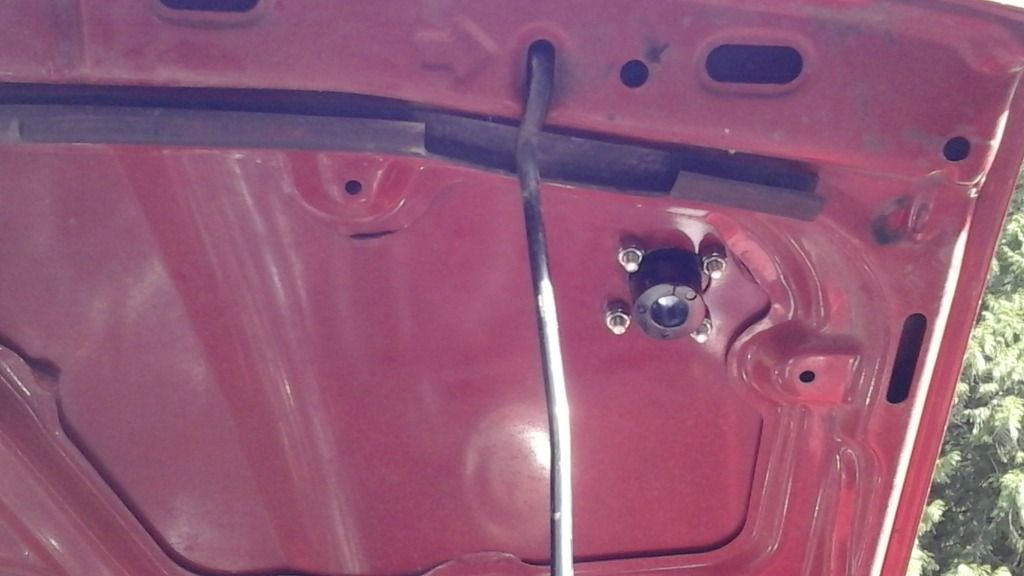
^here's a couple of pics of the Poly Performance hood pin bushing from the underside of the hood.


Overall I'm pretty happy with the install, I would totally recommend these hood pins to anyone that might need to install some, the quality is great there is no metal on metal contact, they should literally last forever. One side note. When installing, just snug down the 4 bolts (they come with nylock nuts) don't over tighten, as it might suck the poly bushing down to much and cause a dent in the hood.

Next on the list is cutting out more of the core support, mount the new radiator, and build a new core support/radiator mount. And I still need to install the new timing chain.
 
Last edited:

rustED

Adventurer
Radiator mock-up

I got the radiator mocked into place today. I had to trim some of the inside of the grille to make the grille fit into the stock location. It was pretty tight, but got it to fit with minimal trimming, it's all on the inside of the grille, so it doesn't show. I had to cut a hole in the hood support structure in the front to clearance for the radiator cap. I need to get a peice of 1" square tubing to bolt in and tie the 2 sides of the core support back together.


rustED

Adventurer


I got the core support finished up and painted.

I also won a set of 35x12.50x17LT BFGoodrich KO2 AT's. I won these tires on another forum that was having a contest, I'm pretty stoked, I've never won anything like this before.


^^^the BFG'S are a little taller than my old Federal MTs.
 
Last edited:

rustED

Adventurer
SHE'S ALIVE!!!

Finally had some time to work on the 4runner. I installed the new double roller timing chain set. What a PITA! The install went good, but after I got it in it wouldn't start, no spark. It ended up that the distributor roll pin had sheared off so the gear was just spinning on the shaft. So I pulled the distributor and replaced the gear pin. But when I pulled the distributor out, the oil pump drive shaft came out with it, and then fell into the oil pan! So I had to drop the oil pan reinstall the oil pump driveshaft and reinstall the distributor. Finally got it all back together and running. Also got my new radiator in for the last time. I also replaced the throttle cable with a metal throttle linkage from a 76' Ford F150, now the throttle response is 100% better, the feel of the pedal is alot better, before it felt kinda spongy, and it had alot of play in the pedal, its alot more adjustable now as well.


^^^new radiator finally in, I wasn't able to use my winch mount since I moved the radiator forward more, I'll have to come up with an alternative probably build a custom front bumper, I've been wanting to ditch the Smittybuilt anyways.


^^^76' Ford F150 throttle linkage installed


^^^had to take the top off!
 
Last edited:

Forum statistics

Threads
189,625
Messages
2,919,110
Members
232,632
Latest member
Timboruski
Top