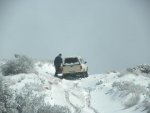
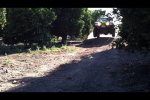
I purchased my ‘86 pickup truck a little over two years ago after selling my Jeep Cherokee. I wanted a more economical 4x4 vehicle that was simple and easy to work on. The pickup came from a friend of mines aunt who was the second owner of ten years. After driving it to its new home in the mountains of Southern California; I prepped it for a trip to Colorado. The trip went very well, the economy and the simplicity of the little truck was just what I wanted; above all, I really enjoyed the practicality of the camper shell that came with the truck. I had never owned a truck with a camper shell but had wanted to for the reasons of camping/sleeping, traveling/hauling and most importantly for my chocolate Labrador affectionately known as Pumpkin.
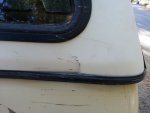
The original camper shell was a Leer placed on the truck when new as the original owner told me, “It was to take her dogs to dog shows along the west coast” it was in good condition for its age and I didn’t see any problems with it until my first desert trip. As of my first desert trip with the truck, I had already been on a numerous adventures with the truck from Colorado to Moab and back, and numerous local 4x4 trails when volunteering for the local National Forest OHV program. I knew that the desert would be the truck and campers greatest test. I have been doing desert trips for a number of years. My friends and I have used our local deserts for recreation, desert racing and general adventuring as we call it; we have learned in that time that nothing will rattle, bounce and violently shake things apart like a spirited drive across the desert.
After the first desert trip it was apparent the truck was good as I had already made some modifications like shocks, tires and springs but the camper shell was another story. All the little cracks that the shell had acquired over its years of use had spread exponentially and it was clear it would not last so I found it a new home. I got a newer shell that I hoped would yield a few years of reliable use, in reality the second shell lasted 5 months. My options were to buy another shell and internally gusset it or build my own shell from scratch. By this point I was over dealing with the lack of integrity traditional camper shells so I opted to build my own.
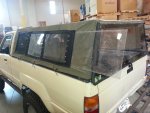
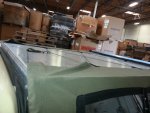
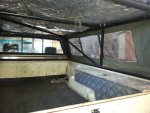
I decided to build the new shell the only way I knew it would hold up to my abuse. I would build a new shell with a tubular steel frame and aluminum panels just like a desert race vehicle. I did decide to go a different route on the sides, I wanted to be able to remove them if I wanted to and I wanted to have a removable window and screen. I decided on canvas for the sides with removable Lexan windows. After many more hours of fabrication and sewing than I had anticipated (I did teach myself how to sew! Thanks YouTube!) I completed the project, at least for now.
Notes: camper shell seems to be pretty rain proof; I have only hose tested it as I live in sunny SoCal. Even though it may look like water would leak from the roof there is a piece of weather stripping between edge of roof aluminum and the canvas. Camper frame is made of 1 ½ inch .090 wall D.O.M.
Please feel free to ask questions or make constructive criticisms.
From the Rubicon
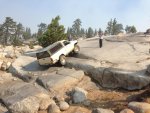


Bullfrog trail without sides on
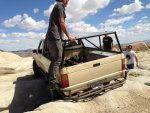
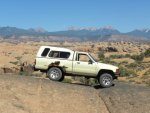
first camper shell in Moab a week after purchase of truck.
The original camper shell was a Leer placed on the truck when new as the original owner told me, “It was to take her dogs to dog shows along the west coast” it was in good condition for its age and I didn’t see any problems with it until my first desert trip. As of my first desert trip with the truck, I had already been on a numerous adventures with the truck from Colorado to Moab and back, and numerous local 4x4 trails when volunteering for the local National Forest OHV program. I knew that the desert would be the truck and campers greatest test. I have been doing desert trips for a number of years. My friends and I have used our local deserts for recreation, desert racing and general adventuring as we call it; we have learned in that time that nothing will rattle, bounce and violently shake things apart like a spirited drive across the desert.
After the first desert trip it was apparent the truck was good as I had already made some modifications like shocks, tires and springs but the camper shell was another story. All the little cracks that the shell had acquired over its years of use had spread exponentially and it was clear it would not last so I found it a new home. I got a newer shell that I hoped would yield a few years of reliable use, in reality the second shell lasted 5 months. My options were to buy another shell and internally gusset it or build my own shell from scratch. By this point I was over dealing with the lack of integrity traditional camper shells so I opted to build my own.
I decided to build the new shell the only way I knew it would hold up to my abuse. I would build a new shell with a tubular steel frame and aluminum panels just like a desert race vehicle. I did decide to go a different route on the sides, I wanted to be able to remove them if I wanted to and I wanted to have a removable window and screen. I decided on canvas for the sides with removable Lexan windows. After many more hours of fabrication and sewing than I had anticipated (I did teach myself how to sew! Thanks YouTube!) I completed the project, at least for now.
Notes: camper shell seems to be pretty rain proof; I have only hose tested it as I live in sunny SoCal. Even though it may look like water would leak from the roof there is a piece of weather stripping between edge of roof aluminum and the canvas. Camper frame is made of 1 ½ inch .090 wall D.O.M.
Please feel free to ask questions or make constructive criticisms.


From the Rubicon


Bullfrog trail without sides on

first camper shell in Moab a week after purchase of truck.


