Not So Subtle E350 Shuttle - 100% Satisfaction Guaranteed

sakurama

Adventurer
This is a great armchair fabricator experience showing the process on a nice ladder. Helps with all the “That welded thing’s so simple.m, why’s it cost so much? I could just make my own.”

Yeah, I'm very susceptible to that sort of thinking but I tend towards the "how can I make it better or more personal?" and I know it will not be worth it on a time/money function but for me it's always a learning experience. I wanted to improve my aluminum welding skills so what better way than to build a ladder and roof rack all from aluminum!

i-qwWd59T-X2.jpg


After checking the fit up (it was good) I set about finish welding the rungs in. The bottom rung was just a bit twisted out and while I saw it early I decided to not mess with it as fixing it was going to be impossible and replacing it was not worth it. I considered trying to fit the tube by hand but as I was feeling cocky with my aluminum welding I figured I'd leave it and see if I could fill the gap.

i-NVdpkrW-X2.jpg


It wasn't a problem. In fact I was finding that I could take my time and really pay attention to the weld and how much the aluminum wet out, how much filler changed the profile of the bead, how much I needed to let off between pulses.

i-cf9MZH3-X2.jpg


Today was one of the best welding days I've had. I've always loved welding and machining aluminum but today I felt like I turned a corner.

i-2fTkHvB-X2.jpg


Right up to the end where I attempted to close up my first tube and forgot that I'd not put a vent hole in. If I'd been thinking ahead I'd have drilled under where the tube went so that it would vent into the long vertical tube. But I didn't. As you attempt to close off a tube the air inside gets super heated and expands and if you don't have a place to vent it will explode out - which it did.

i-2fxzXCb-X2.jpg


It cleaned up fine and I drilled some holes in all the rungs and I'll just put a dab of glue or epoxy on them before I paint it.

i-n9wkF6Z-X2.jpg


i-Bzxm2xH-X2.jpg


i-2xqTSXS-X2.jpg


i-zPBbbgj-X2.jpg


Once all the rungs were welded into place I fit the ladder to the rail again and decided to clearance a small amount for the vertical part of the rail. This should give it a little more purchase and a tighter clamp.

i-jg9MCX2-X2.jpg


The block was radiused to snug into the seam and then drilled through for 8mm flat head bolts.

i-DdNDsXp-X2.jpg


i-qLBCZMm-X2.jpg


I'm super happy with the fit up so far - it's very tight.

i-75Hg7mp-X2.jpg


i-pSjSk6Q-X2.jpg


After all the clamps were tightened down the ladder was rock solid. Zero movement or flex. I was able to bounce the entire van by jumping on it. I am very happy with how burly it is - much better than I expected. I'm going to get some more bed liner tomorrow and get it painted and then start to think about the roof rack.

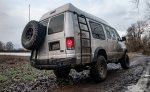
I will say that the ladder really changes the van. Being able to get onto the roof so easily changes the whole feel and adds a lot of practicality to the van. Now to think about the platform.

Gregor
 

RVflyfish

Fishing is life. The rest is details.
Man it must feel so good to go out in your garage and turn an idea from your head into a custom ladder you mount on your van. The breadth of your skills, man. Kudos.
 

sakurama

Adventurer
Man it must feel so good to go out in your garage and turn an idea from your head into a custom ladder you mount on your van. The breadth of your skills, man. Kudos.

Thanks. And I won’t lie - it feels amazing. It’s taken 20 years to get to this point but I wouldn’t trade it. Every project is a chance to learn and expand my skill set and I love doing it.

Very excited to build the roof rack now.

Gregor
 

phenopd

Observer
That is an amazingly nice ladder. I’m still practicing with a spool-gun, but nothing beats tig welding. That would look nice on my van!

Mike
 

sakurama

Adventurer
That is an amazingly nice ladder. I’m still practicing with a spool-gun, but nothing beats tig welding. That would look nice on my van!

Aluminum is tricky with Tig welding - it's a smaller window for the right amount of heat and it can quickly get away from you. It would have been much easier to weld this in steel but I wanted the practice and it's certainly been great for that. I'm feeling much more comfortable with aluminum even after this.

i-t6bPLvj-X2.jpg


I have a real love hate relationship with this Duplicolor bed liner. I didn't prime the ladder but just scuffed it with scotchbrite. I had primed the bumpers with POR15 so it had a solid substrate to hold on to. Also, I didn't have to do so many coats to cover.

i-x3NMZVQ-X2.jpg


The texture is great and the durability on the bumpers has been great but the application is a big pain in the ass as the nozzle constantly clogs. A few times while I was moving the ladder the bed liner peeled off against the cardboard so I'm not sure if this will be as durable. We'll see.

i-sPzN7CX-X2.jpg


I gave the van a bath and then mounted it up. Everything fit just as expected and it's super solid.

i-r2MWZ24-X2.jpg


i-CVHr3Sp-X2.jpg


If I were to do it again I'd break that middle 20 degree bend into two 10 degree bends so the ladder would hug the body a bit more.

i-PHP9nxK-X2.jpg


As much as I didn't really want to do a side ladder I'm happy with how it came out. It hugs the body pretty tightly but there's still room for your feet. It's well inside the mirror and only as wide as the flares so I don't see it being an issue on the trails.

The roof rack will be interesting to tackle - it's going to be my goal to have that done by summer. My plan will be to make it in sections and then weld it together after it's all fitted up. My biggest concern is the wiring and power for the lights and I'm hoping to be able to run all the power within the tubes so nothing is external. I'd like to add some running lights to the rack as well. The first thing will be to create a simple, level base that's about 4' x 8' which is the main part of the roof. I'll probably make that and then just see how it fits with the strange angles on the roof then go from there.


Gregor
 

iggi

Ian
Looks great! Very much admire your fabrication skills. Did you consider knurling the ladder rungs?
 

86scotty

Cynic
The Duplicolor bedliner is annoying but it's so simple. I have done a couple of ladders with it. What you'll find is that it won't stand up to pebbles and stuff coming off the road. The leading edge will be peppered and need a reshoot within a few months.

I usually just get a cardboard box and slice it up where I can wedge it behind and through the ladder and then reshoot the forward edge of the ladder (without removing it) a couple times a year so it looks fresh.
 

sakurama

Adventurer
Looks great! Very much admire your fabrication skills. Did you consider knurling the ladder rungs?

Ha, someone else mentioned that. Bedliner has a lot of texture so no. If I was anodizing it maybe.

The Duplicolor bedliner is annoying but it's so simple. I have done a couple of ladders with it. What you'll find is that it won't stand up to pebbles and stuff coming off the road. The leading edge will be peppered and need a reshoot within a few months.

It's been great on my bumpers - three years and it's holding up well. It may be because I used POR 15 as my base.

Gregor
 

b. rock

Active member
Bumping because I always loved the fab work on this build. Do the 37s rub at all with the MG kit? I thought that put things at about 6" of lift which would fit 35s but not 37s, but I don't see too many folks with the coil front ends running 37s so there doesn't seem to be a ton of data out there.

Edit: side note, my first thought when I saw the radius arm brackets was - why so low and long? To run factory arms and have good geometry. But the thought of shortening them and running aftermarket radius arms corrected for the effective lift/geometry would be an option too. Not sure if that would help the DW situation at all, but usually shorter = stiffer = better.
 

sakurama

Adventurer
Bumping because I always loved the fab work on this build. Do the 37s rub at all with the MG kit? I thought that put things at about 6" of lift which would fit 35s but not 37s, but I don't see too many folks with the coil front ends running 37s so there doesn't seem to be a ton of data out there.

Thanks for the bump. I've been swamped with work this summer so there's been little time to do much on the van.

The 37's are a love hate relationship.

I love how they look and work but it's a lot taller and once again the mileage drops 1mpg and it's a little taller to tow as well. There's a little bit less power but it can still tow the trailer. Almost all the power and performance hits were mitigated by the rebuilt motor so in some ways it feels the same as 35's. The tires do rub in the back - not very often, usually only when I'm off road and only at the back corner of the back wheel well. I've been debating trimming or going back to 35's and I think I'm going to go back to 35's. I've also debated selling it in which case I'd keep the 37's because they look cooler.

i-JRqtdv6-X2.jpg


I have a trip coming up in Oct and I'd like to get the roof rack built but on that front I am torn about whether to replace the roof for a higher one (as a long term solution) or keep this one as it works fairly well and looks good. More than likely I'm going to build the roof rack for this roof despite it's stupid collection of angles. Part of my hold up has been wanting to put solar panels on but I've decided that I have a massive motor and generator so that's pretty silly - I'll just add a 12v house battery to run the air compressor and camp lights.

I don't have any rubbing in the front at full lock. When I built the bumper I trimmed and shaped it so that there was a lot of space around the front wheel so I don't know about stock.

i-sgFhNd5-X2.jpg


I'm looking to start a small business leading motorcycle tours and the van is the perfect support vehicle. I have left it pretty simple inside so I could make it work a lot of different tasks and it's done well as a bike transporter and photo gear hauler. There's not much advantage to 37's outside of the awesome looks but plenty of drawbacks. I'm glad I've done it but I'll probably sell them off and move back to 35's which, on this van, look like perfect stock tires.

As an aside - does anyone know if there's a NATO style steel wheel that would work? I'd like to stay with 17" rims but I love the look of the NATO style rims. If not I'll probably keep these rims and just sell off the tires.

So that's the quick update.

Gregor
 

Attachments

  • image.jpeg
    image.jpeg
    984.3 KB · Views: 40

mk216v

Der Chef der Fahrzeuge
As an aside - does anyone know if there's a NATO style steel wheel that would work? I'd like to stay with 17" rims but I love the look of the NATO style rims. If not I'll probably keep these rims and just sell off the tires.

If Fifteen52 would expand their bolt patterns, their AnalogHD is NATO-esque; https://fifteen52.com/collections/o...nalog-hd-asphalt-black?variant=15113773973570

Rotiform's new STL is a bit NATO'ish, however it's forged so will be $$$$. http://www.rotiform.com/wheel/63157/forged-stl/?styleID=4197
STL-5LUG-18x9-ET30-GLOSS-BLK-A2_1000_1819.png
 

unreng

Member
 

G35Vortec454

Adventurer
Wow, what a build journal!!! I admire you more than I admire your van :cool: .

I followed your thread and got curious about how you permanently fixed your rig's death wobble. No definite fix? other than replacing old parts with new ones, adding a dual steering stabilizers, and re-alignment job?

During my own build 3 years ago I also encountered the dreaded death wobble and luckily was able to resolve the issue. I have a 22ft-long 12,000-lb E350-based Class A motorhome that I put on used 2005 4x4 F450 axles (Dana Super60 front with S110 rear), with the accompanying used radius arms and bushings, and brakes. To this day, after 5000 miles with occasional offroad trips, the used parts are still in place, with the exception of a new trackbar ball joint at the axle and an over-built bracket on the frame.

It maybe worth mentioning the following in relation to death wobble issue: a) the trackbar is mounted upside down (opposite stock install); b) using dual steering stabilizers; c) frame horn crossmember / heavily reinforced; d) stock steering link mounting; d) stock drag-link mounting; e) Custom/extended length pitman arm to take advantage of the wide-track axle's tight turning radius; f) Front weight: 5500lbs; g) Custom/DIY lift: 7.5 inches over stock; h) tires diameter: 34 inches (19.5s); i) BD caster adjustment Cam installed in radius arms; j) adjustable caster/camber cams installed on steering knuckles; k) professional wheel alignment.

Here's the rig.Snowed2.jpgVision4x4.jpgSnowed3.jpg
 

Attachments

  • Vision4x4.jpg
    Vision4x4.jpg
    430.1 KB · Views: 41
Last edited:

Surfdog

New member
The axle showed up yesterday and I managed to get free after spending the morning stripping, grinding and cleaning the front hitch mount on the Avion trailer that we're restoring (you know, because restoring a house, three motorcycles and this van wasn't enough on my plate). My timing was perfect because Josh was still watching his kid and so the only thing to do was prep the axle.

i-strXB5N-X2.jpg


i-HKntkmf-X2.jpg


Which meant I'd escaped stripping, grinding and cleaning only to do more of the same...

i-SLGWwS6-X2.jpg


I was surprised to learn that the knuckle castings aren't even painted from Ford. I was also surprised to learn that the axle weighs about 700lbs. Man, trucks and truck parts are heavy! After several hours of work with a wire brush the axle was clean enough to paint.

i-ZdTMSK3-X2.jpg


Satin black is the best color. Flat enough to hide bad prep and shiny enough to make you feel like a painting hero. That axle looks pretty great.

i-K7Cv9nz-X2.jpg


i-k2Mrk7L-X2.jpg


While I was toiling away on the axle MG was prepping another control arm since the other was suspect after discovering the bent axle. With the control arms in place and the axle prepped and painted it was time.

i-D6Hb25m-X2.jpg


And off it goes into the shop to be united with it's destiny. It will be much happier in it's new life.

i-JB8J3Nz-X2.jpg


Self portrait - because as a photographer I don't get "selfies". Selfie is short for I-have-an-arm-but-no-imagination. Sorry, I digress.

Before the axle can go in the springs need to be installed...

i-wbdrz4B-X2.jpg


i-p9BJJfK-X2.jpg


i-pNbNdCk-X2.jpg


These springs are supposedly taller and softer than in previous kits so we'll see how they work. In order to attach the spring to the lower mount you have to stack all your socket extensions to reach all the way down the spring and tighten the bolt. MG's spring perch is pretty smart and has a cutout to capture the nut so you only need two hands instead of 3... or 4.

i-GTTmL3D-X2.jpg


i-CP93LsM-X2.jpg


Then the completed axle is rolled under the truck to consummate the marriage.

i-bg6JD4r-X2.jpg


Josh hooks things up on the front so that the van can be lowered enough to put weight on the axles so that the drive shaft angles can be set.

i-nmfqW3z-X2.jpg


Since this is the first 7.3 MG has done he want's to be sure to get the measurements right so the driveshaft shop can build the driveshaft right the first time.

i-5TX9Zq7-X2.jpg


And the van is now tall enough to serve as a comfortable work space to calculate the angles and lengths needed.

i-qh8Qd7d-X2.jpg


With that the lift was lowered but the van continued to hang in the air. I was sure that it was still suspended by something, that there was a jack under it or something. It took several moments for it to sink in that the van was sitting, very high up, all on it's own new suspenders. Holy ****.

i-wLqNwBz-X2.jpg


Much like having sex for the first time no amount of stories, pictures or thought will prepare you for the experience. If you've never seen one of these vans in person you simply cannot grasp the size, the height and the sheer presence. I showed my son this photo and he stared at it for a long time, studying all the differences and finally came to the same conclusion that I did, slowly drawing out the words, "It's awesome!"

And I haven't even driven it yet.

Gregor
I noticed the Ducati 900ss in the back ground. I'm in the process of restoring one now. Hope mine looks as good as yours !
 

Surfdog

New member
It makes a HUGE difference. I'll detail it a bit more further down but Rattletrap makes a bigger difference than the MLV but they all help.

I ordered some mass loaded vinyl off Amazon and what came was not what MG had suggested I get. I tried ordering the VB4 MLV from the place MG specified - Cascade Audio Engineering - and got frustrated with the ordering process. It required actually calling them, on the phone, several times. How do places stay in business like that? After a few tries I gave up and ordered something on Amazon which turned out to be not that great. So I went to the place that installed my stereo in the van and they had the good stuff. It was more expensive than if I'd bought it from Cascade but at least I got the right stuff.

Also, I asked them how much coverage they do for Rattletrap/Dyanmat and they said 100%. He said it makes a huge difference and if you've gone to the trouble to pull the entire interior why wouldn't you? While I was there I saw a very sweet custom Firebird and the entire interior was pulled and every square inch was covered in Dynamat. Now I'm going to go back over the wheel wells and cover them completely. He also asked if I'd pulled the side panels and done the walls yet which I hadn't. He strongly suggested that the walls get covered too.

So.

i-4TZj6TL-X2.jpg


Here is full coverage with Rattletrap then full coverage with the VB4 mass loaded vinyl. Here you see it under the steel plates - two different layers of foam basically. But first a side note...

When I bought the MLV I took the 50" roll and unrolled it down the middle of the van for the ride home - you know, just to see. This stuff is amazing! I checked the Db's because I could suddenly hear the stereo way better and more clearly - it sounded much more solid. My suspicion was confirmed - the sound on the highway dropped to 74Db which was nuts. At this point it was very clear that all the noise was coming from the cab of the van - the back was super quiet. That's a 12Db drop from empty.

Anyway on to the frustrating day. As this was MG's very first test plate the holes didn't quite line up - he's since discovered that most vans aren't exact enough to line up. No problem as I bought it with the understanding that I'd have to make it work.

i-txDgHwm-X2.jpg


So my entire day was spent in the pursuit of drilling twelve holes. In order to not swiss cheese my fuel tank I put a sleeve of aluminum on the 1/2" drill bit which worked great as a stop. I drilled through first with a quarter than (later) with a 3/8" and then with the 1/2" and finally with the counter sink. I bought $100 of stainless 1/2" flat head bolts and nylock nuts and stainless fender washers for the underside.

i-x2th3NL-X2.jpg


I had to resharpen my 1/2" bit twice and I completely burned up my $50 countersink. Probably my own fault because I didn't want to do the job right - ie. pilot drill the entire plate and then pull the plates out to drill with cutting fluid on the saw horses and then reinstall. So I skipped the cutting fluid so all I had to do was vacuum the chips.

i-qfqw324-X2.jpg


So after spending the day drilling the holes - okay, some of the day was spent prepping dirt bikes for tomorrow - I managed to get the holes all drilled and countersunk.

i-T3KBMXw-X2.jpg


Once Rob and Lara came back over we attempted to bolt down the plates but we kept having trouble getting the nuts tight. It didn't occur to me that they could be galling until about the 5th one and the second that bound so tight we had to cut the head off. Is that really what's going on? I know stainless can gaul but this seems a bit excessive. It got dark before I could put some anti-seize on the bolts and test the theory. I'm a bit nervous as I've now got to remove about four completely gauled fasteners...

Okay but onto the sound. Like I said, with the MLV just laid out I was getting 74Db's or so. Once the plate was in the sound actually went up but still was less than the Rattletrap alone. Right now it's at about 76-78Db's so the MLV was worth 2Dbs but... BUT! I have to point out that now the van is very quiet in back. The sound is almost exclusively coming from the cabin which I know has not been treated in any way. So I think there's a lot of low hanging Db fruit waiting to be snuffed out with some Rattletrap on the floor and fire wall of the cabin. I'm tempted to just do it now even without removing the seats - just pull the mat and do whatever steel I can.


Evan is the MAN! Fun fact - he used to live one block from my house here in Portland. I've known him for almost 20 years and who'd have guessed I'd have moved into his old hood. He used to be the "motorcycle guy" in the hood and now that's me. Onto your question.

i-PPS8FGx-X2.jpg


That bike was hand made by an engineer in Canada. It came up for sale and I wasn't in the position to buy it and then a few months later the chance came again and I jumped. My next goal is to build a similar but more refined airhead GS style dirt bike. This one had done a lot of the things I wanted to try and I'm looking forward to trying it out once I get it plated. It's a very highly modified BMW with lots done that isn't seen.

i-ZRg3HjG-X2.jpg


Anyway, the van isn't done darn it. I'd hoped I'd be finished by the end of the week but it hasn't come to pass. Hopefully next week.

And if you have advice on why the stainless would gaul - let me know. I'd hate to have to go back to steel but I know I wouldn't have that problem. I'm guessing I should have just put antisieze on them and it would have been fine.

Gregor
Interesting front "faring" & exhaust on BMW. If you get a chance would love a few more pics & sound bit.
 

Forum statistics

Threads
185,897
Messages
2,879,548
Members
225,583
Latest member
vertical.dan
Top