You are using an out of date browser. It may not display this or other websites correctly.
You should upgrade or use an alternative browser.
You should upgrade or use an alternative browser.
Point Five Ambo Build
- Thread starter patoz
- Start date
patoz
Expedition Leader
Thanks!
That's a trick I learned from wiring residential electrical panels. It clutters up the box a little, but is well worth it in the long run if you need it later. This is not my best work, but as I said I was in a hurry to get the picture before sunset. I'll tidy it up some more when everything's in it, and before it get mounted. Hopefully, that will be today if the rain holds off.
Man, I wish I had a garage to work in!!!
rlrenz
Explorer
Take a look at an ambulance panel, and that's how they are all done as well. It's smart, it's good practice, and if you ever have to do a repair, it makes life a whole lot easier. It does make things a little bulkier, but an ambulance panel has a whole lot more room to work in than a jet fighter (I used to work with military aircraft gear, and the added weight and bulk of added wire X thousands of wires adds up to space and weight, plus repair time isn't as much of a factor, either.)
We also have the advantage that we're doing it for ourselves, and not being paid by the job, so time isn't as big a factor.
We also have the advantage that we're doing it for ourselves, and not being paid by the job, so time isn't as big a factor.
patoz
Expedition Leader
I forgot to mention it, but I also have a Dymo Rhino Industrial 6000 Label Printer which I plan to use to label the cables and wires I add. It's not the best label maker on the market and is somewhat outdated, but they 'finally' updated the software so it will interface with a Windows 7 computer. I'll connect it to my laptop and set it up in the back, which will make composing and printing much easier than using the funny keyboard on the machine.

Last edited:
rlrenz
Explorer
I had an older Dymo, and I gave it to Goodwill after trying to figure out the keyboard - I use a Brother now, and we understand each other pretty well. I used to work for 3M, so I have a pretty good stockpile of tie-wraps and wire numbers as well. I've also been going through my ambulance module's electrical panel, and mapping it out so I know what relay has which wires that do what (was that English??). I have the wire routes figured out, so there is a smaller and smaller list of unknowns.
One thing to remember - the way to get to wiring in an ambulance is remove ceiling lights and inside ceiling lights, then you have a fairly large hole to work through. I have a few old rear-view mirrors that help, plus a fiber-optic bore scope if all else fails. Happily, the interior light fixtures are close enough together that it's fairly easy to feed wiring along.
One thing to remember - the way to get to wiring in an ambulance is remove ceiling lights and inside ceiling lights, then you have a fairly large hole to work through. I have a few old rear-view mirrors that help, plus a fiber-optic bore scope if all else fails. Happily, the interior light fixtures are close enough together that it's fairly easy to feed wiring along.
patoz
Expedition Leader
Yeah, I bought the Dymo five years ago, and it was one of the top models then, but I'm not real happy with it. If I used it much more than I do now, I would probably get a better one. It's drizzling rain here now, so I guess I'll label some wires.
As soon as I get my outside lights all working and get a tag for it, I'm going to start doing the same with my electrical panels inside. However, I checked this morning and that big Blue Sea Panel has come down even more on price. It's now under $300.00, and I'm so tempted to just go ahead and get it, and then figure out where to mount it later.
As soon as I get my outside lights all working and get a tag for it, I'm going to start doing the same with my electrical panels inside. However, I checked this morning and that big Blue Sea Panel has come down even more on price. It's now under $300.00, and I'm so tempted to just go ahead and get it, and then figure out where to mount it later.
rlrenz
Explorer
Blue Sea's prices can be funny - it pays to price out all the various versions that might work before you make a final decision. Amazon is the cheapest place I've found to buy Blue Sea - MUCH cheaper than the boat stores, plus they have it all in stock. Every time I've gone to a boat store for what I want, I usually have to settle for what they have in stock. Amazon ships (Prime membership) so darn fast that I almost never go to the boat store anymore - the nearest boat place is 20 miles north of me, and by the time I schedule a trip up there, Amazon is just as fast, and a whole lot more convenient.
Many moons ago, I found a 3/4" 3M version of a Dymo label maker as surplus in the 3M surplus store for only $10. I bought it, then tried to track down 3/4" label tape - it had gone completely obsolete, so I returned the label maker to the store, and decided that the day of the embossed label was over. I've been using a Brother label maker ever since -
Many moons ago, I found a 3/4" 3M version of a Dymo label maker as surplus in the 3M surplus store for only $10. I bought it, then tried to track down 3/4" label tape - it had gone completely obsolete, so I returned the label maker to the store, and decided that the day of the embossed label was over. I've been using a Brother label maker ever since -
patoz
Expedition Leader
My Dymo will use 1/2", 3/4", or 1" nylon or polyester tapes, including the heat shrink type. I do still have a very old cheap Dymo that uses the embossed tapes, but I never use it for anything anymore.
The panel I'm looking at is on Amazon, which is just about the only place I shop anymore also. They had two but now only have one. They will get more, but I wonder if the price will go back up. If it hits the $250.00 mark, I'm going to buy it no matter what.
Edit: I couldn't stand it any longer and went ahead and ordered the panel. Since the price has been dropping about $50.00 dollars every day, I'm pretty sure it would have been down to around $250.00 by tomorrow, but since Amazon was down to the last one, I couldn't take a chance on loosing it. That panel is selling for $1,400.00 to $2,000.00 everywhere else.

I originally wanted to mount it on this door, but the panel depth requirement is 3", and I don't have it here. Then I thought I would mount it on the new door which will be covering the walk-thru opening. That area is about 12" deep and with a third door, would turn that whole wall into a big electrical panel with room for inverters, chargers, etc. also.
However, that space is too narrow for the 19.5" panel, and I had wanted to install a window there anyway. After re-measuring, I found I can mount the panel on the top door if I build it out some with a frame/spacer between it and the door itself. I will then need to make the door open downward, but that's better anyway for working on it and routing the wiring both. I can still put a door on the space below the new window and room for the inverter/charger, etc.
The panel I'm looking at is on Amazon, which is just about the only place I shop anymore also. They had two but now only have one. They will get more, but I wonder if the price will go back up. If it hits the $250.00 mark, I'm going to buy it no matter what.
Edit: I couldn't stand it any longer and went ahead and ordered the panel. Since the price has been dropping about $50.00 dollars every day, I'm pretty sure it would have been down to around $250.00 by tomorrow, but since Amazon was down to the last one, I couldn't take a chance on loosing it. That panel is selling for $1,400.00 to $2,000.00 everywhere else.
I originally wanted to mount it on this door, but the panel depth requirement is 3", and I don't have it here. Then I thought I would mount it on the new door which will be covering the walk-thru opening. That area is about 12" deep and with a third door, would turn that whole wall into a big electrical panel with room for inverters, chargers, etc. also.
However, that space is too narrow for the 19.5" panel, and I had wanted to install a window there anyway. After re-measuring, I found I can mount the panel on the top door if I build it out some with a frame/spacer between it and the door itself. I will then need to make the door open downward, but that's better anyway for working on it and routing the wiring both. I can still put a door on the space below the new window and room for the inverter/charger, etc.
Last edited:
rlrenz
Explorer
The panel may be designed so it can be broken down into modules. The nice thing about Blue Sea is that you can modify their panels fairly easily -- I have a panel that originally had two interlocked breaker sets, but I'm going to modify it so the two interlocked sets are just 4 individual breakers, then use the interlock bar to interlock the two battery charger systems -- the Vanner, or the Xantrex charger. Since the Vanner is also the inverter, I will definitely keep it as a back-up charger, but I'll use the Xantrex as my primary shore-power charger. They will be interlocked so only one can serve as the charger at a time.
In a previous life I worked for shipyard building pleasure boats for the Navy. Standard practice on an electrical panel was 1 1/2 times around the panel prior to hooking up. Done right it could be very neat and professional looking. Something the RV industry has never heard of. ")
patoz
Expedition Leader
After the rain finally moved out, I got a little more done with the wiring on the tongue, but nothing worth reporting.
Santa came to my house late, and brought me a new Blue Sea Systems AC/DC electrical panel.


It came with a Shunt for the DC Amp Meter, and a label set consisting of 30 each, AC and DC labels.
This will have to go on the back burner for a while, because my goal right now is to get it road worthy so I can get it registered and get a tag for it.
Santa came to my house late, and brought me a new Blue Sea Systems AC/DC electrical panel.
It came with a Shunt for the DC Amp Meter, and a label set consisting of 30 each, AC and DC labels.
This will have to go on the back burner for a while, because my goal right now is to get it road worthy so I can get it registered and get a tag for it.
Last edited:
patoz
Expedition Leader
That is an absolutely beautiful panel! If you ever need any 10 amp circuit breakers, let me know -- I bought a bag full for $3/each
Thanks, and I'm glad you told me that. I was already lining up some extras on Amazon for the blank spaces. The ironic thing about using a panel like this is, I'll be using 10 or 15 amp circuit breakers to control DC relays that probably don't pull .5 an amp each. Of course the breakers will protect any items I add without having to go through relays too.
I did find these Blue Sea switches that will mount in the breaker slots. They aren't an exact match to the breakers, but close.
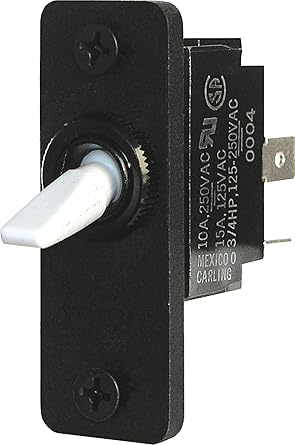
https://www.bluesea.com/products/8204/Switch_Toggle_SPST_OFF-ON
patoz
Expedition Leader
My intention today was to finish up the wiring on the tongue, but then "let's see what's behind this panel" happened.
I removed the panel covering the air conditioning unit and found a mess. Notice the black layer of mold and mildew covering everything.


At this point, I decided to go ahead and remove it. In addition to the black mold, every thing is covered pretty heavy with diesel exhaust residue. I had already scraped some of the residue before I took this picture. I used Super Clean (a cleaner/degreaser) to clean with, and it turned the residue back into an oily mess.

All cleaned up. This is where the 'through the wall/window unit' type A/C unit will go. Just add some vents so the hot air from the compressor can escape.

I then decided to pull the heater unit and remove it, but it was no problem.


For any of you guys who have diesel Wheeled Coach units like mine (1993 era), or any ambulance for that matter, I would suggest you pull the cover panels and check your heat and A/C units for mold and exhaust residue. Mine is 21 years old and sat for a couple of years under oak trees, which might account for some of the mold, but not the exhaust residue. I can't help but wonder how much exhaust the patients and crew inhaled when it was in service as an ambulance.
I removed the panel covering the air conditioning unit and found a mess. Notice the black layer of mold and mildew covering everything.
At this point, I decided to go ahead and remove it. In addition to the black mold, every thing is covered pretty heavy with diesel exhaust residue. I had already scraped some of the residue before I took this picture. I used Super Clean (a cleaner/degreaser) to clean with, and it turned the residue back into an oily mess.
All cleaned up. This is where the 'through the wall/window unit' type A/C unit will go. Just add some vents so the hot air from the compressor can escape.
I then decided to pull the heater unit and remove it, but it was no problem.
For any of you guys who have diesel Wheeled Coach units like mine (1993 era), or any ambulance for that matter, I would suggest you pull the cover panels and check your heat and A/C units for mold and exhaust residue. Mine is 21 years old and sat for a couple of years under oak trees, which might account for some of the mold, but not the exhaust residue. I can't help but wonder how much exhaust the patients and crew inhaled when it was in service as an ambulance.