Sabre
Overlanding Nurse
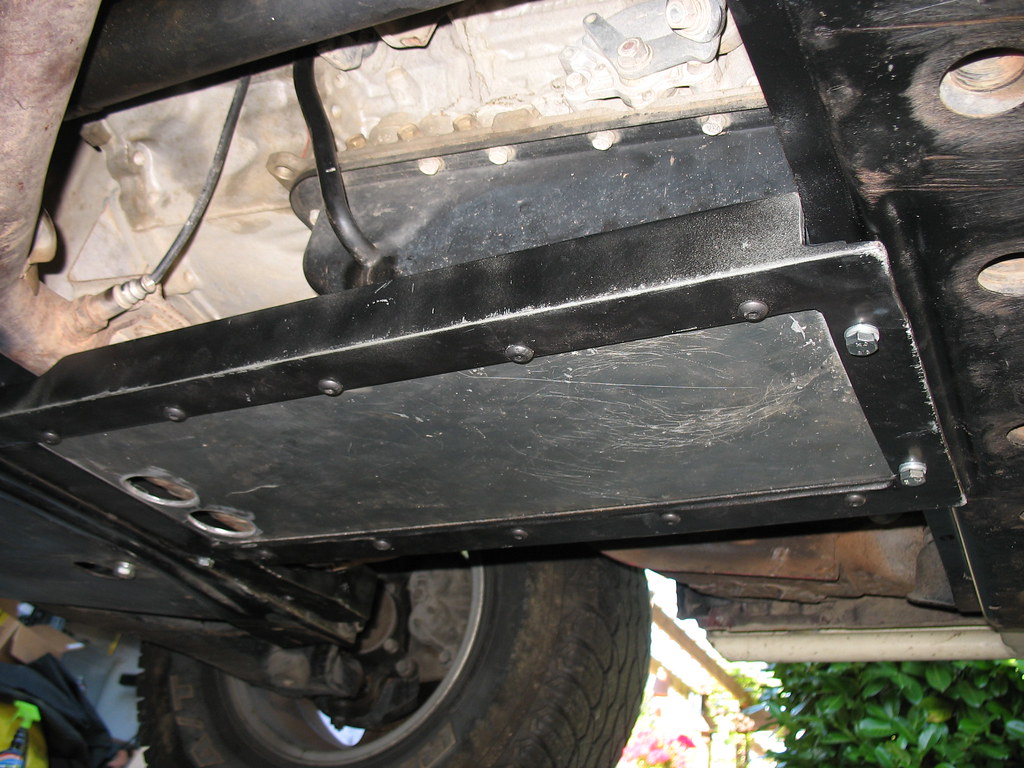
When we last visited clan Sabre, a few projects had been done, such as removing the plastic body cladding, trimming the bumpers, and adding a bit of underbody protection. Read about it in this thread.
We learned on previous trips to Moab and on a long, off-pavement loop to Yellowstone that we wanted some specific mods that would enhance the truck's abilities in the backcountry without messing up its behavior in town.
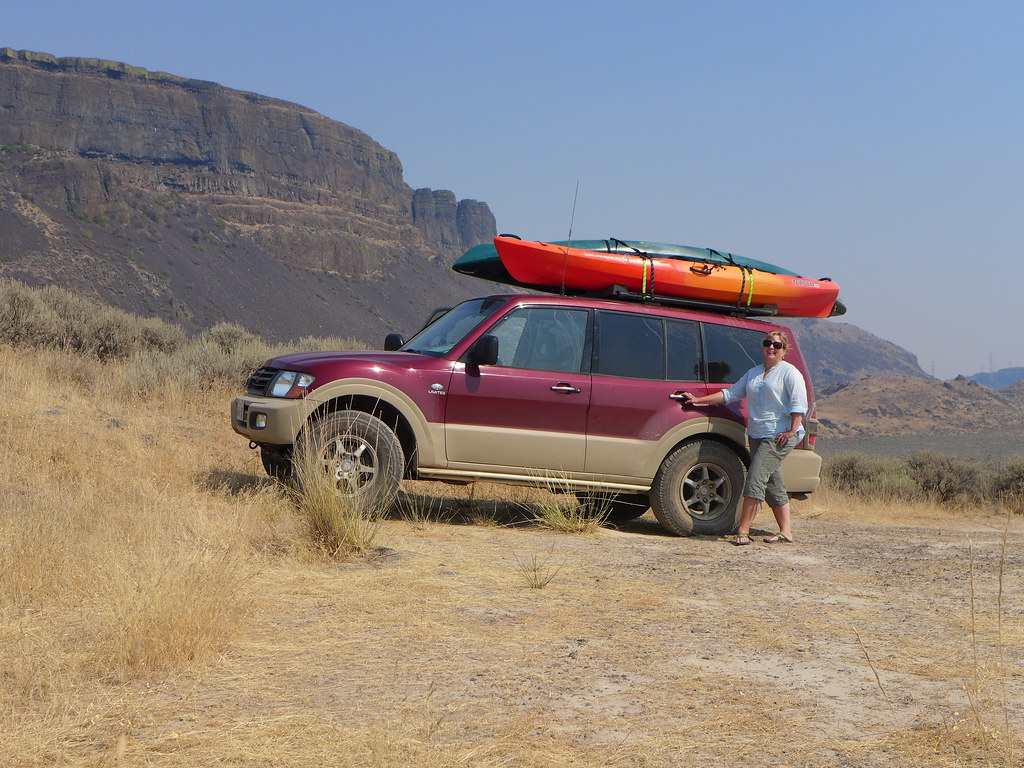
Number one on the list was a proper roof rack. I wanted something strong and useful and with a maximum amount of flexibility in how it can be used. For the last couple of trips we relied upon an aluminum rack that I found on Craigslist. Here's what that one looked like after I fabbed up a homemade mounting system that clamped it on to the factory load bars:
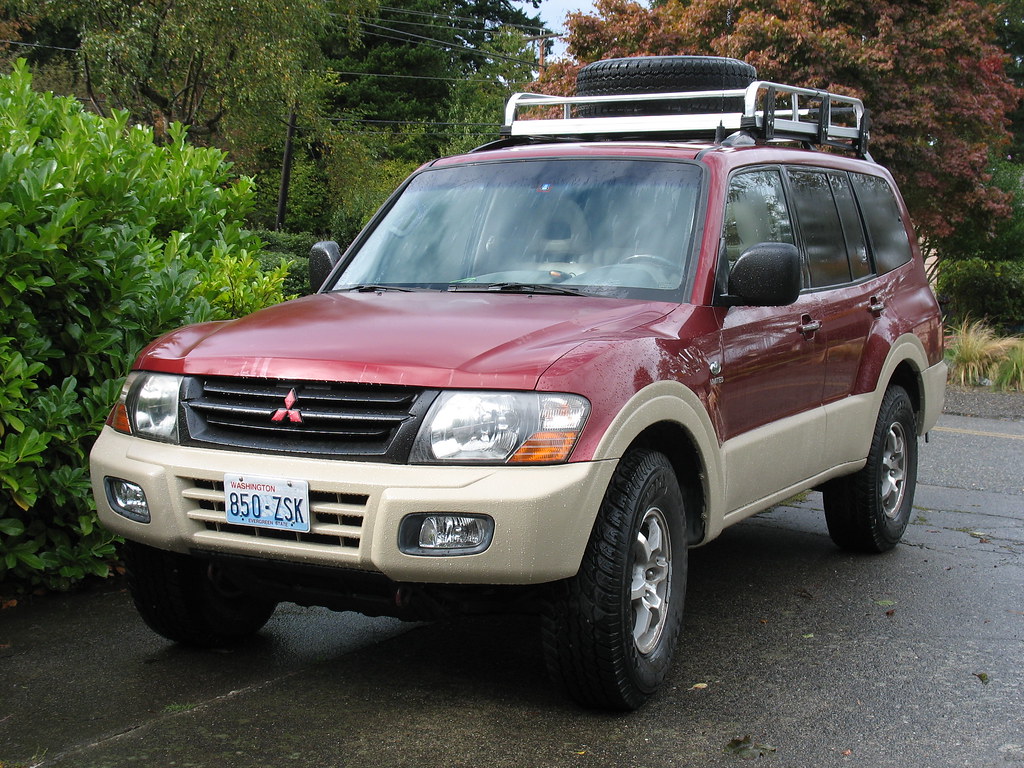
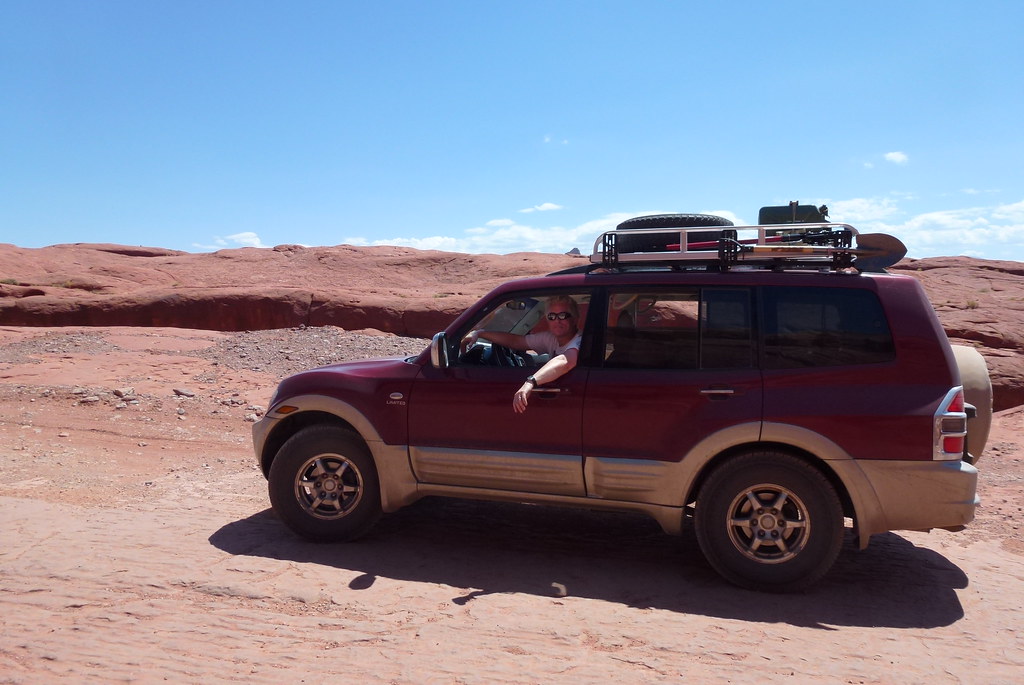
Although this rack met our needs for a few trips, it did have specific drawbacks that I wanted to correct. First, being made of aluminum and never intended for such heavy use, it started to come apart after a thousand miles of washboard and other brutal road conditions. We had a lot of stuff up there at different times: a second spare tire, spare fuel, spare water, hi-lift jack, large propane tank, and other miscellaneous goodies. I had repaired it several times but it was just tearing itself to bits. Second, I didn't like how it used the roof's surface area; it covered the marvelous, enormous sunroof on the Montero and it left a bunch of empty roof space at the rear. This was a function of how the factory load bars were mounted. Finally, I wanted a cleaner mounting system that was more efficient and less "Rube Goldberg."
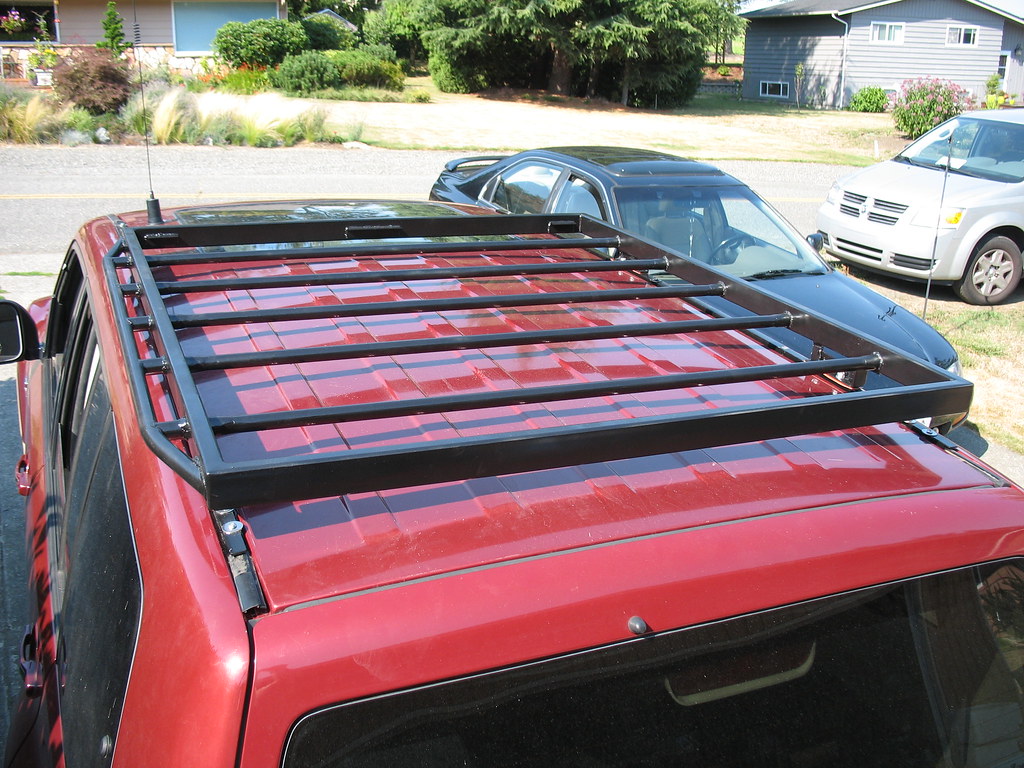
Last year, while making the skidplate that I mounted under the engine, I threw together a roof rack with my newfound welding skills. Here it is in primer:

No, the welds aren't pretty, but they penetrate well and are strong. I had run out of gas for the MIG and decided to teach myself stick welding for this project. Hey, life is one long series of opportunities to learn new things! You notice on the rectangular frame that there are a few support brackets made out of L-shaped metal. These are supports for future use if I decide that I want to put a floor up there. Plastic poultry flooring has been used by some and is ideal for this purpose. I actually sourced some out and sized the rack to allow easy fitment of this cool stuff. We could throw the floor up there, add a couple of camp chairs and turn the thing into a nifty viewing platform for wildlife viewing trips, airshows, etc.
At the start of this summer I dusted this thing off and decided that I had made it far too heavy. Because I'm not an engineer, I always err on the side of caution and all my projects are built, as my late father-in-law used to say, "hell for stout." So I cut out all the round bars which were much heavier than they needed to be and replaced them with heavy-walled electrical conduit. This stuff is plenty strong and saves many pounds up there.
For the past year I've been thinking about how to make a mounting system that was versatile, strong, simple, and would allow easy removal of whatever I had up there. I finally decided that I would removed the factory load bars and toss them. In their place I envisioned track similar to what my company used in its wheelchair vans, the same stuff that trucks use to secure loads inside the vans. Unfortunately, I learned that the factory rack doesn't really live in the groove that I had imagined, but that under that molding trim there is a center rib where the roof is welded to the sides of the body. Therefore, I wasn't going to be able to mount the track in that groove, or at least couldn't do so without a heck of a lot of extra monkey business.
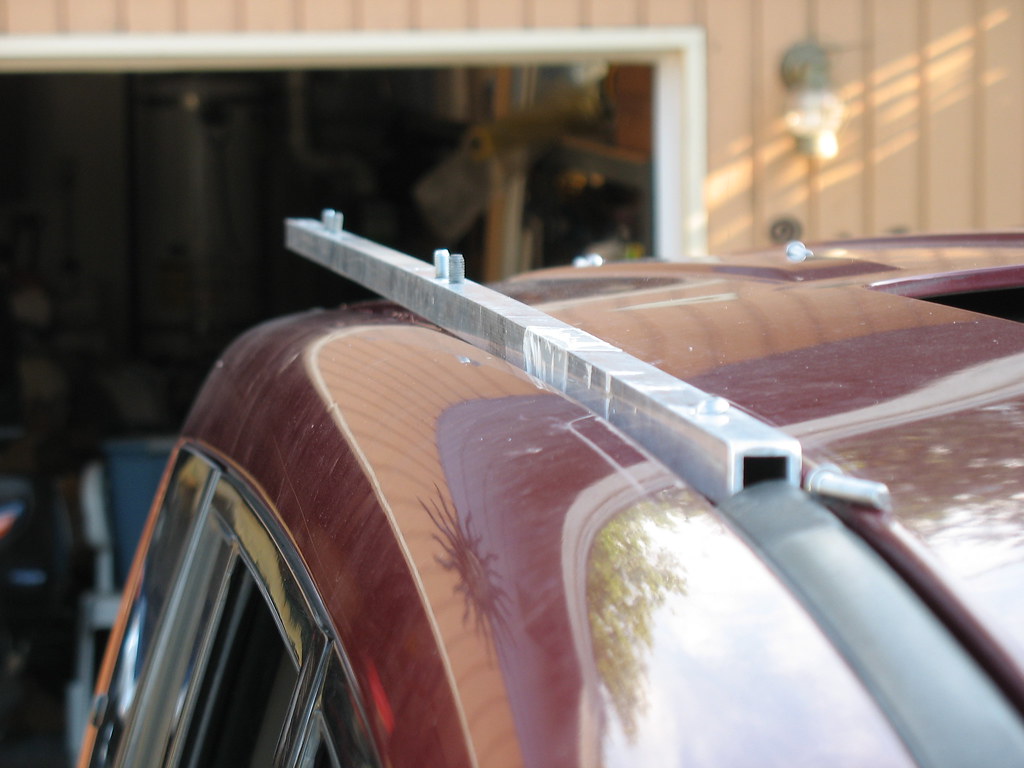
I decided to install a U-channel of aluminum, upside-down, therefore allowing the U-shaped channel to straddle this center rib. I designed a way of mounting the rack (or whatever else I came up with) that would allow for quick and easy installation and removal. After careful measurement, I ordered the aluminum channel from an online supplier. It's 6063 "architectural" aluminum, which is quite flexible and light; the U-channel is 0.75" x 0.75" with a 0.125" (1/8") wall thickness. OK, the material arrived and I had to bite the bullet and remove the factory load bars. This was intimidating but, happily, I had excellent guidance from another (former) Montero owner who had removed his bars for another project. Member Imnosaint, although he later sold his Montero, provided inspiration and reassurance in his excellent descriptions of how to remove the factory bars. This gave me the confidence that I needed to proceed. I thank Imnosaint for this guidance, without which my project would have been much more fraught with worry and difficulty, I'm sure.
OK, here goes. To remove the factory bars, the headliner has to come down. There's no other way around it. I had formerly pulled the headliner down in front when installing a roof-mount NMO antenna base for my ham radio, so I knew more or less what would be involved. One of the most challenging parts of this operation involves the sun visors. I resolved to leave these in place and pull down the rest of the headliner, leaving it attached in the very front. Although it complicated the work somewhat, I do believe that it saved me a bit of time and frustration.
First, the interior grab handles, lights, and HVAC vents need to be removed. Tip: when you later replace the grab handles, be sure to use some Loctite blue or similar threadlocker. They seem to have a habit of becoming loose otherwise.


After removing and carefully setting aside these bits and pieces, the weatherstripping needs to be pulled down. Although this seemed intimidating, it's really super easy. Just pick an upper corner and start experimenting. You'll quickly see that the stuff just pulls right down and that it will be easy to replace later on. Whew! It's always a relief to learn that a chore that I had been dreading turns out to be a piece of cake. Anyway, I peeled down the weatherstripping from both second-row doors and from the rear. Next, the interior trim moulding needs to be removed. Again, I had done some of this in the past with that antenna installation and after replacing the subwoofer in the rear of the truck. With this previous experience behind me, I confidently pulled these pieces straight off. If you just grab them and pull, not prying them with tools, they come off without damaging the little plastic clips that hold them in place.

Once this ceiling hardware, weatherstripping and moulding is out, the headliner can be simply pulled down. It's actually held up by a heavy-duty sort of Velcro. I don't know the technical name for it, but it works basically like Velcro in that you just pull it apart and later press it back together. When it does get re-installed, you feel a distinct "click" when it sticks back together. Anyway, just pull the headliner down. If you've forgotten to remove something, it'll become apparent right away.
The mounting hardware that you need access to is hidden behind the HVAC ductwork, which needs to come down. This stuff is arranged in a "U" shape with a duct running along the top of the back door, connecting to two ducts running forward along both sides of the vehicle. It is fed by the rear HVAC unit in the right rear of the truck. This plastic riser piece is the first piece that you'll need to remove. You can see it here behind the 3rd row seat belt. It's the black plastic thing.

It comes out with a couple of screws.
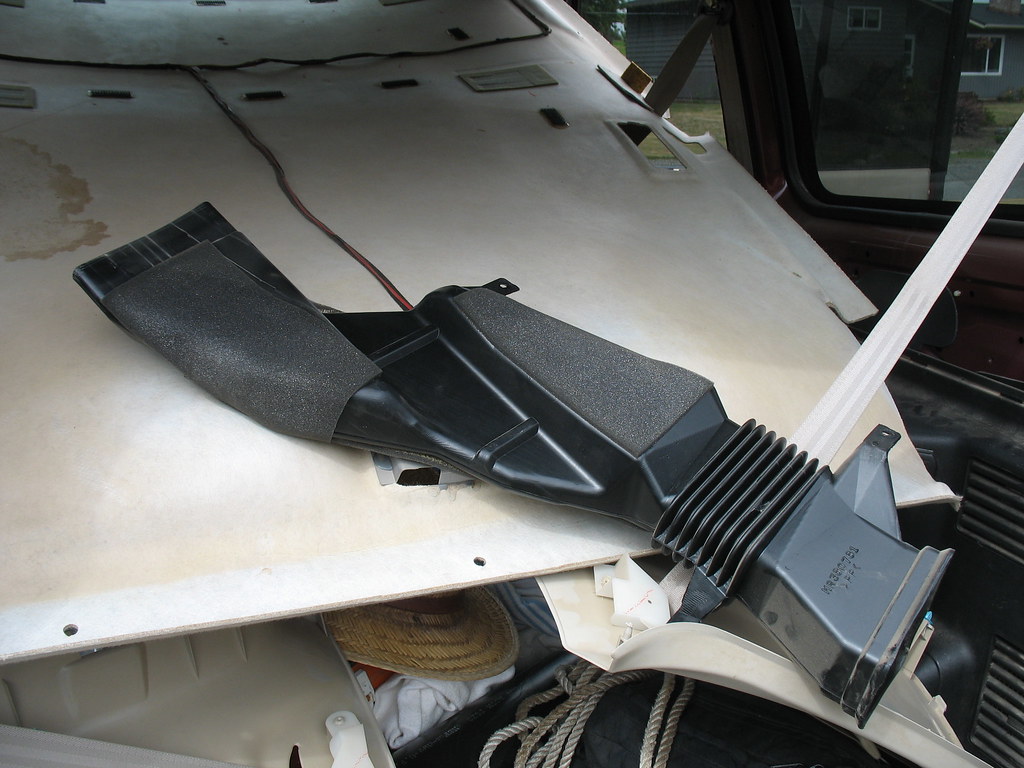
OK, now the ceiling ducts need to come out. They're made out of white plastic covered with black foam stuff. Here you can see the rear duct that runs over the rear door connecting to both the right and left side ducts. This rear duct needs to come out next.


Before removing this rear duct, you'll need to remove the metal bracket that supports the rear cargo light.
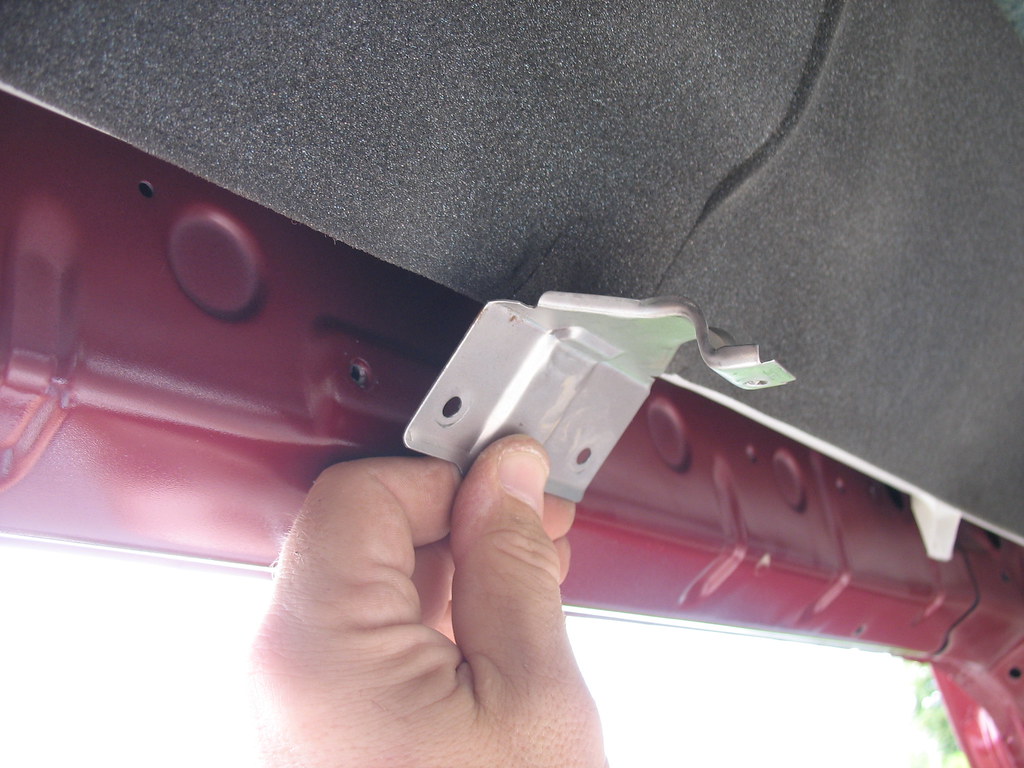
Then it's just a couple of screws and that rear duct comes right down.

Now just remove a few more screws and the right and left ducts come down easily.


We can finally get to the hardware that we need to remove. Each roof rail has five nuts that hold it in place: two at the front and rear, and one in the middle. Remove these and the thing just lifts right off. Here are the rear mounts on the left and right:


Here are the single mounting nuts that are in the center of the load bars. Note that the one on the left side is close to the AM radio antenna wire that leads to the left, rear window.
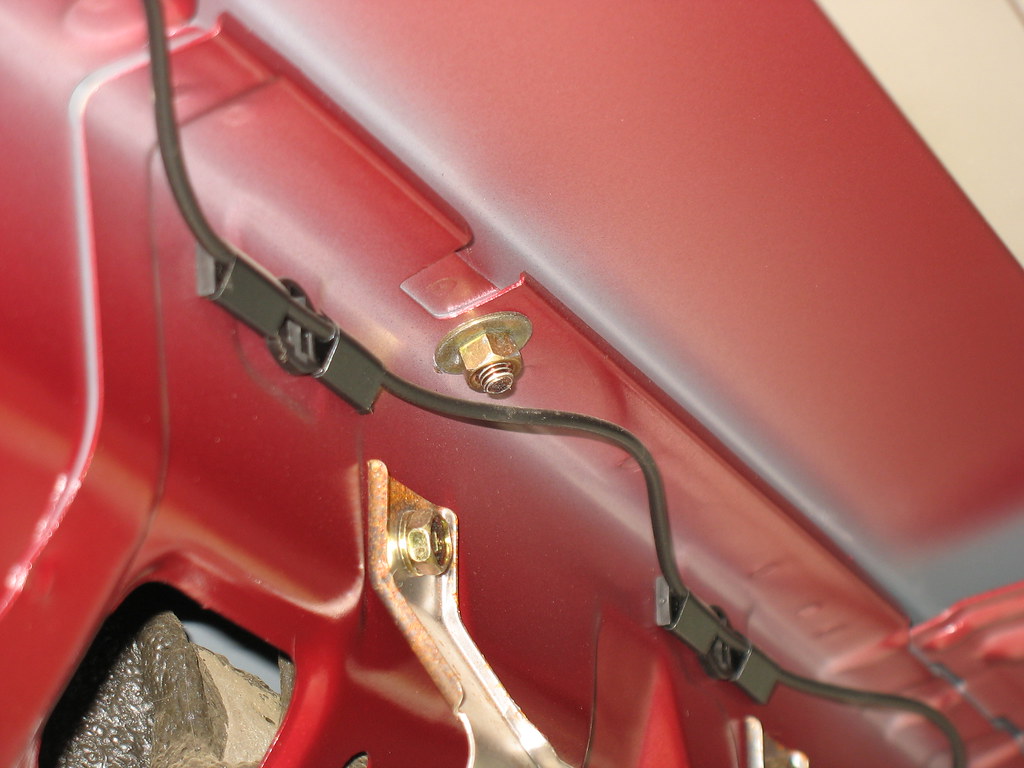
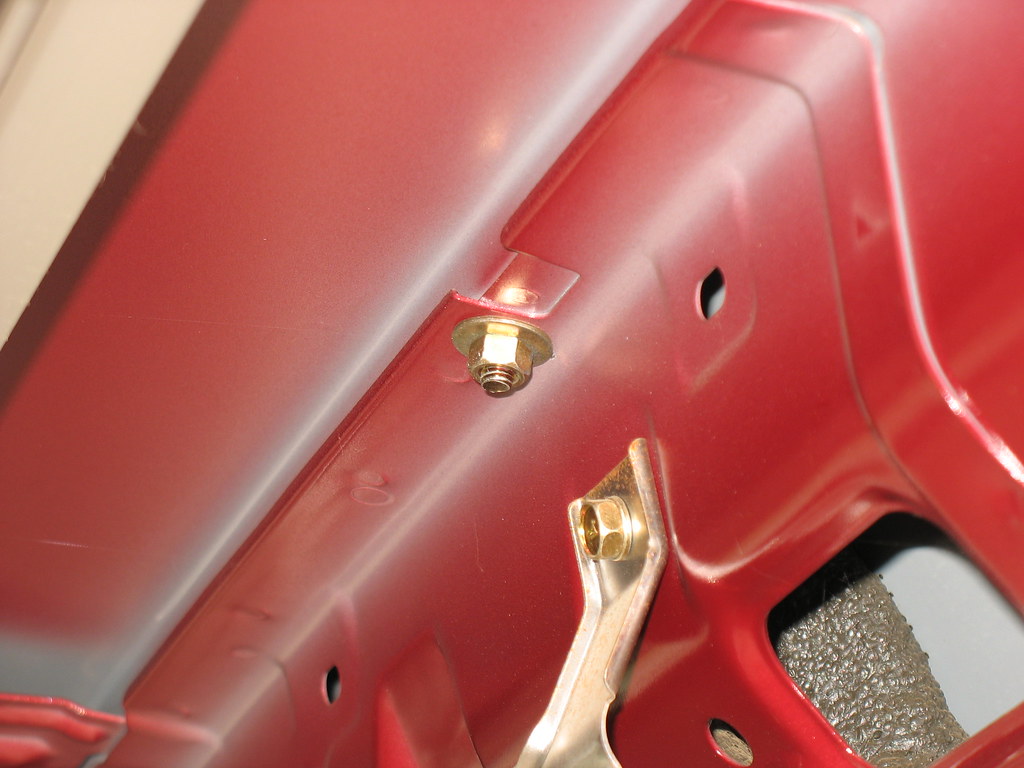
Finally, here is how I accessed the front mounting nuts. Since I hadn't pulled down the entire headliner, I just reached up through the sunroof opening and had easy access to these nuts. See that industrial Velcro-like stuff just to the rear of the opening?


Back off those five nuts per side and here's what you get:

Alright, let's look next at what's left up there on the roof when you remove those load bars. Pictured here is the forward mount for the left-side load bar, right above the driver's head:

Here's the center mounting location on that same side:

And here's the rear mount on the left side:

Continued below....
We learned on previous trips to Moab and on a long, off-pavement loop to Yellowstone that we wanted some specific mods that would enhance the truck's abilities in the backcountry without messing up its behavior in town.
Number one on the list was a proper roof rack. I wanted something strong and useful and with a maximum amount of flexibility in how it can be used. For the last couple of trips we relied upon an aluminum rack that I found on Craigslist. Here's what that one looked like after I fabbed up a homemade mounting system that clamped it on to the factory load bars:


Although this rack met our needs for a few trips, it did have specific drawbacks that I wanted to correct. First, being made of aluminum and never intended for such heavy use, it started to come apart after a thousand miles of washboard and other brutal road conditions. We had a lot of stuff up there at different times: a second spare tire, spare fuel, spare water, hi-lift jack, large propane tank, and other miscellaneous goodies. I had repaired it several times but it was just tearing itself to bits. Second, I didn't like how it used the roof's surface area; it covered the marvelous, enormous sunroof on the Montero and it left a bunch of empty roof space at the rear. This was a function of how the factory load bars were mounted. Finally, I wanted a cleaner mounting system that was more efficient and less "Rube Goldberg."
Last year, while making the skidplate that I mounted under the engine, I threw together a roof rack with my newfound welding skills. Here it is in primer:

No, the welds aren't pretty, but they penetrate well and are strong. I had run out of gas for the MIG and decided to teach myself stick welding for this project. Hey, life is one long series of opportunities to learn new things! You notice on the rectangular frame that there are a few support brackets made out of L-shaped metal. These are supports for future use if I decide that I want to put a floor up there. Plastic poultry flooring has been used by some and is ideal for this purpose. I actually sourced some out and sized the rack to allow easy fitment of this cool stuff. We could throw the floor up there, add a couple of camp chairs and turn the thing into a nifty viewing platform for wildlife viewing trips, airshows, etc.
At the start of this summer I dusted this thing off and decided that I had made it far too heavy. Because I'm not an engineer, I always err on the side of caution and all my projects are built, as my late father-in-law used to say, "hell for stout." So I cut out all the round bars which were much heavier than they needed to be and replaced them with heavy-walled electrical conduit. This stuff is plenty strong and saves many pounds up there.
For the past year I've been thinking about how to make a mounting system that was versatile, strong, simple, and would allow easy removal of whatever I had up there. I finally decided that I would removed the factory load bars and toss them. In their place I envisioned track similar to what my company used in its wheelchair vans, the same stuff that trucks use to secure loads inside the vans. Unfortunately, I learned that the factory rack doesn't really live in the groove that I had imagined, but that under that molding trim there is a center rib where the roof is welded to the sides of the body. Therefore, I wasn't going to be able to mount the track in that groove, or at least couldn't do so without a heck of a lot of extra monkey business.
I decided to install a U-channel of aluminum, upside-down, therefore allowing the U-shaped channel to straddle this center rib. I designed a way of mounting the rack (or whatever else I came up with) that would allow for quick and easy installation and removal. After careful measurement, I ordered the aluminum channel from an online supplier. It's 6063 "architectural" aluminum, which is quite flexible and light; the U-channel is 0.75" x 0.75" with a 0.125" (1/8") wall thickness. OK, the material arrived and I had to bite the bullet and remove the factory load bars. This was intimidating but, happily, I had excellent guidance from another (former) Montero owner who had removed his bars for another project. Member Imnosaint, although he later sold his Montero, provided inspiration and reassurance in his excellent descriptions of how to remove the factory bars. This gave me the confidence that I needed to proceed. I thank Imnosaint for this guidance, without which my project would have been much more fraught with worry and difficulty, I'm sure.
OK, here goes. To remove the factory bars, the headliner has to come down. There's no other way around it. I had formerly pulled the headliner down in front when installing a roof-mount NMO antenna base for my ham radio, so I knew more or less what would be involved. One of the most challenging parts of this operation involves the sun visors. I resolved to leave these in place and pull down the rest of the headliner, leaving it attached in the very front. Although it complicated the work somewhat, I do believe that it saved me a bit of time and frustration.
First, the interior grab handles, lights, and HVAC vents need to be removed. Tip: when you later replace the grab handles, be sure to use some Loctite blue or similar threadlocker. They seem to have a habit of becoming loose otherwise.


After removing and carefully setting aside these bits and pieces, the weatherstripping needs to be pulled down. Although this seemed intimidating, it's really super easy. Just pick an upper corner and start experimenting. You'll quickly see that the stuff just pulls right down and that it will be easy to replace later on. Whew! It's always a relief to learn that a chore that I had been dreading turns out to be a piece of cake. Anyway, I peeled down the weatherstripping from both second-row doors and from the rear. Next, the interior trim moulding needs to be removed. Again, I had done some of this in the past with that antenna installation and after replacing the subwoofer in the rear of the truck. With this previous experience behind me, I confidently pulled these pieces straight off. If you just grab them and pull, not prying them with tools, they come off without damaging the little plastic clips that hold them in place.

Once this ceiling hardware, weatherstripping and moulding is out, the headliner can be simply pulled down. It's actually held up by a heavy-duty sort of Velcro. I don't know the technical name for it, but it works basically like Velcro in that you just pull it apart and later press it back together. When it does get re-installed, you feel a distinct "click" when it sticks back together. Anyway, just pull the headliner down. If you've forgotten to remove something, it'll become apparent right away.
The mounting hardware that you need access to is hidden behind the HVAC ductwork, which needs to come down. This stuff is arranged in a "U" shape with a duct running along the top of the back door, connecting to two ducts running forward along both sides of the vehicle. It is fed by the rear HVAC unit in the right rear of the truck. This plastic riser piece is the first piece that you'll need to remove. You can see it here behind the 3rd row seat belt. It's the black plastic thing.

It comes out with a couple of screws.

OK, now the ceiling ducts need to come out. They're made out of white plastic covered with black foam stuff. Here you can see the rear duct that runs over the rear door connecting to both the right and left side ducts. This rear duct needs to come out next.


Before removing this rear duct, you'll need to remove the metal bracket that supports the rear cargo light.

Then it's just a couple of screws and that rear duct comes right down.

Now just remove a few more screws and the right and left ducts come down easily.


We can finally get to the hardware that we need to remove. Each roof rail has five nuts that hold it in place: two at the front and rear, and one in the middle. Remove these and the thing just lifts right off. Here are the rear mounts on the left and right:


Here are the single mounting nuts that are in the center of the load bars. Note that the one on the left side is close to the AM radio antenna wire that leads to the left, rear window.


Finally, here is how I accessed the front mounting nuts. Since I hadn't pulled down the entire headliner, I just reached up through the sunroof opening and had easy access to these nuts. See that industrial Velcro-like stuff just to the rear of the opening?


Back off those five nuts per side and here's what you get:

Alright, let's look next at what's left up there on the roof when you remove those load bars. Pictured here is the forward mount for the left-side load bar, right above the driver's head:

Here's the center mounting location on that same side:

And here's the rear mount on the left side:

Continued below....


