Small Off-Road Build

rodrage

Adventurer
I'm adding a "Hard Box" (truck under box)- that I got from a friend. Looks beat up on the outside, but just dusty from sitting and the inside has never been used. The box will sit inside the cage behind one of the cargo doors. This will fortify the security for pricey parts like the batteries, solar electronics, etc. Not sure if I'm going to mount the power setup in this box or the tongue box. either way, I wanted a little more security if I need it without blatantly advertising an "odd door" on the rig that says, "valuables in here"!

IMG_5939 (1).jpg
IMG_5928 (1).jpg
IMG_5929 (1).jpg
IMG_5930 (1).jpg
IMG_5931 (2).jpg
 
Last edited:

rodrage

Adventurer
Got a little time this morning to tack up the last roof joist and the wheel spindles. I propped up one of the tires to get the offset for wheel adapters and the needed fender stand off. I added 3 inches to the deflection of 1 3/4" for any heavy, and I rounded it up to 5" total. This put the fender exactly flush with the bottom of the cage and where I was hoping for. I intend to leave the fenders as "sacrificial" tear off if I'm in a bad situation, so I am not building any framing for the fender and will be held on with 5 machine screws. They will be "no step" fenders, but the trailer will have a set of strong out-riggers to hold gear and a primary step for reaching to the high side supplemented by some small fold down steps just at the top of the fenders. The out riggers, welded directly to the chassis, will be a 1x2" frame with expanded steel floor (unless I can find some more cool perforated sheet). The rear pair will hold the propane tanks and the front will be carriers for spare gear strapped down if needed. So the fenders will be removable within a pinch.
IMG_6058.jpg
IMG_6055.jpg
IMG_6061.jpg
IMG_6063.jpg
IMG_6065.jpg
IMG_6082.jpg
IMG_6081.jpg
 

rodrage

Adventurer
Trying to get a fit for some new mods. Currently building a 14" tall/6" wide firewood box between the tool box and the trailer box. It will also hold four (4) jerry cans if needed. The mud trax will lock out the cans from getting lifted and the cooler, once mounted, should be a good flush fit. I'm building a hoop with locking spring pins to lock the cooler down. I'll bolt it to the box once it gets powder coated.
IMG_6108.jpg
IMG_6109.jpg
IMG_6111.jpg
 

rodrage

Adventurer
I have a small hand bender for small trim parts and such, but it won't bend heavy wall tubing. Wheel spacers add 1.3" to each side of the width and I don't like tread hanging out past the fenders, so I'm adding some 2x1 square to fir out the fenders and give them a solid mount without compromising the box. The only option was to cut reliefs in the tube and contour the pipe to the fenders, tack, weld and grind smooth. Here is the fitting before tacking.....
IMG_6124.jpg
IMG_6125.jpg
IMG_6133.jpg
IMG_6134.jpg
IMG_6135.jpg
 

rodrage

Adventurer
Dan- It's a Timbren 3500 axle-less set-up with 285/70/17 BFG ATKOs. Might be hard to see in some of the pictures, but it's there. Hope to get it rolling on its own this weekend.
 

rodrage

Adventurer
Got the adapters and wheels on (finally). Added some steel, and finished some stitching on the tubes. Also added the rear stabilizers.
IMG_6197.jpg
IMG_6200.jpg
IMG_6204.jpg
 

rodrage

Adventurer
I want to get the outriggers finished in the next week and get the battery mounts done if I can find the time. Adding heavy expanded metal to the floor of the outriggers and add the fender rail before tacking them to the frame. Got one set welded and smooth, and battery boxes done before I got side tracked with another project.
IMG_6202.jpg
IMG_6205.jpg
 

rodrage

Adventurer
Finished the outriggers for the second side and the fender rails. Also started the firewood/jerrycan box that will sit behind the tool box on the tongue.
IMG_6209 (1).jpg
IMG_6210 (1).jpg
IMG_6211 (2).jpg
 
Last edited:

rodrage

Adventurer
Spent some time on the saw yesterday. It hasn't rained since August here (until I had pulled the saw out of the garage). Building the host cabinet for the pull out kitchen, the refrigerator and food storage slide-outs, and the two tables to attach to the Snow Peak Jikaro table. I still need to laminate, router and stain several pieces before assembly, but made some progress (even with the down-pour).
IMG_6225.jpg
IMG_6226.jpg
IMG_6227.jpg
 

rodrage

Adventurer
Marine varnish in process. My garage stinks and it is worse than painting. Hopefully, four coats will be enough.
IMG_6250.jpg
 

Attachments

  • IMG_6249.jpg
    IMG_6249.jpg
    517.3 KB · Views: 70

rodrage

Adventurer
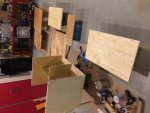
I think I jumped in the deep end with the cabinet build. The box that houses the pull out kitchen, I made from some old baltic birch and some blonde birch I had from an old house project. I coated the interior of the host box with marine varnish and got it really sealed up nice. The outside of the box, which will also be an organizational area on the inside of the trailer will be painted.
However, I have been debating since the start of the project on a color for the entire inside of the trailer. Again, this unit will only house gear and equipment. Personnel will sleep in the RTT tent or the annex. I recall the trailers I've used in the past were tan and/or green in and out. I've landed on a Graphite Gray exterior with Matte Black Trim and Hazard Orange graphics for the outside of the unit.
I've seen great ideas on trim out for the insides of these trailers (even just for cargo). The older I get, I find myself NOT seeing items I'm searching for in small places. I have an assortment of LED interior lights for the interior, but they can only do so much inside a dark interior. This sounds like constructive suicide, but I've decided to paint everything stationary in bright white. The flooring will be covered in a medium gray marine carpet. Yes, several will laugh and point to the damage of post camp gear on bright white. However, I believe that experiences I've had will prove that the idea will work for me. The bright white will help me see/find things easier, and "strange" colors on the white will more easily indicate issues (leaks, rust, etc.)..... Same reason the underside of race cars are gloss white. I'm also sort of obsessive-compulsive so I don't mind cleaning the spots from the white when needed.
Anyway, I painted the outside of the kitchen box bright white and will do the same to the underside of the 2 upper compartment "floors". Paint's on- no turning back now. Also, going to powder-coat the cage white when I'm finished welding.
IMG_6270.jpg
IMG_6269.jpg
Also, got some more parts in varnish and prepping to mount.
IMG_6271.jpg
 

Forum statistics

Threads
185,897
Messages
2,879,550
Members
225,583
Latest member
vertical.dan
Top