You are using an out of date browser. It may not display this or other websites correctly.
You should upgrade or use an alternative browser.
You should upgrade or use an alternative browser.
Subaru Forester Bumper Build for E.J.
- Thread starter StumpXJ
- Start date
E.J.
Explorer
They are close, some guys are running them in 225/70 15 but that leaves .2" of clearance to the spring seat (the 215/75s would rub). I'd love a fatter tire but value the clearance and slightly better mpg's a little more.Josh can correct me if im wrong but those Generals are the biggest tires that will fit due to the strut.
The lower spring seat is in the way to get any taller of a tire on that Foz.
EDIT: dang Stump, you are up and at 'em early
")
BIGdaddy
Expedition Leader
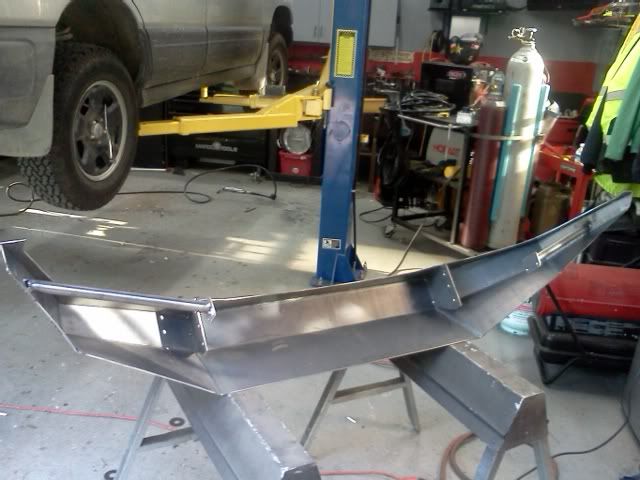
I'd definitely like to see some tie-ins further back into/onto the car's uniframe if this is going to be a recovery point and later on (as you said) possibly a winch mount. I'd also like to see some vertical gussets connecting the plates on the interior of the bumper for stromph, but man-o-man, that is a NICE bumper, sir.
StumpXJ
SE Expedition Society
All good points Brian, I will address them if I can below:
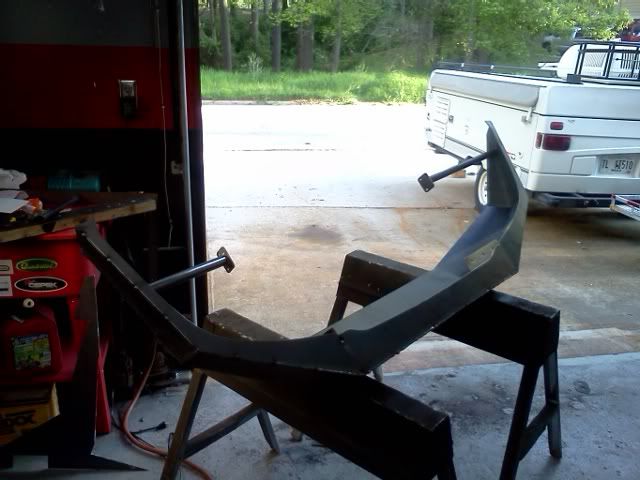
There isnt really any physical way to tie into the 'frame' (and still be able to remove the bumper), this isnt like a cherokee where it has even a fake 'frame rail'. I almost 'painted myself into a corner with the side supports with respect to getting the bumper off, but it angles down just enough to allow the supports to clear and the bumper to be removed. Its kinda hard to explain without being here to see how the car is designed.
The recovery points are already mounted on the vehicle, right below the bumper, and Josh intends to continue using those.
A winch would be fairly easy to do, because you could build between the two mounting horns which are pretty stout.
The inside of the bumper is getting gusseted as we speak, I mentioned it in an earlier post. Its gonna be about as strong/light as possible for what we are building off of.
I have to keep reminding myself this isnt a typical overweight truck or SUV I am used to building for. It had a plastic bumper....for example. Thanks!
~ Stump

Got most of the aesthetic grinding done....
There isnt really any physical way to tie into the 'frame' (and still be able to remove the bumper), this isnt like a cherokee where it has even a fake 'frame rail'. I almost 'painted myself into a corner with the side supports with respect to getting the bumper off, but it angles down just enough to allow the supports to clear and the bumper to be removed. Its kinda hard to explain without being here to see how the car is designed.
The recovery points are already mounted on the vehicle, right below the bumper, and Josh intends to continue using those.
A winch would be fairly easy to do, because you could build between the two mounting horns which are pretty stout.
The inside of the bumper is getting gusseted as we speak, I mentioned it in an earlier post. Its gonna be about as strong/light as possible for what we are building off of.
I have to keep reminding myself this isnt a typical overweight truck or SUV I am used to building for. It had a plastic bumper....for example.
Thanks! ~ Stump
Got most of the aesthetic grinding done....
BIGdaddy
Expedition Leader
All good points Brian, I will address them if I can below:
There isnt really any physical way to tie into the 'frame' (and still be able to remove the bumper), this isnt like a cherokee where it has even a fake 'frame rail'. I almost 'painted myself into a corner with the side supports with respect to getting the bumper off, but it angles down just enough to allow the supports to clear and the bumper to be removed. Its kinda hard to explain without being here to see how the car is designed.
The recovery points are already mounted on the vehicle, right below the bumper, and Josh intends to continue using those.
A winch would be fairly easy to do, because you could build between the two mounting horns which are pretty stout.
The inside of the bumper is getting gusseted as we speak, I mentioned it in an earlier post. Its gonna be about as strong/light as possible for what we are building off of.
I have to keep reminding myself this isnt a typical overweight truck or SUV I am used to building for. It had a plastic bumper....for example.
~ Stump
Got most of the aesthetic grinding done....
Understood on all counts! thanks for the reply.
StumpXJ
SE Expedition Society
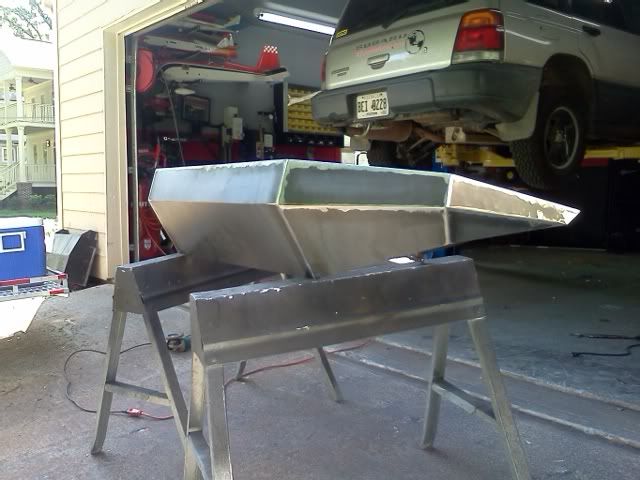
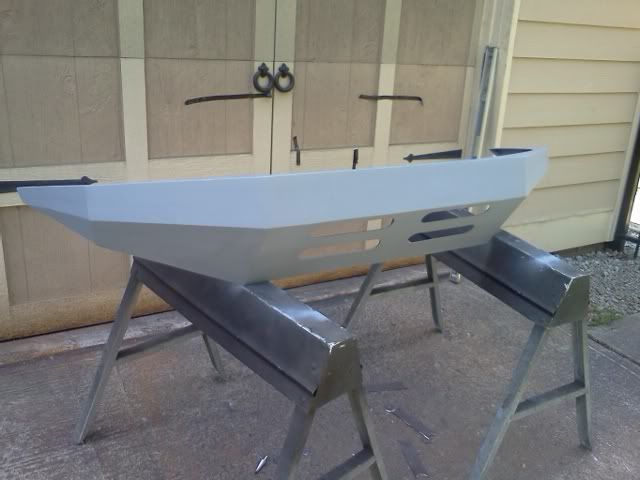
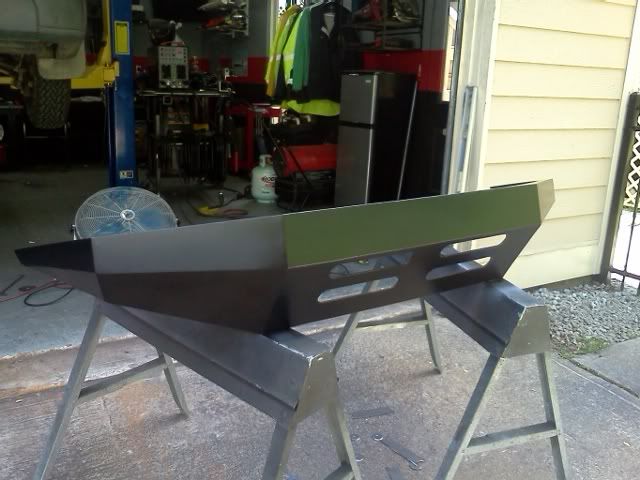
Got the last of the work done to the bumper, end caps for the corners, gussets welded, and everything ground down smooth.
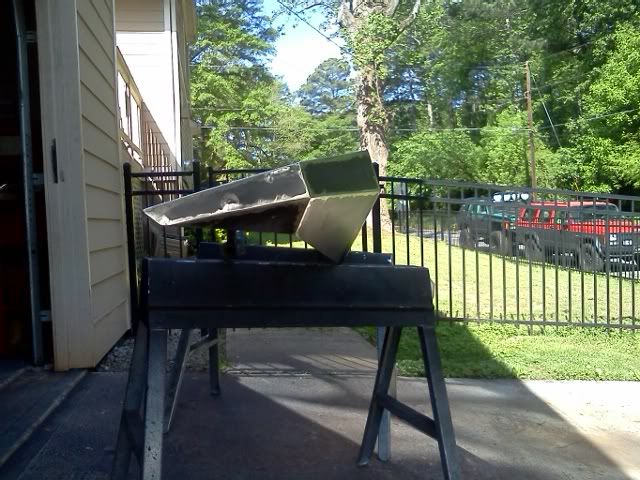
Just finished up the vents for the radiator. Ive had a surprising number of people ask me how do you cut oval slots or even square holes in steel. Maybe this will help those folks...
Get it all laid out where you want whatever shape it is you are cutting, in this case it will be rounded slots.
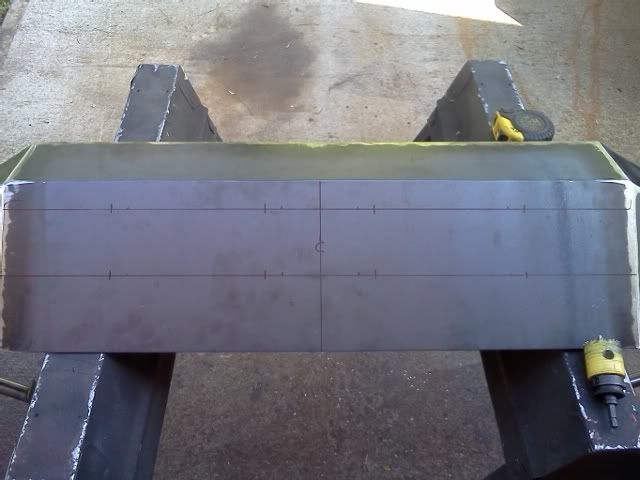
Pick out your favorite sized hole saw, or drill bit (1-3/4" in this case)
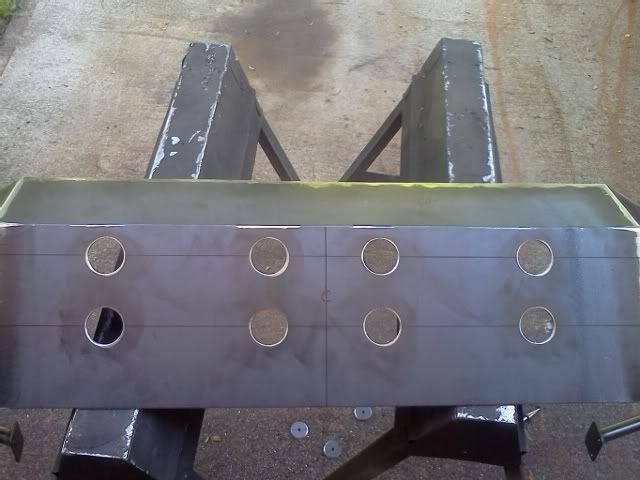
Connect the dots...so to speak.
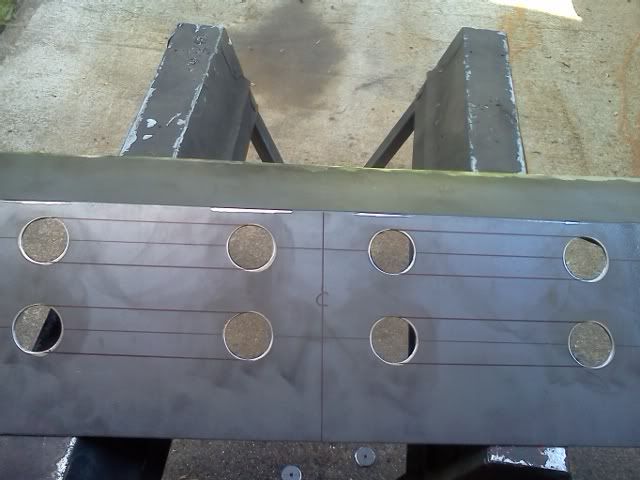
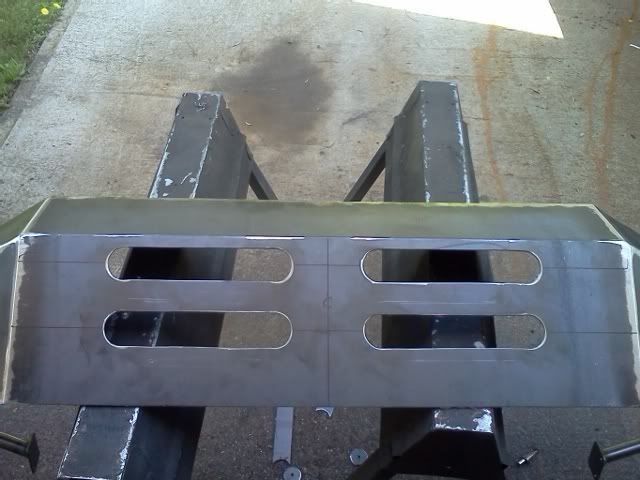
Then cut along those lines. I normally use a thin cutoff wheel for most of my stuff, with a little patience, practice, and a whole lot of safety, you can do a LOT of cool things with them. There are a couple ways to make the cuts, but this is the easiest for me. I have a plasma, but the line is only as straight as your hand moves = lots of grinding usually. I also have a CNC Milling machine that would have done it, but I would be finished by the time I wrote the program... a manual mill would work nicely too though. Anyway, this is what we were shooting for, easy peasy.

Thats pretty much it for the bumper build. It will get cleaned down well with acetone, sprayed with an Etching primer, and probably 3-4 coats of semi-gloss paint for ease of touch up if/when Josh beats on it and scratches it up.
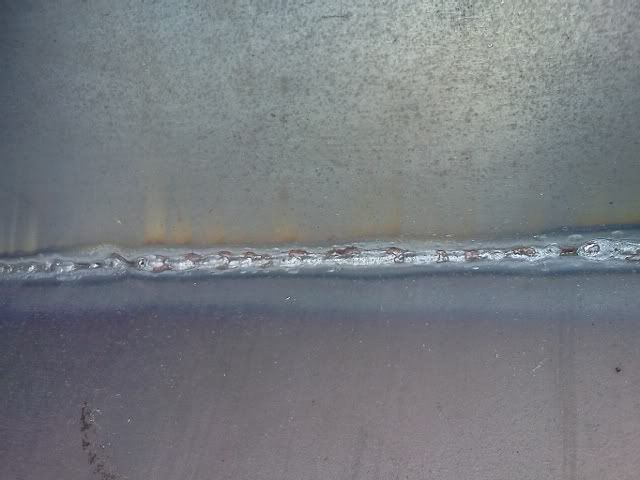
I was also asked in a PM if I welded the backside of the plates too.... Honestly, a good welding machine, some skill/experience, you shouldnt have to. To a point anyway, thinner material such as this, shouldnt be an issue. Not much point in welding it if you dont get full penetration. It essentially is 'welded' all the way through. This photo shows the penetration through to the backside. These are all cell phone pics, so excuse the crappy quality, but you get the gist.
The next pictures should be of it painted, and mounted on the Foz.
~ Stump
Just finished up the vents for the radiator. Ive had a surprising number of people ask me how do you cut oval slots or even square holes in steel. Maybe this will help those folks...
Get it all laid out where you want whatever shape it is you are cutting, in this case it will be rounded slots.
Pick out your favorite sized hole saw, or drill bit (1-3/4" in this case)
Connect the dots...so to speak.
Then cut along those lines. I normally use a thin cutoff wheel for most of my stuff, with a little patience, practice, and a whole lot of safety, you can do a LOT of cool things with them. There are a couple ways to make the cuts, but this is the easiest for me. I have a plasma, but the line is only as straight as your hand moves = lots of grinding usually. I also have a CNC Milling machine that would have done it, but I would be finished by the time I wrote the program... a manual mill would work nicely too though. Anyway, this is what we were shooting for, easy peasy.
Thats pretty much it for the bumper build. It will get cleaned down well with acetone, sprayed with an Etching primer, and probably 3-4 coats of semi-gloss paint for ease of touch up if/when Josh beats on it and scratches it up.
I was also asked in a PM if I welded the backside of the plates too.... Honestly, a good welding machine, some skill/experience, you shouldnt have to. To a point anyway, thinner material such as this, shouldnt be an issue. Not much point in welding it if you dont get full penetration. It essentially is 'welded' all the way through. This photo shows the penetration through to the backside. These are all cell phone pics, so excuse the crappy quality, but you get the gist.
The next pictures should be of it painted, and mounted on the Foz.
~ Stump
Last edited:
Eaglefreek
Eagleless
:bowdown:
Forum statistics
Members online
- RallyeX
- COAKXterra
- 85_Ranger4x4
- SD Shawn
- Jasalvas
- mark5280
- Raisinhead
- aikido73
- jtolle777
- Yeti342
- N.Penley
- TCM
- 2auroras
- claymond
- pinevalley
- Attack Force AWD
- salstoy
- mrpotatocat
- TheNextEpisode
- Dougnuts
- bt50
- Robbus
- cug
- LordExplorer
- aknightinak
- fourfa
- mmth_ski_bum
- Bikestuff
- tacollie
- terry4130
- Camper123
- jetbuilt
- matttahoe53
- MrModica
- Roaming Robertsons
- habakuk
- KI4LTX
- Kingsize24
- Superinferno
- One shot
- beef tits
- TacoSauce11
- gator70
- ABBB
- Uncle Jeffy
- pedalwrench
- DapperDan11
- SC4ws
- Lost in Texas
- Liechi735
Total: 972 (members: 50, guests: 922)