TEJASYOTA
Adventurer
After 9-years of ownership...lots of dirt, mud, rocks, trees, bug hits, etc.
The front end of my headlamp lens looked like what it hit - - CRAPPY and Foggy!
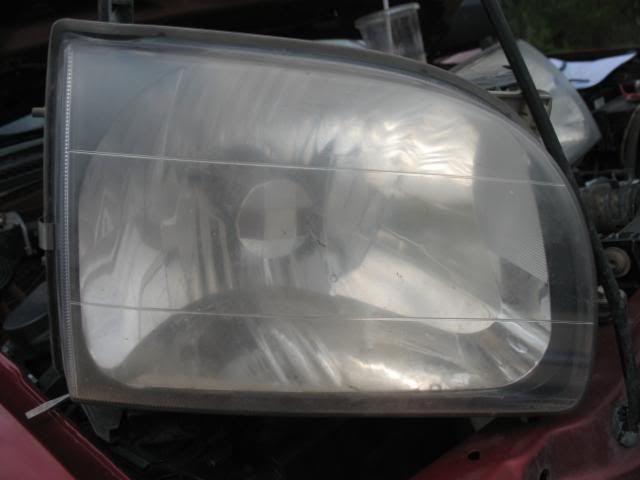
Note, that I have done the sanding, polishing of these lens many times.
After the last refinishing job, the lens were still not clear.
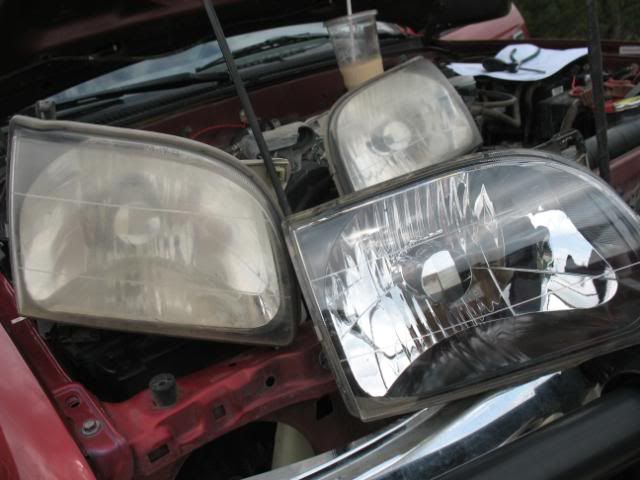
So I decided to search and purchase "new" headlamp assemblies.
I have been patiently waiting, searching for a replacement.
Then fellow TTORA Member ThunderONE, was selling his set.
PayPal and a week later...they arrived.
Following the Tacoma FSM's instructions of removing the Side Markers and Front Grill was fairly easy.
Since I have an ARB Bull Bumper, the Bull Bar was fairly close to the grill, so the extraction of the grill did not happen.
I just unclipped the mounts and let the grill hang in place.
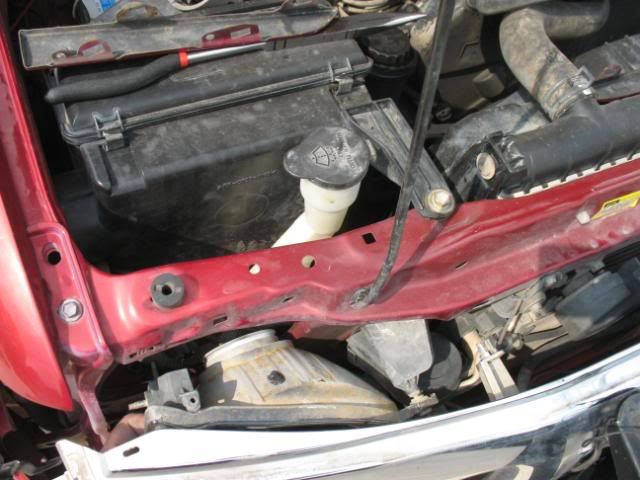
Undoing the bolt (1) and nuts (2) for the headlamps was easy.
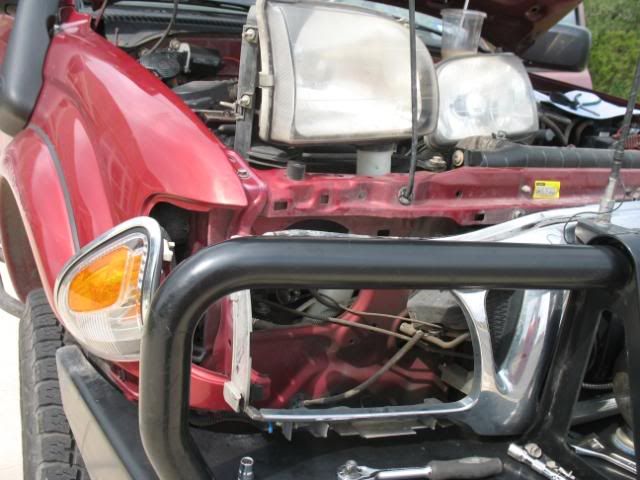
The removal of the Headlamp assy was something of a puzzle.
After a few different twists and turns, I was able to remove the headlamp assemblies.
Here were the steps.
1) Using one hand or a piece of wood, wedge it between the back side of the grill and the sheet metal it was mounted on.
2) Pull headlamp close to the back side of the grill.
3) Twist the headlamp top towards you, so the lens will tilt towards you and then eventually downwards.
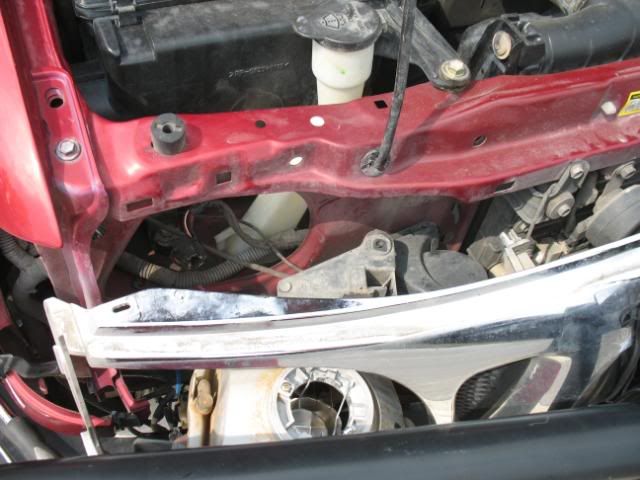
4) Pull through the Grill's headlamp opening, the stud side of the headlamp towards you.
You will most likely need to shuffle the Grill (left to right) to allow the headlamp to squeeze through.
You might want to place a towel on the bottom edge of the headlamp opening of the grill.
This will prevent and scratches to the lens.
I forgot about doing that....
Now you are done with the removal.
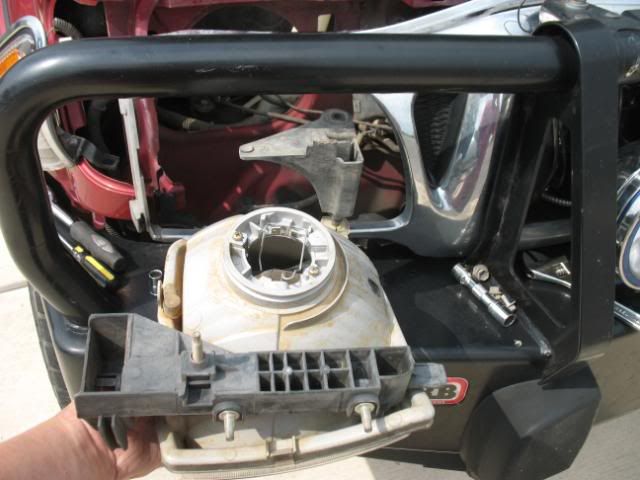
The only thing I had pick and pull from my old headlamp was the alignment brackets.
They are the black plastic things on the back sides of the headlamp.
That was easy to remove and reinstall...use a thin flat head screwdriver to release the clips.
Now the reassembly was basically backwards...
I will not bore you with that, so here is the finished product.
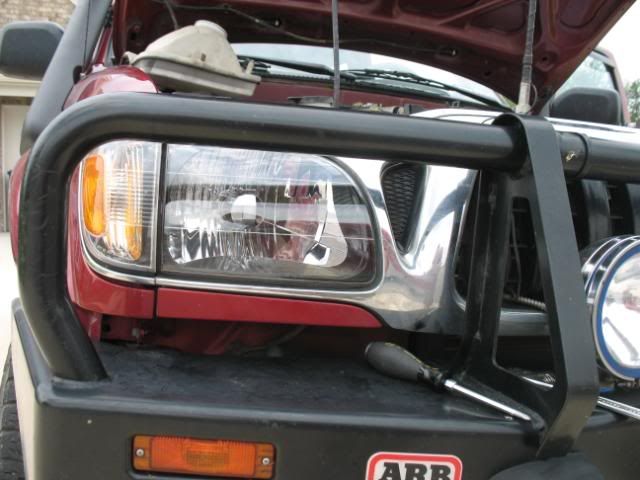
Just under 1-hour work.
Tonight I will check out the beam alignment, via eyeballing it.
Again, thanks to ThunderONE for selling his to me.
The front end of my headlamp lens looked like what it hit - - CRAPPY and Foggy!
Note, that I have done the sanding, polishing of these lens many times.
After the last refinishing job, the lens were still not clear.
So I decided to search and purchase "new" headlamp assemblies.
I have been patiently waiting, searching for a replacement.
Then fellow TTORA Member ThunderONE, was selling his set.
PayPal and a week later...they arrived.
Following the Tacoma FSM's instructions of removing the Side Markers and Front Grill was fairly easy.
Since I have an ARB Bull Bumper, the Bull Bar was fairly close to the grill, so the extraction of the grill did not happen.
I just unclipped the mounts and let the grill hang in place.
Undoing the bolt (1) and nuts (2) for the headlamps was easy.
The removal of the Headlamp assy was something of a puzzle.
After a few different twists and turns, I was able to remove the headlamp assemblies.
Here were the steps.
1) Using one hand or a piece of wood, wedge it between the back side of the grill and the sheet metal it was mounted on.
2) Pull headlamp close to the back side of the grill.
3) Twist the headlamp top towards you, so the lens will tilt towards you and then eventually downwards.
4) Pull through the Grill's headlamp opening, the stud side of the headlamp towards you.
You will most likely need to shuffle the Grill (left to right) to allow the headlamp to squeeze through.
You might want to place a towel on the bottom edge of the headlamp opening of the grill.
This will prevent and scratches to the lens.
I forgot about doing that....
Now you are done with the removal.
The only thing I had pick and pull from my old headlamp was the alignment brackets.
They are the black plastic things on the back sides of the headlamp.
That was easy to remove and reinstall...use a thin flat head screwdriver to release the clips.
Now the reassembly was basically backwards...
I will not bore you with that, so here is the finished product.
Just under 1-hour work.
Tonight I will check out the beam alignment, via eyeballing it.
Again, thanks to ThunderONE for selling his to me.