guthriealexander
Observer
The “80% Done but Good Enough for Government Work” Build
1995.5 FZJ-80 (OBD II)
Purchased in April of 2011 with 185,000 Miles
Currently 225,000
I have not done a particularly good job of documenting this build and the various iterations of this truck, nor has much of anything been planned. Some mornings I just wake up and think, i’m gonna build a bumper for the cruiser, or i’m gonna build some drawers like i’ve seen on expo and then I just do it. The quality is never great and the fit and finish leaves a lot to be desired, but for the most part it works for me and thats all that matters. I’m an 80% kinda guy.
I know im missing some details and images, I will try and fill in the gaps when I find them, this is the problem with waiting to start a thread.
In 2011 I purchased, what I thought of at the time was a pretty clean locked 1995 cruiser with a front ARB, that had a documented head gasket replacement, and some other decent records. The carpet had been replaced, the seat covers looked decent and other than a dent up front the thing looked to be in pretty good condition.
A carfax report showed 6 previous owners, which was a bit concerning at the time, but not enough to deter me, and the report showed no claims on the vehicle. Let just say carfax is useful to find out some basic information on a vehicle, but never trust it to get you anything close to the cars history. As with any used car purchase, when you start to find all the dumb or crazy things previous owners have done to a vehicle, sometimes you can’t help but scratch your head. Im sure if I ever sell this truck the buyer will think the same thing about all the stuff I have done to it.
At the time I was new to Cruisers, I had a 1991 toyota mini truck that I loved a lot and had learned a lot about fixing cars with. The more I learned about that truck, the more I knew I wanted a land cruiser.

Here is the truck the day I brought her home, more of less stock with the ARB.
I joined the local Austin Cruiser Club to try and learn as much as I could, outside of what I could gleam off expo and Mud and very quickly got to modifying it with no real goal or plan in mind other than I did not have the money to make it what I was seeing on expo, so I was just going to do the best I could.
I did all the normal maintenance that everyone recommended, PHH, baselined fluids, upgraded to the stock height OME suspension and added 285 BFG AT’s.
First order of business was to get the spare tire out from under the truck. I really liked the 4x4 labs bumper, but couldn't afford it at the time. Sean on Mud had a design that I really liked and seemed like it was manageable with my limited skills and attention span, you can see his original thread here.
http://forum.ih8mud.com/threads/just-built-rear-bumper-swing-out-tire-carrier.404280/
Started off by cutting off about 6 inches off the rear frame, it is a scary feeling when that sawzall hits metal, but no turning back.

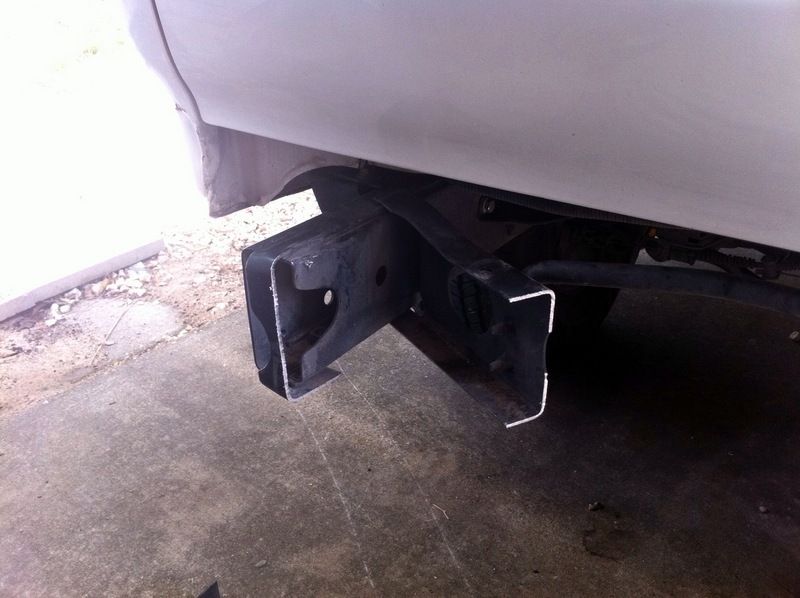
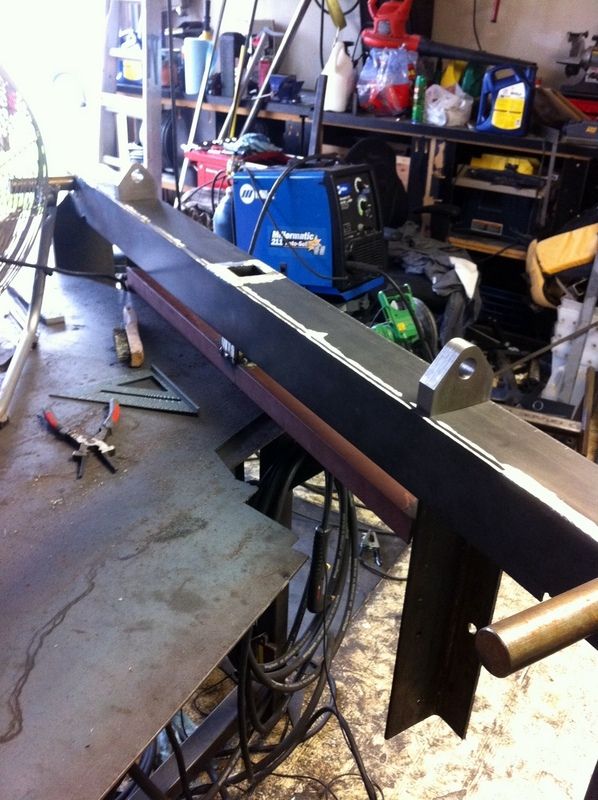
The basic form consists of a .25 inch 2x4 main tube, and 3/16 2x6 tube sides with Iron Pig spindles. Welded in a new .25 inch chanel rear cross member with an inset trailer hitch receiver, welded back face of the cross member and front and back face of the main 2x4 tube. Brackets are also ¼ inch and is bolted into every hole I could reach. I think there are 10 total.
New crossmember welded into the frame.


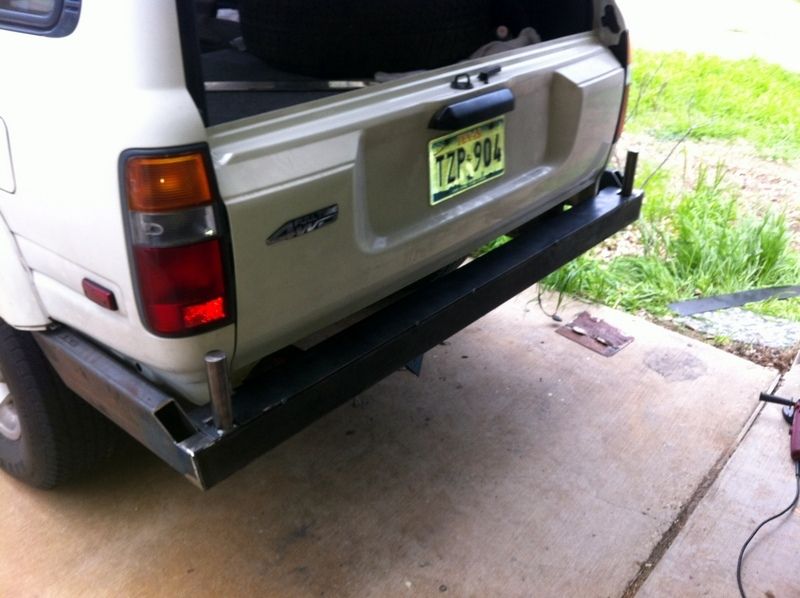
Form up.
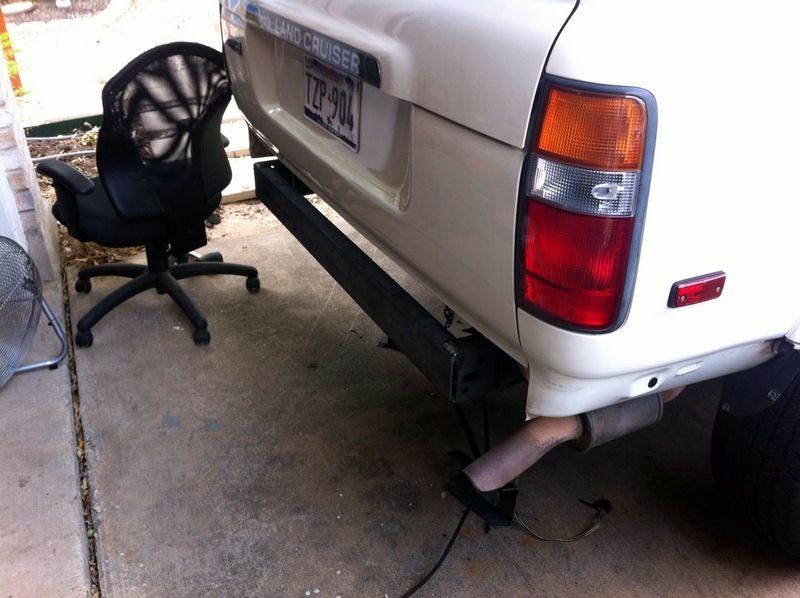
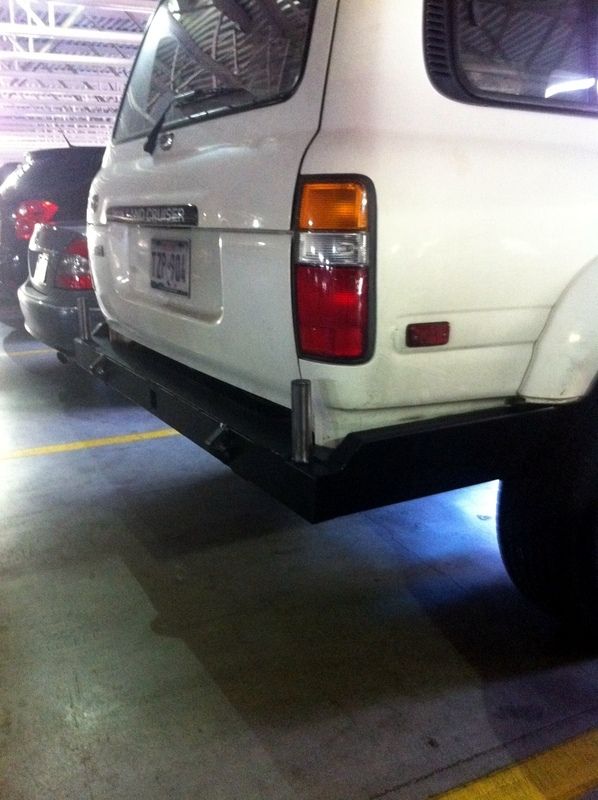
I drove around with this bumper for a month or so and eventually came to the conclusion that it was just too bad, even by my standards. So I pulled it off and started over.
Version II of the bumper was much better planned and focused on getting the spindles and the swing out tire carrier on. For the most part this was straight forward other than my first tire placement covered my passenger brake light, so I had to cut it off and move the carrier arm about 6 inches to the drivers side.


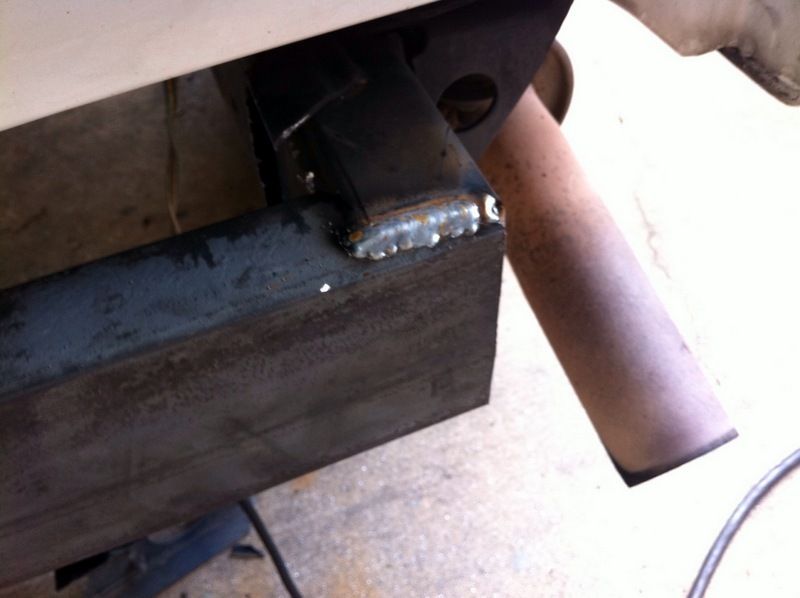
Insetting the receiver.


No build is complete without some drama, and I had some of the drug cartel variety. During the local Austin Cruiser meeting DaveGonz commented how low my rear floor panel was under the cruiser. Being new to the vehicle I had not noticed, the spare tire carrier was still under there bolted up the way it should but sure enough he was right. Comparing my under floor to his showed mine to be about 5 inches lower than the other cruisers. Someone had welded in a false floor panel under the cruiser with a hinged access panel that had been welded and bondoed shut. The whole box was then caulked from both sides, the interior covered in duct tape and painted black. The worst part is that they took a saw to the gas filler tube to run it under the frame. It took me 2 weekends with the plasma and grinder to get most of the box out. Not wanting to spend the money Mr toyota wanted for a new gas filler tube assembly I had to reweld it back together in 3 places to get it back to the stock geometry. A major *** whipping.
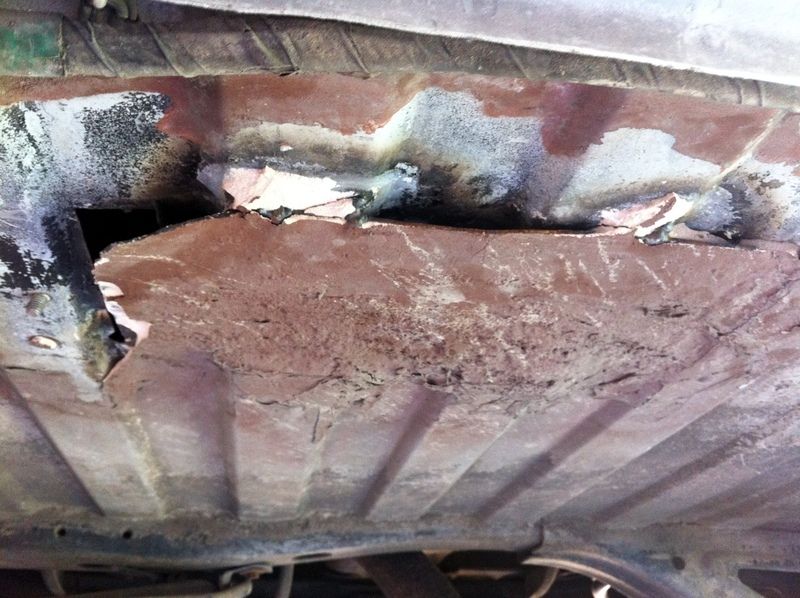
False floor as i start to chip away the bondo covering the hinge panel.

Panel removed
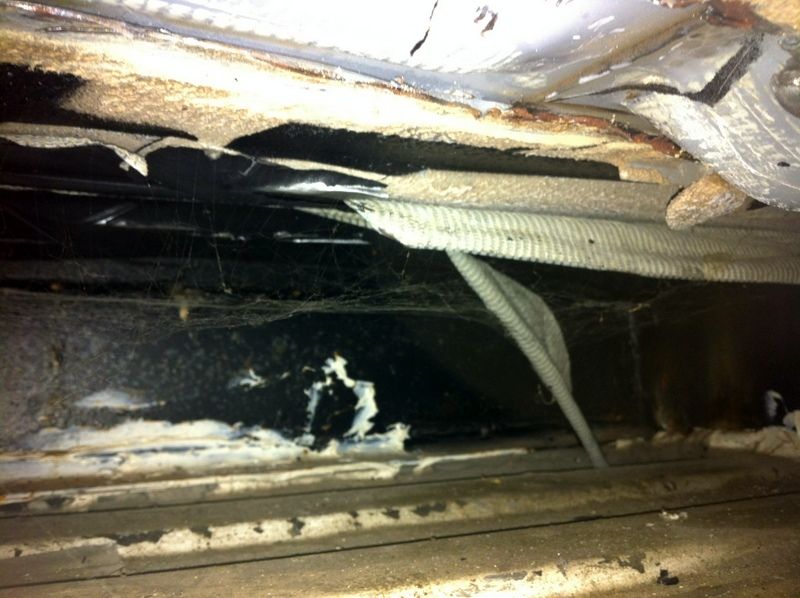
Inside the box

Cutting out the box, you can just barely make out the rerouted gas filler neck under the frame.
Like many others my flares were starting to fall off in places and generally just started to look bad. I did lots of research on the flareless look and convinced myself that I liked it. Once again not wanting to spend the money on having it line-xed professionally I bought some Als liner from 4-wheel-parts and a drywall gun from harbor freight. I taped off the truck and started to weld up the fender flare holes, about ¼ through I got tired and gave up and put aluminum tape over the rest.


1995.5 FZJ-80 (OBD II)
Purchased in April of 2011 with 185,000 Miles
Currently 225,000
I have not done a particularly good job of documenting this build and the various iterations of this truck, nor has much of anything been planned. Some mornings I just wake up and think, i’m gonna build a bumper for the cruiser, or i’m gonna build some drawers like i’ve seen on expo and then I just do it. The quality is never great and the fit and finish leaves a lot to be desired, but for the most part it works for me and thats all that matters. I’m an 80% kinda guy.
I know im missing some details and images, I will try and fill in the gaps when I find them, this is the problem with waiting to start a thread.
In 2011 I purchased, what I thought of at the time was a pretty clean locked 1995 cruiser with a front ARB, that had a documented head gasket replacement, and some other decent records. The carpet had been replaced, the seat covers looked decent and other than a dent up front the thing looked to be in pretty good condition.
A carfax report showed 6 previous owners, which was a bit concerning at the time, but not enough to deter me, and the report showed no claims on the vehicle. Let just say carfax is useful to find out some basic information on a vehicle, but never trust it to get you anything close to the cars history. As with any used car purchase, when you start to find all the dumb or crazy things previous owners have done to a vehicle, sometimes you can’t help but scratch your head. Im sure if I ever sell this truck the buyer will think the same thing about all the stuff I have done to it.
At the time I was new to Cruisers, I had a 1991 toyota mini truck that I loved a lot and had learned a lot about fixing cars with. The more I learned about that truck, the more I knew I wanted a land cruiser.

Here is the truck the day I brought her home, more of less stock with the ARB.
I joined the local Austin Cruiser Club to try and learn as much as I could, outside of what I could gleam off expo and Mud and very quickly got to modifying it with no real goal or plan in mind other than I did not have the money to make it what I was seeing on expo, so I was just going to do the best I could.
I did all the normal maintenance that everyone recommended, PHH, baselined fluids, upgraded to the stock height OME suspension and added 285 BFG AT’s.
First order of business was to get the spare tire out from under the truck. I really liked the 4x4 labs bumper, but couldn't afford it at the time. Sean on Mud had a design that I really liked and seemed like it was manageable with my limited skills and attention span, you can see his original thread here.
http://forum.ih8mud.com/threads/just-built-rear-bumper-swing-out-tire-carrier.404280/
Started off by cutting off about 6 inches off the rear frame, it is a scary feeling when that sawzall hits metal, but no turning back.


The basic form consists of a .25 inch 2x4 main tube, and 3/16 2x6 tube sides with Iron Pig spindles. Welded in a new .25 inch chanel rear cross member with an inset trailer hitch receiver, welded back face of the cross member and front and back face of the main 2x4 tube. Brackets are also ¼ inch and is bolted into every hole I could reach. I think there are 10 total.


New crossmember welded into the frame.


Form up.
I drove around with this bumper for a month or so and eventually came to the conclusion that it was just too bad, even by my standards. So I pulled it off and started over.
Version II of the bumper was much better planned and focused on getting the spindles and the swing out tire carrier on. For the most part this was straight forward other than my first tire placement covered my passenger brake light, so I had to cut it off and move the carrier arm about 6 inches to the drivers side.


Insetting the receiver.


No build is complete without some drama, and I had some of the drug cartel variety. During the local Austin Cruiser meeting DaveGonz commented how low my rear floor panel was under the cruiser. Being new to the vehicle I had not noticed, the spare tire carrier was still under there bolted up the way it should but sure enough he was right. Comparing my under floor to his showed mine to be about 5 inches lower than the other cruisers. Someone had welded in a false floor panel under the cruiser with a hinged access panel that had been welded and bondoed shut. The whole box was then caulked from both sides, the interior covered in duct tape and painted black. The worst part is that they took a saw to the gas filler tube to run it under the frame. It took me 2 weekends with the plasma and grinder to get most of the box out. Not wanting to spend the money Mr toyota wanted for a new gas filler tube assembly I had to reweld it back together in 3 places to get it back to the stock geometry. A major *** whipping.

False floor as i start to chip away the bondo covering the hinge panel.

Panel removed

Inside the box

Cutting out the box, you can just barely make out the rerouted gas filler neck under the frame.
Like many others my flares were starting to fall off in places and generally just started to look bad. I did lots of research on the flareless look and convinced myself that I liked it. Once again not wanting to spend the money on having it line-xed professionally I bought some Als liner from 4-wheel-parts and a drywall gun from harbor freight. I taped off the truck and started to weld up the fender flare holes, about ¼ through I got tired and gave up and put aluminum tape over the rest.


Last edited:


