The overland beater: Dodge 1500

drewactual

Adventurer
those relays are weak... they blow... the issue i always encountered (when i encountered pump issues) was the pump would get hot on a low tank of gas (gas cools them) and they would heat up, drawing more current than they're designed to, and the relay would give up the ghost. easy solution: keep them submerged. :wings:
 

kraven

Hegelian Scum
Yeah, I remembered after I posted last night that when the guy dropped it off he took it off the dolly and started it, but it wouldn't crank. And then he kicked the tank a few times and it started. So, I figure it probably has a bad pump and it started when I was looking at it just because.

But the relay is a factory Mopar piece. It's original looking, which is odd, in my experience.

It needs new straps anyway, so I'm gonna drop the tank and just do the straps and hardware while I'm at it. It's an easy -ish job.
 

kraven

Hegelian Scum
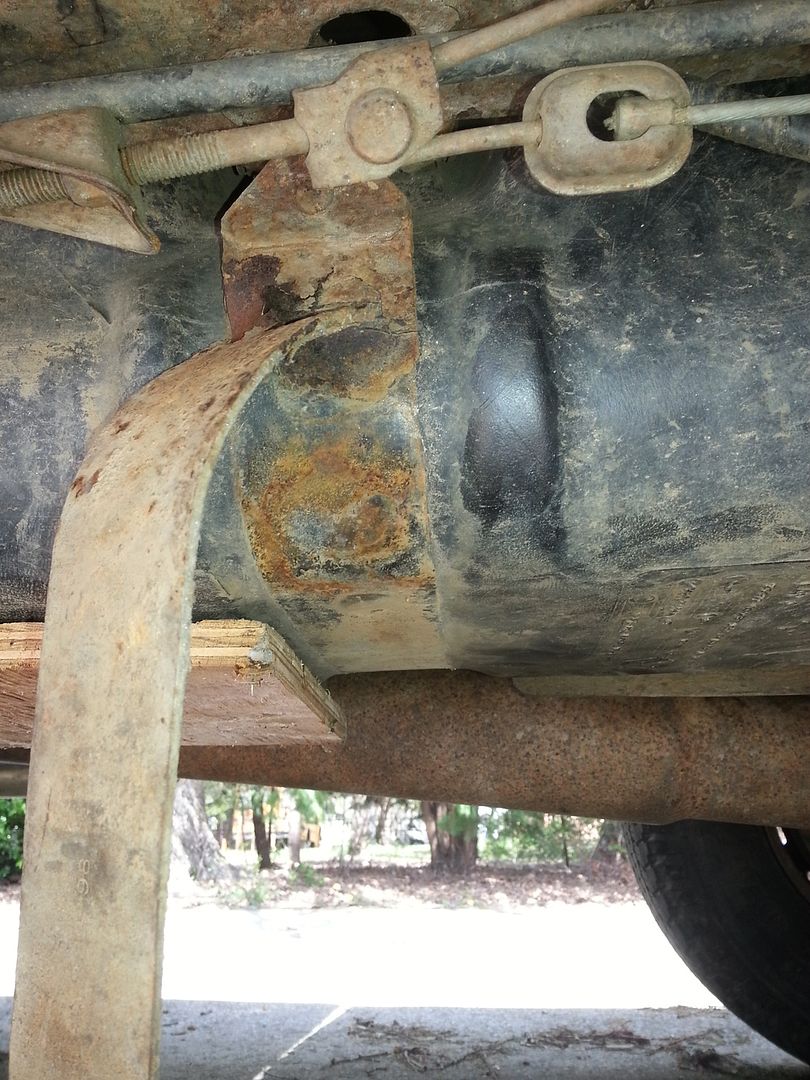
Straps look OEM. And this one looks more rusted than I thought, which is generally how it goes.
IMG_20160414_142449_zpsl32klytg.jpg


Tank in and out is a piece of cake. Remove the filler hose and the vent hose from the filler neck.
*check the filler neck for rust through*
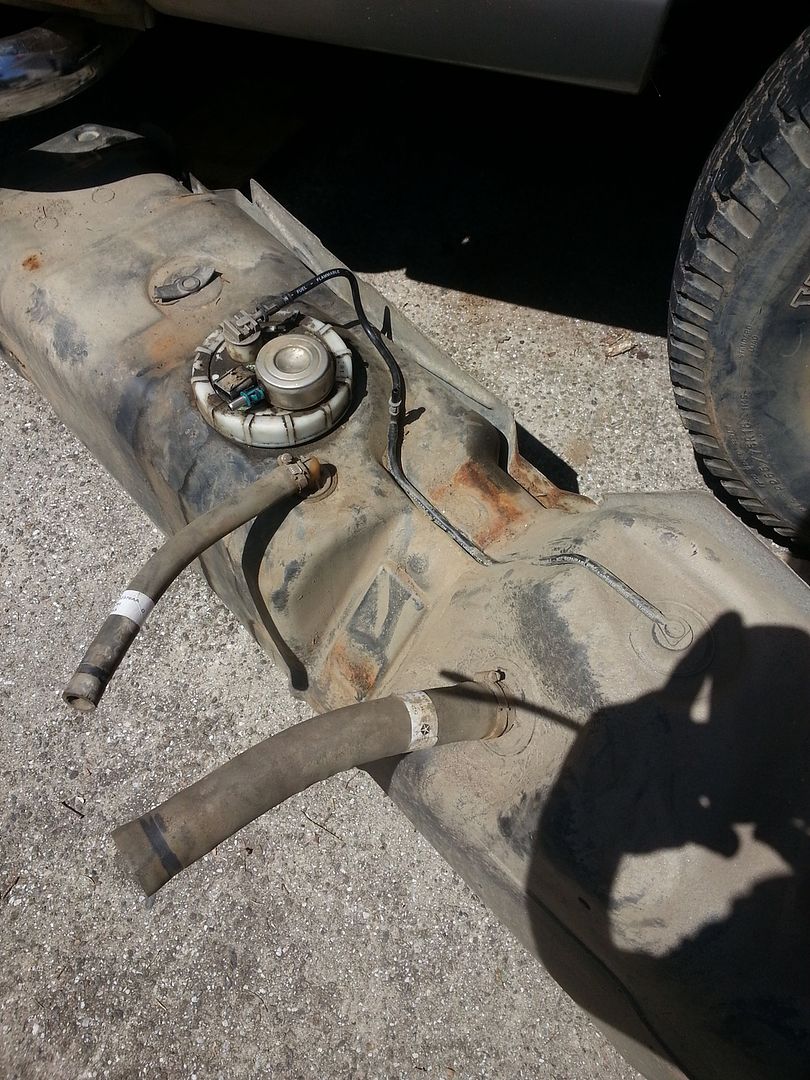
Get a jack, a piece of plywood, a 15mm deep socket, an 8 or 10 inch extension, and a ratchet. Remove the two nuts that hold the straps. Pull the straps loose. Ease the tank down an inch or so, so you can get your ginormous hands in there. Remove the main fuel line by quick connect. If you lower the tank too much, you put it under tension and it won't pop off. Then you'll be frustrated. Don't be frustrated. Be mellow.

The tank might have 3 gallons of fuel in it. So it was easy to manhandle around.

IMG_20160414_151845_zpswx48r21w.jpg


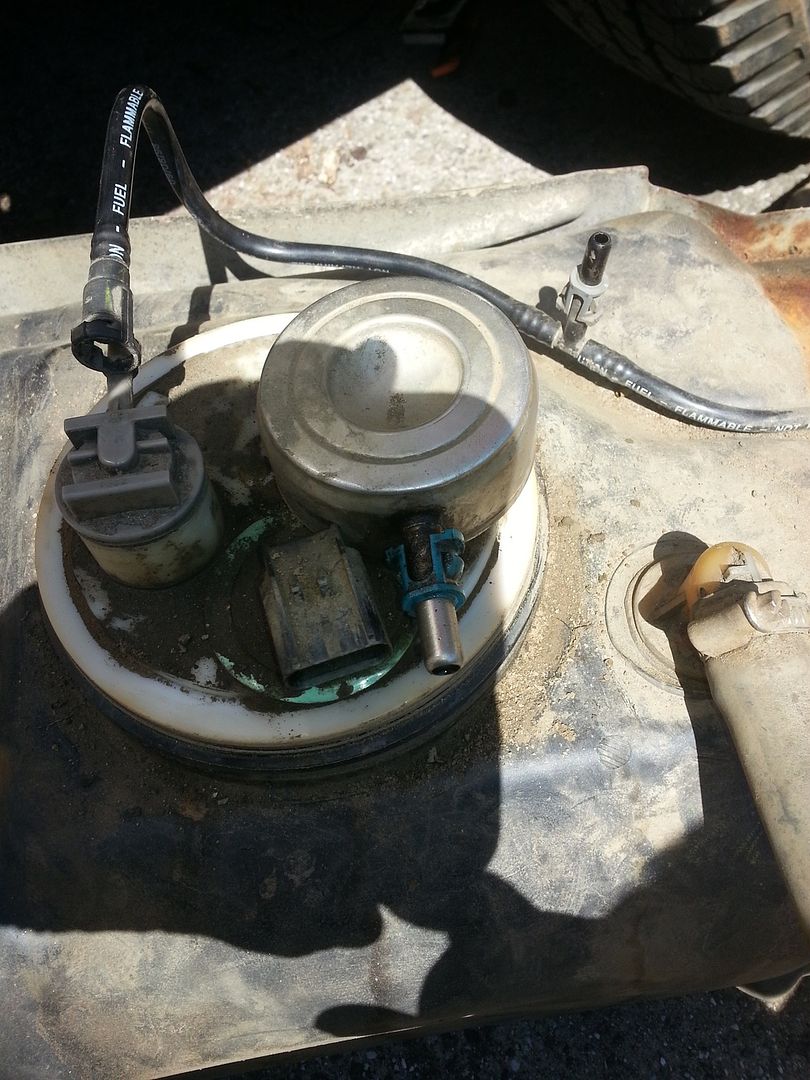
Take the quick disconnect off from the vertical fitting on the vent side. Then you can lower the tank down and remove electrical and vent from the pump (another quick disconnect you can just pinch)
Super easy.
IMG_20160414_151845_zpswx48r21w.jpg


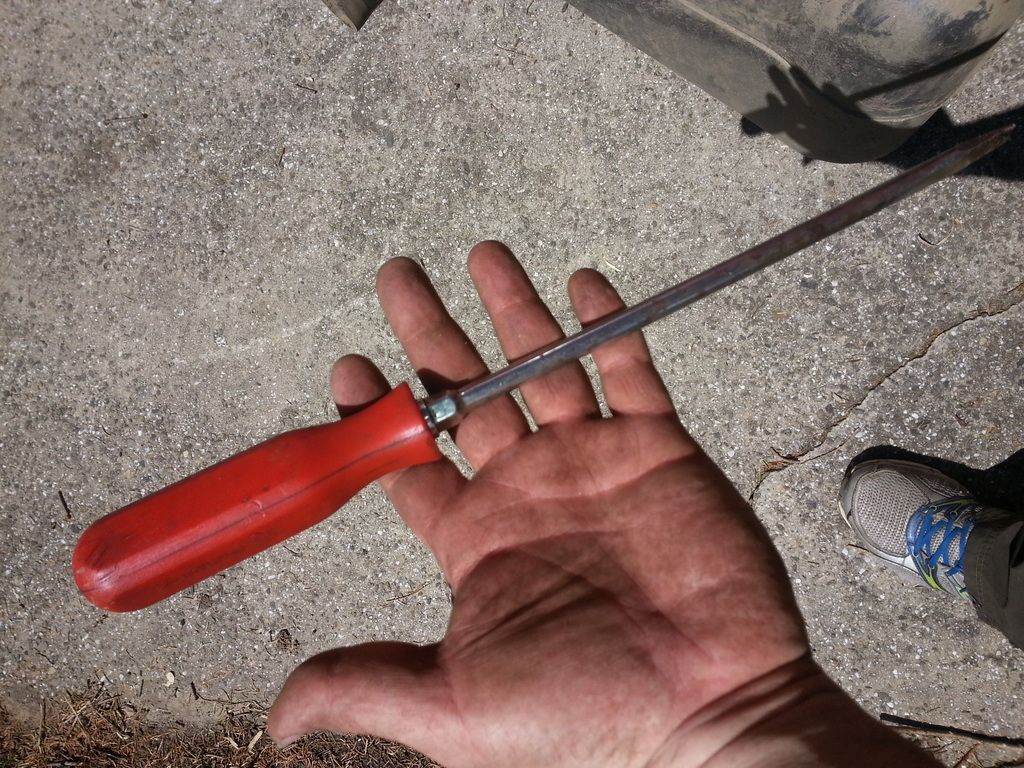
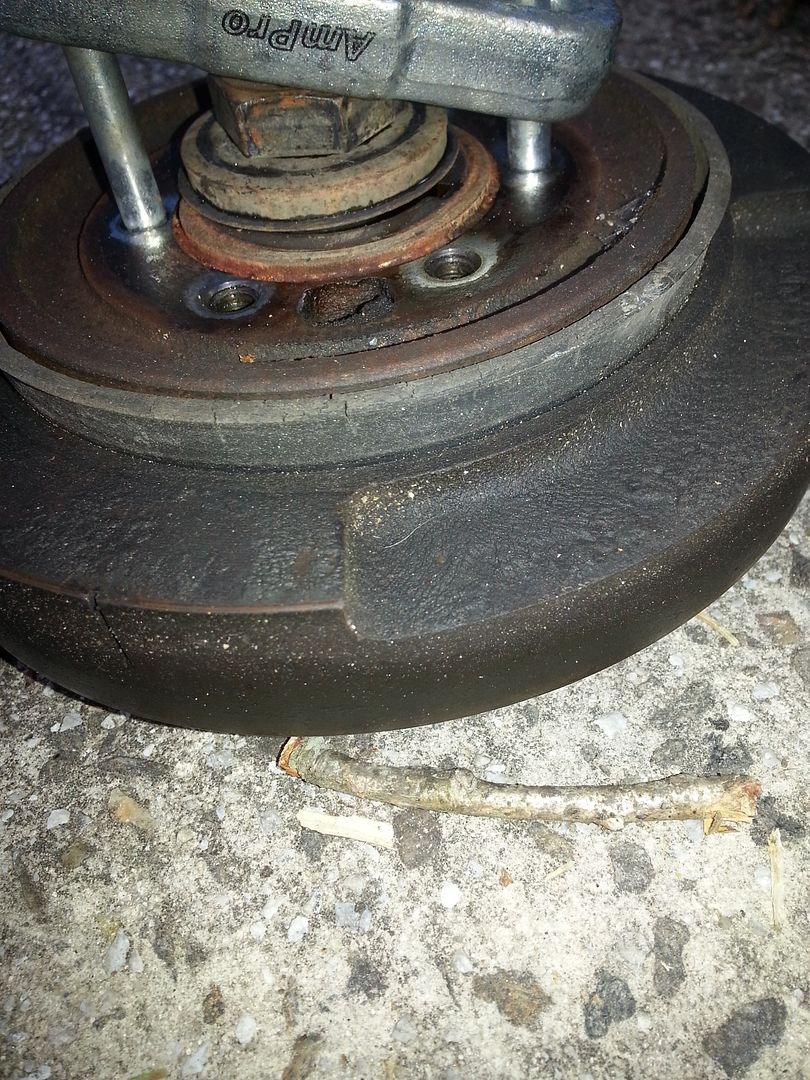
The ring that holds it in place threads on like a big nut. You can use a strap wrench, or a brass drift, or a pokemon game.
Just gently drive the thing counter clockwise as you look down on it. I used my old pal the giant flat screwdriver/pry bar/anger translator/rust defier.
IMG_20160414_151816_zps1oma2och.jpg

Clean the top so you don't shower dust and road debris in to the tank interior. Vacuum it, sweep it, poke it with your finger. Whatever.
IMG_20160414_152725_zpsed6mmxu5.jpg

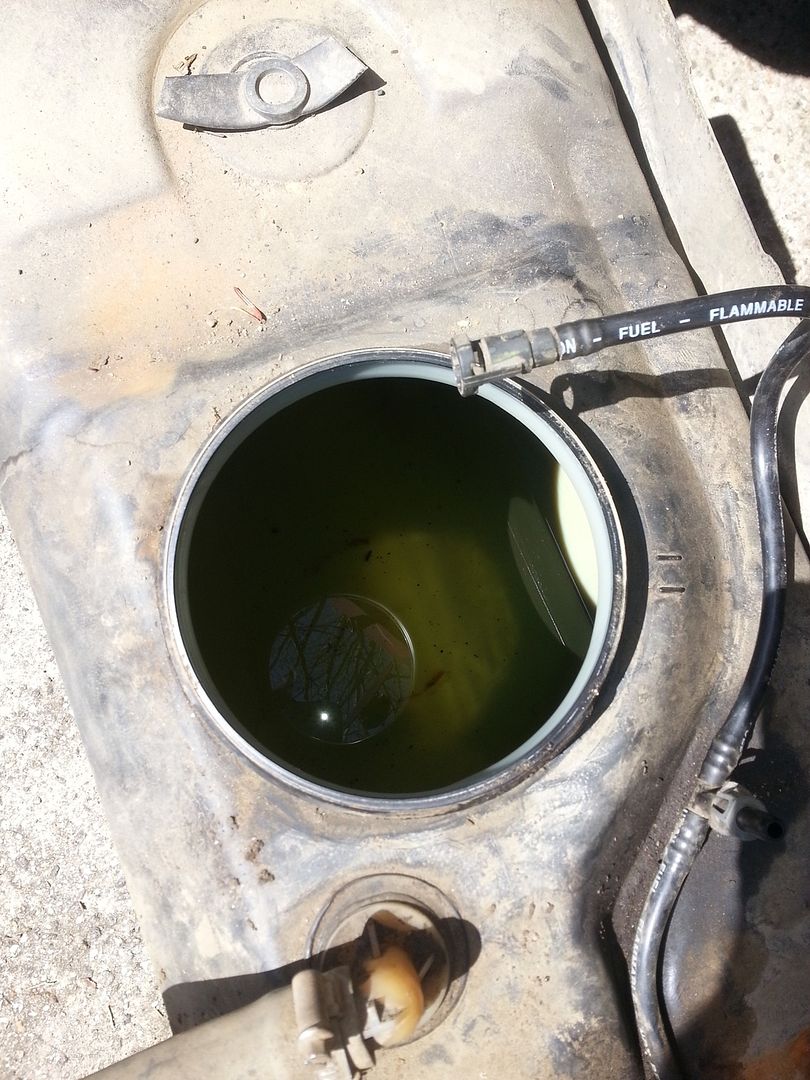
There's about a half gallon of fuel in this thing, just sitting there chilling. Make sure you have a bucket. I did. I also was able to dump most of it right back in the tank, because I cleaned the top of the pump well enough to not shower dust in there when I tilted it. Made life easier.
Piece of cake, man.
IMG_20160414_153356_zps46sum7mj.jpg


There's an alignment mark on the pump top and the tank body (two dashes at about 3 o clock in the above pic) that you need to pay attention to when you disassemble and reassemble. Don't be an idiot and think it doesn't matter. It matters, if'n you want your fuel gauge to work properly, lines to line up when you jack it back up in there, and stuff.
Speaking of which, depending on what pump you order, you'll need that fuel float and arm, maybe. So, don't throw the pump down or into a bucket full of pine power all willy nilly. Take the black clip off, then take the wire arm and float off in one piece.
 

kraven

Hegelian Scum
Well, there's your problem.
IMG_20160415_193024_zpsawoiixq6.jpg

Balancer outer ring worked back on the rubber and ate into the timing cover. I got the fuel pump all done and started on the front seal, thinking I would just pull the balancer and replace the seal, and twerk out of there, easy like. Hell to the naw, brother. Hell to the naw.
Stick a fork in that balancer.
IMG_20160415_193116_zps44egoam9.jpg
 

kraven

Hegelian Scum
I also bedlined the interior floor area. So, that's nice. Time to reinstall the seats and stuff.
20160415_201509_zps0nhk6lgm.jpg
 

chilliwak

Expedition Leader
Thats quite the hole :Wow1:you got in the front cover Kraven. I guess its time to find a new one. Good work on the gas tank.:)
 

kraven

Hegelian Scum
Should be able to weld that up pretty easily (not me, I only have a mig outfit to do steel). It's all aluminum. Biggest problem is that it's coated in oil and would need to be thoroughly cleaned to avoid contamination. I'm looking around for a junkyard part right now. Maybe I can find a junkyard balancer too.

The fuel pump was a piece of cake. Those new straps were absolutely perfect reproductions of the originals. Fit right up there without any hassle.
 

kraven

Hegelian Scum
Got the seats bolted back in and touched up the somewhat uncured bedliner I put on the floor.

Working now against a no start condition. Got the pump in and got good pressure with it when I hotwire it. The old one was pretty low, so it was a fix.
But now I'm getting some kind of weird no spark/no fuel condition. I had spark and fuel. It all worked. I took it apart and now it won't work. But I still have the whole front accessory drive off it, including a couple of grounds. So that may be it.

I just found a mention on a forum about an issue with the security system shutting the whole truck down. It came from the factory with an alarm, but there's no fob for it. So... I guess that's possible.
There's a security dooflotchie called "Central Timer Module" that apparently will lose power and lock the whole thing down, including the PCM.

I'll hopefully get this figured out tomorrow.
 

kraven

Hegelian Scum
It turned out to be a ground cable missing off the corner of the PCM. The previous owner apparently robbed a nut off it and the cable had worked loose. I didn't have the nut, so I just put it over the stud and hit the key. Blammo! Everything works now.

I'm gonna make some new ground cables for this part, since they're a little crispy. These trucks are super sensitive to ground quality. Very important.

Buddha, I did check the crank sensor in my diagnostic path and it checked ok, which led me to do the cluster diagnostic (push the odo reset stalk and then turn the key to on, wait, then read codes). I got a "no bus" code, which told me it had a ground problem or a power supply problem.

I never throw parts at problems. I always try to diagnose and follow the evidence. Saves money and time.

Now I just need my parts to come in so I can get the timing chain replaced, the cover on, and the balancer reinstalled. In the meantime, I think I'll do the rear seal and oil pump pick up tube and get that over with. The rear seal leaks pretty hard, so it's a must. The bummer is that the SBM engine requires you to loosen all the main caps to get clearance to pull the old seals out and install the new ones. Not looking forward to that.
 
Last edited:

kraven

Hegelian Scum
And now we wait for Fed Ex.
20160417_192846_zpsdwbjczaj.jpg


Clean gauges. Gonna fix the bezel with some plastic weld before I replace it. I can take stuff being broken, but rattles? Naw man.
a5f56187-d393-4847-82f8-1cfc4f103345_zpsoduafa19.jpg


A broader shot at the busted mess that used to be a dash. Good job, Iacocca. Ram Tough, except in direct sunlight.
e63616cf-ff21-4e56-9e2c-f1913bdab62c_zpsqidb9leo.jpg
 

kraven

Hegelian Scum
Having more trouble than I thought getting a good timing cover. All the ones at salvage yards seem to have forklift damage or are warped where someone took one off with a crowbar.

Found one on ebay and another on a mopar forum, but no guarantees. 200 bucks is too steep for a new repop. And the Dorman parts usually need to be massaged when they're fitted, so I'd rather get a factory Dodge part off an engine.
 

drewactual

Adventurer
I think they're shared (the timing cover) with 318 magnums, as well as the LA blocks in 318, 340, and 360... they should be not too hard to find.
 

kraven

Hegelian Scum
They are shared, but you really have to make sure you get the right year in order to get the particular accessory drive parts to fit up. Seems like there's a cut off with the stock stuff for early magnums that ends about 96 and then 97 up is one part. I got one off eBay coming in case mine can't be welded, or it warps in the process. Cast aluminum that's spent years covered in oil is a ***** to try and TIG. Only like 43 bucks with free shipping. That was fair, I thought.
It costs me more than that to dig through a junkyard for 4 hours culling through busted ones and having to pull them myself.

The new balancer came in today. It's the later model with the pulley made onto it. Allegedly the correct imbalance for the 5.9.

running total for the project stands at $2173 and change, including bedliner and the new timing parts, balancer, etc. The cover and balancer were unexpected, but I'd planned on replacing the timing set anyway. So, that only really costed about 100 bucks more. I already had all the gaskets to do it. So, it was just parts.

Budget is being maintained. After this round, I should have an operational vehicle and be able to get out of the underhood, do the axle repair/replace, and look into the t-case. It's going to be nice to hear the engine run after a cascade of setbacks.
 

Forum statistics

Threads
186,004
Messages
2,880,783
Members
225,705
Latest member
Smudge12
Top