The War Pig (formerly: "School me on 1st Gen Rams")

PNWDad

Dad in the streets, Daddy in the sheets
I did the White Face Gauges and LEDs from someone online I cant remember right now. They sell you these high quality stickers that go over the black gauges. I replaced my bulbs with the 5-LED ones, and they are TOO BRIGHT!!@! :bike_rider:

I now have to drive with the dash lights off when Im in the really dark of night. I should swap them out with the 1-LED ones the company sells. Overall I LOVE the more modern look of the white face gauges with the LED light.
 

Terrainist

Explorer
Thanks for the pics of your dash lighting upgrade -- would you consider changing the title of your thread here to reflect your truck and tinkerings? The relevant things are somewhat difficult to find using the search engine because they are buried...

I see your rig is just getting broken in. Mine is going to turn 300 thousand shortly. It's great telling people the mileage when they ask and are unaware of how long these trucks can go. You scored a nice one, congrats again.

If you are sound deadening the cab to lower the engine noise in there, people have had limited success. Might sound deaden the engine bay as well, hood, firewall, etc. That might help. And an exhaust system engineered to be quite.
 

TheAlmightySam

Adventurer
It's been a while! I thought I'd give you all an update on what's been going on with the truck. He's been earning his keep working hard around the house as well as out on the road. Close to home, he's been busy hauling loads of gravel to resurface our parking pad, as well as loads of lumber for our ongoing backyard makeover. Away from home, he proved his worth on a borderline disastrous whitewater rafting trip, where the tour company was so incredibly disorganized that weren't even able to tow our raft down to the river for us. Seriously - Deschutes River Adventures: AVOID. On a more positive note, over the last few thousand miles it has been eminently reliable, turning about 16 MPG in the city and 18 or so on the highway, which I find very reasonable for a 20' long, 7000+ lb truck on 35" mud tires, especially one with a few performance tweaks.

In the great tradition of my various terrible 20-year-old cars, this one needed a name. One night, while up far too late in the studio, some friends and I were blasting some industrial music in a vain attempt to keep awake. A cover of Black Sabbath's "War Pigs" came on, performed by PIG. We all looked at each other simultaneously and decided that was the most perfect name for the truck. Thus my great big blue Dodge, which my friend Rana calls the "most redneck thing ever" became christened the "War Pig."

Progress on the truck has been slow but steady, with improvements mostly focused upon comfort and usability, as the truck is already considerably more confident off-road than I am. So, without further ado, the next series of posts will flesh out what I've been up to for the last eight months...
 
Last edited:

TheAlmightySam

Adventurer
Audio System

First off, I performed a pretty major upgrade to the audio system. When I bought the truck, the stereo was absolutely abysmal. Only one speaker worked, and it was so old and tired that it could only barely be heard from the driver's seat. This was not going to stand.

As I mentioned above, my girlfriend was kind enough to get me a CD player for the truck last Nonreligious December Holiday, a Kenwood KDC-X794. It certainly looks nice in the dash, the white lighting matching my LED dash lights wonderfully. For the most part, it has proven a good head unit, but like all aftermarket stuff it seems, it has a few quirks that drive me just shy of nuts. First, it only manages to work with my iPhone about two-thirds of the time. The other third of the time it just sits and acts pissed. An unplug and re-plug usually solves the problem, but it's plenty obnoxious. Second, once recognized, it automatically plays the first song alphabetically in your library until you select something else. I have heard the first few seconds of Genesis's ABACAB no less than six trillion times by now. Grawr. It is, however, still a lovely gift, and for the most part, it performs up to expectations without looking completely gaudy and obnoxious in the dashboard.


Oooh shiny shiny!

Before continuing with the install, however, it was absolutely necessary to sound-deaden this truck. My poor girlfriend, who already has a quiet voice, was downright inaudible from the passenger's seat. I get accused of not listening enough as it is - I do NOT need the truck to help. I yarded out the carpet and coated the floor with two layers of Peel & Seal, going as far up the firewall as I could. While I was at it, I put three layers on the insides of the doors. Three rolls of the stuff total did the trick. I will say, from experience as former car audio installer, this stuff does not seem to work as well as Dynamat or the other name-brand sound deadeners, but it does work pretty darn well, and it is certainly cheap. Conversations are now possible from driver to passenger without shouting, but it's still impossible to use my Bluetooth headset, not because I can't hear it, but because its noise-cancelling circuit is utterly overwhelmed by the racket from the big Diesel. Oh well, it's not like anyone calls me for anything important anyway :D .

With the carpet still out, I ran a 0-gauge wire from the battery, protected with a 200A ANL fuse, all the way under the seat. A generic distribution block splits power to the two amplifiers, a Diamond Audio 600.1 for the sub, and a 400.4 for the door speakers. At the same time, I also ran RCA cables from the head unit back to the amps. I took them via a different route than the power wire to avoid any noise being picked up from the alternator. A handy tear in the carpet made for a great spot to pull the RCAs through.


Trick Daddy says: "Why you got those little *** amps in your trunk? That's why your **** don't thump-thump!"

Door speakers are a pair of Eclipse 5 1/4"s that I had laying around. They're not great, but they'll do until I can scrounge the cash for something better. For the sub, a Diamond Audio D3 10D4, I built a custom box out of 3/4" MDF. I needed something with enough air space for the sub, but which wouldn't get in the way of legroom for the rear passengers, and also leave enough room for long stuff like camping chairs to ride behind the bench. The box I came up with is a reasonable compromise. I also recessed the sub so I could protect it with a grille, which also covers the sub visually. I covered it in grey felt, but I'll be redoing it with grey carpet from Crutchfield one of these days. The felt works fine, but it's not quite as dark in color as I would like.


Fire safety experts say you should occasionally shake up your extinguisher to keep the powder from settling. Stiff rear springs and a big subwoofer accomplish that automatically!
 
Last edited:

TheAlmightySam

Adventurer
Exterior Accessories

With all the audio done, I turned toward the rest of the electrical system. My previous ride quickly devolved into a rats nest of wiring, as one poorly-planned electrical modification built on top of another and another. This rig is not going to fall prey to the same problem. To that end, I purchased from OTRATTW a pair of Blue Sea Systems fuse blocks and a bunch of Carling Contura X switches. I also procured a whole herd of relays and relay harnesses. One fuse block and bank of relays was mounted under the hood to control exterior accessories, while the other fuse block and another batch of relays was mounted under the seat, tapping power from the same distribution block.

My friend Scott tossed me a basic OBA system he had laying around, and I mounted it on the passenger frame rail, plumbed to an air line quick disconnect and a pair of air horns. The kit itself is Mystery Brand, but the compressor appears identical to the one used in some of the older Viair kits. I wired it and the air horns to one of the relays in the engine bay each so they can be controlled from the interior. In use for airing up tires, it is far from fast, but it works in a pinch. One of those clip-on air chucks is on my list of things to buy. Incidentally, I did not go for the giant train horn fad - these are high-pitched, shrill, and (typically) used judiciously.


I love the look on pedestrians' faces when they hear this thing fire up while I'm waiting for the grid heater to shut off. BRZZZZZZZZZZZZZZZZZZZZZZZZZZZ!

A short clip of the air horns versus the stock horn.

The other three relays under the hood control lighting. I replaced the headlamps with Euro-spec H4 housings and rewired them to use relays. The voltage drop at the headlamps is atrocious on these things with factory wiring, and with the relays powering them, the lighting is so much better it's almost hilarious. The final relay controls a pair of Hella 500s scavenged from my old Jeep, another gift from the girl. Now that I have a proper set of headlamps, however, I can see what people complain about regarding the Hella 500s. Since under no circumstances do I run them when traffic is around, I'm not super worried about the beam pattern being iffy for oncoming cars, so I might convert them to HID just to see how they perform. We shall see.

EDIT: Just realized this photo shows the wiring from testing the OBA system. Be assured, it is now wired correctly to use a relay to trigger the compressor.
 
Last edited:

TheAlmightySam

Adventurer
Overhead Switch Pod

This is an edited version of a write-up originally posted on CumminsForum. While it is edited for less bitchiness, the content remains unaltered.

One of the little frustrations on the first-gen is that the dashboard doesn’t have anywhere decent to mount auxiliary switches. I’ve seen people take the info center out of the upper dashboard and mount switches there, but that always winds up looking a little unfinished to me, and further, if you’ve got illuminated switches like I’m using, I worry that the lights would be distracting mounted there. I’ve seen people make panels that sit in the transmission tunnel, but I’ve got a G360, so that won’t work. My old XJ had a similar problem, and many people mounted switches overhead, so I thought I’d adapt that same idea to my Dodge. My goal was to be able to mount eight switches overhead in a pod that looks as factory as possible, for as cheap as possible. Note also that you just as easily could adapt this pod to hold gauges or a combination of switches and gauges, should you so desire.

I am insistent that on my truck, any modification I make must look and perform as though the factory did it. With that in mind, I went switch shopping. The usual metal toggle switch is cool and all, but it looks pretty janky on anything other than a WWII fighter plane. The little illuminated switches from the car parts store share the same problem - they look terrible - and leave little room on them for labeling, which, if you’ve got as much crap going on in the interior as I do (and a girlfriend who occasionally needs to drive the truck) is a necessity. After much hemming and hawing and nearly settling on a variety of inferior solutions, I stumbled upon Carling Technologies, who offer a variety of OEM-looking switches, some even pre-labeled! Unfortunately, they do not sell directly to the public. After some searching, I found an online retailer with a decent selection: OTRATTW. They offer both the Carling Contura V, and the Contura X, with a number of pre-printed labels for the most common uses. I settled on the Contura X (the V switches are really nice, and allow you to easily change the actuator, but I felt they looked too modern for the interior of my truck. Just my opinion, your milage may vary, offer void in Utah, etc.).


The Carling Contura X switch with lower light and a blank plate for the three switches I'm not ready to install yet. Switches are available in a variety of colors with pre-printed labels.

The other advantage of the Contura line is that they offer a snap-in mounting panel for ganging switches. These snap in panels allow you to cut one big hole, snap in the panel, and snap the switches into that, keeping them all straight, aligned, and neat. Carling also offers a beautiful set of harnesses for their switches to keep the wiring ultra-clean, of which I accidentally didn’t order enough, so they're not shown on all the switches in this writeup. I have since gone back and procured enough.

On my Dodge, I measured that a 10” wide switch pod will just barely fit between the sun visors and still allow them to swing to the side. Since I’m mounting eight fairly wide switches up there, a 10” wide pod should allow plenty of room. My switches in their gang panel are just over 2” tall, so I opted to make the panel 3” tall to leave them a little margin on top and bottom. Combined with the 10” total width, this left a nice even margin around the switches on all sides, looking nice and clean.

Another constraint is the depth of the switches. I want the pod to be angled slightly down toward the driver, but if I angled it too much, the tail end of the switch would run into the ceiling. With the benefit of some graph paper and a little bit of time, I determined that a 3” tall pod, angled back at a 15º angle will allow the switches to just barely clear the ceiling. One thing to keep in mind is that the roof is NOT level, and nearly all of the 15º I selected was eaten up by the angle of the roof. As it sits, the face of my panel sits nearly vertical, which, though perhaps not precisely ideal, works just fine for my needs. I chose to make my pod 5” deep, which has no particular significance other than it looked good to me and left enough room for all the wire that will live in the pod.

I acquired the following supplies from the local hardware store:
  • 18”x24”x0.08” clear acrylic sheet (you only really need half that, but they didn’t have anything the right size. Make one for a friend!): $8.98
  • 1 tube acrylic cement: $5.49
  • 1 tube 2-part epoxy: $4.99
  • 1 plastic cutter: $3.98
  • 1 can Rustoleum Bumper and Trim paint (feel free to substitute the paint of your choice): $4.98
  • 2 1 1/2” L-brackets: $1.29

I acquired the following supplies from my toolbox:
  • Drill with bits
  • Dremel with fiberglass-reinforced cutoff wheel
  • Heat gun
  • Sandpaper, 240 grit
  • Steel wool, #00
  • Fine-tip permanent marker
  • 24” straightedge
  • 2x small sheet metal screws
  • Screwdriver to fit said screws
  • Misc. clamps
  • Tape measure
  • A bunch of blue female quick-disconnects (on the Contura X switches I selected, you need five per switch)
  • A bunch of yellow butt splice connectors
  • Wire crimpers
  • Assorted wire ties
  • A whole ton of wire (seriously - there's close to 200 feet of wire in this project)

to be continued...
 
Last edited:

TheAlmightySam

Adventurer
Overhead Switch Pod, Continued

Despite how boxy the interior of a first-gen is, there aren’t really any hard edges. Everything is slightly rounded, and, while it would have been easier to cut six pieces of acrylic, glue it into a box, and stick it to the ceiling, I wanted the switch pod to match the slightly curved interior. So, to that end, I chose to bend the primary panel into a gently curved radius to form the sides and bottom of the pod. Using the aforementioned plastic cutter, I cut a 5” wide piece of acrylic, leaving it deliberately long (bending this stuff by hand is not an exact science, so I wanted to leave plenty of room to trim it down later). Using the plastic cutter is extremely straightforward: simply place the “hook” onto the surface of the plastic, and using a straightedge, drag it backwards with medium pressure across the plastic. It will make a god-awful racket and peel up a thin strip of plastic. Repeat ad nauseum. Once sufficiently weakened, the piece will simply snap off, leaving a clean, straight edge.


The victim and the tool of destruction.

I next marked the center of the piece, and measured out 4 1/4” from it, giving me two lines, 9 1/2” apart, centered on the piece. “But Jedi Master Sam,” you’re saying in that really annoying voice, “I thought the pod was supposed to be 10” wide, not 9 1/2!” “Yes, my young padawan,” I say, sounding remarkably like Issac Hayes, “but the radius in the material will make up the other 1/2."

Back to business. I aligned one of the lines to the edge of my work table, making sure it was straight, and clamped it down. I set my heat gun on high and slowly and evenly heated the area around the line I drew. As soon as the material began to droop, I gently bent it to 90º and removed the heat, allowing it ample time to cool and re-solidify. I repeated the same on the other side, using a scrap chunk of 2x6 to elevate the piece so that the first bend would clear the table.


Clamped and ready to bend.


Heating the area of the bend.


The first side bent to shape.


The second side ready to bend


All bent to shape.

With the piece bent and cooled, it was time to cut it to fit the ceiling. I wanted the panel to be 3” tall at the front, and angled back at a 15º angle, so I marked all that out, and trimmed both sides with the plastic cutter, leaving a finished main panel!


Ready to trim.


Trimmed down at a 15º angle.

Satisfied with the fit, I proceeded to cut the front panel to fit inside. I elected to set my front panel back from the edge of the main panel by 1/32”. I’ve found that trying to make things precisely flush is an exercise in frustration (or an exercise in lots and lots of sanding), so setting it back a hair buys me a little wiggle room in the fit of this thing. Once cut correctly in width and height, I used a piece of sandpaper to radius the corners to fit. When I was satisfied with the fit, I busted out my tube of acrylic cement and went to town, being careful to keep any cement off the showing side of the acrylic. This stuff works quickly and slightly “melts” the two pieces together, forming a permanent bond not unlike two pieces of welded metal. It will dry to the point where you can handle it in about 20 minutes, and continue to cure and smell funny for 24 hours. While that side is drying, I made a panel for the rear as well and glued it in.


Super awesome (read: smelly as hell) acrylic cement


The front panel clamped and drying.


It's a mini aquarium... kinda.

I now had a fairly-acceptable little clear box on my hand! I’m missing the photo of this step, but, after an early abortive attempt at making brackets out of acrylic, I epoxied the two L-brackets to either side of the box on the inside. I then drilled a hole on the bottom of each just large enough to fit the head of my sheet metal screws through. I may use these holes to mount little red LEDs for some night-time dash lighting, or I might just get a hole plug.

It’s time to paint! I selected Rustoleum Trim and Bumper paint, which has the distinction of picturing a yellow pre-97 XJ on the front (I used to own a ’92, and I’m still rather partial to the little gas guzzlers), as well as leaving a nice textured black finish.


The paint of choice.


All painted and pretty!

Now it’s time to cut the hole for the switches. Since I’m using a Carling mounting panel on mine, I only have to cut out one monster hole for all eight switches. Carling offers mounting panels in varying sizes from a single switch on up, but my retailer only offered one, three, and six switch options. They did offer, however, a modular option that allows you to connect as many together as you wish, and I opted for this. The system comes with two kinds of pieces: an end piece and a center piece, so I ordered two end pieces and six center pieces for a total of eight. Here I used my Dremel with a cutoff wheel to create a nice, clean hole for the switch panel.


The Carling modular switch panel pieces, an end piece and a center piece.


Eight switch panels, all stuck together.


The switch pod trimmed to fit.

to be continued...
 
Last edited:

TheAlmightySam

Adventurer
Overhead Switch Pod, Continued

With the hole for the switches cut and the switches mounted, I test fit it on the roof and marked where the screws needed to go. I also marked out a hole to run the wiring through, and cut it out with an Exacto knife. I grabbed my drill, and using a piece of tape wrapped around the bit to act as a stop, drilled two holes in the interior roof skin. Do NOT drill all the way through your roof!


Test-fitting the pod.


My brand-new headliner marked for surgery.


The first cut is the deepest, as the song says.

The next step was to wire everything up. The Carling switches I selected have five inputs: power from the battery, power from the dash lights for the lower light illumination, power to whatever the switch is controlling, and two grounds. That's a lot of wire to cram into a very small switch pod. With eight total switch positions (note that although I'm only installing five switches today, I'm wiring all eight for expandability), that's eleven wires coming into the pod: power, illumination, ground, and eight trigger wires. One thing that helps keep all these wires a little more manageable is to twist the wires together. To do this, I tie wires to the door latch and twist them together using my trusty Makita. As soon as the wire starts to pull the drill forward, the wire is twisted enough. As I have four trigger wires running under the hood, four running to a relay panel I'll be installing under the dash, and the power, ground, and illumination running to the factory fuse box, I'm twisting them together into those three sets.


Four trigger wires tied to the door latch.


Chucked up in the drill.


11 wires all twisted together.

As I mistakenly ordered only three switch harnesses, I'm using those for the three blank switch spots, and using female quick disconnects for the five switches. As soon as my other five harnesses arrive from OTRATTW this week, I'll rewire the five to use the appropriate harnesses. Not that there's anything wrong with quick disconnects, mind you, but the harnesses make for a nice, clean install. Either way, here it is all wired up. Disregard the acrylic brackets in this photo; they are part of the aforementioned abortive attempt. Needless to say, metal L-brackets worked much better. I ran the wiring across the headliner and down the A-pillar, the wiring of which will be saved for a later post.


All wired up!


The wiring threaded through the headliner.


All mounted up!

to be continued...
 
Last edited:

TheAlmightySam

Adventurer
If you've got a lot of electronics on board as I do, I find it useful to label my switches. While an enormous bank of unlabeled switches certainly functions fine, the last thing I want to do when I'm trying to turn on my CB radio is to grab the wrong switch and blast the air horn. I also have a lovely female friend who will be driving my truck when it snows, and there's no reason why she should have to bother remembering what switch does what on a truck she barely ever drives when she's already stressed out from trying to wrangle a truck the size of a battleship down an icy street. Furthermore, I want my switch panel to look as factory as possible, and a bunch of unlabeled switches just looks unfinished to me. With that in mind, I needed a labeling solution which solves the following problems:

  • Cheap!
  • Can come up with any label I wish, since I need some goofy stuff
  • Ability to print both a symbol and text onto the lens
  • Easily readable with the light on and off
  • Upper indicator light easily visible
  • Either highly durable or easily replaceable (preferably both!)

There are a few options I investigated, each with pros and cons:

Pre-labeled switches from Carling:
Pros:
  • Looks nice
  • Durable
  • Easily readable with the light on and off
  • Upper indicator light easily visible
Cons:
  • Limited availability, especially for non-standard stuff
  • No printed text on the Contura X, at least from my supplier

Labels from Mudstuff:
Pros:
  • Looks nice
  • Durable
  • Cheap
Cons:
  • Black text on a red lens is anything but readable (note that the Contura V switches they sell have a custom white lens to match the D90's interior)
  • Limited selection of labels

Silkscreening:
Pros:
  • Same as the pre-printed labels, since silkscreening is exactly how Carling does it
  • Can make any label you like
Cons:
  • Since you have to make a custom screen for each switch, it's anything but cheap

Vinyl stickers:
Pros:
  • Mostly the same as silkscreening
Cons:
  • Not very durable - vinyl doesn't stick particularly well to textured ABS plastic
  • The vinyl people I spoke with mentioned they would have trouble cutting as fine a design as the ultra-small labels will need.

Laser etching:
Pros:
  • Same as silkscreening
  • The ultimate in durability
Cons:
  • Expensive as hell

Label maker:
Pros:
  • Durable
  • Can print any text you like
Cons:
  • Have to buy a not-particularly-cheap machine
  • Labels are shiny and kinda cheesy-looking
  • No ability to print custom symbols

Home-made labels:
Pros:
  • Dirt cheap
  • Can print anything you like
  • Easy to read
Cons:
  • Questionably durable
  • Light does not easily shine through the label

After much trial and error, I decided for now to go with home-made labels. As you can see above, none of these are ideal solutions, but the cons of the home-made label are least egregious to me. If they don't hold up, they're cheap enough that I can always print more, and I think I have a solution to the opacity problem.

I sourced a pack of label paper at my local Staples for ≈$5.00 (holy crap the staff in the Hayden Island Staples are odd...) and, using the Carling Label PDF as a guide, created a set of label symbols in Illustrator, and then, after I got fed up with Illustrator, just traced the damn things in Sketchup (note that if you're less fussy than I am, you simply could print the labels as-is from Carling's PDF - I just wanted to do a couple little custom things on mine). Using a pair of calipers, I measured the upper lens on the switch to be 0.455” square. As these labels are pretty opaque, I'm going to leave a 0.075” border of bare lens around the label, so that I can see the lens when illuminated. This leaves a label 0.35" square. I did indeed try to have the lens shine through the white paper, and while it looked really nice when the switch was turned off, with the light shining through it looked astonishingly cheesy and you couldn't really see at a glance whether the switch was active or not.

I printed symbols and text out onto labels via my trusty HP, and trimmed them down, leaving a “tail” on each one to make it easier to position each label without fouling up the adhesive on the back. At the same time, I made text labels for each of the switches (if anyone is interested, I have a whole rant on why both text and symbolic labels are necessary, but that's another story for another day), 0.75” x 0.25”. In keeping with my insistence that this installation look as factory as possible (given its limited budget), I looked for a typeface that was a reasonable approximation of the existing text in the interior. The font I selected was Eurostile Bold 7 pt, which seems to be a surprisingly good match for the factory labels. The font size becomes a bit of a balancing act - either you have a nice big font and can't fit very much text, or you shrink the font down and make it more difficult to read at a glance. I had to fit the word “compressor” on mine for the OBA system, so there you go.


A big 'ol sheet of labels! You'll note a few extras on there: some are for a couple of other switches not part of this project, and some are for relays and fuses mounted under the hood.


Symbols. The extra empty label squares are there simply so I could size everything correctly. It's a long story.


Text labels! Eurostile is not my favorite font, but it matches, so pleh.

Stuck on the switches, they actually look pretty nice! Since I chose white symbols on a black background, when you trim the label you'll notice you can see the white of the trimmed edge of the paper, which looks super extra cheap. My solution was to run a black gel pen along the edge to blacken it. Being paper, the labels are not liable to hold up very well with sweaty or wet hands. One solution to this is to coat them with a clear sealant. Clearcoat out of a can will work fine, or just dig in the bathroom for some of the girlfriend's clear nail polish and go to town.


All labeled up from the driver's perspective. The labels are easy to read and recognize despite the small size.


Three switches lit. With the small border around the upper label, the light is instantly visible. It's not the very slickest solution anyone has ever come up with, but it's highly functional and looks quite reasonable.

to be continued...
 
Last edited:

TheAlmightySam

Adventurer
I acquired the following equipment:


Shiny, shiny!

Before we go any further, we need to do some surgery on these relay harnesses. See, a standard automotive relay has five pins, which are numbered and function as follows:

30: Power from battery (this is the power that will eventually feed whatever device you're controlling)
85: Ground
86: Power from the switch
87: Power to device when the switch is activated
87A: Power to device when the switch is deactivated

87A is the one we're interested in here. Since I only want power to the device when the switch is on, 87A serves no useful function, and we're going to remove it from the harness. You could also just cap off the wire coming from the harness, but this is just as easy, leaves less wire to package, and doesn't waste a splice connector on dead-ending a wire. On these harnesses, 87A is the red wire, and out it must come. A small Allen wrench to bend the locking pin back allows the wire to be removed easily.


Insert ...


... bend ...


... and pull. Easy!

The harnesses I selected clip together into one monster harness.


Four harnesses ganged together.


With relays installed.

With all that done, it's time to mount and wire everything up. I chose to grab power from the same distribution block I used for the audio system. A convenient place to mount the block was right next to the distribution block, under the seat.


All mounted up! It's a lot of wire to package into a small space, but some zip ties and careful wire placement keeps everything manageable and relatively tidy.

Below is a wiring diagram for what I have installed. EDIT: I have updated the wiring diagram with a clearer, more complete version of the original. I can offer a larger-scale diagram if needed.

 
Last edited:

TheAlmightySam

Adventurer
While I was dinking around with the electrical system, I also mounted a switch panel low on the dash where the factory cargo lamp control is. One controls the driving lamps, the other, the relatively ineffectual cargo lamp. The two blank spots are pre-wired in case I wire in more lighting eventually.


I also added a 400W power inverter by the passenger's feet for those random 110V goodies, such as our laptops.


I polished off the interior with a pair of blue fuzzy dice scavenged from a Subaru I owned many years ago.


Big pimpin'!
 
Last edited:

TheAlmightySam

Adventurer
To close off this update, I gave the big bastard a bath and a coat of wax. He sure is handsome all cleaned up!


We also took the big monster out to Long Beach this weekend and bombed around on the sand. The Cooper STTs performed admirably aired down, even in the loose dry sand. The same couldn't be said of about half of the other beach-goers, who all simultaneously managed to forget that 2WD is utterly useless in sugar sand and promptly became a minefield of stuck cars.


So that's what's been going on in the last eight months!
 
Last edited:

sdwhip

Observer
Nice work and nice truck. I seriously find it hard to stop staring at the pictures of it. It's probably the nicest 1st gen on here and I wish it was mine and not yours.:)
 

TheAlmightySam

Adventurer
Trip report time!

Monday was my girlfriend's and my fourth anniversary, so we celebrated with a five day long trip around eastern Oregon. For those unfamiliar with the geography and climate of Oregon, the western third of the state is low and very wet, and houses the vast majority of the population. The eastern two thirds, however, is on a high plateau and is dry desert. The further east you go, the sparser and sparser the population. Harney County, where we would be spending much of our trip, contains fewer than 0.8 people per square mile, 38th sparsest county in the nation. It is very, very empty out there.

For this trip, we picked up a couple new pieces of equipment, my thoughts on which I will give as we go: a Seattle Sports 5-gallon solar shower and a Spot Connect system. I also picked up a new pair of Smith Serpico sunglasses in Silver/Platinum since my last pair is at the bottom of the Deschutes River, thanks to my girlfriend's sister's husband not hanging on down a set of rapids and slamming into me, knocking them off my head. Thanks, Alex. :elkgrin:

Day 1: Portland to Hells Canyon


We left Portland at about 9:00 on Saturday, intending to reach Hat Point, which overlooks Hells Canyon, the deepest river gorge in North America. Our journey for the day totaled 291 miles, which my mapping software indicated should approximately 9 hours. Already, we found one of the flaws with the Solar Shower: the rubber from which it is constructed is a little on the fragile side. As we were packing, I was filling it with the hose so it would get nice and warm on our drive, when it slipped off the deck railing and fell a few feet onto the gravel below. The bag ripped in three places, and the shower nozzle broke in half. I patched the rubber with a bike inner tube kit I had in the garage, and epoxied the nozzle back together.

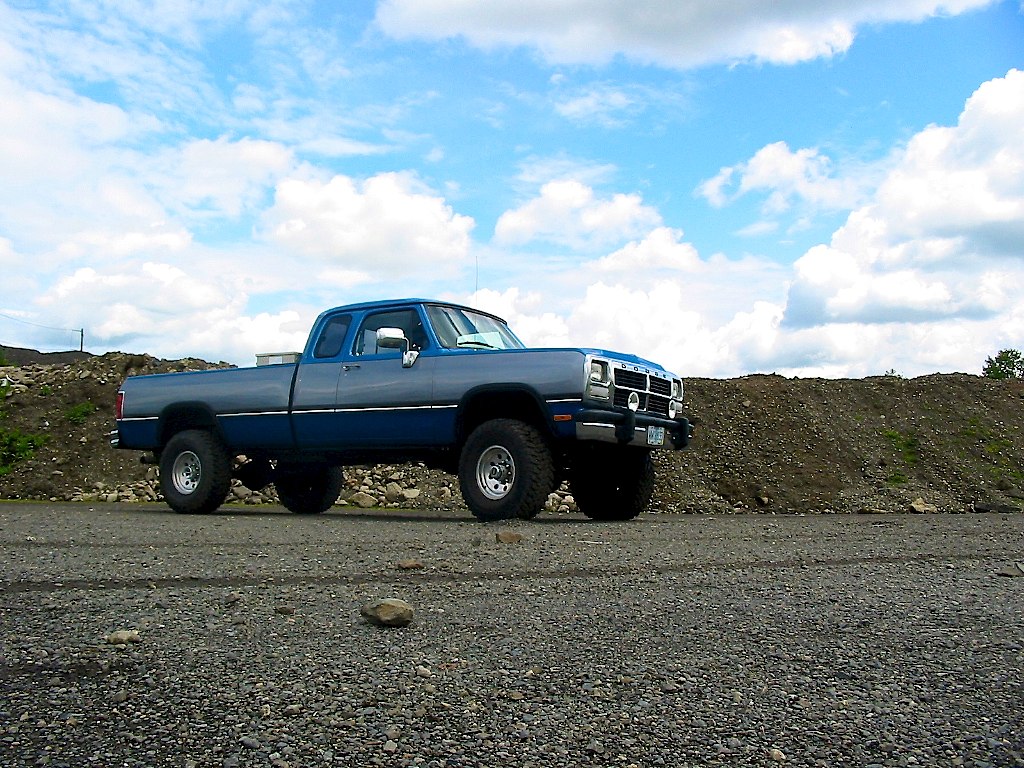
The drive along I-84 was, as usual, uneventful. The truck cruises beautifully, purring along at 75 MPH, turning barely 2000 RPM, getting about 17 MPG. Wind noise is an issue, however, and above 65 MPH, conversation with my lovely passenger proved difficult, as did hearing the radio. Tire noise from the Cooper STTs is surprisingly minimal for a mud tire, with only a dull, low-pitched hum is heard from them, certainly not as bad as I've come to expect from knobby tires.


<Shaft Theme Song>Who's the guy with awesome sunglasses? Sam! Can ya' dig it?</Shaft theme Song>

Just outside of Portland, we turned on the Spot Connect to track our trip. If you're unfamiliar with the Spot system, it is a family of emergency locator beacons that use the GlobalStar satellite system. The Spot Connect system interfaces with iPhones and Android phones, and are controllable via said phone over Bluetooth. To turn on tracking, send an OK message or a non-emergency "Help" message, the Spot must be controlled by a phone. While this may seem cumbersome, the Spot Connect device has an SOS button on its side which works sans phone, and the advantage of it connecting to the phone is that it allows you to send a short text message over the GlobalStar system to any number of pre-programmed addresses. The system has a couple little quirks, but once you've got them figured out, it really works quite well, and I'm pretty satisfied with it. It would be nice if it had buttons for tracking, OK, and Help on the device, but the ability to send arbitrary messages ("We're OK, but plz bring a rear U-joint") more than makes up for it. A couple pieces of foam tape stick it to the dash something fierce.


We turned off I-84 at Pendleton, and drove on little state roads from Pendleton to Imnaha. Both my girlfriend and I grew up in farm country, and, as much as I love living in the city, the change in scenery, from Mercedes Benzes to tractors, from grey concrete to golden hay fields, was wonderful. We stopped in Enterprise for fuel, and learned very quickly that out in the country, this truck catches a lot of attention. In fact, for the rest of the trip, everywhere we stopped, someone would come up and talk to me about the truck. It's a huge compliment that people like the old Dodge so much, but it's a little disconcerting to be so conspicuous while traveling.


Freshly-baled hay along SR-11

At the town of Joseph, we took a wrong turn and accidentally wound up along Wallowa Lake, which is along the Wallowa Mountains, a series of 9,000 and 10,000 ft peaks. The lake was beautiful, the mountains were beautiful, and we even ran into a very, very tame deer. The unintentional detour set us back a half hour, but in the end, it was worth it. We'll be back to explore this area further, some other trip.


Wallowa Lake with the Wallowa Mountains in the background


'Sup.

We made it to Imnaha around 6:00, about two hours behind schedule. This, it would turn out, would plague our trip, as my mapping software apparently thinks everyone cruises around at 90+ MPH on twisty country roads (and it didn't help that I missed my turn in Joseph). Said software also fails to take into account how slow one travels on gravel and dirt roads, and continues its expectation that you will be driving at Grand Prix speeds.

Hat Point Rd. is a 23 mile stretch of washboarded gravel road that leads up a ridge that juts out into Hells Canyon, on the Oregon-Idaho border. It's surrounded on three sides by the deepest river gorge on the continent, and the views from the lookout at the end of the road are nothing short of spectacular. The canyon was shrouded in haze from various forest fires across the state, and the view looked more like a painting than reality. It's hard to believe just how deep and wide this canyon is. Near Hat Point, the Snake River has created a canyon 8,000 ft deep, and the opposite rim is over five miles away.


The view from our tent.

We set our tent a few feet from the canyon rim, and went to sleep under the brightest moon I've ever seen.
 
Last edited:

Forum statistics

Threads
189,941
Messages
2,922,523
Members
233,156
Latest member
iStan814
Top