The Woodsy Bit: Adventures of an '88 Phoenix

surlydiesel

Adventurer
Just point her here to the thread. I have seen very hack installs of AC units and yours is super slick. Frankly, I would think anyone would appreciate AC in certain weather conditions ha ha ha
 

subterran

Adventurer
Been bopping around town for the past week with the AC unit installed. We live in an urban area, but our roads are abysmal. Driving on our streets is in many cases rougher than many FS roads, with the exception of washboarding. We have more bumps and potholes than an artillery range. Plus, we've got low branches and speed breakers all over the place. So far, the little AC unit is holding together very well. Time to take it to the woods soon to be really sure she'll hold together. We will probably never use it in the NE Georgia Mountains, but it's a good 'torture test'. Now, we may well use it in the NW Georgia mountains, or down in South GA, for sure. That's where hot was born and raised. Along with the South Georgia state bird - the swamp skeeter.
 
Last edited:

Mateowulf

New member
Awesome thread. I picked up a 95 phoenix not too long ago that fits my tacoma perfectly. Problem is there are some roof leaks. How has your black jack roof sealant held up over time?
 

subterran

Adventurer
Mateowulf,
Thanks very much for the compliment, I'm glad you've enjoyed my rant.

I'm pretty satisfied with the blackjack stuff, and have no regrets. Any peeling issues I have had were my own fault for not cleaning up the previous owner's sealing attempts using silicone. Nothing sticks to silicone. I had a tenatious leak in my roof somewhere that took me forever to figure out. I kept thinking it was the edge seam, so I kept sealing it and resealing it. But every time I would open her up, it would still leak a few drops onto the bed. VERY annoying. I was always attacking the area where I saw the water coming out - it was not ocourring to me that the water was travelling to my bed because I was popping up the back first (all the water flows to the front) then opening the front up. Anyway, I finally figured out the culprit: It wound up being the vent. and peeled off all of the silly-kone and resealed the vent with a few coats of Blackjack. Finally I'm dependably dry. So - don't neglect the vent, or anywhere there's a hole in the roof!

As an aside, if you have any holes in your canvas, I have found that seam grip works very well to seal it back up, either from the inside or the outside. It's clear, and so it disappears very well after applying. It's tough, stays flexible and is UV resistant:

http://www.amazon.com/Gear-Repair-A...UTF8&qid=1418330461&sr=8-1&keywords=seam+grip

I continue the repairs, upgrades and improvements to the rig. I just got done reenforcing the cabover with aluminum angle, as it had began to sag (the PO had given the same repair a solid try with a 2x4, but I have now solved it much better and don't expect it will ever be a problem again. I am also considering painting the canvas grey with some of this 'vinyl repair' paint:
http://www.amazon.com/dp/B00099C9M4...colid=RREJ15JCDLRL&coliid=ICAY3Y68WG2QG&psc=1
I think it will help to update the look, as well as reinforce a few stresspoints. If it fails, I won't have lost anything but a little time. Jury's still out on that project, as my canvas does in fact work fine and is waterproof. It just looks a little dirty and dated - (not unlike myself, LOL)

I am also working on a fiendish project of adding a tiny woodstove to my camper. It will mount to the window, just like I did my Air Conditioner, so it will be completely removeable in the off season, with no holes cut in the roof. Stop back by in several weeks, and I'll post some updates.

Congrats on your new camper. I know you'll have a great time in it. Merry Christmas!
 
Last edited:

subterran

Adventurer
The Bug-Nuttiness continues...

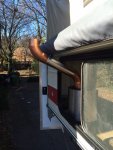
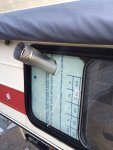
In keeping with the "gee whiz... what else can I hang out this window" theme, I wanted to post some pix of my latest stroke of madness. I have this tiny woodstove, and I was wondering if I could use it in my TC somehow. I should know better than to start asking those sorts of questions. So I started putting this together. It's been a slow process, as firstly, I wanted to re-use an existing woodstove, instead of buying a new one. When I bought this Tiny Tot originally, it had the "cook top" option. That would work fine if I were going to run a pipe only vertical, and put a thimble in the roof. But, after the air conditioner I changed my plan to going 'window mount', because that makes it all removeable very easily with no harm done. Anyhow - I first had to lose several inches in height before I could make that bend to go out the window. I ordered the 'simple D' top for my stove. The stove is made by Fatsco, which is a tiny 'mom and pop' organization in Michigan. It took anout 4 weeks after my order for the parts to arrive, and I was easily able to swap out the two tops, gaining the clearance I was looking for. Then I had to find a way to make that bend. A buddy of mine is a sheet metal expert, and suggested I look into high-end gutters for my bends. I was able to find these very nice copper seamless 60 Deg. pipes. They were reletively cheap, too, compared to the rest of the stainless steel piping. You'd think that stuff was made of gold instead of SS for what they charge. After getting everything assembled, I posed it all so I could make a template for the actual window board. What you see in the photos is just my foam mockup. I will use concrete 'backer board' to make the final board, it being heat-proof and generally light. Underneath the stove will be an aluminum sheet, to stand it off of the plywood floor and protect from hot sparks.
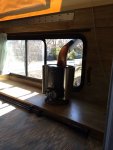
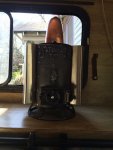
woodstove - inside 2.JPG woodstove - inside 3.JPG
woodstove - outside.jpg woodstove - hole template.JPG

Here are my overall solutions, for anyone who is interested:

The backrest will be displaced by the stove, so I will not use the original when the stove is installed. (it is removed for these photos) Instead, I will use the 'rear' seat bottom. The seat bottom represents a fire hazard, and would need to be covered or removed anyway. I will make a new cover for the rearmost storage compartment that is more fire resistant. The existing seat bottom will become the backrest for the now shortened sofa, over the forward compartment.

When we travel, you will remove all of the external pipe, and store it while underway. The only bit of pipe that will remain is the first copper bend, which will still allow the window to close.

The damper will go in the first section of pipe, and will be controlled by a wire from inside the rig.

There will be vent holes in the board, directly behind the stove, so that it can draw outside air and pre-warm it at the same time.

The awning will probably have to be removed, or at least shifted to the rear. I still need to make some brackets for the Driver's side, so that I can just move it over to that side instead of having to take it off.

The top of the pipe will have a draft prevention cap, and will extend about 8-10 inches above the top of the popped-up camper to avoid sooting of the camper itself. I still need to work out some sort of temporary wire bracket to hold the top of the pipe.

We still have the Atwood forced-air heater, so this will be a "light a fire while awake, then go to bed and when it goes out, the Atwood will take over" situation.

We do have a CO detector onboard, too. (I keep trying to kill us, but it has not worked yet..)

Lastly, there is the "why?" of it. Firstly, it's just cool. Secondly, I want a woodstove in my home so bad I can taste it, but the wife won't have any of that in our current home. So, in my little clubhouse, I have one. We will probably not use it much, about like the AC, but it's there if I want to. Pretty neat that you can just grab some coals from the fire in a little metal bucket, and dump them into the little stove. I don't actually recommend doing that. It's alot safer to just light a fresh fire in the stove, as coals can go everwhere. But hey - you could in a pinch.

I will post more photos when I actually get done so you can see it completed.

Now, go camping.
 
Last edited:

subterran

Adventurer
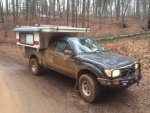
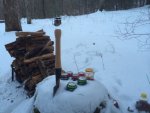
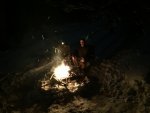
We slipped off this past weekend for some quality time. It snowed pretty good here last week, so while most of it was gone in a few days in the lowlands, up high there was still as much as 8". The old rig got super gloppy right away. As we got up above 2500', the snow got deeper, and things were cleaner. We poked around in a area new to us, near Rock Creek Lake. We got in a few tough spots, sliding back down the gullies but we were able to get enough traction and momentum to surmount all encounters. We finally found a secluded spot and set up camp. I had to dig out the fire ring, then I cut up a couple of dead-and-down hardwoods, and split em up with my hatchet. We had a blasting fire going just at dark. Nothing but the wind and owls out that night. Sweet. The temperature was quite nice, even with the snow. I just put all my beers in the snow - it saves a trip. So quiet out there...
mud_truck.JPG snow cooler.jpg
snow fire.jpg Snow_camp_2015.jpg
 

Umtaneum

Adventurer
I had a Fatsco "Chummy" stove in one of my sailboats, back in the 80's. I sailed that thing to Alaska and back, using handfuls of gathered driftwood for heat. In the winter, we would sail the Puget Sound with the woodstove cranking, I could put a blanket over the companionway and man the tiller with the heat billowing up from below. A lot of times we would be the only sailboat in sight for an entire day, it was just too cold for everybody else to be out there. Anyhow, Fatsco stoves are one of the funkiest, most down-home and yet useful things I can think of from the sailing world. I salute you for putting one in your camper.

I wish I could have come up with a sensible way to put one in my new Phoenix popup. I probably just wasn't creative enough. I'll just carry more propane, I guess.
 

subterran

Adventurer
Umtaneum,
I'm glad you like the stove. This is actually the second camper I have put this one in. It's rare to hear from someone with experience with one. Thanks for posting. As for wedging one into your camper - if your window is as big as mine, you can just hang it out the side like I have. The Phoenix Camper thread here recently had some new rigs they just delivered, and one fellow's photo had a stove thimble poking out the side, so they will put one in for you at the factory there. You might ask for details on that install too. Anyway, thanks again, and good luck on installing a wood stove, if that's what you want to do!
 

subterran

Adventurer
I was having lots of troubles with my Magnum Energy battery combiner system. It just died. I had a second one (it was warranteed, and they didnt want the old one back) so I put it in and it still wouldnt work. I had to replace my alternator last summer, and I replaced it with an Autozone refurb. Within a few weeks of the replacement, the voltage regulator in the alternator stopped working properly, and now I get voltage pulses, from 13.5 to 15.3 volts. All the lights in the truck pulse now. I'm too lazy to fix it again, but the spikes up above 15v are causing the old combiner to error and not work. It never worked partularly well, and would inexpicably not charge anyway, so I am glad to see it go.

I had been just relying on the solar panel, since we mostly just overnight. If you give the little solar system a week to recover, it can do the job. It worked fine for most of the year, but now that it's as hot as a whorehouse on payday, the poor little fridge just runs all the time, and sucks the battery dry in about 30 hours. A few times, I have sapped the battery really low - so I am over it. Time to do something about it!

I found this thread most entertaining and helpful:
http://www.expeditionportal.com/for...ttery-setup-for-50?highlight=battery+isolator

I pretty much followed it to the letter:
View attachment 298864

The only thing I added was a switch mounted on the dash to make it harder to get into trouble. If you turn off the ignition, it disconnects the batteries. You do have to remember to flip the switch off before you start the truck, or the ALT dummy light comes on due to lower current to the batteries.

I put it all in on Friday night and we used it and tested it over the weekend and it seems to work great. I hope it will still be great when we are parked for several days, and I have to start the truck to bring the battery up a few notches. I'm thinking that running the truck for a half hour or 45 minutes will be enough to keep me out of the danger zone.
 

rangerdogg

Adventurer
Woody nice seeing you enjoying yours , just got out with mine with the family . Put new canvas and did a few other thing . Need to post some stuff . So busy with the little one
 

subterran

Adventurer
Hi Rangerdogg!
I'm glad you are getting out, and teaching the little one to enjoy the outdoors. We have been getting out at least twice a month since I got Woody (actually since I became an adult 30 years ago, really...), and it's great. We have been beating the snot out of this little TC. It seems like everywhere we go, the roads are crappy 4x4 roads, and the bushes are growing right over the road. So, Woody has lots and lots of new scratches. I about knocked the awning off a few times, but everything is still holding on, and no dents! It's been so hot lately that last weekend we had to use the little air conditioner to get any sleep. It works great with a 1000 watt generator, and the fuel will last about 6 hours. It was the first time I have actually used the whole thing (A/C on Genny) while boondocking and I am quite pleased. I can take the genny way off in the woods and hide it behind trees and deadfall, run a 100 foot cord, and no one can hear it (plus, no one is around, LOL)

Keep having a good time and living the dream!
 
Last edited:

subterran

Adventurer
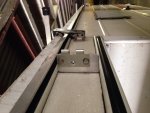
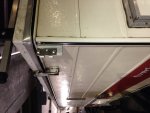
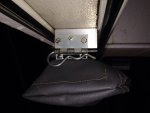
I finally got it together and put two more quick release awning brackets on the driver's side of my junk. Now the awning can go on the passenger side, drivers side, or even across the back. (Or, I could even add a second awning if I wanted..) Check it out!

image.jpg image.jpg
image.jpg

Oh, for the love of MIKE! This forum keeps turning my photos no matter what I do to fix them! You get the idea...

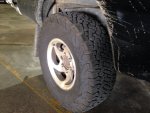
I also just got some new meats for woody, too. These are the new BF GOODRICH TA KO2. I like alot. Very very quiet, yet nice and grippy. These are 31 x 10.5 R15 on stock wheels. I'll have to do something about these stock wheels someday...

image.jpg

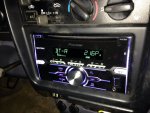
And last thing - I put in a new stereo. The factory one's tape deck died, and I wanted to update to bluetooth. This one was less
than $100. and is great:

image.jpg

That's it for now. As you were.
 
Last edited:

Forum statistics

Threads
185,928
Messages
2,879,831
Members
225,627
Latest member
Deleman
Top