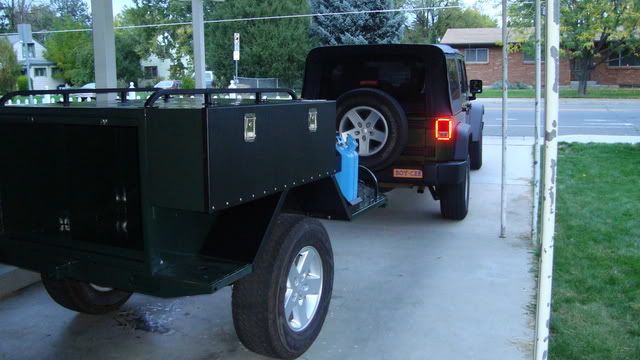
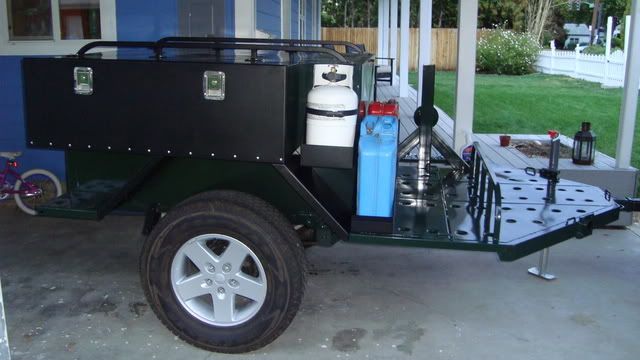
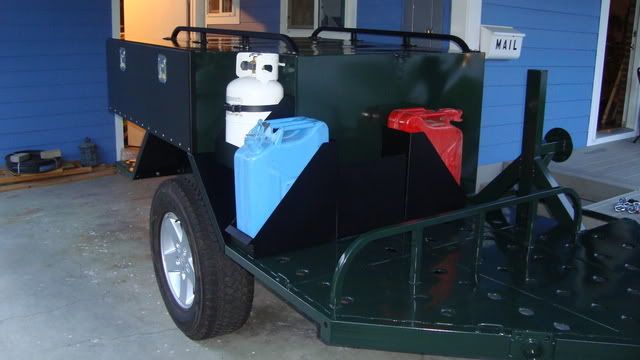
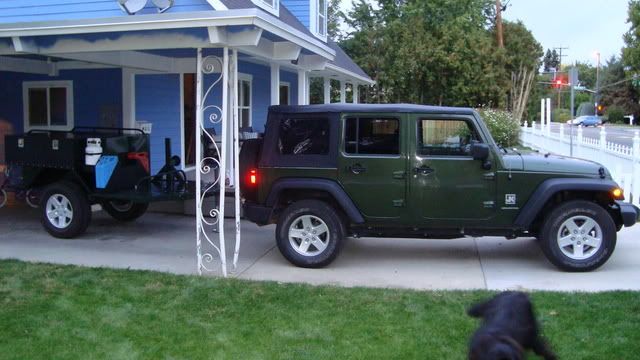
TheGillz Explo Off-Road Trailer via Geotracker90 Build!

TheGillz

Explorer
Martyn said:
We clean up silicon with a cloth with a little WD40 on it.

Let the silicon dry slightly before wiping off.

I did let it dry. And the smudges crumble right off. There isn't any of it smeared anywhere else that would require a cleaner.....YET.

When I attatch the rest of the pieces to the main trailer body, I will keep all your tips in mind. Thank you very much for them, BTW. I love it around here!
 

TheGillz

Explorer
AAAAnd your patience is rewarded.......sorta.

I got the trailer this morning. I got alot of it put together. I had a lot of errands to run.

So here are some teaser shots. I will have a pic heavy spread this weekend as I finish up putting the parts on, and work on the lights. I need to find some good weather seal as well.

Two questions for advice.

1. What dust proof weather seal should I use for the doors?

2. Where do the reflectors get placed?


On to the mini-show.

The inside.
PowderedBody1010.jpg


PowderedBody1011.jpg


PowderedBody1012.jpg


PowderedBody1007.jpg


PowderedBody1006.jpg


PowderedBody1008.jpg
 

Martyn

Supporting Sponsor, Overland Certified OC0018
Reflector placement.

Amber; Placed at the front, one just in front of the tongue bend and one behind on the chassis rail. Both sides, total of 4 amber reflectors.

Red; Placed at the rear corner, one on the rear bumper as far to the outside as possible, one on the side as far back as possible on the chassis rail. Both sides a total of 4 red reflectors.
 

Martyn

Supporting Sponsor, Overland Certified OC0018
Trimlock is a good option. When sizing the bulb make sure that when the door is closed it does not completely squash the bulb. The guide lines are that the bulb should be slightly compressed so that if you placed a piece of paper between the door and seal there would be a slight resistance when pulling the paper out.

If you over compress the bulb you will be replacing it all in about 12 months.
 

Hilldweller

SE Expedition Society
TheGillz said:
AAAAnd your patience is rewarded.......sorta.

I got the trailer this morning. I got alot of it put together. I had a lot of errands to run.

PowderedBody1007.jpg
Outstanding; I can't wait to see shots of you getting it dirty...

It's begging for a RTT.
 

DarkHelmet

Adventurer
That thing is friggin' awesome! I could really use something like that for SAR. I hope to see it sometime since we are both in the Boise area. If I had a trailer like that but with a deck to hold an ATV in place of the cooler area that would really fit the bill.

- DH
 

GeoTracker90

Adventurer
Clark,

The trailer is looking awesome! I love how the two-tone powdercoating pulls it all together. Like others have said, now I can't wait for some "action" pictures.

Mike

p.s. - Were you able to swap out the U-bolts for a longer set?
 

TheGillz

Explorer
GeoTracker90 said:
Clark,

The trailer is looking awesome! I love how the two-tone powdercoating pulls it all together. Like others have said, now I can't wait for some "action" pictures.

Mike

p.s. - Were you able to swap out the U-bolts for a longer set?


Thank you everybody, and Thank Mike too. Weather, budget constraints, and other things around the house conspired against me this weekend and all I got done was to put on the other side box. But Thursday is payday, and I should be able to get some weather seal, wiring supplies and some more silicone, ubolts/shackle parts and get 'er finished up. Maybe even take it out this weekend.

p.s. - I have not done new ubolts yet, but when I was putting the suspension back on at the powdercoaters, I noticed that without washers the current nuts are not being nice to the holes in the brackets and look to be pushing through a little, so that is on the list for thursday as well. Definately before it goes off road.
 

cucinadio

New member
GeoTracker90 said:
I'm home! That means that it's time for some additional photos.

DSCF5348.jpg


DSCF5349.jpg

This shows the passenger side with both the front and rear fender segments in place. It also has the side box lid hanging in place. I must say that it looks a little naked with out the shiny latches.

DSCF5347.jpg

Driver side of the trailer. I ended up with too many interuptions this weekend and didn't get the rear fender segment and support structure done as I was hoping to.

DSCF5350.jpg

Lock-n-roll hitch all welded up to the 2" square tube tongue. There are eight rosette welds, two per side as well as a multiple pass circumferential weld around the opening that the
in to.


hey mate,

nice job ...well done man..
Q? ....whats the go in the us for a slide in draw bar/hitch ..its not reall common here in australia ?

cheers
 

TheGillz

Explorer
cucinadio said:
hey mate,

nice job ...well done man..
Q? ....whats the go in the us for a slide in draw bar/hitch ..its not reall common here in australia ?

cheers

Well, I am the one that wanted the adjustable hitch bar/tube. Here in the states most of the trips you would take will have miles and miles of Interstate 2 - 4 lane freeway and/or state highways traveling at speeds >60mph. I wanted the longer position to aid in highway stability for getting to the offroad/dirt road forests/camping areas, then I can shorten the track of the trailer once there to aid in off road menuverability.


ps, I am a go for getting most of the remaining details done tomorrow...more pics coming, with a trip this or next weekend!! :D
 

TheGillz

Explorer
Oct 9 Update 1

Well I spent most of the day in Home Depot, Lowes, the dentist :D, and a trailer supply shop.

Needless to say I ran out of daylight (blast the fall!), but did manage to get some cool stuff done.

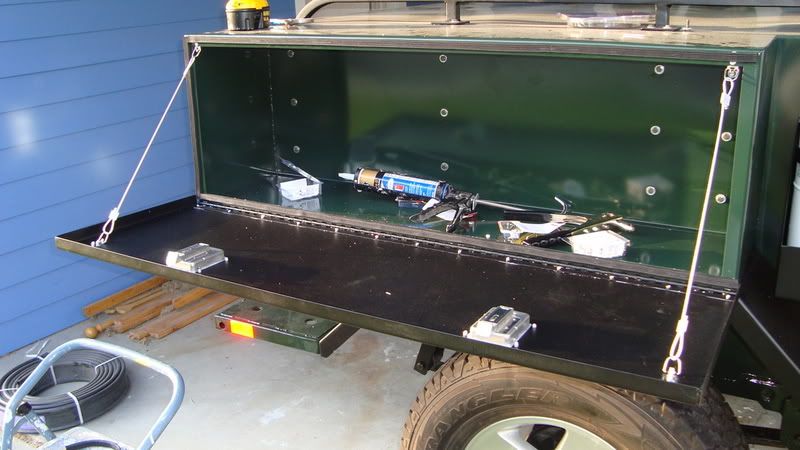
First I got some "heavy duty" picture hanging loops and riveted them to the side doors and the side boxes.

DoorCables003.jpg


DoorCables004.jpg


I bought some 1/8 inch cable and aluminum compression connectors. Rated at 384 lbs.

DoorCables001.jpg


It left some extra rivets in the doors, but I think I have decided to put some flat black on all the rivets on the doors.

DoorCables005.jpg


DoorCables007.jpg


I then moved on to.....
 
Last edited:

TheGillz

Explorer
Oct 9 Update 2

....installing the tail gate. First I got the hinge sealed and bolted on.

DoorCables008.jpg


I then took my grinder to some tie down brackets so that the cable would fit between it and the inside wall of the tailgate.

DoorCables010.jpg


DoorCables009.jpg


DoorCables011.jpg


Next I attatched another whole tiedown with the loops to the inside of the trailer box.

DoorCables013.jpg


I made two identicle cable runs with the tie down loops attached.

DoorCables014.jpg


And here's the cable attached to the tailgate...

DoorCables016.jpg


...and the main box.

DoorCables017.jpg


And I am pleased to show that it works as I hoped!

DoorCables015.jpg


I have to finish up the other side box, and find some weather seal. I picked some up that you can see in the open side box picture in the last post, automotive stuff from Home Depot. But it wasn't thick enough at 1/4 inch, so looks like I need something at least 3/8-1/2inch...I will probably get some of the stuff that was suggested earlier, but I have no idea how to apply it or what parts to get...


At least I still have shop time for this weekend!:)
 

GeoTracker90

Adventurer
TheGillz said:

Looking pretty good there Clark!! Nice job on the tailgate and side box cables. All in all it looks like you are making great progress.

On item I wanted to mention, and maybe this is just because of the lighting, but the rear side reflector appears to be amber. This should be red in color, and the amber marker lights and reflectors go up near the front.

Keep up the good work!! I keep checking in to see when the latest update is posted. In the mean time I'm cooking up an idea for another trailer and working on the teardrop as well.

Mike
 

Forum statistics

Threads
189,951
Messages
2,922,624
Members
233,207
Latest member
Goldenbora
Top