You are using an out of date browser. It may not display this or other websites correctly.
You should upgrade or use an alternative browser.
You should upgrade or use an alternative browser.
Urban Suburban 1989 GMC Build
- Thread starter Rally592
- Start date

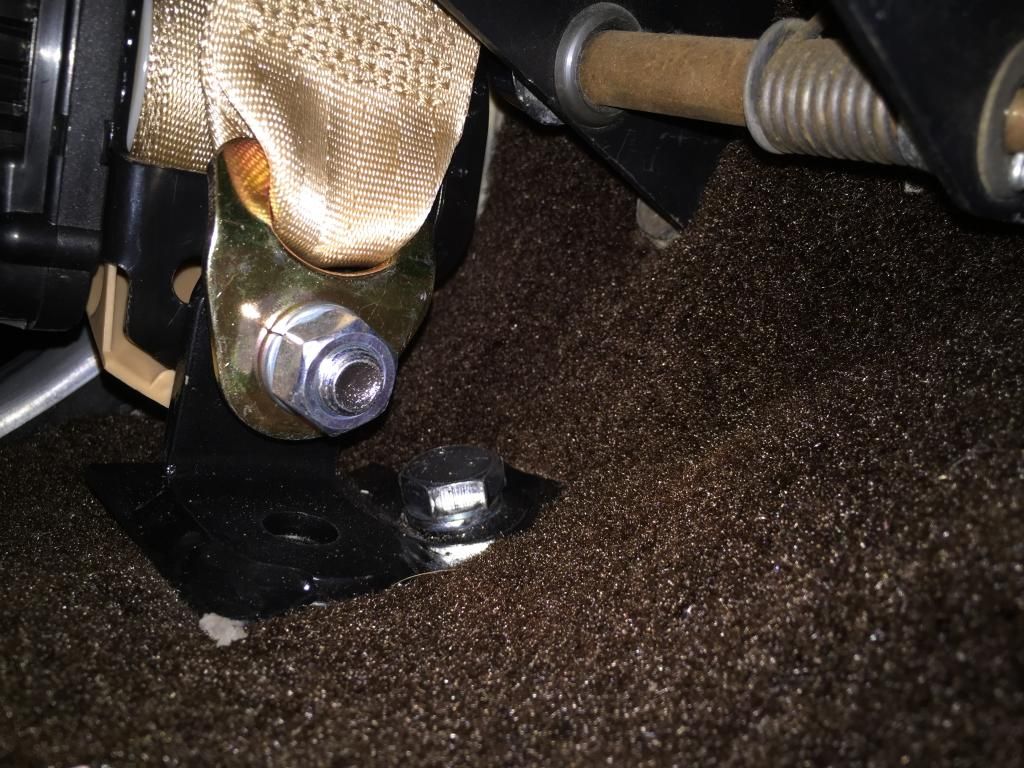
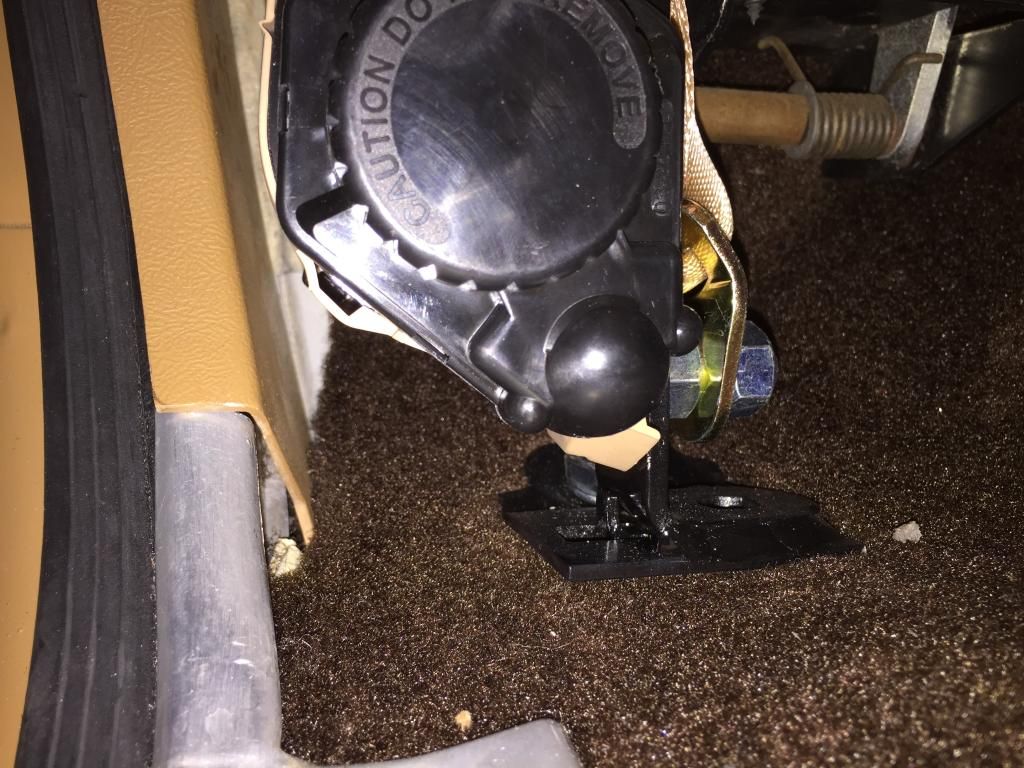
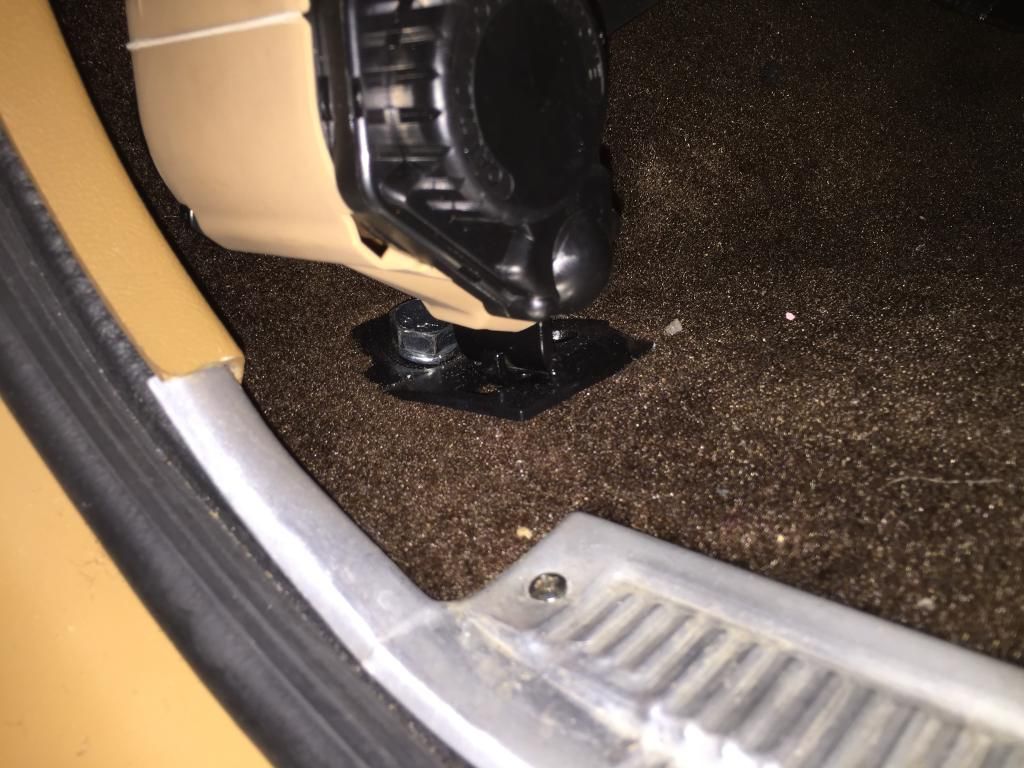
As requested here are a couple pics of the seatbelt mount. I took the stock bracket off the stock seatbelts and welded the 90 degree adapter to it. Otherwise you cannot bolt in any seatbelt with the location of the stock holes (without the stock bracket). I did the same for the front although I did not have to weld those.
Carpet kit I got from stockinteriors.com along with the matching carpet panels for the lower doors and extra carpet by the yard for other stuff (like the rear sides above the wheel wells and rear doors etc). The carpet kit was an ACC kit and it was ok. Best piece of advice is let it set out and go slow. It took some time and turned out well. I also use a sharp bolt or old punch and heat it red hot and melt around any seat mounting holes etc so when you start bolts it does not fray. I bought the headliner material from there as well.


Carpet kit I got from stockinteriors.com along with the matching carpet panels for the lower doors and extra carpet by the yard for other stuff (like the rear sides above the wheel wells and rear doors etc). The carpet kit was an ACC kit and it was ok. Best piece of advice is let it set out and go slow. It took some time and turned out well. I also use a sharp bolt or old punch and heat it red hot and melt around any seat mounting holes etc so when you start bolts it does not fray. I bought the headliner material from there as well.
Dratwagon
Adventurer
Thanks, I'll definitely be using this idea for the back seat, for the front I have a seat from a 2005 Silverado with built in seat belts. Are those new seat covers and if so.
Any chance you are going to the swap meet next weekend.
I just need to set it outside, it's already 85degs and getting hotter.
Any chance you are going to the swap meet next weekend.
Fire a torpedo heater over the carpet kit to get it good and flexible. Just a tip.
I just need to set it outside, it's already 85degs and getting hotter.
Last edited:
ADVW/Liam
Adventurer
green...
Great build. I love these old trucks. I'm watching this build, and another one where a guy chopped about 14-18 inches (i dont remember) off the rear. If there are any of these surbrubans left in 12 years (my kid will be 16) I'll give the Tacoma to him, and start building my own Suburban.
Great build. I love these old trucks. I'm watching this build, and another one where a guy chopped about 14-18 inches (i dont remember) off the rear. If there are any of these surbrubans left in 12 years (my kid will be 16) I'll give the Tacoma to him, and start building my own Suburban.
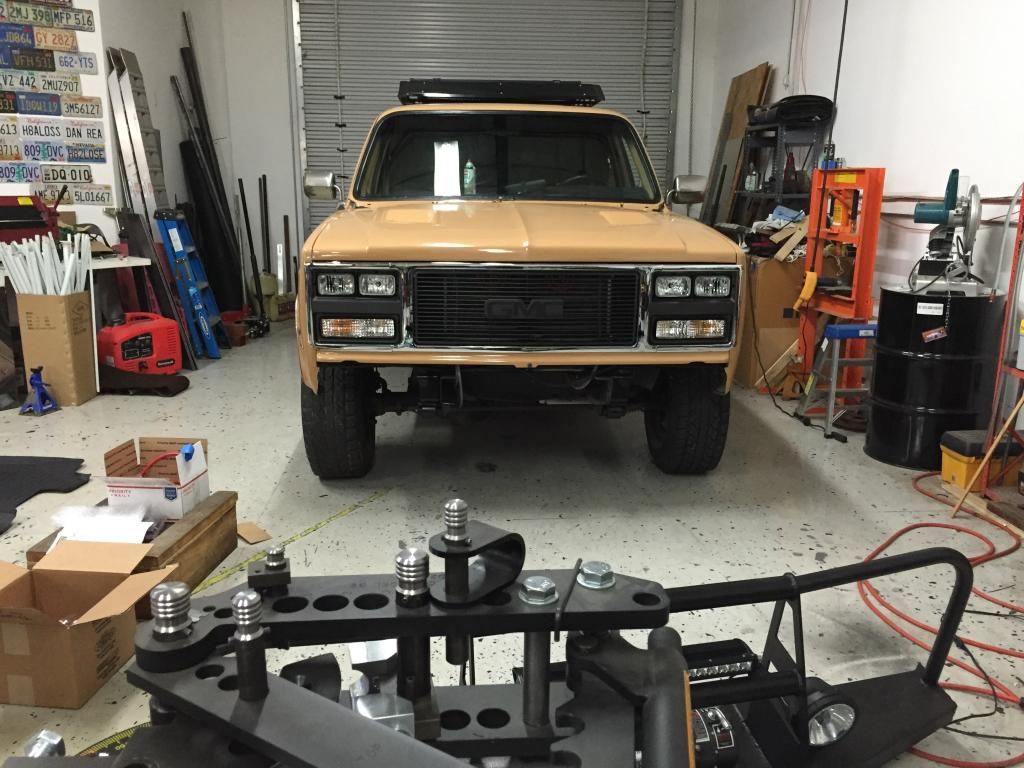
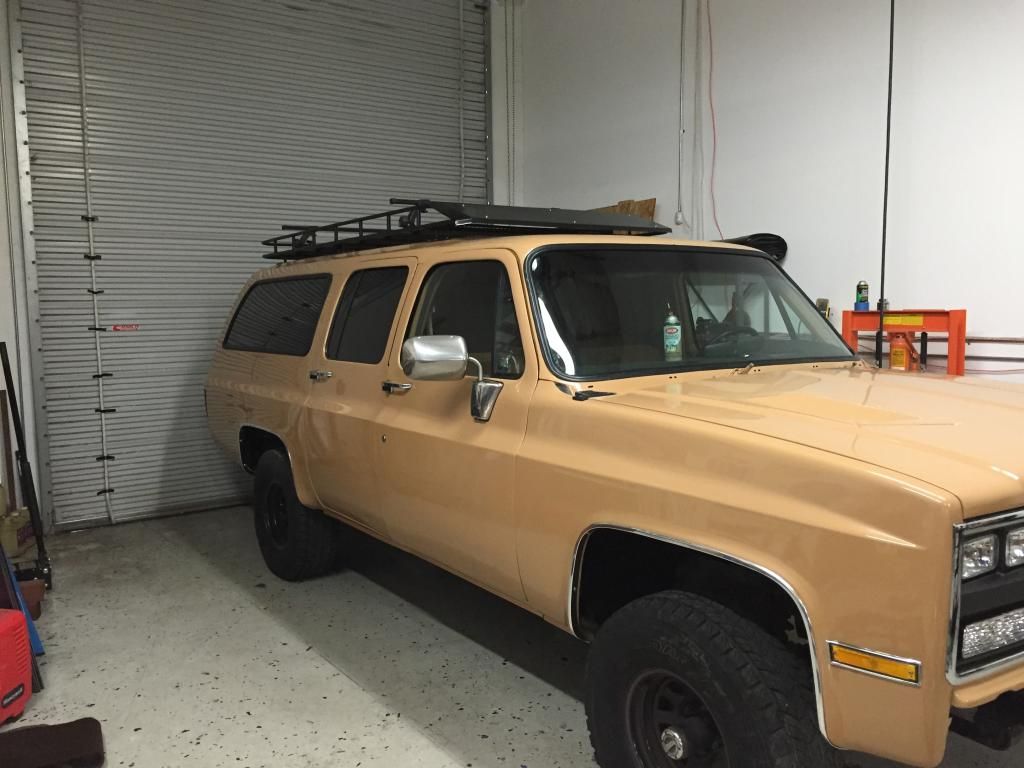
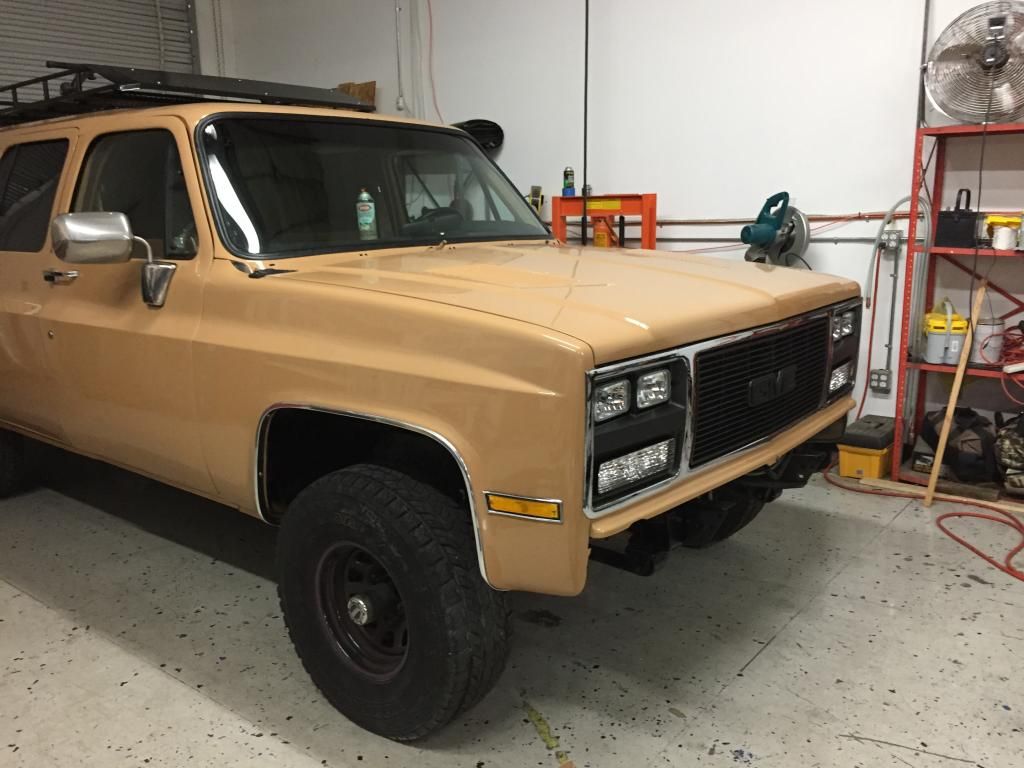
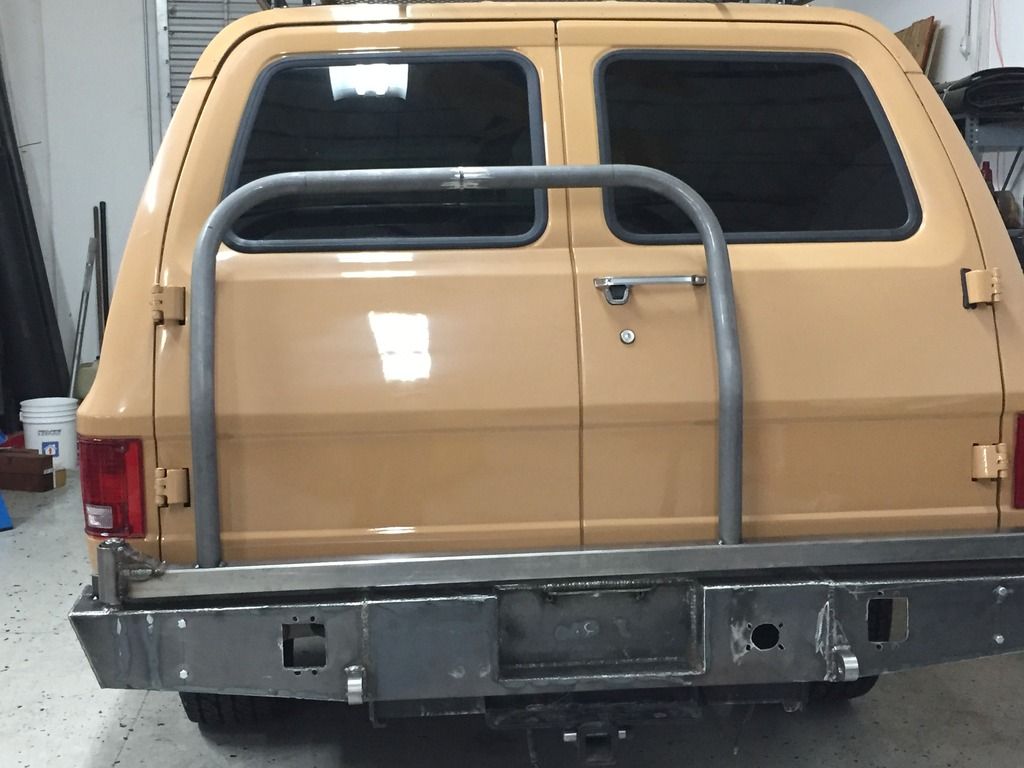
While waiting for some parts I decided to put on the roof rack and front grill trim etc. cleans up nice. The look of the rack is exactly what I wanted. Grill makes it look a lot more finished in the front.
So list of things to do yet are get batteries wired for the dual battery setup. Get front bumper on (which will be just about last as I don’t want to lean over it while working under hood unless I have to) build rear bumper and swing out. Finishing wiring up winch and lights etc.
Much more fun than bodywork and interior work.


east_tn_81
Adventurer
Looking so good
D
Deleted member 9101
Guest
Loooove the winch controls in the ash tray!
Todd McLaughlin
Observer
Excellent work.
Todd McLaughlin
Observer
Excellent Build Great Ideas.
Guys I am sorry it is been a while. Also sorry for not answering the PM’s in a timely fashion as I have been busy at work and on the Burb.
Attached is what I have been working on. The Rear Bumper! Thing is a beast. I used the Mounts from PMA4x4 and just started cutting metal. Only thing I made templates for are the end pieces. I got my creativity going and forgot to take pics of the mockup but you get the idea. I am putting flush mount Rigid LED’s in the rear along with the trailer plug in the bumper. Also you can see I got some new wheels and Tires! Have not driven it yet but the sure changed the look of the truck. Tire swing out parts are from A to Z Fabrication.
Pictures worth more than words at this point.
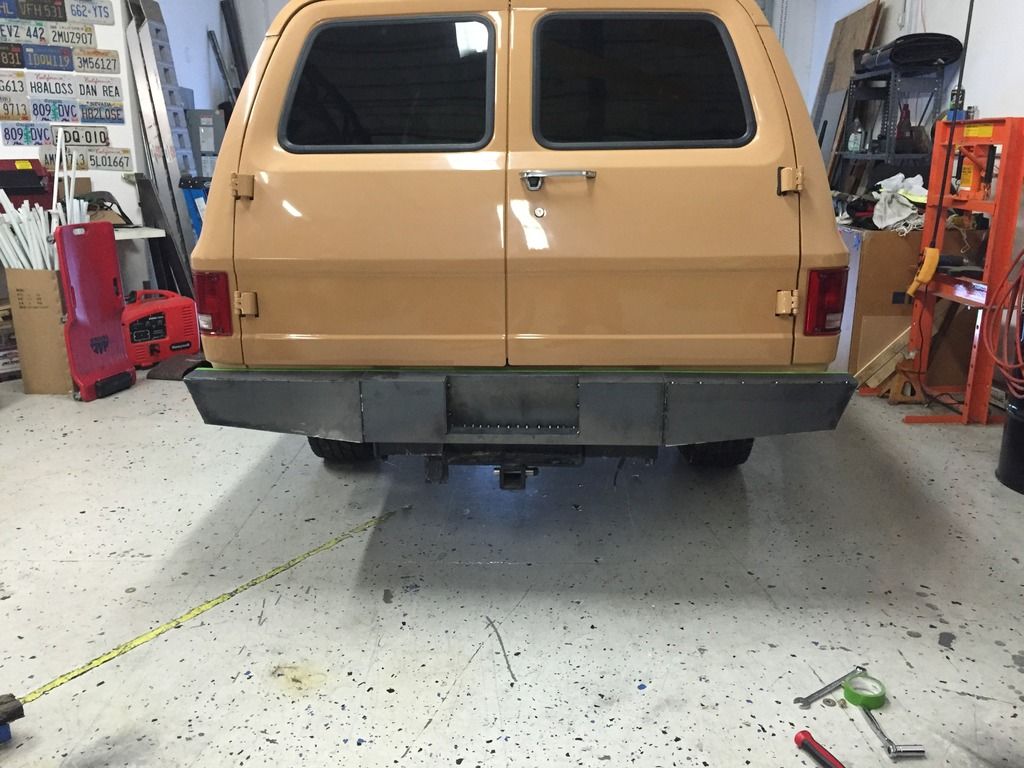
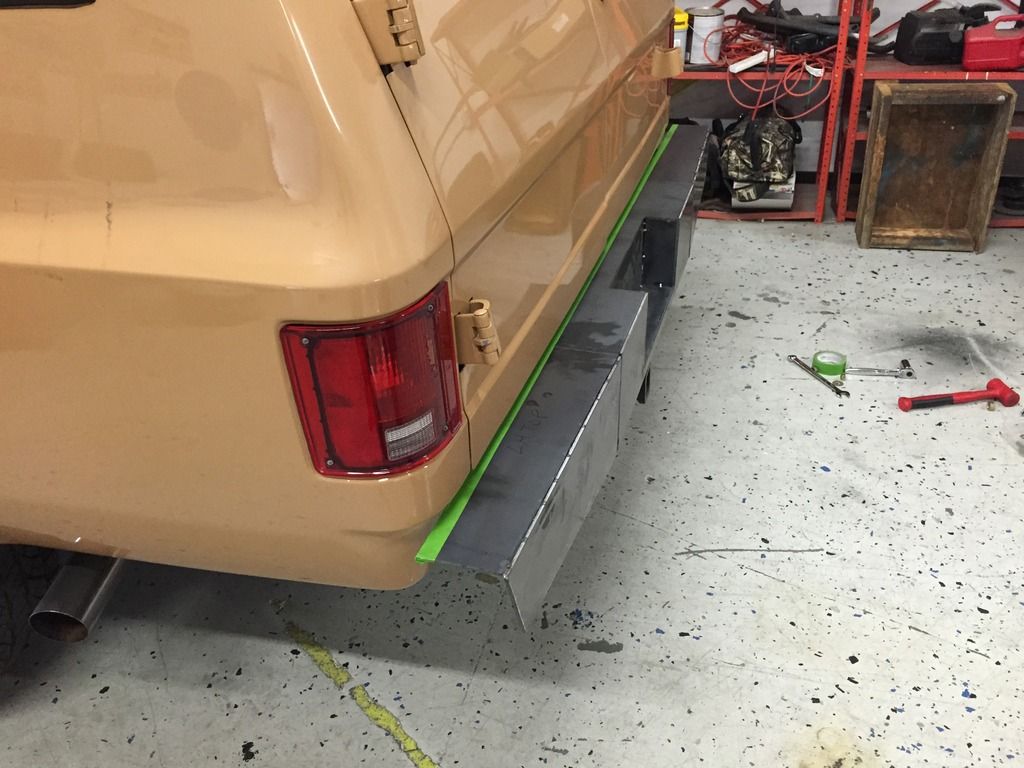
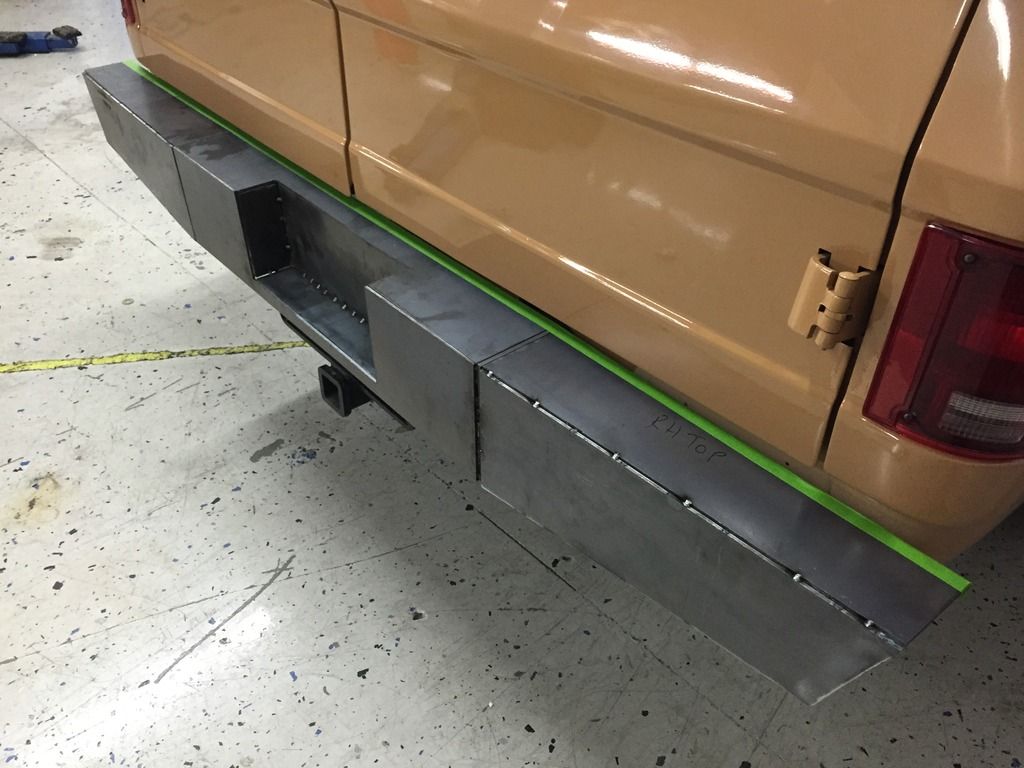
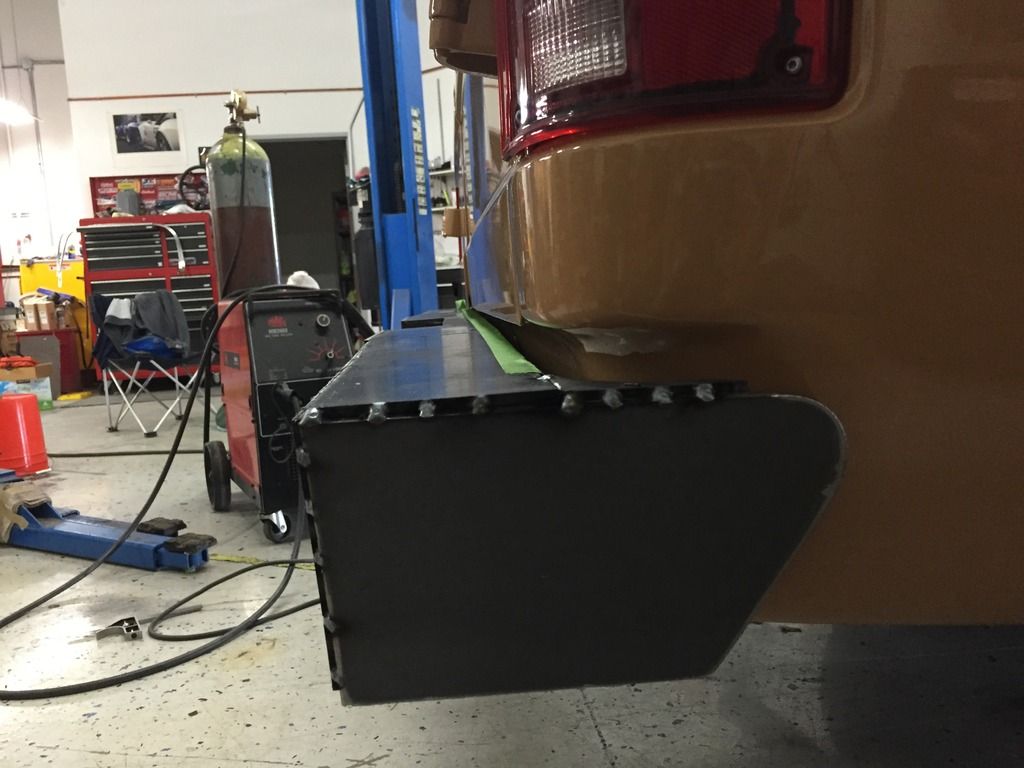
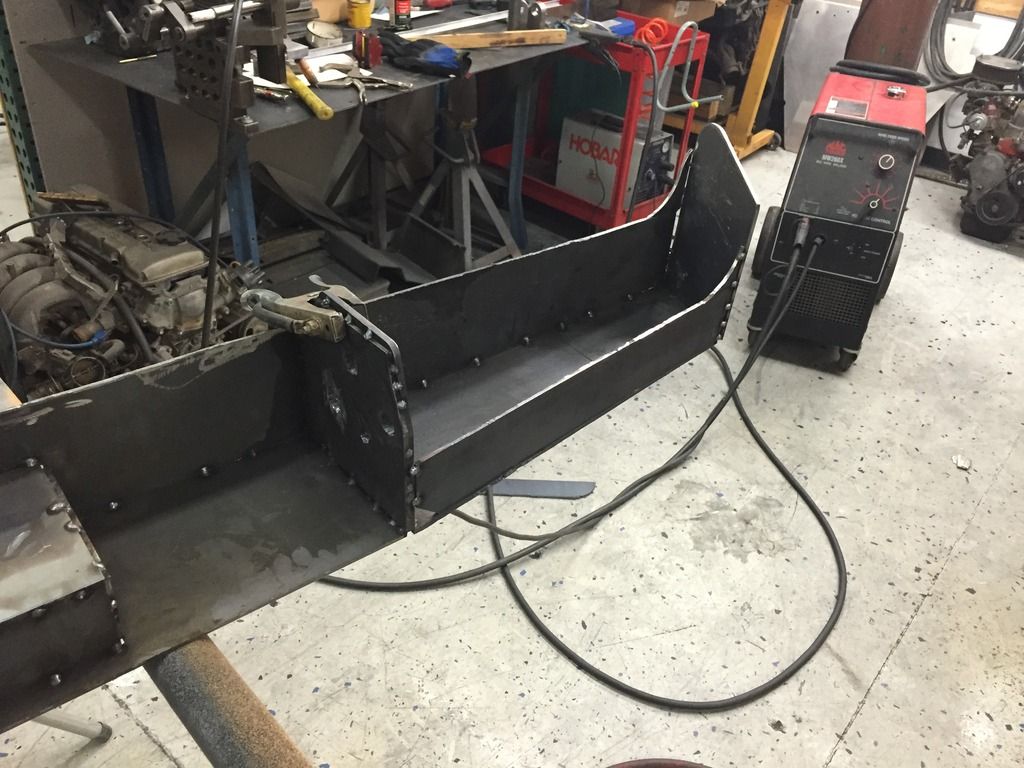
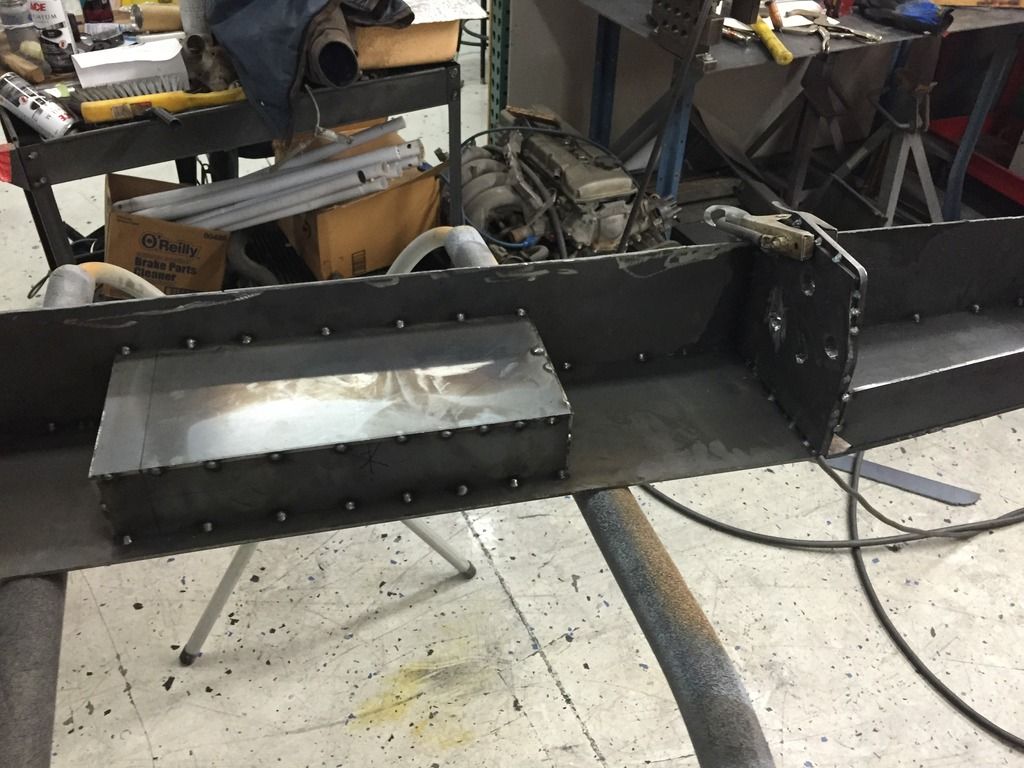
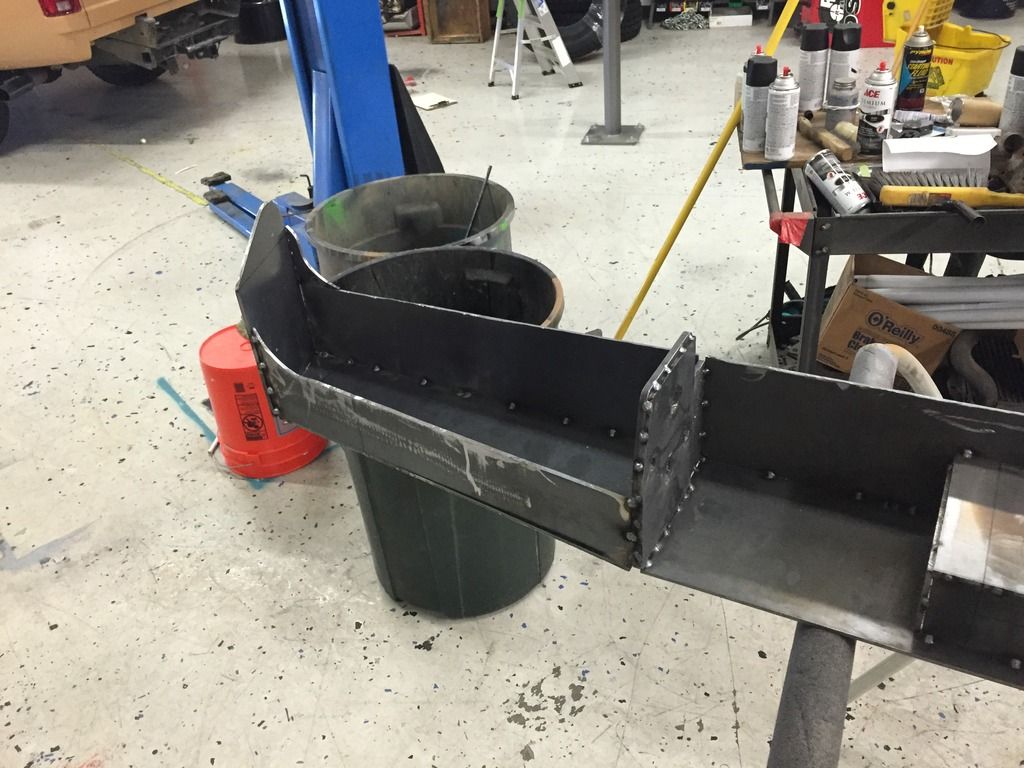
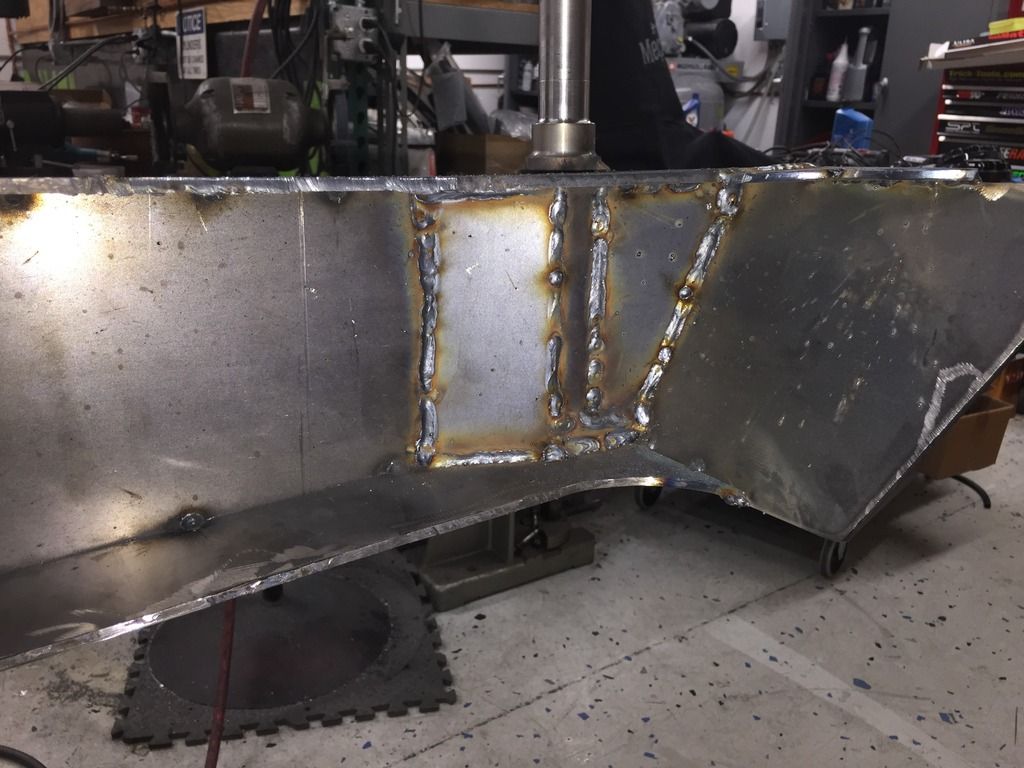
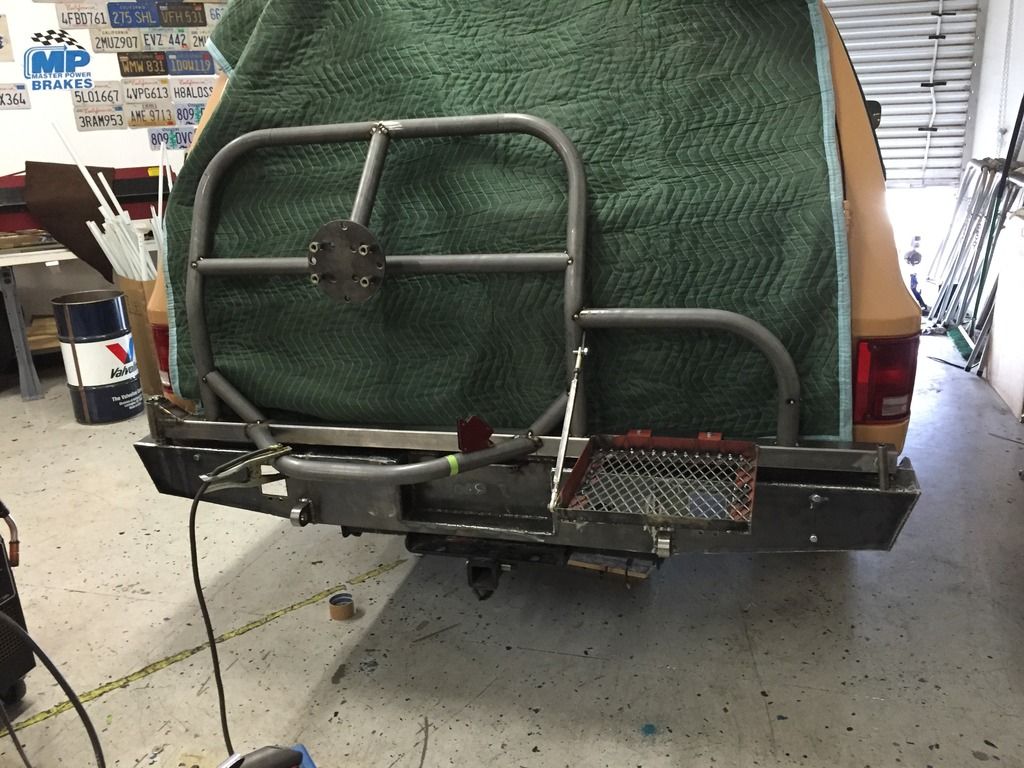
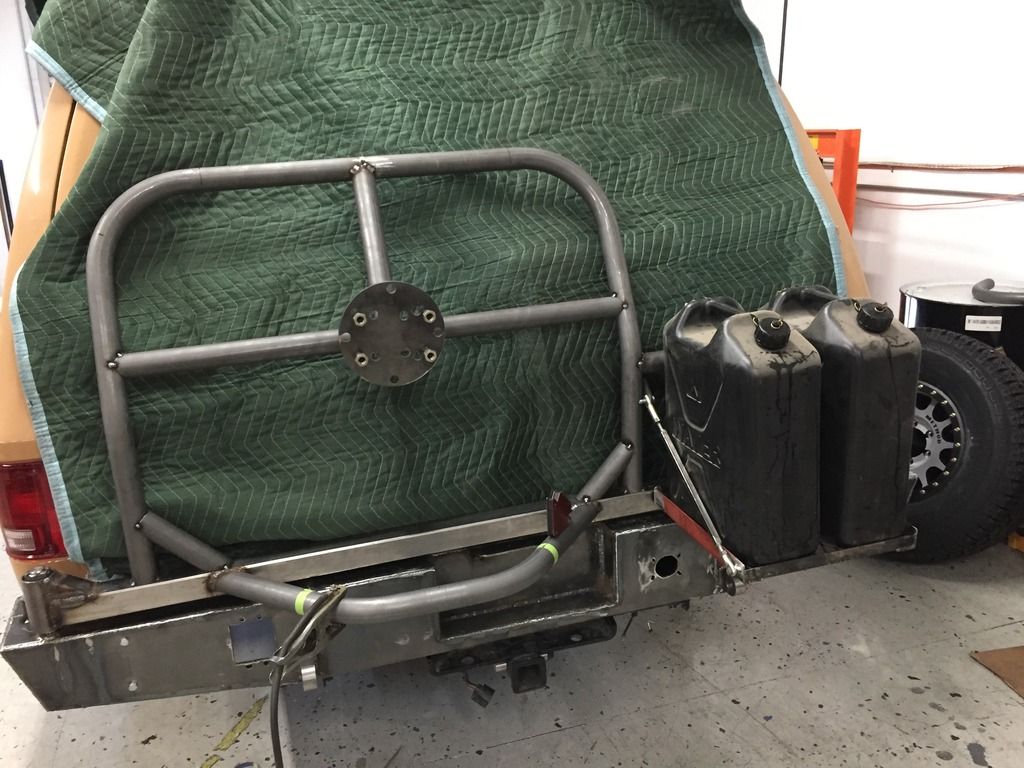
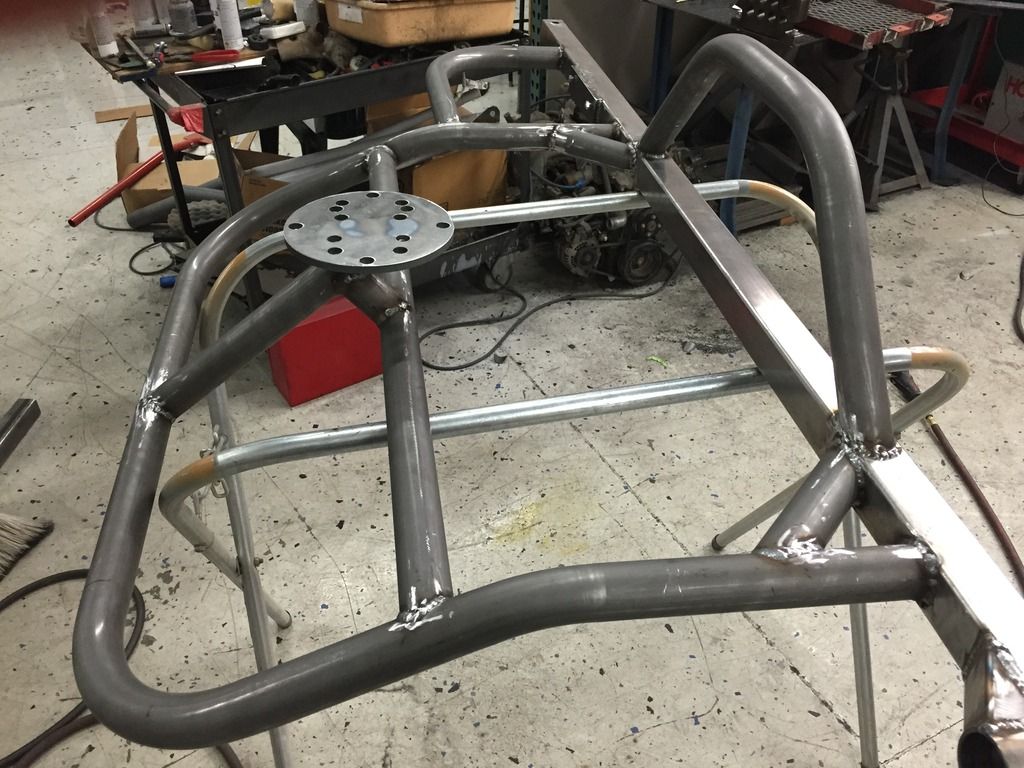


